Quick Answer
Side imaging and down imaging serve different purposes on kayak fish finders. Down imaging provides a detailed, narrow view directly beneath your kayak (typically 10-20 feet wide), making it excellent for marking fish and studying bottom composition as you move. Side imaging scans up to 200 feet on each side of your kayak, revealing structure, cover, and fish-holding areas across a much wider swath. For kayak anglers, down imaging is usually sufficient for most fishing scenarios, while side imaging becomes valuable when you need to cover large areas quickly or locate specific structure in unfamiliar waters.
Key Takeaways
- Down imaging creates a narrow, photo-like view directly below your kayak, ideal for identifying fish and bottom details in the path you’re traveling
- Side imaging scans wide areas to both sides (50-200 feet per side), perfect for mapping structure and finding fish-holding spots without passing directly over them
- Most beginner kayak fishing setups benefit more from down imaging due to lower cost and simpler interpretation
- Side imaging units typically cost $200-$500 more than down imaging-only models and require larger battery capacity
- Shallow water (under 10 feet) works well with both technologies, but side imaging excels at revealing distant structure in these conditions
- Combo units offering both technologies start around $500-$600 and provide maximum versatility for serious kayak anglers
- Transducer placement and kayak stability significantly impact image quality for both sonar types
What Is the Difference Between Side Imaging and Down Imaging on a Fish Finder?
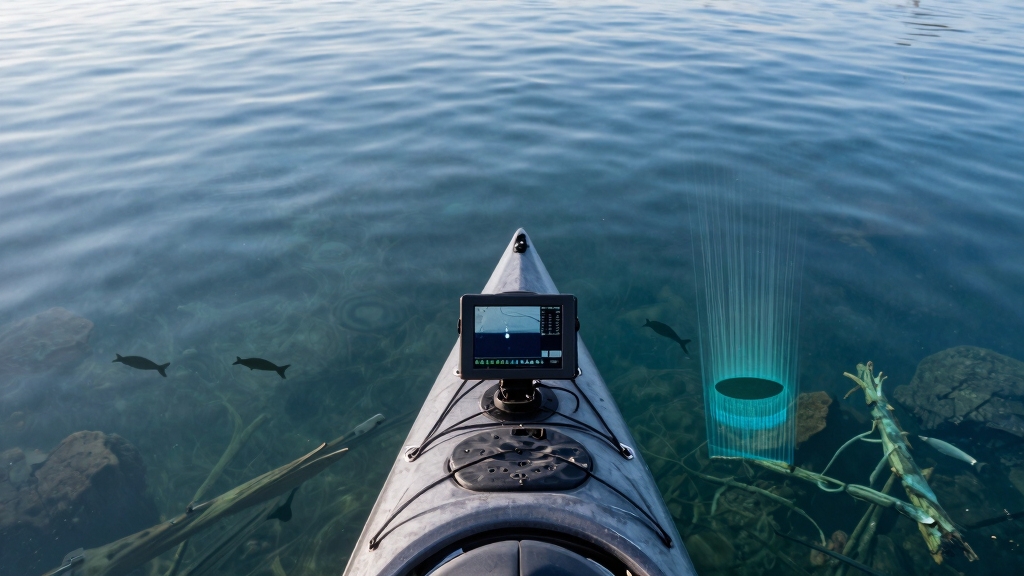
Down imaging uses high-frequency sonar (typically 455 kHz or 800 kHz) to create a detailed, photo-like image of what’s directly beneath your kayak in a narrow cone, usually 10-20 feet wide depending on depth. Side imaging uses the same frequencies but directs the sonar beams horizontally to each side, scanning up to 200 feet in both directions and creating a bird’s-eye view of the bottom.
The fundamental difference lies in coverage area and perspective. Down imaging shows you what you’re passing over right now, with excellent detail of fish arches, bottom composition, and vertical structure. It’s like looking through a narrow window straight down.
Side imaging, by contrast, shows you what’s happening to your left and right simultaneously. The display splits into two halves, with the center line representing your kayak’s path. Objects appear as shadows on the screen, with harder materials (rocks, wood) showing as bright returns and softer materials (mud, vegetation) appearing darker.
Key technical differences:
- Beam width: Down imaging = 10-20 feet wide; Side imaging = 100-400 feet total coverage
- Detail level: Down imaging shows more vertical detail; Side imaging shows more horizontal coverage
- Fish identification: Down imaging displays classic fish arches; Side imaging shows fish as dots or small marks
- Best use: Down imaging for marking spots as you fish; Side imaging for scouting and mapping
When you’re learning to read a fish finder screen, down imaging is generally more intuitive because it matches your mental model of what’s below you.
Which Is Better for Kayak Fishing: Side Imaging or Down Imaging?
For most kayak anglers, down imaging provides better value and more immediately useful information. It excels at showing you fish directly beneath your kayak, helping you understand bottom composition, and marking productive spots as you fish. Down imaging is sufficient if you primarily fish familiar waters, target specific structure types, or focus on vertical presentations.
Side imaging becomes the better choice when you need to cover large areas efficiently, scout unfamiliar lakes, locate specific structure like submerged timber or rock piles, or fish expansive flats where fish-holding spots are scattered. Tournament anglers and those who frequently explore new waters benefit most from side imaging’s wide coverage.
Choose down imaging if you:
- Fish the same lakes or rivers regularly
- Focus on crappie, panfish, or other species that hold tight to vertical structure
- Have a limited budget (units start around $200-$300)
- Prefer simpler screen interpretation
- Fish primarily in deeper water where side imaging range is limited
Choose side imaging if you:
- Regularly explore new fishing locations
- Target bass, walleye, or other species that relate to horizontal structure
- Can invest $500+ in a fish finder
- Fish large lakes or reservoirs where locating structure is time-consuming
- Want to map productive areas for future trips
Many experienced kayak anglers eventually upgrade to combo units that offer both technologies, but starting with down imaging alone is a smart approach for most people getting into kayak fishing.

Down Imaging: Get a clear view of what's happening below your boat; View timber, brush, bridge pilings, rocks and any other structure with sharp detail

Dual Beam Sonar: Choose from a narrow and a wide beam for great detail or a generous coverage area, helping you identify fish, structure and contours.

Easy-to-use 7” color fishfinder with new vivid scanning sonar color palettes to easily distinguish fish and structure; tilt/swivel bailmount bracket included
Do I Really Need Side Imaging on a Kayak or Is Down Imaging Enough?
Down imaging is enough for 70-80% of kayak fishing situations, especially if you fish familiar waters, target species that hold near vertical structure, or primarily use your fish finder to confirm fish presence rather than scout new areas. You can be a highly successful kayak angler with only down imaging.
The reality is that kayaks move slowly compared to bass boats, which actually makes down imaging more effective. At 2-3 mph paddling speed, you have plenty of time to study the down imaging display and mark waypoints on productive spots. Side imaging’s wide coverage is less critical when you’re not covering water at 30-40 mph.
However, side imaging becomes genuinely valuable in specific scenarios. If you fish large reservoirs where locating scattered brush piles or rock formations is like finding needles in a haystack, side imaging cuts your search time dramatically. When fishing shallow flats (3-8 feet deep), side imaging can reveal structure 100+ feet away, letting you plan your approach without spooking fish.
You probably don’t need side imaging if:
- Your home waters are under 500 acres
- You know where the productive structure is located
- You primarily fish rivers or streams with defined channels
- Your fishing kayak budget is tight
- You’re still learning basic fish finder interpretation
Side imaging becomes worth it when:
- You fish 5+ different lakes regularly
- You compete in kayak fishing tournaments
- You target suspended fish over large flats
- You enjoy the scouting and mapping process
- You have the budget for a $500+ unit and larger battery
A common mistake is buying side imaging and never learning to use it effectively. The technology requires practice to interpret correctly, and many kayak anglers end up relying primarily on down imaging anyway.
How Much Does Side Imaging Cost Compared to Down Imaging for Kayaks?
Down imaging-only fish finders for kayaks typically range from $200-$400 for quality units, while side imaging models start around $500 and extend to $1,200+ for premium features. The price difference reflects not just the additional sonar technology but also larger screens, more processing power, and advanced mapping capabilities that typically accompany side imaging units.
Budget-conscious kayak anglers can find excellent down imaging units in the $250-$350 range that include GPS, basic mapping, and reliable fish detection. These units usually feature 5-7 inch screens and provide everything needed for productive fishing.
Side imaging units in the $500-$700 range offer both technologies, larger 7-9 inch screens, better resolution, and more sophisticated mapping. Premium units above $800 add features like CHIRP sonar, networking capabilities, and high-definition displays.
Typical price ranges (2026):
- Down imaging only: $200-$400
- Side imaging (includes down imaging): $500-$1,200
- Transducers (replacement/upgrade): $100-$300
- Installation accessories: $50-$150
Don’t forget to factor in battery costs. Side imaging draws more power, so you’ll need a larger battery (typically 12V 20Ah minimum vs. 12V 10Ah for down imaging only), adding $50-$100 to your total investment.
The best value for most kayak anglers is a mid-range combo unit around $600 that includes both technologies, allowing you to learn and use whichever proves most valuable for your fishing style.

MEGA Side & Down Imaging Technology: View fish, structures, and contours 125 feet on either side of your boat and 125 feet directly beneath your watercraft with 3x more detail than standard imaging sonar; Transducer included

Clear Vu scanning Sonar shows you more of what is in the water around your boat; This high frequency sonar gives near photographic images with detailed representations of objects, structure and fish

FISHREVEAL: Fish are easier to find and easier to identify. FishReveal combines the target separation of Lowrance CHIRP sonar and the high-resolution images of structure from DownScan Imaging to makes fish light up on your display.
Can You Use Side Imaging in Shallow Water from a Kayak?
Side imaging actually performs exceptionally well in shallow water from a kayak, often better than in deep water. In depths of 3-15 feet, side imaging can scan 75-150 feet to each side with excellent clarity, revealing grass beds, rock piles, stumps, and other structure that would take hours to locate by paddling over them with down imaging alone.
The key advantage in shallow water is that the sonar beams travel less distance vertically before spreading horizontally, resulting in sharper images and better target separation. A kayak’s slow speed also helps because you’re not creating as much turbulence or moving too fast for the sonar to paint a clear picture.
However, shallow water side imaging requires proper transducer installation. The transducer must be level and positioned where it won’t create turbulence or air bubbles. On a kayak, this usually means a through-hull installation or a carefully positioned scupper mount.
Shallow water side imaging tips:
- Optimal depth range: 5-20 feet produces the clearest images
- Range settings: Use 50-75 foot range per side in water under 10 feet deep
- Speed: Maintain 1.5-2.5 mph for best image quality
- Sensitivity: Increase sensitivity 10-15% in very shallow water (under 5 feet)
Common mistake: Setting the range too wide in shallow water. If you’re in 6 feet of water, you don’t need 200-foot range per side. Narrow the range to 50-75 feet for much better detail and faster screen refresh.
Side imaging in shallow water is particularly valuable for bass fishing in lakes where fish relate to isolated cover on otherwise featureless flats.
Best Fish Finder with Down Imaging for Kayak Under $500
The Garmin Striker Vivid 7sv and Humminbird Helix 7 CHIRP MDI GPS G3 both offer excellent down imaging performance for kayaks under $500. These units provide 7-inch color screens, built-in GPS, basic mapping, and reliable down imaging that reveals bottom composition and fish with impressive clarity.
The Garmin Striker Vivid 7sv (typically $400-$450) features high-contrast color palettes that make fish and structure easier to identify, built-in GPS with waypoint marking, and ClearVü down imaging that rivals more expensive units. It’s particularly user-friendly for beginners but offers enough features to satisfy experienced anglers.
The Humminbird Helix 7 CHIRP MDI GPS G3 (around $450-$500) includes Mega Down Imaging, which operates at higher frequencies for even sharper images than standard down imaging. It also offers more advanced mapping options and easier customization of display settings.
Key features to expect under $500:
- 7-inch color display with good sunlight visibility
- Down imaging with 455 kHz or 800 kHz frequency
- Built-in GPS with waypoint and track storage
- Basic lake maps (upgradeable to premium maps)
- Split-screen views (sonar + mapping)
- Transducer included in the package
For kayak-specific considerations, look for units with low power consumption (important for battery life), simple mounting options, and screens that remain visible in direct sunlight. Both recommended units draw under 1 amp during normal operation, making them suitable for smaller 12V 10-20Ah batteries.
Budget alternative: The Garmin Striker 4 with CHIRP sonar (around $150-$200) doesn’t include down imaging but provides excellent traditional sonar and GPS for kayak anglers just starting out.

CHIRP Down Imaging: Filters out visual noise and clutter for a clear view beneath your boat; CHIRP Digital Sonar processing delivers detailed imaging to simplify fish finding

Two installation options: Mounts directly to a boat guide rail or to a compatible M6 fixing hole, giving you a flexible setup for fish finder electronics.

Easy-to-use 4-inch color fishfinder with new vivid scanning sonar color palettes to easily distinguish fish and structure; tilt/swivel bailmount bracket included
Why Is My Side Imaging Not Showing Fish Clearly on My Kayak?
Side imaging not showing fish clearly usually results from incorrect transducer installation, improper sensitivity settings, or moving too fast for the sonar to paint a detailed picture. Fish appear as small dots or marks on side imaging rather than the arches you see on down imaging, so you may be seeing fish but not recognizing them.
The most common culprit is transducer angle. Side imaging transducers must be perfectly level (parallel to the water surface) to produce clear images. Even a 5-degree tilt can blur the image or create a dead zone on one side. On kayaks, this is challenging because the hull curves and the kayak rocks with waves.
Speed is the second most common issue. Side imaging requires slower speeds than traditional sonar—ideally 1.5-3 mph. Paddle or pedal too fast, and the image becomes streaky and unclear. Kayaks naturally move at good side imaging speeds, but if you’re in a pedal kayak pushing 4+ mph, you’ll see degraded images.
Troubleshooting checklist:
- Check transducer level: Use a bubble level to verify the transducer is parallel to the water surface
- Verify mounting location: Ensure no turbulence or air bubbles pass over the transducer face
- Adjust sensitivity: Start at 75% and increase in 5% increments until you see clear bottom definition
- Slow down: Reduce speed to 2 mph or less
- Adjust range: Match range to depth (use 50-75 feet per side in water under 20 feet deep)
- Check frequency: Try switching between 455 kHz (more range) and 800 kHz (more detail)
Remember that fish on side imaging look different than on down imaging. They appear as small bright dots or comma-shaped marks, not arches. Suspended fish show up as dots between the bottom and the surface line. Schools of baitfish appear as clouds of small marks.
If you’ve verified all settings and installation and still see poor images, the transducer may be damaged or the unit may need a software update.
Is Side Imaging Worth It for Small Kayaks or Just Bigger Boats?
Side imaging works just as effectively on small kayaks as on larger boats, and in some ways it’s even more valuable on a kayak. The technology doesn’t care about vessel size—it only requires proper transducer installation and sufficient battery power. A 10-foot kayak with side imaging can scan the same 200-foot swath as a 20-foot bass boat.
The real question is whether the investment makes sense given how you fish from a kayak. If you cover large areas, scout new waters frequently, or fish expansive flats, side imaging provides tremendous value regardless of kayak size. The slow speed of kayaks actually produces clearer side imaging than boats running at higher speeds.
However, small kayaks do present some practical challenges. Limited battery capacity means you need to be more conscious of power consumption. Side imaging draws 1.5-2.5 amps compared to 0.5-1 amp for down imaging only, so you’ll need a larger battery or shorter fishing trips. A 12V 20Ah battery provides roughly 8-10 hours of side imaging use.
Small kayak considerations:
- Battery weight: Larger batteries (20-35Ah) add 15-30 pounds to your kayak
- Screen size: 7-9 inch screens are ideal but require secure mounting on small kayaks
- Stability: You need a stable kayak to keep the transducer level while viewing the screen
- Transducer mounting: Limited hull space may restrict installation options
Side imaging is absolutely worth it on small kayaks if you fish the right scenarios. Tournament kayak anglers regularly use side imaging on kayaks under 12 feet with excellent results. The key is matching the technology to your fishing style, not your kayak size.
If you’re fishing a small kayak on farm ponds or narrow rivers, save your money. If you’re fishing 1,000+ acre lakes from a small kayak, side imaging becomes a game-changer.
How Deep Does Down Imaging Work on a Kayak Fish Finder?
Down imaging on kayak fish finders typically works effectively from 1 foot to 300-400 feet deep, though practical depth limits depend on water clarity, bottom composition, and the specific unit’s power output. Most kayak fishing occurs in 5-50 feet of water, where down imaging performs exceptionally well and provides photo-like detail of bottom structure and fish.
The frequency you choose affects maximum depth. Lower frequencies (455 kHz) penetrate deeper but provide less detail, making them better for depths beyond 100 feet. Higher frequencies (800 kHz or Mega Imaging at 1.2 MHz) offer sharper images but work best in shallower water, typically under 100 feet.
Water clarity significantly impacts performance. In clear water, down imaging can produce usable images to 300+ feet. In stained or muddy water, effective depth may drop to 50-100 feet as suspended particles scatter the sonar signal.
Depth performance by frequency:
- 455 kHz: Effective to 300+ feet, good all-around choice
- 800 kHz: Best detail to 150 feet, excellent for most kayak fishing
- 1.2 MHz (Mega Imaging): Maximum detail to 100 feet, ideal for shallow water
For kayak fishing, you’ll rarely need to see deeper than 50-60 feet. Most fish-holding structure in lakes and reservoirs exists in the top 40 feet of the water column, well within down imaging’s sweet spot.
A common mistake is assuming deeper is always better. If you fish primarily in 10-30 feet of water, a unit optimized for shallow water detail (800 kHz or higher) will serve you better than one designed for maximum depth.
Side Imaging vs Down Imaging for Bass Fishing in Lakes
For bass fishing in lakes, side imaging provides a significant advantage when locating fish-holding structure, while down imaging excels at confirming fish presence and studying specific spots in detail. Serious bass anglers benefit from having both technologies, but if choosing one, side imaging offers more value for the structure-oriented nature of bass fishing.
Bass relate heavily to horizontal structure—points, ledges, brush piles, rock piles, and grass lines. Side imaging reveals these features across a wide area, letting you identify productive spots without paddling directly over them (and potentially spooking fish). You can scan an entire point or flat in minutes rather than hours.
Down imaging becomes valuable once you’ve located structure with side imaging. It shows you exactly what’s beneath your kayak, helps you position for precise casts, and confirms whether bass are actually using the structure you’ve found.
Bass fishing scenarios:
- Shallow flats (3-10 feet): Side imaging excels at finding isolated grass clumps, stumps, and rock piles
- Main lake points: Side imaging reveals the entire point structure and any brush or rock on it
- Deep ledges: Down imaging shows the ledge profile and fish suspended along it
- Docks and laydowns: Down imaging provides better detail of vertical structure
In practice, tournament kayak bass anglers use side imaging to scout and locate structure during practice, then rely more on down imaging during competition when they’re fishing known spots. Recreational anglers who fish the same lakes repeatedly may find down imaging sufficient after they’ve learned where the structure is located.
The slow speed of kayaks makes side imaging particularly effective for bass fishing. At 2 mph, you can thoroughly scan both sides of a creek channel or the entire length of a point while the sonar paints a detailed picture.
Do Beginners Need Side Imaging or Should They Start with Down Imaging?
Beginners should start with down imaging only. It’s more intuitive to interpret, costs significantly less, requires smaller batteries, and provides all the information needed to catch fish while learning kayak fishing fundamentals. Side imaging adds complexity and cost that most beginners won’t fully utilize until they’ve mastered basic fish finder interpretation and kayak fishing skills.
Down imaging shows you what’s directly beneath your kayak in a way that matches your mental model of fishing. You see fish as arches, bottom composition as textures, and structure as shapes—all relatively easy to understand after a few trips. Side imaging requires learning to interpret a bird’s-eye view where fish appear as dots and structure appears as shadows, which takes more practice.
New kayak anglers also benefit from focusing on fishing rather than technology. Learning to paddle efficiently, manage gear, maintain stability while casting, and understand fish behavior are more important initially than having the latest sonar technology. A simple down imaging setup lets you focus on these fundamentals.
Beginner-friendly progression:
- First season: Basic fish finder with traditional sonar and GPS ($150-$250)
- Second season: Add down imaging for better bottom detail ($300-$400)
- Third season+: Consider side imaging if you’re fishing new waters regularly ($500+)
This progression also spreads the cost over time and ensures you’re investing in technology you’ll actually use. Many kayak fishing beginners discover they’re perfectly happy with down imaging alone and never feel the need to upgrade.
Exception: If you’re an experienced boat angler transitioning to kayak fishing and already understand side imaging, starting with a combo unit makes sense. You’ll appreciate having the technology you’re accustomed to using.
Common Mistakes When Installing Side Imaging Transducer on Kayak
The most critical mistake is mounting the transducer at an angle rather than perfectly level. Side imaging transducers must be parallel to the water surface to produce clear images on both sides. Even a slight tilt creates a dead zone on one side or produces blurry, unusable images. Use a bubble level during installation and verify level again after mounting.
The second common error is placing the transducer where turbulence or air bubbles pass over it. On kayaks, this typically happens when mounting too close to the hull’s chine (where the bottom curves up to the side) or near scupper holes. Turbulence scatters the sonar signal and creates noise on the display.
Many kayak anglers also mount transducers too far forward or too far back. The ideal location is near the kayak’s center of gravity, where the hull remains most stable and level during paddling. Mounting too far forward causes the transducer to rise out of the water when you lean back; too far back and it rises when you lean forward.
Installation best practices:
- Location: Mount within 12 inches of the kayak’s center point, on the flattest part of the hull
- Level: Use a bubble level and verify level both fore-aft and side-to-side
- Depth: Position the transducer face flush with or slightly below the hull surface
- Clearance: Ensure 6+ inches of clear water flow on all sides of the transducer
- Cable routing: Secure cables away from paddle stroke and use waterproof connections
- Test before permanent mounting: Use temporary mounting (suction cup or tape) to verify performance before drilling
Through-hull installations provide the best performance but require drilling holes in your kayak. Scupper mounts are easier but may not work well on all kayak models. Transducer arms offer flexibility but can create turbulence if not positioned correctly.
A mistake specific to side imaging: forgetting to account for kayak stability. If your kayak rocks significantly in waves, the transducer angle constantly changes, degrading image quality. Consider upgrading to a wider, more stable kayak if you plan to use side imaging seriously.
Can You Get Both Side and Down Imaging on One Kayak Fish Finder?
Yes, most modern side imaging fish finders include down imaging as well, providing both technologies in a single unit. These combo units use a single transducer that contains multiple sonar elements, eliminating the need for separate transducers and allowing you to switch between views or display both simultaneously on a split screen.
Combo units typically cost $500-$1,200 depending on screen size, resolution, and additional features like mapping and networking. The transducer included with these units contains elements for traditional sonar, down imaging, and side imaging, all in one housing.
The advantage of combo units extends beyond having both technologies. You can display side imaging on one half of the screen and down imaging on the other, giving you both wide-area scanning and detailed bottom views simultaneously. This setup is particularly valuable when you locate structure with side imaging and want to study it in detail with down imaging without switching screens.
Popular combo units for kayaks:
- Garmin Striker Vivid 9sv: 9-inch screen, ClearVü (down) and SideVü imaging, GPS, $600-$700
- Humminbird Helix 7 CHIRP MSI GPS G4: 7-inch screen, Mega Side and Down Imaging, excellent mapping, $700-$800
- Lowrance Hook Reveal 7 TripleShot: 7-inch screen, both imaging types, FishReveal technology, $500-$600
All combo units require only one transducer installation, simplifying the setup process. The transducer is typically larger than down imaging-only models but mounts the same way.
One consideration: combo units draw more power when running both imaging types simultaneously. Budget for a 12V 20-35Ah battery to ensure full-day operation, especially if you’re also running other electronics like a GPS or phone charger.
Does Side Imaging Drain Battery Faster Than Down Imaging on Kayaks?
Yes, side imaging drains batteries approximately 50-100% faster than down imaging alone. A typical side imaging unit draws 1.5-2.5 amps during operation compared to 0.5-1.5 amps for down imaging only. This difference means a 12V 20Ah battery provides roughly 8-10 hours of side imaging use versus 13-20 hours with down imaging only.
The increased power consumption comes from running additional sonar elements and processing more data. Side imaging transducers contain separate elements for left and right scanning plus down imaging, and the unit’s processor works harder to render three simultaneous sonar views.
For kayak anglers, this matters because battery weight and capacity are always compromises. A 12V 10Ah battery weighs about 7 pounds and costs $50-$80, while a 12V 35Ah battery weighs 25+ pounds and costs $150-$250. Larger batteries provide longer runtime but add significant weight to your kayak.
Battery recommendations by usage:
- Down imaging only, 4-6 hour trips: 12V 10-15Ah battery
- Down imaging only, full-day trips: 12V 20-25Ah battery
- Side imaging, 4-6 hour trips: 12V 20-25Ah battery
- Side imaging, full-day trips: 12V 35-50Ah battery
You can extend battery life with side imaging by using it strategically rather than continuously. Run side imaging when scouting new areas or searching for structure, then switch to down imaging only when fishing known spots. Most units let you disable side imaging with a button press, immediately reducing power draw.
Another power-saving strategy: reduce screen brightness to 60-70% instead of maximum. This can save 0.2-0.5 amps without significantly impacting visibility in most conditions.
Consider investing in a quality lithium battery rather than lead-acid. Lithium batteries weigh 60% less for the same capacity, provide more consistent voltage throughout the discharge cycle, and last 3-5 times longer. A 12V 20Ah lithium battery weighs just 5-6 pounds compared to 15 pounds for lead-acid.
Frequently Asked Questions
Can you use side imaging while moving in a kayak?
Yes, side imaging works best while moving at 1.5-3 mph, which is a typical kayak paddling or pedaling speed. The sonar needs forward motion to paint a continuous picture of the bottom. Stationary side imaging produces a vertical line rather than a useful image.
Does side imaging work in rivers or just lakes?
Side imaging works in rivers but is most effective in slower-moving water (under 2 mph current). Strong current can tilt your kayak and transducer, degrading image quality. It’s excellent for revealing channel edges, drop-offs, and structure in river pools and slow sections.
How do you tell the difference between fish and structure on side imaging?
Fish appear as small bright dots or comma shapes suspended above the bottom, while structure shows as larger shapes attached to the bottom with shadows extending away from your kayak’s path. Fish marks are usually isolated and may appear in groups, while structure creates continuous patterns.
Can you see individual fish with down imaging?
Yes, down imaging shows individual fish as arches or thick marks, often with more detail than traditional sonar. You can distinguish fish size, see suspended fish clearly, and even identify fish holding tight to structure. Larger fish create wider, more pronounced marks.
What frequency is best for kayak fishing: 455 kHz or 800 kHz?
For most kayak fishing in depths under 50 feet, 800 kHz provides better detail and sharper images. Use 455 kHz if you regularly fish deeper than 80 feet or in stained water where penetration matters more than detail. Many units let you switch between frequencies.
Do you need a special kayak for side imaging?
No special kayak is required, but wider, more stable kayaks (30+ inches wide) provide better transducer performance because they remain more level in waves. Any fishing kayak can accommodate side imaging with proper transducer installation.
How long does it take to learn to read side imaging?
Most anglers can identify basic structure (points, channels, brush piles) within 2-3 trips. Becoming proficient at distinguishing fish from structure and understanding subtle bottom changes typically takes 10-15 hours of on-water practice.
Can side imaging see through vegetation?
Side imaging can see through sparse vegetation but dense weed beds block the sonar signal, creating shadows. You’ll see the top edge of vegetation clearly but not what’s beneath thick grass or lily pads. This limitation applies to down imaging as well.
Does kayak speed affect down imaging quality?
Yes, but down imaging tolerates faster speeds better than side imaging. Down imaging remains effective up to 5-6 mph, though image quality improves at slower speeds (2-3 mph). Kayaks naturally move at ideal speeds for both technologies.
What’s the minimum depth for side imaging to work?
Side imaging works in as little as 3 feet of water, though 5+ feet is ideal. In very shallow water (under 3 feet), the sonar beams don’t have enough distance to spread horizontally before hitting bottom, reducing effective range.
Can you record side imaging for later review?
Most modern units with side imaging offer screenshot capability and some allow continuous recording to a memory card. This feature is valuable for reviewing productive areas later or sharing findings with fishing partners.
Do you need GPS with side imaging?
GPS isn’t required for side imaging to function, but it’s highly recommended. GPS lets you mark waypoints on structure you find with side imaging and create custom maps showing productive areas, making it much easier to return to spots later.
Conclusion
Choosing between side imaging vs down imaging for kayaks ultimately depends on your fishing style, budget, and the waters you fish. Down imaging provides excellent value for most kayak anglers, offering detailed views of fish and bottom structure directly beneath your kayak at a reasonable cost. It’s the smart starting point for beginners and remains sufficient for anglers who fish familiar waters or focus on vertical presentations.
Side imaging becomes worthwhile when you regularly explore new waters, fish large lakes where locating scattered structure is challenging, or want to maximize your time on the water by covering more area efficiently. The technology works just as well on kayaks as on larger boats, but requires a larger investment in both the unit itself and battery capacity.
For serious kayak anglers who can afford the investment, combo units offering both technologies provide maximum versatility. You can use side imaging to scout and locate structure, then switch to down imaging for detailed study and precise positioning. This combination is particularly powerful for tournament fishing or when targeting structure-oriented species like bass and walleye.
Next steps to take:
- Assess your typical fishing scenarios—do you fish the same waters repeatedly or explore new locations regularly?
- Set a realistic budget including the fish finder, transducer, battery, and mounting hardware
- If starting out, begin with a quality down imaging unit in the $300-$400 range
- Practice interpreting your fish finder on every trip, taking notes about what you see versus what you catch
- Consider upgrading to side imaging after a season or two if you find yourself wishing for wider coverage
- Invest in proper transducer installation—level mounting is critical for image quality with both technologies
Remember that no fish finder catches fish for you. These tools help you locate productive water more efficiently, but success still depends on presentation, technique, and understanding fish behavior. Start with the technology that fits your budget and fishing style, master it thoroughly, and upgrade only when you’ve identified specific limitations in your current setup.
Whether you choose side imaging, down imaging, or both, you’re adding a powerful tool to your kayak fishing gear that will help you find and catch more fish. The key is matching the technology to your needs rather than buying the most expensive unit available.