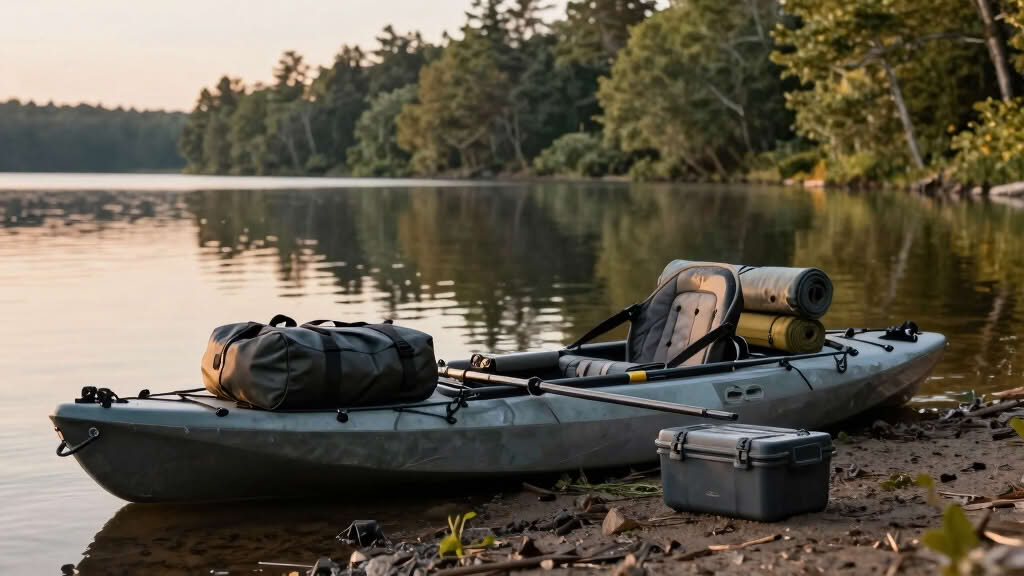
Most kayak anglers who attempt their first overnight camping trip overpack by 30-40% and discover halfway to camp that their kayak handles like a waterlogged brick. A proper kayak camping with fishing gear packing list balances three competing demands: enough tackle to catch dinner, sufficient camping equipment to stay comfortable, and light enough weight to keep your kayak stable and maneuverable. This guide breaks down exactly what to bring, what to leave behind, and how to pack it all so you can paddle, fish, and camp without capsizing or compromising your trip.
Key Takeaways
- Weight capacity matters: Most fishing kayaks safely carry 200-350 pounds of gear for overnight trips, but staying 20-30% below max capacity improves stability and paddling efficiency
- Waterproof organization is essential: Use separate dry bags for camping gear, fishing equipment, and food to protect items and maintain balance
- Fishing rods need protection: Collapsible or two-piece rods in protective tubes prevent breakage during transport and portaging
- Minimize tackle selection: Bring 2-3 proven lure types and essential terminal tackle rather than your entire collection
- Sit-on-top kayaks offer easier gear access but sit-inside models provide better weather protection for multi-day trips
- Pack heavy items low and centered: Place dense gear like tackle boxes and water near the kayak’s center of gravity
- Plan for capsizing: Keep critical items (phone, keys, first aid) in a waterproof pouch attached to your person
- Fresh bait requires insulated storage: Small soft-sided coolers work better than hard coolers for kayak camping
- Common packing mistakes: Bringing too many clothing changes, oversized camping gear, and redundant fishing equipment
- Test your load before the trip: Practice paddling with full gear in calm water to assess stability and make adjustments
What Is Kayak Camping and How Is It Different From Regular Camping
Kayak camping combines paddling, fishing, and backcountry camping into multi-day water-based adventures where you carry all your gear in your kayak to remote campsites accessible only by water. Unlike car camping where you can bring a cooler full of food and bulky equipment, or backpacking where you distribute weight across your body, kayak camping requires packing everything into limited waterproof storage compartments while maintaining your vessel’s balance and paddling performance.
The main differences from regular camping include:
- Weight distribution matters more than total weight: A 40-pound pack on your back feels different than 40 pounds shifting in your kayak’s bow
- Everything must be waterproof: Gear gets wet from paddle drip, waves, and potential capsizing
- Access to gear is limited while paddling: You can’t easily reach items stored in sealed hatches until you beach the kayak
- Space is constrained and oddly shaped: Long narrow hulls and round hatches require creative packing solutions
- You’re combining two activities: Fishing gear competes with camping equipment for precious storage space
For fishing enthusiasts, kayak camping opens access to remote lakes, coastal islands, and river systems where fish see less pressure and camping spots offer true solitude. Check out our beginner kayak fishing resources if you’re new to the sport.
Kayak Camping Packing List for Beginners With Fishing Equipment
A complete kayak camping with fishing gear packing list for a 2-3 day trip includes essentials from four categories: safety equipment, camping gear, fishing tackle, and food/water. Beginners should start with this core list and add items only after testing their kayak’s capacity and their own paddling stamina.
Safety & Navigation (Non-Negotiable)
- Personal flotation device (PFD) worn at all times
- Whistle attached to PFD
- Headlamp with extra batteries
- First aid kit in waterproof case
- Navigation tools (map, compass, or GPS device)
- Emergency communication (waterproof phone case or VHF radio)
- Paddle leash
- Bilge pump or sponge
Camping Essentials (Minimize Weight)
- Lightweight 2-person tent (provides gear storage space)
- Compact sleeping bag rated for expected temperatures
- Sleeping pad (inflatable pads pack smaller than foam)
- Portable camp stove and fuel canister
- Cookware (single pot and utensil set)
- Water filtration system or purification tablets
- 2-3 liters water capacity
- Headnet and insect repellent
- Small tarp for rain shelter or ground cover
Fishing Gear (Streamlined Selection)
- 2 fishing rods maximum (one primary, one backup)
- Rod tubes or protective sleeves
- One compact tackle box with proven lures
- Pliers and line cutters
- Fishing license and required permits
- Measuring tape and fish identification card
- Small landing net (collapsible)
- Stringer or fish bag if keeping catch
Clothing & Personal Items
- Quick-dry paddling clothes (worn)
- One complete change of dry clothes in waterproof bag
- Rain jacket and pants
- Sun protection (hat, sunglasses, sunscreen)
- Water shoes or sandals for camp
- Toiletries and biodegradable soap
- Towel (microfiber packs small)
Food (Lightweight and Compact)
- Dehydrated meals or freeze-dried backpacking food
- Energy bars and trail mix
- Coffee or tea
- Minimal fresh food (gets heavy and requires cooling)
This list assumes you already own appropriate kayak gear and fishing gear. First-time kayak campers should practice packing and paddling with this load before committing to a remote destination.

FULLY ADJUSTABLE & LOCKABLE: These sturdy rope tie downs are fully adjustable and lockable. The easy automatic locking and anti-loosening design ensures quick and secure fastening, allowing you to raise and lower fixtures effortlessly. No knots any more
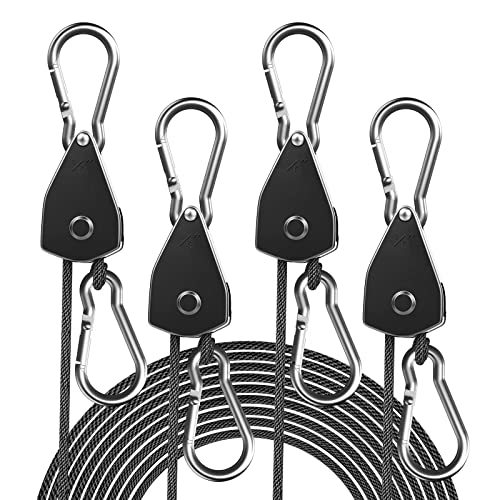
Built to Last: The retractable ratchet straps are durable, tear & rust-resistant - up to 75 lbs weight load capacity per ratchet and 300 lbs per 4-pack

FULLY ADJUSTABLE & LOCKABLE: These sturdy rope tie downs are fully adjustable and lockable. The easy automatic locking and anti-loosening design ensures quick and secure fastening, allowing you to raise and lower fixtures effortlessly. No knots any more
How Do You Pack Fishing Rods in a Kayak Without Breaking Them
Fishing rods survive kayak camping trips when you use protective rod tubes, secure them properly, and choose two-piece or travel rods designed for transport. The most common rod damage happens during portaging, beaching, and when gear shifts during paddling, not from normal fishing use.
Best protection methods:
Invest in hard-shell rod tubes: PVC pipe with end caps (DIY option) or commercial rod cases protect rods from impact and crushing. Tubes should extend 2-3 inches beyond rod tips.
Use two-piece or multi-piece rods: Travel rods break down to 3-4 feet, making them easier to secure inside kayak hatches or along the deck. Quality two-piece rods cast just as well as one-piece models.
Secure rods along the kayak’s centerline: Use bungee cords or rod holders to keep tubes from sliding. Never let rods hang over the side where they can catch on obstacles.
Pack rods inside the hull when possible: Rear storage compartments in many fishing kayaks accommodate 4-foot rod tubes, keeping them completely protected.
Pad contact points: Wrap foam pipe insulation around rod tubes where they contact hard surfaces or other gear.
Common mistake: Bringing expensive one-piece rods on kayak camping trips. Even with protection, the risk of damage increases significantly. Save your premium rods for day trips and use reliable mid-range two-piece rods for camping adventures.
For longer kayaks that offer more storage options, check our guide on fishing kayak length to understand how hull dimensions affect gear capacity.

【4-IN-1 NESTING SYSTEM | UNBEATABLE VALUE】 This complete set features four precision-sized hard shell cases that nest perfectly inside each other for compact storage. From professional road trips to casual weekend fishing, this all-in-one system provides the perfect-fit carrier for your entire rod collection while saving massive space when not in use.

Easy portability: featuring a portable fishing rod case design with ergonomic handles and detachable straps, it’s simple to transport from your car trunk to your favorite fishing spot,spinning rod travel case,outdoor fishing gear bag

【4-IN-1 NESTING SYSTEM | UNBEATABLE VALUE】 This complete set features four precision-sized hard shell cases that nest perfectly inside each other for compact storage. From professional road trips to casual weekend fishing, this all-in-one system provides the perfect-fit carrier for your entire rod collection while saving massive space when not in use.
Best Waterproof Bags for Kayak Camping With Fishing Gear
Waterproof dry bags in the 10-20 liter range provide the best balance of protection, organization, and packability for kayak camping with fishing gear. You’ll need at least three separate bags: one for sleeping gear, one for clothing, and one for electronics and items that absolutely cannot get wet.
Top dry bag features for kayak camping:
- Roll-top closure with at least 3 folds: Creates reliable waterproof seal even after repeated use
- Bright colors: Yellow, orange, or red bags are easier to spot if they come loose
- D-ring attachment points: Allow you to clip bags to kayak rigging or each other
- Transparent windows: Let you identify contents without opening (useful for frequently accessed items)
- Durable material: 500D PVC tarpaulin or similar heavy-duty fabric resists punctures from fishing hooks and rough handling
Recommended bag system:
| Bag Size | Purpose | What Goes Inside |
|---|---|---|
| 20L | Sleeping system | Sleeping bag, inflatable pad, pillow |
| 15L | Clothing | Dry clothes, rain gear, extra layers |
| 10L | Electronics & valuables | Phone, keys, wallet, headlamp, first aid |
| 10L | Food | Dehydrated meals, snacks (separate from scented items) |
| 5L | Fishing accessories | Extra line, leaders, small tackle items |
Don’t use dry bags for: Heavy items like tackle boxes, water bottles, or camp stoves. These items don’t need waterproof protection and their weight works better in open storage areas where you can position them for optimal balance.
Alternative for tackle: Waterproof tackle boxes (like Plano or Flambeau waterproof models) protect fishing gear better than dry bags and prevent hooks from puncturing bag material. Store these in accessible deck areas rather than sealed compartments.
Choose bags from established outdoor brands rather than cheap alternatives. A failed dry bag 10 miles from the launch point ruins trips. Quality bags from Sea to Summit, NRS, or Outdoor Research cost more upfront but remain waterproof for years.
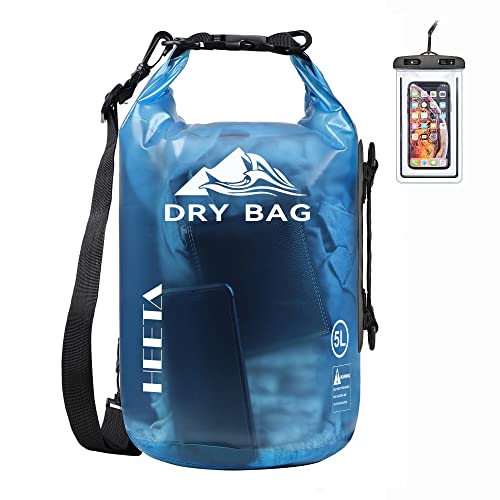
Waterproof - Built with professional seamless technology, our dry bag keeps your items and valuables dry during water sports like boating and kayaking. Note: It can handle accidental submersion, but should not be kept underwater for extended periods

Built to Endure: Reinforced multi-layer construction delivers exceptional tear and abrasion resistance yet remains flexible. Ruggedness is backed by expertly welded seams, heavy-duty buckles, sturdy straps, and robust stitching. Designed to withstand rock scrapes and harsh conditions, it helps keep your gear protected and dry on every water adventure.
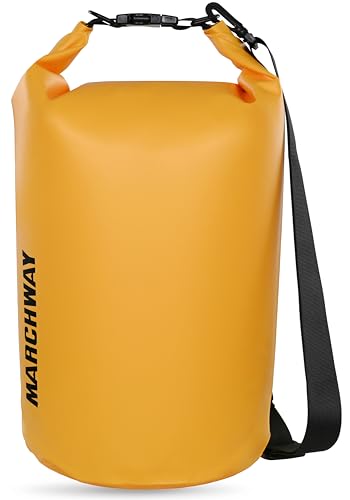
Built to Endure: Reinforced multi-layer construction delivers exceptional tear and abrasion resistance yet remains flexible. Ruggedness is backed by expertly welded seams, heavy-duty buckles, sturdy straps, and robust stitching. Designed to withstand rock scrapes and harsh conditions, it helps keep your gear protected and dry on every water adventure.
How Much Weight Can You Safely Pack in a Fishing Kayak for Overnight Trips
Most fishing kayaks safely carry 200-350 pounds of combined paddler and gear weight for overnight trips, but you should stay 20-30% below the manufacturer’s maximum capacity rating to maintain stability, maneuverability, and safety margins. A kayak loaded to its absolute limit becomes sluggish, sits lower in the water, and responds poorly in wind or waves.
Calculate your safe load:
- Find your kayak’s maximum weight capacity (usually 300-550 pounds for fishing kayaks)
- Subtract your body weight
- Subtract 20-30% safety margin
- The remainder is your gear budget
Example: 400-pound capacity kayak, 180-pound paddler
- 400 – 180 = 220 pounds available
- 220 × 0.75 (keeping 25% margin) = 165 pounds for gear
- Realistic 2-3 day camping and fishing load: 40-60 pounds
Typical gear weights:
- Camping equipment (tent, sleeping bag, pad, stove): 15-20 pounds
- Fishing gear (2 rods, tackle, net): 8-12 pounds
- Food and water (3 days): 15-20 pounds
- Clothing and personal items: 5-8 pounds
- Safety equipment: 3-5 pounds
- Total: 46-65 pounds
Longer kayaks (13+ feet) and wider models (32+ inches) handle weight better than short recreational kayaks. If you’re a heavier paddler or planning extended trips, consider kayaks specifically designed for touring or expedition use. Our fishing kayak buying guide covers weight capacity considerations in detail.
Warning sign you’ve overpacked: If your kayak’s scupper holes (on sit-on-top models) are underwater while you’re seated, you’ve exceeded safe capacity. Redistribute or remove gear before paddling.
Sit-On-Top vs Sit-Inside Kayak for Camping and Fishing
Sit-on-top kayaks work better for kayak camping with fishing gear in warm weather and calm waters because they offer easier gear access, simpler re-entry after capsizing, and more deck space for securing equipment. Sit-inside kayaks excel in cold conditions, rough water, and longer paddling distances due to better weather protection and more efficient hull designs.
Sit-on-top advantages for fishing and camping:
- Gear stored on deck remains accessible while paddling
- Built-in rod holders and mounting points for accessories
- Self-draining scupper holes eliminate water accumulation
- Easier to climb back onto after swimming or capsizing
- More stable platform for standing and casting
- Better ventilation in hot weather
Sit-on-top disadvantages:
- Gear exposed to rain, spray, and waves (requires more waterproofing)
- Less protected storage space inside hull
- Slower paddling speed over long distances
- Lower back support during extended paddling
- Legs and lower body get wet
Sit-inside advantages for camping trips:
- Sealed bulkhead compartments keep gear completely dry
- Spray skirt blocks rain and waves
- More comfortable for multi-hour paddling sessions
- Better performance in wind and choppy conditions
- Warmer in cold weather
Sit-inside disadvantages:
- Difficult to access gear while on water
- Harder to re-enter after capsizing (requires practiced technique)
- Limited deck space for fishing rods and tackle
- Cockpit can fill with water if you capsize
- Less stable for standing and casting
Choose sit-on-top if: You’re camping in summer, fishing frequently throughout the day, paddling shorter distances (under 10 miles), and prioritizing fishing over paddling efficiency. Most dedicated fishing kayaks use sit-on-top designs for good reason.
Choose sit-inside if: You’re paddling in cold water or weather, covering long distances between fishing spots, camping in exposed coastal areas, or prioritizing paddling performance over fishing convenience.
Hybrid option: Some touring kayaks feature large cockpits with removable spray skirts, offering flexibility for both fishing and weather protection. Tandem fishing kayaks also provide extra gear capacity if you’re camping with a partner.
What Fishing Gear Should I Leave Behind on a Kayak Camping Trip
Leave behind your full tackle collection, multiple rod types, bulky landing nets, heavy anchors, and any fishing electronics beyond a basic fish finder. A kayak camping with fishing gear packing list should include only proven lures and tackle for the specific species you’re targeting, not every piece of equipment you own.
Fishing gear to skip:
Multiple rods for different techniques: Bring one versatile medium-action spinning rod (6’6″ to 7′) and one backup. You can catch most freshwater species with this setup using different lures and line weights.
Your entire tackle box collection: Select 15-20 proven lures in 2-3 categories (for example: soft plastics, crankbaits, and topwater). Bring essential terminal tackle (hooks, weights, swivels) but leave specialty items at home.
Large landing nets: Full-size nets with long handles take up excessive space. Use a compact folding net or learn to hand-land fish. For catch-and-release, you often don’t need a net at all.
Heavy mushroom anchors: Traditional anchors weigh 5-10 pounds and require bulky rope. Use a lightweight folding anchor (2-3 pounds) or anchor trolley system instead. In many camping situations, beaching the kayak works better than anchoring.
Expensive electronics: Advanced fish finders, GPS chartplotters, and other electronics add weight, require battery power, and risk water damage. A basic portable fish finder or smartphone with offline maps provides sufficient navigation and fish-finding capability. Learn more about reading fish finder screens to maximize a simple unit.
Bait buckets and aerators: Live bait systems add weight and complexity. Artificial lures eliminate the need to keep bait alive. If you must use live bait, catch it at your destination rather than transporting it.
Extra line spools: One spare spool of your primary line weight is sufficient. You won’t respool your entire reel during a 2-3 day trip.
Specialized rods: Leave your musky rod, surf casting rod, and fly fishing setup at home unless that specific technique is your trip’s primary focus. Versatility beats specialization for kayak camping.
Rule of thumb: If you haven’t used a piece of fishing gear on your last three trips, don’t bring it kayak camping. Pack for the fishing you’ll actually do, not the fishing you imagine doing.
How to Keep Fishing Bait Fresh While Kayak Camping
Keep fishing bait fresh during kayak camping trips by using a small soft-sided cooler (6-12 quart capacity) with reusable ice packs, storing it in a shaded area of your kayak, and refreshing ice at your campsite if you’re near cold water sources. For multi-day trips, artificial lures eliminate bait storage challenges entirely and catch fish just as effectively.
Bait storage strategies:
For live bait (minnows, shiners, leeches):
- Use an insulated bait bucket or small soft cooler (hard coolers are too bulky)
- Add frozen water bottles instead of loose ice (less mess, reusable)
- Change water twice daily using lake or river water
- Keep bait container in the coolest part of your kayak (under seat, in shade)
- Limit bait quantity to what you’ll use in 24 hours
For cut bait or dead bait:
- Vacuum-seal portions before the trip
- Store in cooler with ice packs
- Keep separate from food items
- Use within 48 hours even when properly iced
For worms and nightcrawlers:
- Store in breathable container with bedding material
- Keep cool but not frozen
- Worms survive 3-5 days without refrigeration if kept moist and shaded
- Most reliable live bait option for kayak camping
Better alternative – switch to artificial lures:
Most experienced kayak camping anglers abandon live bait entirely because:
- Soft plastic baits (worms, grubs, swimbaits) catch the same species as live bait
- No storage, cooling, or maintenance required
- Unlimited shelf life
- One package of soft plastics weighs ounces and lasts multiple trips
- More versatile across different fishing conditions
If you insist on live bait: Catch it at your destination. Most camping locations have minnows, crayfish, or worms available near shore. Spend 20 minutes gathering bait rather than hauling it for miles in your kayak.
Cooler consideration: If you’re bringing a cooler for bait, size it to also hold a few beverages and perishable food items. A 12-quart soft cooler serves double duty without taking up excessive space. Position it in your kayak’s tank well or rear storage area where it won’t affect balance.
Where to Store Tackle Boxes in a Kayak When Camping Overnight
Store tackle boxes in your kayak’s center console, tank well, or milk crate system where they remain accessible during fishing but secure during paddling. For overnight camping trips, transfer essential tackle to a small waterproof box that stays with the kayak while storing your main tackle box at camp to reduce weight during fishing excursions.
Best tackle storage locations:
During paddling to and from camp:
- Rear tank well: Secure tackle box with bungee cords or cargo net. This area keeps weight centered and prevents the box from sliding.
- Sealed rear hatch: If your tackle box fits through the hatch opening, storing it inside the hull protects it from waves and keeps weight low in the kayak.
- Milk crate system: Many anglers mount plastic milk crates in the tank well. Tackle boxes fit inside crates, and the crate’s structure prevents shifting.
- Center console: Some fishing kayaks have built-in storage consoles between your legs. Small tackle boxes or utility boxes fit here for easy access.
At camp:
- Store your main tackle box in your tent or under a tarp
- Reduces kayak weight for fishing trips from camp
- Protects tackle from overnight dew and rain
- Prevents theft if camping in popular areas
For fishing from camp:
- Transfer 1-2 hours worth of lures and terminal tackle to a small waterproof utility box (Plano 3600 size)
- Attach this box to your kayak with a leash or bungee
- Leave bulk tackle at camp
- Restock the small box as needed
Tackle organization tips for camping:
Use a tackle box with secure latches (not magnetic closures) to prevent spills during transport. Plano, Flambeau, and Bass Mafia make waterproof models that survive kayak environments.
Avoid: Soft tackle bags. They don’t protect lures from crushing, hooks puncture the material, and they’re difficult to secure in a kayak. Hard plastic boxes with dividers keep tackle organized and protected.
Weight distribution: A full tackle box weighs 5-10 pounds. Position it near your kayak’s center of gravity (typically just behind your seat) rather than in the bow or stern where it affects handling.
Consider a kayak stability upgrade if you’re struggling to balance gear weight. Wider kayaks and those with better hull designs handle loaded tackle boxes more gracefully.
Can You Bring a Cooler on a Kayak Camping Trip for Fish
You can bring a small soft-sided cooler (12-20 quart capacity) on a kayak camping trip to store caught fish, but hard coolers are too bulky and heavy for most kayaking situations. A better solution is a collapsible fish bag or stringer combined with processing and cooking fish at camp rather than storing them on ice for extended periods.
Cooler considerations for kayak camping:
Soft coolers work, hard coolers don’t:
- Soft-sided coolers (Coleman, YETI Hopper, Arctic Zone) compress when empty and weigh 2-3 pounds
- Hard coolers take up constant space, weigh 8-15 pounds empty, and have awkward shapes for kayak storage
- A 12-quart soft cooler holds 3-4 decent-sized fish plus ice
Where to position a cooler:
- Tank well (rear deck area) secured with bungee cords
- Behind your seat if you have a large cockpit area
- Never in the bow where weight affects steering
Ice management:
- Freeze water bottles before the trip (reusable, drinkable as they melt)
- Bring a small bag of ice for the first day
- Refresh ice by freezing lake water in bottles at camp (only if temperatures drop below freezing at night)
- Most ice melts within 24-36 hours even in insulated coolers
Better alternatives to coolers:
Fish stringers: Keep caught fish alive in the water until you’re ready to cook them. Clip the stringer to your kayak while fishing, then transfer to a stake at camp.
Collapsible fish bags: Insulated bags designed for fish weigh ounces and pack flat. Add lake water and your catch stays fresh for several hours.
Catch, clean, cook immediately: The best approach for kayak camping. Fillet fish at camp, cook what you’ll eat that day, and release the rest. No storage needed.
Catch and release: If you’re fishing primarily for sport, release everything and rely on packed food for meals. Eliminates all fish storage concerns.
If you must keep fish overnight: Clean and fillet them, wrap in plastic bags, and store in your cooler with maximum ice. Cook within 24 hours. Never store whole uncleaned fish for more than a few hours, even on ice.
Reality check: Most kayak camping anglers don’t bring coolers. The weight, space, and ice management hassle outweigh the benefits. Plan to eat fresh-caught fish immediately or stick with catch-and-release fishing and packed meals.
Common Mistakes People Make Packing for Kayak Fishing Camping Trips
The most common packing mistakes for kayak camping with fishing gear include bringing too many clothing changes, oversized camping equipment, redundant fishing tackle, inadequate waterproofing, and poor weight distribution. These errors lead to overloaded kayaks, uncomfortable paddling, and gear damage.
Top packing mistakes and fixes:
1. Packing like a car camper
- Mistake: Bringing full-size tents, camp chairs, large coolers, and bulky sleeping bags
- Fix: Choose backpacking-weight gear. Your tent should weigh under 4 pounds, sleeping bag under 3 pounds
2. Too many clothing changes
- Mistake: Packing a different outfit for each day plus extras
- Fix: Wear quick-dry fishing clothes, bring one complete dry change for camp, and one set of warm layers. Wash and dry clothes at camp if needed
3. Bringing your entire tackle collection
- Mistake: “I might need this” mentality leads to 20+ pounds of tackle
- Fix: Research target species, pack 15-20 proven lures, skip specialty items
4. Poor waterproofing strategy
- Mistake: Assuming kayak hatches are waterproof or using garbage bags for protection
- Fix: Invest in quality dry bags. Assume everything will get wet and pack accordingly
5. Loading gear randomly
- Mistake: Stuffing items wherever they fit without considering weight distribution
- Fix: Heavy items (water, tackle) go low and centered. Light items (sleeping bag, clothing) can go in bow or stern
6. Forgetting to test the load
- Mistake: Packing for the first time at the launch site
- Fix: Do a practice paddle with full gear in calm water near home. Adjust before your trip
7. Overpacking food
- Mistake: Bringing fresh food, canned goods, and elaborate meal ingredients
- Fix: Dehydrated meals, energy bars, and simple one-pot cooking. Plan 2,500-3,000 calories per day
8. No backup plan for critical items
- Mistake: One paddle, one headlamp, one lighter
- Fix: Redundancy for essential safety and survival items. Two ways to make fire, backup light source, repair kit
9. Inaccessible items during paddling
- Mistake: Packing snacks, water, and sunscreen in sealed hatches
- Fix: Keep frequently needed items in deck bags or dry bags with quick access
10. Ignoring weather forecasts
- Mistake: Packing for ideal conditions
- Fix: Bring rain gear and warm layers even if the forecast looks perfect. Weather changes quickly on water
11. New, untested gear
- Mistake: Buying equipment specifically for the trip without testing it first
- Fix: Use proven gear you’ve tested on day trips. Save new equipment experiments for shorter outings
12. Inadequate food storage
- Mistake: Leaving food in open bags or non-sealed containers
- Fix: Use dry bags or waterproof containers. In bear country, hang food or use bear-resistant containers
The 80/20 rule: You’ll use 20% of what you bring 80% of the time. If you’re debating whether to bring something, leave it behind. You can always add items on future trips, but overloading your first kayak camping trip creates misery.
Do I Need a Separate Dry Bag for Each Type of Gear When Kayak Camping
You need at least three separate dry bags when kayak camping with fishing gear: one for sleeping equipment, one for clothing, and one for electronics and items that absolutely cannot get wet. Additional bags for food and fishing accessories improve organization but aren’t strictly necessary if you pack thoughtfully.
Minimum dry bag system (3 bags):
Bag 1 – Sleeping system (20L):
- Sleeping bag
- Sleeping pad
- Pillow or stuff sack with extra clothes
- Keeps your sleep gear dry and compressed
Bag 2 – Clothing (15L):
- One complete dry outfit for camp
- Rain jacket and pants
- Warm layers
- Extra socks and underwear
- Separating clothes from sleeping gear prevents cross-contamination if one bag fails
Bag 3 – Critical electronics and valuables (10L):
- Phone in waterproof case
- Keys and wallet
- Headlamp and batteries
- First aid kit
- Fire starting materials
- This bag should be the most secure and potentially attached to your person
Recommended additions (5 bags total):
Bag 4 – Food (10L):
- Dehydrated meals
- Snacks and energy bars
- Coffee and drink mixes
- Separating food from other gear prevents odors and makes bear-hanging easier
Bag 5 – Fishing accessories (5L):
- Extra line and leaders
- Small lures and terminal tackle
- Fishing license and permits
- Keeps fishing items separate from camping gear
What doesn’t need dry bags:
- Tackle boxes (use waterproof models)
- Camp stove and fuel (water won’t damage them)
- Cookware and utensils
- Water bottles and filtration system
- Tent (in its stuff sack, already water-resistant)
- Rope and bungee cords
Organization benefits of multiple bags:
- Find items quickly without unpacking everything
- Maintain kayak balance by distributing bags to different storage areas
- If one bag fails, other gear stays protected
- Color-code bags for instant identification (yellow = sleeping, orange = clothes, red = electronics)
Budget approach: Start with three quality bags and add more as you identify organizational needs. Cheap bags fail when you need them most, so prioritize quality over quantity.
Packing within bags: Use stuff sacks or ziplock bags inside dry bags for additional organization and a second layer of protection. This system works especially well for small items like first aid supplies, toiletries, and fishing accessories.
What to Do If Your Kayak Tips Over With All Your Camping and Fishing Gear
If your kayak capsizes with camping and fishing gear, stay calm, secure yourself first, then recover the kayak and any floating gear before attempting to re-enter. Properly packed equipment in sealed dry bags and secured with tethers will remain with your kayak, but loose items will sink or float away within seconds.
Immediate capsize response (first 60 seconds):
- Stay with your kayak: It’s your largest flotation device and most visible object for rescuers
- Account for your paddle: Grab it immediately or attach it to your kayak with a paddle leash
- Assess the situation: Are you in danger from cold water, current, or boat traffic?
- Check for loose gear: Grab any floating items within arm’s reach
- Don’t chase sinking gear: Your safety matters more than equipment
Re-entry techniques:
For sit-on-top kayaks (easier):
- Swim to the side of the kayak near the cockpit
- Reach across and grab the far side
- Kick hard and pull yourself onto the deck
- Rotate into seated position
- Bail water from the cockpit area
For sit-inside kayaks (requires practice):
- Flip the kayak upright (it will be full of water)
- Use a paddle float for stability if you have one
- Position yourself perpendicular to the kayak
- Kick hard and slide onto the rear deck
- Rotate legs into cockpit
- Bail water with pump or sponge
Gear recovery after re-entry:
- Secured items in dry bags should still be attached via bungee cords or in hatches
- Check all attachment points and retighten any loose bungees
- Floating items may have drifted downwind or downstream
- Paddle to recover visible gear, but don’t risk capsizing again
- Accept that some loose items are gone
Prevention is better than recovery:
Secure everything before launching:
- Use bungee cords, cam straps, or cargo nets for deck items
- Clip dry bags to D-rings or through bungee systems
- Store heavy items in sealed hatches when possible
- Attach expensive items (rod, tackle box) with leashes
Keep critical items on your person:
- Waterproof pouch with phone, keys, and ID attached to PFD
- Whistle on PFD
- Knife or multi-tool on PFD
- These items stay with you regardless of what happens to the kayak
Practice capsize recovery:
- Before your camping trip, practice in calm, shallow water
- Wear your PFD and bring a friend for safety
- Learn how quickly your kayak fills with water
- Test your re-entry technique with and without gear
- Identify which items float and which sink
Cold water considerations:
- Hypothermia sets in quickly (under 60°F water)
- Get out of the water as fast as possible
- If you can’t re-enter, swim to shore while pushing your kayak
- Wet clothes lose insulating value; change immediately after reaching land
When to abandon gear:
- If you’re in danger from cold, current, or weather
- If attempting recovery risks another capsize
- If you’re exhausted and need to reach shore
- Gear can be replaced; you cannot
Most capsize situations result from overloading, poor weight distribution, or paddling beyond your skill level in challenging conditions. Understanding kayak capsize prevention and recovery techniques is essential before attempting overnight camping trips.
Is Kayak Camping With Fishing Gear Good for Families or Solo Only
Kayak camping with fishing gear works well for both families and solo paddlers, but families need tandem kayaks or multiple boats, careful trip planning for children’s abilities, and shorter distances between campsites. Solo kayak camping offers more flexibility and simplicity but requires self-sufficiency and careful safety planning since you have no backup if problems arise.
Family kayak camping considerations:
Best for families when:
- Children are age 8+ and comfortable swimming
- Trip distances are under 5 miles per day
- Campsites have easy beach access (no difficult landings)
- Weather forecast is stable and mild
- You have appropriate kayaks for each family member or tandem boats for adults with young children
- Fishing is a secondary activity, not the primary focus
Family packing strategy:
- Distribute gear across multiple kayaks
- Adults carry heavy items (food, water, tent)
- Kids carry their own sleeping bags and clothing in small dry bags
- Reduce fishing gear to basics (one rod per person maximum)
Family-friendly destinations:
- Protected lakes with established campsites
- Calm rivers with multiple access points
- Island camping with short crossings
- Areas with facilities (outhouses, fire rings)
Solo kayak camping advantages:
Why solo works well:
- Pack at your own pace and skill level
- Fish whenever you want without coordinating schedules
- Cover more distance or stay put as conditions dictate
- Simpler meal planning and gear decisions
- Quieter fishing opportunities
- Personal challenge and self-reliance
Solo safety requirements:
- Tell someone your detailed itinerary and check-in plan
- Carry emergency communication (satellite messenger or PLB)
- Stay within your skill level for paddling and weather conditions
- Bring redundant safety equipment
- Know self-rescue techniques
- Avoid remote locations for your first solo trips
Solo packing benefits:
- All gear fits in one kayak (no coordination needed)
- Optimize weight distribution for your paddling style
- Bring exactly what you need without compromises
Couples and small groups:
The ideal kayak camping scenario for many anglers is 2-3 people. This provides:
- Safety backup if someone has problems
- Shared gear weight (tent, stove, first aid)
- Fishing partners for different techniques
- Social interaction at camp
- Someone to help with difficult launches or landings
Age and ability factors:
For children:
- Under 8: Ride in tandem kayak with adult, minimal paddling
- 8-12: Own kayak for short distances, adult stays close
- 13+: Can handle their own kayak and gear on appropriate trips
For beginners:
- Start with day trips combining paddling and fishing
- Progress to overnight trips at established campgrounds
- Build to remote camping after mastering skills
- Consider guided trips for first experiences
Physical demands:
- Paddling 5-10 miles with gear requires moderate fitness
- Loading and unloading kayaks multiple times per day
- Setting up camp after paddling
- Fishing while managing a kayak
- Be realistic about your group’s abilities
Whether solo or with others, successful kayak camping with fishing gear depends more on preparation, appropriate expectations, and skill level than group size. Start with shorter trips close to civilization and build experience before attempting remote multi-day expeditions.
Frequently Asked Questions
How many days of food should I pack for kayak camping?
Pack food for your planned trip duration plus one extra day as a safety margin. For a 3-day trip, bring 4 days of food. Dehydrated meals and energy-dense snacks (nuts, bars, dried fruit) provide 2,500-3,000 calories per day while minimizing weight and storage space.
Can I use a regular backpacking tent for kayak camping?
Yes, backpacking tents work perfectly for kayak camping. Choose lightweight models (under 4 pounds) that pack small. Avoid heavy car-camping tents that take up excessive space and add unnecessary weight to your kayak.
What’s the best way to transport fishing rods on a kayak?
Use two-piece or collapsible rods in protective tubes secured along your kayak’s centerline with bungee cords. Store tubes inside rear hatches if they fit, or strap them to the deck where they won’t interfere with paddling or catch on obstacles.
Do I need a fishing license for kayak camping?
Yes, you need a valid fishing license for the state where you’re fishing, plus any required permits for camping on public lands. Keep licenses in a waterproof case attached to your person or stored in an accessible dry bag.
How do I keep my phone charged during multi-day kayak camping trips?
Bring a waterproof solar charger or portable battery pack (10,000+ mAh capacity). Store electronics in a waterproof dry bag when not in use. Turn your phone to airplane mode to conserve battery and only use it for navigation, photos, and emergencies.
What if there’s no established campsite where I want to fish?
Practice Leave No Trace principles: camp on durable surfaces (rock, gravel, or established sites), stay 200 feet from water sources, pack out all trash, and check local regulations about dispersed camping. Some areas require permits even for primitive camping.
Can I kayak camp in saltwater or ocean environments?
Yes, but saltwater kayak camping requires additional considerations: tide charts, weather monitoring, corrosion-resistant gear, and understanding of coastal conditions. Start with protected bays and estuaries before attempting open ocean camping. Check out ocean kayak fishing for specialized techniques.
How do I deal with rain during a kayak camping trip?
Pack all gear in waterproof dry bags, bring a quality rain jacket and pants, set up a tarp shelter at camp for cooking and gear storage, and choose a tent with good rain protection. Embrace the rain as part of the adventure rather than letting it ruin your trip.
What’s the minimum kayak length for camping with fishing gear?
A 12-foot kayak is the practical minimum for overnight camping with fishing gear. Longer kayaks (13-15 feet) offer more storage capacity, better tracking, and improved paddling efficiency for covering distance with a loaded boat.
Should I bring a GPS or rely on my phone for navigation?
Bring both if possible. Download offline maps to your phone before the trip, but also carry a waterproof GPS device or paper maps and compass as backup. Phone batteries die, screens break, and electronics fail in wet environments.
How do I find good kayak camping spots that also have fishing?
Research public lands with water access (national forests, state parks, BLM land), use satellite imagery to identify potential campsites, consult fishing forums for local knowledge, and start with established water trails that mark camping areas. Many states publish paddling guides with campsite locations.
Can I bring my dog kayak camping and fishing?
Yes, if your dog is comfortable in kayaks, swims well, and wears a dog PFD. Dogs add 30-60 pounds to your weight capacity and require their own food, water, and gear. Practice day trips before attempting overnight camping, and be prepared for wet, muddy conditions at camp.
Conclusion
A well-planned kayak camping with fishing gear packing list balances three priorities: safety, comfort, and fishing success. Start with the essentials covered in this guide—proper waterproof storage, streamlined tackle selection, lightweight camping equipment, and careful weight distribution. Test your complete setup on a short overnight trip before committing to remote multi-day adventures.
The most successful kayak camping anglers pack light, choose versatile gear over specialized equipment, and prioritize items that serve multiple purposes. Your first trip will teach you more than any article can, so start conservative with distance and duration while you learn what works for your paddling style and fishing preferences.
Before your next trip, review your kayak gear and fishing gear to ensure everything is in good condition. Practice your capsize recovery technique in calm water, test your dry bags for leaks, and verify that your kayak can handle the loaded weight comfortably. With proper preparation and realistic expectations, kayak camping opens access to remote fishing opportunities and backcountry experiences that few anglers ever discover.
Pack smart, paddle safe, and tight lines on your next kayak camping adventure.