
Quick Answer
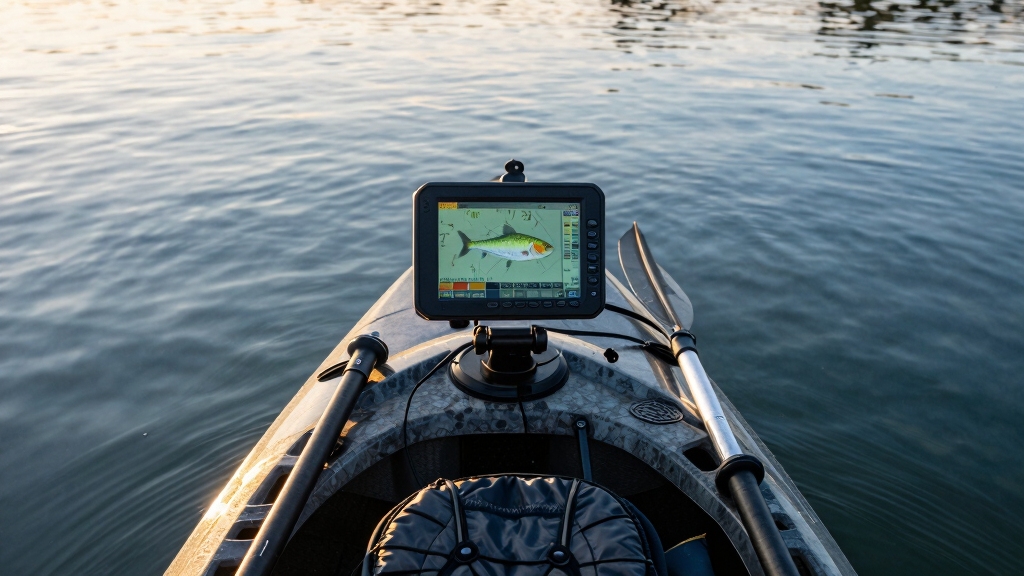
Installing a fish finder on a kayak involves mounting the display unit within easy viewing distance, positioning the transducer for optimal sonar readings (typically in a scupper hole or on the hull), connecting a suitable marine battery, and waterproofing all electrical connections. Most kayak anglers can complete a basic installation in 2-4 hours without drilling holes by using scupper mounts, suction cups, or RAM mounting systems, though permanent installations offer better durability and performance for serious fishermen.
Key Takeaways
- No drilling required for most installations, scupper hole mounts, suction cups, and clamp systems work on nearly all kayak types
- Transducer placement is critical, mount it in clean water flow, away from turbulence, typically in a scupper hole or on the transom
- Use a sealed 12V marine battery (7-10Ah for most units) and keep it in a waterproof battery box to prevent corrosion and shorts
- Portable setups take 30-60 minutes to install and remove, while permanent mounts require 2-4 hours but offer better stability
- Budget fish finders under $200 deliver excellent performance for kayak fishing and are easier to install than high-end units
- Inflatable kayaks can support fish finders using specialized mounts that don’t puncture the hull
- Waterproof all connections with marine-grade heat shrink tubing and dielectric grease to prevent failure on the water
- Common mistakes include mounting transducers in turbulent water, using automotive batteries, and failing to secure loose cables
What Is a Fish Finder and How Does It Work on a Kayak?
A fish finder is a sonar device that sends sound waves through the water and interprets the returning echoes to display underwater structure, bottom composition, water depth, and fish locations on a screen. On a kayak, the system consists of three main components: a display unit mounted within the paddler’s view, a transducer that emits and receives sonar signals (mounted on or through the hull), and a power source (typically a small 12V battery).
The transducer is the heart of the system. It converts electrical energy into sound waves that travel through water at roughly 4,900 feet per second. When these waves hit objects, whether fish, rocks, vegetation, or the bottom, they bounce back to the transducer, which converts them back into electrical signals. The display unit processes these signals and creates a visual representation, showing depth, structure, and fish as arches or marks.
For kayak applications, fish finders work best when:
- The transducer maintains consistent contact with clean water flow
- The unit is powered by a battery with sufficient amp-hours for your fishing duration
- The display is positioned to minimize glare while remaining easily readable
- All connections are waterproofed against splashes and submersion
Most kayak fish finders operate at frequencies between 50 kHz (deeper water, wider cone) and 200 kHz (shallow water, detailed imaging). Many modern units combine both frequencies for versatility. Once you understand how to read a fish finder screen, you’ll identify fish-holding structure and adjust your fishing strategy accordingly.
Best Fish Finders for Kayaks Under $200
Several quality fish finders deliver excellent performance for kayak fishing without breaking the $200 budget. The Garmin Striker 4, Humminbird PiranhaMAX 4, and Lowrance HOOK Reveal 5 consistently rank among the top choices for kayak anglers who want reliable sonar without premium pricing.
Top budget-friendly options include:
- Garmin Striker 4 – 3.5-inch color display, CHIRP sonar, GPS waypoint marking, and excellent battery efficiency. Ideal for kayakers who fish multiple spots and want to mark productive locations.
- Humminbird PiranhaMAX 4 – Dual-beam sonar, fish ID+ technology, and a simple interface that beginners appreciate. The 4.3-inch display offers good visibility in bright conditions.
- Lowrance HOOK Reveal 5 – 5-inch screen with FishReveal technology that combines CHIRP sonar with DownScan imaging for clearer fish separation. Slightly above $200 but worth considering if budget allows.
- Lucky Portable Fish Finder – Castable sonar unit under $100 that works without any mounting, perfect for anglers testing fish finder technology before committing to a permanent installation.
Choose a unit under $150 if you’re new to beginner kayak fishing and want to test the technology. Spend closer to $200 if you fish frequently and want features like GPS, better screen resolution, and advanced sonar processing. All these units run efficiently on small 7Ah batteries, keeping your total system weight under 5 pounds.
Common mistake: Buying the cheapest no-name fish finder on online marketplaces. These units often have poor waterproofing, inaccurate readings, and no customer support. Stick with established brands that offer warranties and proven kayak compatibility.

✦ Fish Finder and Depth Finder : It is a portable fish finder that could display approximate fish location and water depth. The sonar transducer can be attached to the hull of kayak or boat in order to understand the changing of water depth when you are moving by. The water depth detection range is between 3ft(1m) and 328ft (100m) when the transducer is completely immersed in the water.

It is a portable and castable fish finder that comes with a wireless sonar probe/sensor. The maximum distance between the sensor and the handheld unit is 262FT/80M. No need to drill hole in your boat hull to install the sensor any more. Two small holes on the sensor allow you to tether it with your fishing line and cast it onto water as far as you want.
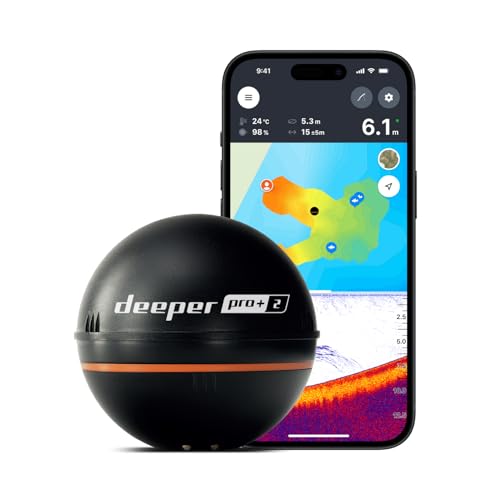
READY TO PERFORM: Wide beam, mid, and narrow beams make covering large expanses or drilling down on specific spots available at your disposal; Ideal for elite anglers who want to take their matchplay to the next level
Do I Need to Drill Holes in My Kayak to Install a Fish Finder?
No, most kayak fish finder installations don’t require drilling holes in the hull. Scupper hole mounts, suction cup systems, RAM ball mounts, and clamp-on transducer arms allow secure installation without permanently modifying your kayak, making them ideal for anglers who want flexibility or fish multiple kayaks.
No-drill mounting options:
- Scupper hole mounts – Fit into existing drain holes on sit-on-top kayaks, providing stable transducer placement in clean water flow. These are the most popular choice for permanent installations without drilling.
- RAM mounting systems – Use track systems, gear tracks, or clamp bases already present on many fishing kayaks to secure display units with adjustable arms.
- Suction cup mounts – Attach displays to smooth kayak surfaces temporarily. Best for portable setups or testing different positions before committing to permanent mounting.
- Trolling motor mounts – Clamp onto existing trolling motor shafts if your kayak has one, keeping the transducer in optimal position while moving.
- Transducer arms – Clamp to the kayak’s gunwale or side and extend the transducer into the water without hull penetration.
When drilling makes sense: If you paddle a sit-inside kayak without scupper holes, fish in rough water where clamp mounts might shift, or want the cleanest possible installation with flush-mounted displays and through-hull transducers, drilling small holes (properly sealed with marine sealant) provides the most secure and professional result.
Always use marine-grade stainless steel hardware if you drill, and seal every penetration with silicone or 3M 5200 marine adhesive sealant. For most recreational kayak anglers, though, no-drill solutions offer 95% of the performance with zero risk of compromising hull integrity.
Portable Fish Finder vs Permanent Mount for Kayak
Portable fish finder setups use temporary mounting solutions (suction cups, clamp mounts) and allow quick installation and removal, making them perfect for anglers who fish occasionally, own multiple kayaks, or want to move their unit between boats. Permanent mounts use scupper installations or drilled mounting points with hardwired connections, offering superior stability and durability for dedicated kayak anglers who fish frequently in varied conditions.
Portable setup advantages:
- Install in 15-30 minutes, remove in 5 minutes
- Move the unit between kayaks, canoes, or small boats
- No risk of damaging your kayak’s resale value
- Lower initial cost (no specialized mounting hardware)
- Ideal for rental kayaks or borrowed boats
Permanent mount advantages:
- Rock-solid stability in rough water and high-speed paddling
- Cleaner cable routing with less snag risk
- Better transducer performance from consistent positioning
- Professional appearance and easier operation
- No setup time, just load your kayak and go
Choose portable if you’re new to kayak fishing, paddle different kayaks regularly, or fish calm lakes and ponds where stability isn’t critical. Choose permanent if you own a dedicated fishing kayak, paddle in ocean kayak fishing conditions with waves and current, or fish multiple times per week and want maximum convenience.
Many experienced kayak anglers start with portable setups to learn their preferences, then upgrade to permanent installations once they’ve determined optimal display and transducer positions for their specific fishing style.

2-in-1 Ultimate Angler Combination - Engineered specifically for kayak and SUP anglers, this premium mounting system allows you to install your fishfinder display screen and transducer arm simultaneously on a single sleek setup. No more cluttered decks—just a streamlined, high-efficiency fishing workspace that keeps your essentials perfectly positioned.

Dual Beam Sonar: Choose from a narrow and a wide beam for great detail or a generous coverage area, helping you identify fish, structure and contours.

Two installation options: Mounts directly to a boat guide rail or to a compatible M6 fixing hole, giving you a flexible setup for fish finder electronics.
How to Waterproof Fish Finder Wiring on a Kayak
Waterproofing fish finder wiring requires marine-grade heat shrink tubing with adhesive lining on all connections, dielectric grease on plug connections, and cable routing that keeps connections elevated above bilge water. Every exposed connection point is a potential failure point in the wet kayak environment, so proper sealing is non-negotiable for reliable operation.
Step-by-step waterproofing process:
Use marine-grade heat shrink tubing – Standard electrical tape fails in wet conditions. Marine heat shrink with adhesive lining creates a waterproof seal when heated with a heat gun or lighter.
Apply dielectric grease – Coat all plug connections (display to transducer, battery to power cable) with dielectric grease before connecting. This prevents corrosion and creates a moisture barrier.
Route cables above water level – Run wiring along the kayak’s highest points using cable ties or adhesive cable clips. Keep connections out of the hull bottom where water accumulates.
Seal battery connections – Use waterproof battery boxes with gasket seals. Apply dielectric grease to terminal connections and ensure the box lid seals completely.
Protect the transducer cable – This is your most vulnerable point. Use spiral cable wrap or split loom tubing to protect the cable from abrasion, and secure it every 12-18 inches to prevent movement.
Test before launching – Spray all connections with water before your first trip. If you see moisture penetration or corrosion after a few trips, reseal immediately.
Common mistake: Using automotive-grade electrical supplies instead of marine-grade components. Automotive heat shrink and connectors aren’t designed for constant moisture exposure and will fail within weeks in a kayak environment. Spend the extra few dollars on marine supplies, your fish finder will thank you.
For kayak gear that lasts, waterproofing is the difference between years of reliable service and frustrating failures at the worst possible moments.

3:1 SHRINK RATIO & FAST CONTRACTON SPEED: Shrinks to 1/3 of its original diameter and seals extremely tightly, solving the problem of many 2:1 shrink tubes that don't shrink enough and therefore don't seal tightly enough, Shrink temperature: 80 to 125°C, Provides a professional connection within seconds.

[4:1 SHRINK RATIO – STRONGER, TIGHTER, RELIABLE SEAL] Experience premium performance with HUAKAYO’s 4:1 heat shrink tubing — shrinks to one-fourth of its original diameter for a tighter, waterproof, professional-grade connection. Perfect for projects that demand extra compression and durability under any condition.

4:1 SHRINK RATIO & FAST CONTRACTON SPEED: Shrinks to 1/4 of its original diameter for greater tightness and a 30% increase in sealing. Eliminates the problem of 2:1 and 3:1 tubing not shrinking tight enough. Heat Shrink Tubing shrink temperature: 80 to 125°C, Provides a professional connection within seconds.
Where Should I Mount a Fish Finder Transducer on a Kayak?
Mount your fish finder transducer in a location with clean, turbulence-free water flow, typically in a scupper hole near the center of the kayak or on a side-mounted arm that positions it below the hull in undisturbed water. The transducer face should be parallel to the water surface and positioned so it doesn’t create drag or catch on underwater obstacles.
Best transducer mounting locations:
Rear scupper hole – Most popular choice for sit-on-top kayaks. Provides clean water flow, easy access for adjustment, and minimal drag. Use a scupper transducer mount designed for your kayak’s scupper diameter (usually 1.5 or 2 inches).
Side-mounted arm – Clamps to the kayak’s gunwale and extends the transducer into the water beside the hull. Allows precise angle adjustment and works on kayaks without scupper holes. Keep the transducer at least 6 inches from the hull to avoid turbulence.
In-hull mounting – For sit-inside kayaks or anglers who want zero drag. The transducer sits inside the hull, bonded with epoxy or silicone, and shoots through the plastic. Only works in kayaks without foam-filled hulls and reduces signal strength by 10-20%.
Trolling motor mount – If you have a kayak trolling motor, mounting the transducer on the motor shaft keeps it in optimal position and allows adjustment when you raise or lower the motor.
Positioning rules:
- Keep the transducer face parallel to the water surface (not angled up or down)
- Position it at least 12 inches from the paddle stroke zone to avoid strikes
- Mount it away from hull protrusions, keels, or anything that creates turbulence
- In scupper holes, ensure the transducer extends below the hull bottom by at least 1 inch
- Test at different speeds, if readings disappear above 3 mph, you have turbulence issues
Avoid these locations: Directly behind the seat (paddle strikes), near the bow (too much turbulence), or in scupper holes that drain air pockets (causes interference). If you fish in shallow water with lots of structure, side-mounted arms allow you to quickly raise the transducer to avoid damage.
Fish Finder Battery Keeps Dying: What Am I Doing Wrong?
If your fish finder battery dies quickly, you’re likely using an undersized battery (below 7Ah for most units), leaving the unit powered on when not actively fishing, or have a parasitic drain from corroded connections or damaged wiring. Most kayak fish finders draw 0.2-0.4 amps per hour, so a 10Ah battery should provide 20-25 hours of runtime under normal conditions.
Common battery problems and solutions:
Problem: Battery dies after 2-3 hours
- Cause: Battery capacity too small (5Ah or less) or battery is old and won’t hold charge
- Solution: Upgrade to a 10Ah sealed lead-acid or lithium battery. Lithium batteries cost more but weigh half as much and last 3-4 times longer.
Problem: Battery drains when fish finder is off
- Cause: Corroded connections creating parasitic drain, or fish finder not fully powering down
- Solution: Clean all connections with a wire brush, apply dielectric grease, and disconnect the battery between trips. Some units draw standby power even when “off.”
Problem: Battery works fine at home but dies on the water
- Cause: Cold temperatures reduce battery capacity by 20-40%, or vibration from paddling causes loose connections
- Solution: Keep the battery insulated in cold weather, and secure all connections with lock washers or thread-locking compound.
Problem: New battery dies after one season
- Cause: Storing the battery in a discharged state or in extreme temperatures
- Solution: Charge the battery fully before storage, recharge every 2-3 months during off-season, and store in a temperature-controlled environment (40-80°F).
Battery selection guide:
- 7Ah sealed lead-acid – Minimum size for basic fish finders, provides 12-15 hours runtime, weighs 5 lbs, costs $25-35
- 10Ah sealed lead-acid – Best value for most kayak anglers, provides 20-25 hours runtime, weighs 7 lbs, costs $35-50
- 10Ah lithium (LiFePO4) – Premium choice, provides 25-30 hours runtime, weighs 3 lbs, costs $80-120, lasts 5+ years
Always use a sealed (AGM or gel cell) battery, never a flooded lead-acid battery that can leak acid if the kayak tips. For serious kayak anglers who fish all day, a 10Ah lithium battery offers the best combination of weight, runtime, and longevity.
Can I Install a Fish Finder on an Inflatable Kayak?
Yes, you can install a fish finder on an inflatable kayak using non-penetrating mounting solutions like suction cups for the display, clamp-on transducer arms that attach to the kayak’s side rails or D-rings, and a battery secured in a waterproof dry bag. Specialized inflatable kayak fish finder mounts are available from companies like YakAttack and Scotty that work with the attachment points built into most inflatable fishing kayaks.
Installation approach for inflatable kayaks:
Display mounting – Use heavy-duty suction cups rated for marine use (not cheap automotive types) on the inflatable’s rigid floor or deck. Alternatively, attach a RAM mount to the kayak’s accessory tracks if equipped.
Transducer mounting – Clamp a transducer arm to the kayak’s side rail, D-ring, or accessory track. The arm extends the transducer into the water beside the kayak. Some inflatable-specific mounts use straps that wrap around the tubes without damaging them.
Battery placement – Store the battery in a waterproof dry bag or hard case, secured with straps to prevent shifting. Keep it low and centered for stability.
Cable management – Use adhesive cable clips designed for temporary use, or run cables through existing bungee cord systems. Avoid anything that punctures or permanently adheres to the inflatable material.
Inflatable-specific considerations:
- Test suction cup mounts on your specific kayak material, some textured PVC surfaces don’t hold suction well
- Position the transducer arm so it doesn’t interfere with paddle strokes or create drag
- Expect slightly less stable readings than hard-shell kayaks due to flex in the hull
- Remove all electronics before deflating to prevent damage to mounting points
Best inflatable kayaks for fish finders have rigid floors, accessory tracks, and reinforced mounting points. The Sea Eagle FishSkiff, Advanced Elements StraitEdge, and Aquaglide Blackfoot are popular choices that accommodate fish finder installations without modification.
Avoid: Drilling, gluing, or using adhesives that might damage the inflatable material. Always choose mounting solutions designed specifically for inflatable kayaks, and test them in shallow water before heading to deep water.
Fish Finder Installation Mistakes That Damage Kayaks
The most damaging fish finder installation mistakes include drilling holes without proper sealing (leading to water intrusion and hull delamination), over-tightening mounting hardware that cracks plastic, routing cables through areas where they chafe against sharp edges, and using automotive-grade sealants that don’t bond to polyethylene kayak hulls. These errors can compromise your kayak’s structural integrity and create expensive repair situations.
Critical mistakes to avoid:
Drilling without proper sealant
- Unsealed holes allow water between the kayak’s inner and outer hull layers, causing delamination and adding weight
- Fix: Use marine-grade silicone or 3M 5200 on every drilled hole, and apply sealant to bolt threads before installation
Over-tightening scupper mounts
- Excessive force cracks the plastic around scupper holes, especially in cold weather
- Fix: Tighten until snug, then add just 1/4 turn. Use large backing washers to distribute pressure
Mounting transducers in turbulent areas
- Turbulence behind hull features causes air bubbles that block sonar signals
- Fix: Test transducer position at paddling speed before permanent installation. Move it if you see signal loss or interference
Using the wrong adhesives
- Standard epoxy and super glue don’t bond to polyethylene (the material in most kayaks)
- Fix: Use adhesives specifically rated for polyethylene, or use mechanical fasteners instead
Ignoring cable routing
- Cables that rub against sharp edges will eventually wear through, causing shorts or complete failure
- Fix: Use split loom tubing or spiral wrap on all cables, and secure them every 12 inches with cable ties
Mounting batteries without securing them
- A loose 7-pound battery becomes a dangerous projectile in rough water or if the kayak flips
- Fix: Use a battery box with strap tie-downs, or secure the battery with cam straps to the kayak’s frame
Installing in-hull transducers over foam
- Foam-filled hulls block sonar signals completely, rendering in-hull mounting useless
- Fix: Check your kayak’s construction before attempting in-hull mounting. If it has foam, use an external mount
For kayak anglers comparing different fishing kayak options, choosing a model with factory-installed fish finder mounting points eliminates most installation risks and provides optimal positioning from the start.
Do I Need a Special Battery for a Kayak Fish Finder?
You need a sealed 12-volt battery (AGM, gel cell, or lithium) rated for marine use, not a standard automotive battery that can leak acid and create dangerous fumes in the confined kayak environment. Most kayak fish finders run efficiently on 7-10Ah batteries, which provide 12-25 hours of runtime while weighing 3-7 pounds depending on battery chemistry.
Battery types for kayak fish finders:
Sealed Lead-Acid (AGM)
- Capacity: 7-12Ah typical
- Weight: 5-8 lbs
- Cost: $25-60
- Lifespan: 2-4 years with proper care
- Best for: Budget-conscious anglers, occasional use, calm water fishing
Gel Cell
- Capacity: 7-12Ah typical
- Weight: 5-8 lbs
- Cost: $40-80
- Lifespan: 3-5 years
- Best for: Anglers who fish in extreme temperatures or rough water (more vibration-resistant than AGM)
Lithium (LiFePO4)
- Capacity: 7-12Ah typical
- Weight: 2-4 lbs
- Cost: $80-150
- Lifespan: 5-10 years
- Best for: Weight-conscious anglers, frequent users, those who want maximum runtime per charge
Battery sizing guide:
- 5Ah or less – Only suitable for ultra-compact fish finders used for 2-3 hour trips
- 7Ah – Minimum recommended size, provides 12-15 hours for most units
- 10Ah – Sweet spot for all-day fishing, provides 20-25 hours runtime
- 12Ah or more – Overkill for most kayak applications unless you run multiple electronics
What makes a battery “marine-grade”? Marine batteries are sealed to prevent acid leaks, have vibration-resistant internal construction, and use terminals that resist corrosion in wet environments. Never use a standard automotive battery in a kayak, if it tips or gets splashed, you risk acid burns and toxic fumes.
Charging and maintenance: Use a smart charger designed for your battery type (lead-acid chargers damage lithium batteries and vice versa). Charge after every trip, store batteries at 50-100% charge, and keep them in moderate temperatures (40-80°F) during off-season storage.
For anglers building a complete kayak fishing gear setup, budget $35-50 for a quality 10Ah AGM battery or $100-120 for a lithium battery if weight savings matter.
How Long Does It Take to Install a Fish Finder on a Kayak?
A basic portable fish finder installation takes 30-60 minutes for first-timers and 15-20 minutes once you’re familiar with the process. A permanent installation with scupper mounts, cable routing, and waterproofing typically requires 2-4 hours for your first installation, though experienced kayak anglers can complete the same setup in 60-90 minutes on subsequent kayaks.
Time breakdown by installation type:
Portable setup (30-60 minutes):
- Mount display with suction cup or RAM arm: 5-10 minutes
- Attach transducer arm to gunwale: 10-15 minutes
- Connect battery and test system: 5-10 minutes
- Route and secure cables: 10-15 minutes
- On-water testing and adjustment: 10-15 minutes
Permanent scupper mount (2-4 hours):
- Install scupper transducer mount: 20-30 minutes
- Mount display with RAM arm or track mount: 15-20 minutes
- Route cables through kayak: 30-45 minutes
- Install battery box and secure battery: 20-30 minutes
- Waterproof all connections: 20-30 minutes
- Cable management and tie-downs: 15-20 minutes
- On-water testing and fine-tuning: 30-45 minutes
Permanent installation with drilling (4-6 hours):
- Plan mounting locations and mark holes: 30-45 minutes
- Drill and seal display mount holes: 30-45 minutes
- Install flush-mount display or RAM base: 20-30 minutes
- Drill and seal transducer mount holes: 30-45 minutes
- Route cables through hull (may require additional holes): 45-60 minutes
- Install battery box with through-bolts: 30-45 minutes
- Waterproof all connections and penetrations: 30-45 minutes
- Cable management: 20-30 minutes
- On-water testing and adjustment: 30-45 minutes
Factors that affect installation time:
- Kayak design – Kayaks with factory fish finder mounting points and cable channels cut installation time by 30-50%
- Your experience level – Second and third installations go much faster as you learn efficient techniques
- Tools available – Having the right tools (marine drill bits, heat gun, cable ties, crimping tools) speeds the process significantly
- Mounting complexity – Simple suction cup mounts are quick; custom fabrication for unusual kayak designs adds hours
Pro tip: Do your first installation at home where you have all your tools and can take your time. Don’t attempt your first fish finder installation at the boat launch on opening day, you’ll rush, make mistakes, and miss prime fishing time.
For beginner kayak fishing enthusiasts, starting with a portable setup lets you learn the technology and determine your preferred mounting positions before committing to a permanent installation.
Fish Finder Showing Wrong Depth Readings After Installation
Wrong depth readings after installation typically result from incorrect transducer angle (not parallel to the water surface), air bubbles under the transducer face, mounting in turbulent water flow, or selecting the wrong transducer type for your fishing depth. Most depth reading problems can be fixed by adjusting the transducer position and recalibrating the unit’s settings.
Troubleshooting depth reading problems:
Reading shows too shallow or fluctuates wildly
- Cause: Air bubbles under the transducer or mounting in turbulent water
- Fix: Reposition the transducer to a location with clean water flow, ensure it extends below the hull bottom, and paddle at different speeds to find where readings stabilize
Reading shows too deep or no bottom reading
- Cause: Transducer angled incorrectly (pointing up or down instead of straight down), or depth range setting too low
- Fix: Adjust transducer angle to be parallel with water surface, and increase the depth range in your fish finder’s settings menu
Reading disappears at higher speeds
- Cause: Transducer creating turbulence or cavitation at speed, or mounting location in turbulent water
- Fix: Move transducer to a cleaner water flow area, or add a small fairing block to smooth water flow over the transducer face
Reading accurate in shallow water but fails in deep water
- Cause: Wrong transducer frequency for depth (200 kHz doesn’t penetrate deep water well)
- Fix: Switch to 50 kHz frequency if your unit has dual-frequency capability, or upgrade to a transducer rated for your fishing depth
Reading shows multiple bottom lines or ghost images
- Cause: Sensitivity set too high, or transducer picking up side echoes from hull or nearby structure
- Fix: Reduce sensitivity setting by 10-20%, and ensure transducer is mounted away from hull protrusions
Readings accurate at rest but wrong while paddling
- Cause: Transducer shifting position due to loose mounting hardware
- Fix: Tighten all mounting bolts and add lock washers to prevent vibration loosening
Calibration steps for accurate readings:
- Take your kayak to water with a known depth (check navigation charts or ask local anglers)
- Let the kayak sit motionless for 30 seconds to allow readings to stabilize
- Compare the fish finder reading to the known depth
- Adjust the depth offset in your fish finder’s calibration menu to match actual depth
- Test at multiple depths to verify accuracy across your fishing range
Most fish finders also have automatic calibration modes that adjust settings based on water conditions. Run auto-calibration in the water where you fish most often for best results.
Is a Fish Finder Worth It for Beginner Kayak Fishermen?
A fish finder is worth it for beginner kayak fishermen who fish unfamiliar waters, target species that relate to specific depth ranges or structure, or want to accelerate their learning curve by understanding underwater topography. However, beginners who fish small ponds with visible structure, have limited budgets, or are still learning basic casting and paddling skills might benefit more from investing in quality rods, safety gear, and fishing time before adding electronics.
When a fish finder helps beginners:
- Fishing new lakes or rivers – Quickly locate drop-offs, channels, and structure without spending hours searching
- Targeting depth-specific species – Crappie, walleye, and striped bass hold at specific depths that change seasonally
- Learning underwater topography – Understanding how fish relate to structure accelerates your fishing education
- Building confidence – Knowing fish are present (or absent) helps you decide when to move to new spots
- Cold-water fishing – In winter, fish hold tight to specific structure; a fish finder eliminates guesswork
When beginners should wait:
- Very limited budget – A quality PFD, paddle, and basic tackle matter more than electronics for safety and success
- Fishing small, simple waters – Farm ponds and small creeks with visible structure don’t require sonar
- Still learning kayak basics – Master paddling, stability, and basic fishing before adding equipment complexity
- Fishing ultra-shallow water – In water under 3 feet deep, visual observation works as well as sonar
Budget-friendly approach for beginners: Start with a portable fish finder under $100 (like a castable sonar unit) to test the technology without committing to a full installation. If you find it valuable after a season, upgrade to a mounted unit with better features. This approach lets you learn whether fish finder technology matches your fishing style before investing $200-400 in a complete system.
Skills that matter more than electronics for beginners:
- Reading water visually (current breaks, color changes, surface activity)
- Understanding seasonal fish behavior and migration patterns
- Mastering basic fishing techniques (casting accuracy, lure presentation)
- Learning kayak stability and paddle control
- Building knowledge of local waters through time on the water
A fish finder is a tool that amplifies your fishing knowledge, it won’t make you a better angler by itself, but it will help you apply what you learn more effectively. For beginners committed to kayak fishing as a long-term pursuit, a fish finder is a worthwhile investment that pays dividends as your skills develop.
Scupper Hole Mount vs Trolling Motor Mount for Fish Finder
Scupper hole mounts install the transducer through existing drain holes in sit-on-top kayaks, providing stable positioning in clean water flow without drilling, while trolling motor mounts attach the transducer to the motor shaft, keeping it in optimal position and allowing adjustment when you raise or lower the motor. Choose scupper mounts for paddle-powered kayaks and trolling motor mounts if you have a kayak with an electric motor.
Scupper hole mount characteristics:
Advantages:
- No drilling required, uses existing scupper holes
- Very stable mounting with minimal vibration
- Positions transducer in clean water flow below hull
- Easy to adjust depth by changing mounting position
- Works on nearly all sit-on-top kayaks
- Costs $20-40 for quality mounts
Disadvantages:
- Only works on sit-on-top kayaks with scupper holes
- Transducer is fixed in position (can’t raise it in shallow water)
- May reduce scupper drainage slightly
- Requires finding a scupper hole in a good transducer location
Best for: Paddle-powered sit-on-top kayaks, anglers who fish varied depths without extreme shallow water, budget-conscious installations
Trolling motor mount characteristics:
Advantages:
- Transducer moves with motor, maintaining optimal position
- Can raise transducer in shallow water to avoid damage
- Keeps transducer in clean water even at higher speeds
- Easy to adjust angle and depth
- No hull modifications required
Disadvantages:
- Only works if you have a trolling motor
- Adds weight and complexity to motor installation
- Transducer cable must route to motor location
- May interfere with motor operation if not positioned correctly
- Costs $30-60 for quality mounts
Best for: Kayaks with electric trolling motors, anglers who fish shallow water with lots of structure, those who want maximum adjustability
Hybrid approach: Some kayak anglers use a scupper mount for the primary transducer and add a trolling motor mount for a secondary transducer (like a side-imaging unit), giving them multiple sonar views. This setup is common on high-end fishing kayaks with multiple electronics.
Installation difficulty: Scupper mounts are slightly easier to install (30-45 minutes) compared to trolling motor mounts (45-60 minutes), but both are straightforward for DIY installation. Neither requires specialized tools beyond basic hand tools and cable ties.
For most kayak anglers fishing from paddle-powered sit-on-top kayaks, scupper hole mounts offer the best combination of stability, ease of installation, and cost-effectiveness. If you’ve invested in a trolling motor system, trolling motor mounts provide superior adjustability and protection for your transducer.
Conclusion
Installing a fish finder on your kayak transforms your fishing experience by revealing underwater structure, fish locations, and depth changes that would otherwise remain invisible. Whether you choose a simple portable setup that installs in 30 minutes or a permanent installation with scupper mounts and waterproofed connections, the key to success lies in proper transducer positioning, adequate battery capacity, and thorough waterproofing of all electrical connections.
Start with a budget-friendly fish finder under $200 and a no-drill mounting solution to test the technology without permanently modifying your kayak. As you gain experience and understand how you use the unit, you can upgrade to permanent mounts, larger displays, or advanced sonar features that match your fishing style.
Your next steps:
- Choose your fish finder based on your budget, fishing style, and desired features
- Select mounting hardware that matches your kayak type (scupper mounts for sit-on-top, clamp mounts for sit-inside or inflatables)
- Purchase a 10Ah sealed battery and waterproof battery box for reliable power
- Gather installation supplies: marine-grade heat shrink tubing, dielectric grease, cable ties, and mounting hardware
- Install at home where you have tools and time, not at the boat launch
- Test in shallow water before heading to deep water, and adjust transducer position for optimal readings
- Learn to read your display using our complete guide to reading fish finder screens
With proper installation and a bit of practice interpreting sonar readings, your fish finder will become an indispensable tool that helps you locate productive fishing spots, understand seasonal fish movements, and spend more time with your line in the strike zone. The investment in time and equipment pays dividends every time you paddle out, giving you the underwater vision that separates consistently successful anglers from those who rely on luck alone.





