Most kayak anglers waste their first two hours on a new lake paddling aimlessly, hoping to stumble onto fish. Learning how to find fishing spots on a new lake transforms that guesswork into a systematic approach that puts you on productive water within 30 minutes of launching.
Key Takeaways
- Start with structure: Fish congregate around points, creek channels, weed edges, and depth changes that you can identify on maps before you launch
- Use free technology: Apps like Navionics and Google Earth reveal underwater contours, vegetation, and access points without expensive equipment
- Match depth to season: Spring and fall fish hold shallow (3-10 feet), while summer and winter push them to deeper water near thermoclines
- Scout efficiently: Focus your first hour on three high-probability areas rather than covering the entire lake
- Kayak advantages: Your shallow draft lets you access shoreline structure and backwater areas that boats can’t reach
- Time matters: Early morning and late evening offer the best conditions for both finding and catching fish on unfamiliar water
- Natural vs. reservoir: Natural lakes have gradual contours and weed beds, while reservoirs feature steeper banks and man-made structure like old roadbeds
What Are the Best Fishing Spots to Look for When Fishing a New Lake
The most productive spots on any new lake share common features: points where land juts into the water, creek channels that provide depth changes, weed bed edges, and areas where shallow flats drop into deeper water. These structure elements concentrate baitfish and create ambush points for predators.
High-percentage areas to target first:
- Rocky points and peninsulas – These create current breaks and depth transitions on both sides, often holding fish from 5 to 25 feet deep depending on season
- Creek and river channels – The deepest water pathway through a lake, visible on contour maps as tight lines, especially productive where they bend or intersect with flats
- Weed bed edges – The transition zone between vegetation and open water provides cover and oxygen, typically in 6-12 feet of water
- Docks and piers – Artificial shade and structure that concentrate panfish and bass, accessible year-round
- Submerged timber and brush piles – Visible on side-scan sonar or marked by locals, these hold fish at multiple depths
- Inlet and outlet areas – Moving water brings oxygen and food, creating feeding zones especially after rain
Choose your first spot based on water temperature: If it’s above 65°F, start with shallow weed edges and points. Below 55°F, focus on deeper channel edges and drop-offs near the main lake basin.
A common mistake is targeting only obvious shoreline features. The best kayak anglers also look for isolated structure 50-100 yards from shore – a single rock pile, hump, or weed patch that doesn’t get fished as heavily.
How to Read a Lake Map to Find Fish
Lake maps reveal underwater structure before you launch, showing depth contours, bottom composition, and fish-holding features that aren’t visible from the surface. Contour lines that bunch together indicate steep drop-offs, while widely spaced lines show gradual slopes where fish cruise and feed.
Key map features to identify:
- Contour intervals – Each line represents a depth change (usually 5 or 10 feet). Count lines from shore to find the depth of any feature
- Points and humps – Look for contour lines that form a “V” shape pointing into the lake (underwater points) or circles surrounded by deeper water (humps)
- Creek channels – Follow the tightest contour lines that snake through the lake, marking the old riverbed before the lake was formed
- Flats and shelves – Large areas between contour lines where depth stays consistent, prime feeding zones in 8-15 feet
- Saddles – Areas between two humps or points where fish travel between deep and shallow water
Free mapping resources:
- Navionics Web App – Detailed bathymetric charts for most U.S. lakes, free browser version available
- Google Earth – Zoom in on clear lakes to see bottom structure, vegetation, and access points
- State DNR websites – Many offer free downloadable lake maps with depth contours and boat ramps marked
For kayak fishing specifically, mark shallow access routes to deeper structure. Your advantage is reaching areas 3-6 feet deep that boats avoid, so trace paths from launch points to productive mid-lake features.
Cross-reference your map with satellite imagery. If you see dark patches in shallow water on Google Earth, those are likely weed beds or rock piles worth investigating. Our guide on how to read a fish finder screen complements map reading by helping you confirm what you’re seeing below your kayak.
Should I Fish Shallow or Deep Water on an Unfamiliar Lake
Start shallow (3-10 feet) during spring and fall when water temperatures are between 55-70°F, and target deeper water (15-30 feet) during summer and winter when fish seek stable temperatures. Shallow water is easier to read from a kayak and produces faster results when conditions are right.
Seasonal depth guidelines for most gamefish:
| Season | Primary Depth | Water Temp | Best Structure |
|---|---|---|---|
| Spring | 3-8 feet | 50-65°F | Shallow bays, flats, spawning areas |
| Summer | 15-25 feet | 70-80°F | Deep weed edges, thermocline, points |
| Fall | 5-15 feet | 55-70°F | Creek channels, shallow flats, points |
| Winter | 20-35 feet | 35-50°F | Deep basins, channel bends, humps |
Signs you’re fishing the wrong depth:
- No baitfish activity on your fish finder or visually at the surface
- Water feels unusually warm or cold for the season when you touch it
- You’re marking fish on sonar but getting no bites (they may be suspended and inactive)
The kayak advantage is mobility. Spend 15-20 minutes at each depth zone rather than committing to one strategy. Start shallow because it’s faster to cover water and easier to see structure, then work deeper if you’re not finding active fish.
Exception: On hot summer afternoons (water above 75°F), skip shallow water entirely and paddle directly to the deepest accessible structure near your launch point. Fish will be lethargic in warm shallows but may feed in cooler depths.
What Equipment Do I Need to Find Fish in a New Lake
A basic fish finder, waterproof phone with mapping apps, and polarized sunglasses will locate 90% of productive spots on a new lake without breaking the budget. Advanced electronics help, but aren’t necessary for kayak anglers who can visually scout shallow structure.
Essential gear for locating fish:
- Polarized sunglasses – Let you see 2-6 feet below the surface to spot weed beds, rocks, and cruising fish ($20-150)
- Smartphone with waterproof case – Run free apps like Navionics or Fishbrain for GPS mapping and community reports ($15-40 for case)
- Basic fish finder – Shows depth, bottom hardness, and fish location; portable units start at $100-200 and mount easily on kayaks
- Topographic map – Paper or digital, study before launching to identify three target areas ($0-15)
Nice-to-have upgrades:
- Side-scan sonar – Reveals structure 50+ feet to each side of your kayak, dramatically faster for covering water ($400-800)
- GPS chartplotter – Marks waypoints so you can return to productive spots and track your coverage ($200-500)
- Water temperature gauge – Helps predict fish depth and activity levels, built into most fish finders
Many beginner kayak anglers start with just a phone and polarized glasses, adding electronics after they’ve fished a few lakes. Your eyes and a basic understanding of structure will find fish – technology just speeds up the process.
Budget approach: Download Navionics Boating app (free version), study the lake for 20 minutes before launching, and visually scout your top three spots. Add a $150 portable fish finder once you’ve confirmed you enjoy the lake enough to return.

[99% UV400 Protection]: SUOSO sports sunglasses 99% UV400 shielding against harmful UVA and UVB rays. Our high-definition lenses provide unparalleled clarity, immersing you in vibrant colors and enhancing your visual experience, whether you're exploring the great outdoors or your daily urban adventures.
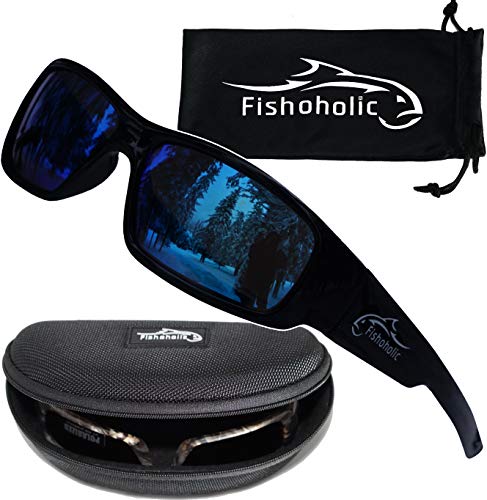
Gloss Black frame and Blue Mirror lens with Fishoholic Logo on both sides

Multi-Pack Combination: Discover unbeatable value with KALIYADI 4-pack sport sunglasses, offering style, protection, and convenience in one affordable package. Never worry about misplacing your mens sport sunglasses again. With four pairs KALIYADI mens polarized sunglasses, you'll always have a backup ready for any activity or outing
How to Use a Fish Finder on a Lake I’ve Never Been to
Set your fish finder to auto mode, start in 8-12 feet of water near visible structure, and idle your kayak slowly (1-2 mph) while watching for depth changes, bottom hardness transitions, and fish arches. Your first goal is understanding the lake’s depth profile, not immediately finding fish.
Step-by-step first-time scanning:
- Launch and paddle to your first target area (identified from map research)
- Turn on your fish finder and let it auto-calibrate for 30 seconds
- Paddle parallel to shore in 10-15 feet of water, watching the depth readout to understand the slope
- Mark waypoints when you see depth changes, hard-to-soft bottom transitions, or suspended fish
- Make perpendicular passes from shallow to deep to map the drop-off contour
- Zoom in on promising areas by circling and crossing them from multiple angles
What to look for on your first pass:
- Depth changes of 5+ feet within a short distance (drop-offs and ledges)
- Bottom hardness shifts from soft (mud/silt) to hard (rock/gravel), shown by color or intensity changes
- Fish arches or marks between the bottom and surface, especially in groups
- Suspended baitfish clouds that appear as fuzzy masses in mid-water
A common beginner mistake is paddling too fast. Keep your speed under 2 mph so the transducer can paint an accurate picture. In a kayak, this is a slow, steady paddle stroke every 2-3 seconds.
Interpreting what you see: Tight contour lines on your screen mean steep drop-offs (good). Scattered individual marks near the bottom are likely fish (good). Thick bands of marks in mid-water are baitfish schools (very good – predators are nearby).
If you’re new to fish finders, our detailed guide on reading fish finder screens covers interpreting arches, understanding sensitivity settings, and distinguishing fish from structure. Installing your unit properly is also critical – check out resources on fish finder installation for kayak-specific mounting tips.

2-in-1 Ultimate Angler Combination - Engineered specifically for kayak and SUP anglers, this premium mounting system allows you to install your fishfinder display screen and transducer arm simultaneously on a single sleek setup. No more cluttered decks—just a streamlined, high-efficiency fishing workspace that keeps your essentials perfectly positioned.
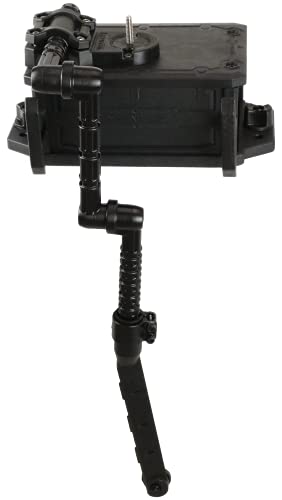
ALL-IN-ONE SOLUTION – CellBlok system includes track-mounted battery box with top platform paired with the SwitchBlade Transducer Arm for streamlined fish finder setup.

【 Corrosion-Proof Marine-Grade Construction】High-strength composite basez, hardware withstand 5x longer than plastic mounts in harsh waters. Non-slip rubberized coating prevents GPS unit slippage
Free Apps to Find Fishing Spots on Lakes
Navionics Boating, Fishbrain, and Google Earth provide free access to depth maps, community fishing reports, and satellite imagery that reveal productive structure before you launch. These apps replace expensive paper maps and give you GPS tracking to mark your own discoveries.
Top free fishing apps for 2026:
Navionics Boating (Free Web Version)
- Detailed bathymetric charts for thousands of lakes
- Depth contours, navigation channels, and hazards marked
- Limited free features; full app is $15/year but web version works for planning
Fishbrain (Free Tier)
- Community reports showing recent catches by species and location
- GPS mapping with basic depth contours
- Weather and solunar forecasts
- Social features to connect with local anglers
Google Earth (Free)
- Satellite imagery showing vegetation, structure, and water clarity
- Historical imagery to see seasonal changes
- Measure distances between features
- Identify access points and parking areas
State DNR/Wildlife Apps (Free)
- Lake-specific stocking reports and regulations
- Printable contour maps
- Boat ramp locations and amenities
- Examples: Minnesota Fishing, Texas Parks & Wildlife, Florida Fish & Wildlife
How to use apps effectively:
- Start with Google Earth to get the big picture – identify bays, points, and access
- Switch to Navionics to see underwater contours and plan your route
- Check Fishbrain for recent reports to confirm the lake is producing
- Download offline maps before you leave home (cell service is spotty on many lakes)
The free versions have limitations – Navionics restricts advanced features, Fishbrain shows fewer community catches – but they provide enough information to find productive water on your first trip. Upgrade to paid versions ($10-20/year) once you’re fishing new lakes regularly.
Pro tip: Screenshot your target areas with depth numbers visible, then save them to your phone’s photos. You can reference these on the water without burning battery on GPS tracking.

Premium GPS Tracker — The LandAirSea 54 GPS tracker provides accurate global location, real-time alerts, and geofencing. Easily attaches to vehicles, ATVs, golf carts, or other critical assets.

Waterproof

POWER YOUR OUTDOOR ADVENTURES WITH CONFIDENCE: The Nocqua Pro Power Kit keeps your essential electronics ready for fishing trips, kayaking and marine adventures. This reliable 12v marine battery provides dependable performance as a portable kayak battery with convenient 12v rechargeable battery power for GPS units, depth finders and outdoor equipment.
How Long Does It Take to Figure Out Where Fish Are on a New Lake
Expect to spend 30-60 minutes locating your first productive spot on a new lake if you’ve done pre-trip research, or 2-3 hours if you’re exploring blind. Kayak anglers have an advantage because you can quickly check multiple shallow areas that boats can’t access efficiently.
Realistic timeline for finding fish:
- With map research + fish finder: 20-40 minutes to locate and confirm a productive area
- With map research, no electronics: 45-90 minutes of visual scouting and test fishing
- No research, exploring blind: 2-4 hours to understand the lake and find consistent action
- Returning to the same lake: 10-15 minutes to paddle to previously marked spots
Factors that speed up the process:
- Fishing during peak feeding times (dawn/dusk)
- Targeting obvious structure (docks, points, weed edges)
- Using a fish finder to eliminate dead water quickly
- Talking to other anglers at the ramp (5 minutes of conversation can save an hour of searching)
Factors that slow you down:
- Midday fishing when fish are inactive and harder to locate
- Large, featureless lakes with minimal structure
- Poor water clarity that hides visual cues
- Fishing during weather fronts when fish are scattered
Don’t expect to “figure out” the entire lake in one trip. Professional guides spend years learning a single body of water. Your goal for trip one is finding 2-3 reliable spots that produce fish, then expanding your knowledge on subsequent visits.
Realistic first-trip goal: Catch fish from at least one spot and identify two other promising areas to try next time. That’s a successful scouting mission that sets you up for faster action on return trips.
Do I Need a Boat to Find Good Fishing Spots or Can I Fish from Shore
Kayaks access 80% of productive fishing spots on most lakes, including shallow flats, weed beds, and tight shoreline structure that boats can’t reach safely. Shore fishing limits you to 10-20% of the lake but can be productive if you target points, docks, and inlet areas within casting distance.
Kayak advantages for finding fish:
- Access to water 2-6 feet deep where big fish feed but boats can’t go
- Quiet approach that doesn’t spook fish in clear, shallow water
- Ability to fish both sides of points, docks, and weed edges
- Mobility to check multiple spots in a 2-3 hour session
- Reach mid-lake humps and channel edges far from shore
Shore fishing advantages:
- No equipment investment beyond rods and tackle
- Can fish longer without fatigue
- Better for night fishing (safety)
- Easier to manage multiple rods and larger fish
Best shore fishing spots on a new lake:
- Fishing piers and docks – Pre-built structure that attracts fish
- Dam areas – Deep water close to shore, current, and oxygen
- Rocky points – Cast parallel to shore to cover the drop-off
- Inlet streams – Moving water brings food and fish
- Boat ramps – Often have deep water and structure nearby
If you’re committed to shore fishing, use Google Earth to identify the 3-4 spots where deep water comes closest to accessible banks. These are your high-percentage areas. Most lakes have 5-10 productive shore spots versus hundreds of kayak-accessible locations.
For kayak anglers exploring new water, your shallow-draft advantage is huge. Focus on areas 3-8 feet deep within 100 yards of shore – this is the zone where you outperform both shore anglers and boat fishermen. Our fishing techniques resources cover how to work these areas effectively once you’ve found them.
Common Mistakes When Fishing a Lake for the First Time
The biggest mistake is covering too much water too quickly instead of thoroughly fishing three high-probability spots. New lake anglers also tend to fish only one depth zone, ignore weather and time of day, and fail to adapt when their first spot doesn’t produce.
Top mistakes that waste time on new lakes:
1. No pre-trip research
Showing up blind and hoping to stumble onto fish wastes 1-2 hours. Spend 15 minutes with a lake map and satellite imagery before you launch.
2. Paddling constantly without fishing
You’re scouting, not racing. Stop and make 10-15 casts at each promising feature before moving on.
3. Fishing only one type of structure
If points aren’t producing, try weed edges. If shallow isn’t working, go deeper. Vary your approach every 30 minutes.
4. Wrong time of day
Arriving at noon on a hot summer day means fish are deep and inactive. Early morning and late evening are 3-4x more productive for locating active fish.
5. Ignoring other anglers
If you see boats or kayakers concentrated in one area, there’s a reason. Check it out before exploring empty water.
6. Fishing too fast
Slow down your retrieve and presentation. Fish in unfamiliar water are often less aggressive, requiring a more methodical approach.
7. Not marking productive spots
Drop a waypoint or take a landmark photo when you catch fish. You’ll want to return to that exact spot.
8. Giving up too soon
One unproductive spot doesn’t mean the lake is dead. Try at least three different areas and two different depths before concluding the bite is off.
How to avoid these mistakes:
- Research for 15-20 minutes before your trip
- Plan to fish 3-4 specific spots based on structure and season
- Bring multiple lure types to adapt to what you find
- Fish during prime times (first/last two hours of daylight)
- Stay in each productive area for 30-45 minutes before moving
- Use your phone or GPS to mark catches and promising structure
The difference between a frustrating first trip and a successful one usually comes down to preparation and patience, not luck or expensive gear.
How to Find Fishing Spots Without Expensive Electronics
Polarized sunglasses, visual structure identification, and systematic coverage of high-probability areas will find fish on any lake without electronics. Focus on visible features like weed beds, docks, points, and depth changes you can see or feel with your lure.
No-electronics scouting strategy:
Step 1: Pre-trip visual research (15 minutes)
- Study Google Earth satellite view to identify points, bays, vegetation, and access
- Note 3-4 areas with visible structure or depth changes
- Screenshot or print a simple map
Step 2: Launch and observe (10 minutes)
- Watch for jumping baitfish, feeding birds, or surface activity
- Note wind direction (fish the windblown side of structure first)
- Look for other anglers and where they’re concentrated
Step 3: Systematic shallow scouting
- Paddle the shoreline in 4-8 feet of water
- Look through polarized glasses for rocks, weeds, and bottom changes
- Stop at every point, dock, and weed edge to make 10-15 casts
Step 4: Feel the bottom
- Use a jig or weighted lure to “feel” bottom composition
- Hard bottom (rock/gravel) = good; soft bottom (mud/silt) = move on
- Note where you feel depth changes or structure
Visual clues that reveal fish-holding spots:
- Dark patches in shallow water – Vegetation or rock piles
- Color changes – Often mark depth transitions or bottom type shifts
- Foam lines or current seams – Concentrate food and baitfish
- Lily pads and emergent vegetation – Hold bass and pike in the edges
- Overhanging trees and brush – Provide shade and cover
- Docks with deeper water – Cast to corners and shaded sides
The “fan cast” method:
When you reach a promising spot, anchor or hold position and make casts in a 180-degree arc, covering shallow to deep water. This systematic approach ensures you don’t miss fish holding at a specific depth.
Lure selection for scouting:
Use search baits that cover water and provide bottom feedback – spinnerbaits, chatterbaits, or Texas-rigged worms. These lures help you feel structure while also catching fish.
Many successful kayak anglers fish for years without electronics, relying on observation and pattern recognition. Electronics speed up the process but aren’t required for finding and catching fish on new water.
What Time of Day Is Best for Exploring a New Lake for Fishing
Early morning (dawn until 9 AM) and late evening (two hours before sunset until dark) offer the best combination of active fish and good visibility for scouting new water. Fish feed aggressively during these periods and hold in predictable shallow areas that are easier to locate from a kayak.
Time-of-day strategy for new lakes:
Dawn to 9 AM (Best overall)
- Fish are actively feeding in shallow water
- Low light makes them less spooky
- You can see structure as the sun rises
- Cooler temperatures are comfortable for paddling
- Less boat traffic and competition
Midday (10 AM to 3 PM) (Worst for fishing, okay for scouting)
- Fish move deeper and become inactive
- Bright sun lets you see bottom structure clearly through polarized glasses
- Good time to map the lake and mark spots for evening
- Hot and uncomfortable in summer
Late Evening (3 PM to Dark) (Second best)
- Fish move shallow again to feed
- Cooling water temperatures trigger activity
- You can test spots identified during midday scouting
- Challenging to navigate safely after dark
Seasonal adjustments:
- Spring: Fish all day – spawning activity keeps fish shallow and active from dawn to dusk
- Summer: Focus on dawn and dusk only; midday fish are deep and lethargic
- Fall: Extended feeding windows – good action from 7 AM to 11 AM and 2 PM to dark
- Winter: Midday (11 AM to 2 PM) is often best when water temperatures peak
Ideal first-trip schedule:
Launch at dawn, fish actively until 9 AM, spend midday scouting and mapping with your eyes and electronics, then fish your best spots from 5 PM until dark. This gives you two feeding windows plus dedicated scouting time.
Weather considerations:
Overcast days extend feeding windows – fish may stay active all day. Bright, calm, high-pressure days compress feeding into shorter dawn/dusk periods. Plan your scouting intensity accordingly.
If you can only fish midday, focus on deeper structure (channel edges, humps, deep docks) where fish retreat during bright conditions. You’ll catch fewer fish but can still learn the lake for future trips.
How to Tell if a Lake Has Good Fishing Before I Go
Check your state DNR stocking reports, read recent online fishing reports (Fishbrain, local forums), and look for diverse habitat in satellite imagery – lakes with varied depth, vegetation, and structure consistently produce better fishing than featureless bowls. Public access and fishing pressure also indicate whether a lake is worth your time.
Research checklist before visiting a new lake:
1. State DNR/Wildlife Agency Website
- Recent stocking records (what species, when, how many)
- Lake survey data (fish population, size structure)
- Special regulations (catch limits, size restrictions often indicate quality)
- Water quality reports
2. Online Fishing Reports
- Fishbrain app – recent catches with photos and locations
- Local fishing forums and Facebook groups
- YouTube videos from the past 6-12 months
- Google reviews of the lake or nearby bait shops
3. Satellite Imagery Analysis
- Good signs: Varied shoreline, visible vegetation, multiple bays and points, clear water
- Bad signs: Uniform bowl shape, muddy water, no visible structure, agricultural runoff
4. Access and Pressure
- Multiple boat ramps = popular and likely productive
- Kayak-only access = less pressure, potentially better fishing
- Nearby urban areas = heavier pressure but often well-stocked
Red flags that suggest poor fishing:
- No recent stocking records and no natural reproduction
- Consistent negative reports over multiple seasons
- Algae blooms or water quality warnings
- Extremely shallow (under 10 feet max depth) in hot climates
- Heavy agricultural runoff or industrial pollution
Green flags that suggest good fishing:
- Regular stocking of multiple species
- Active online community sharing catches
- Varied depth (at least 20-30 feet max depth)
- Clear to slightly stained water in satellite images
- Mix of shallow and deep water, vegetation and open areas
Ask local bait shops:
Call ahead and ask, “Is [lake name] fishing well right now?” and “What species are most active?” Shop owners know which lakes are producing and will often share specific tips to sell you the right tackle.
Realistic expectations:
Even “good” lakes have slow days. Your goal is finding water with a healthy fish population and suitable habitat, not guarantees. A lake with recent positive reports and good structure gives you an 80% chance of catching fish if you fish it correctly.
Difference Between Finding Spots on a Natural Lake vs Reservoir
Natural lakes feature gradual depth changes, extensive weed beds, and soft bottoms, with fish relating to vegetation and subtle contours. Reservoirs have steeper banks, man-made structure like old roadbeds and timber, and distinct creek channels, with fish holding tighter to hard structure and depth breaks.
Natural lake characteristics:
- Gradual slopes – May paddle 100+ yards to find a 10-foot depth change
- Weed-dominated structure – Fish relate to vegetation edges, pockets, and depth where weeds stop growing
- Soft bottoms – Muck, silt, and organic matter in most areas
- Consistent water levels – Seasonal changes are minimal
- Scattered rock and gravel – Usually on points and in shallow bays
- Best spots: Weed edges in 8-15 feet, inside turns on weed lines, isolated rock piles, inlet areas
Reservoir characteristics:
- Steep banks – Depth drops quickly from shore, often 20+ feet within 50 yards
- Man-made structure – Old roads, foundations, bridges, and standing timber
- Defined creek channels – The old river system that was flooded, visible on contour maps
- Variable water levels – Can fluctuate 10-20 feet seasonally, exposing or covering structure
- Hard bottoms – Rock, clay, and gravel more common than soft sediment
- Best spots: Creek channel bends, points where channels meet flats, standing timber, brush piles, old roadbeds
How to adjust your approach:
| Factor | Natural Lake Strategy | Reservoir Strategy |
|---|---|---|
| Primary structure | Weed edges and depth changes | Creek channels and hard cover |
| Depth to start | 6-12 feet | 10-20 feet |
| Key map feature | Weed line depth | Creek channel path |
| Seasonal pattern | Less dramatic movement | Fish follow water level and channel |
| Kayak advantage | Access to shallow weed flats | Fish steep banks boats avoid |
Hybrid systems:
Some lakes combine features – natural lakes with dam-controlled levels, or old reservoirs that have developed weed beds. Study your specific lake’s history to understand which patterns apply.
First-trip strategy:
- Natural lake: Focus on finding the weed line depth, then follow it around the lake hitting points and inside turns
- Reservoir: Locate the main creek channel on your map, then fish where it bends, intersects with points, or has visible timber
Understanding whether you’re fishing a natural lake or reservoir shapes your entire approach to finding fish. Natural lakes reward patience and systematic weed-edge coverage, while reservoirs demand precise positioning on specific structure elements.
For more guidance on selecting the right kayak for different lake types, check out our resources on lake fishing kayaks and general kayak fishing techniques.
Frequently Asked Questions
How many spots should I try on my first trip to a new lake?
Plan to thoroughly fish 3-4 high-probability spots rather than sampling 10+ areas quickly. Spend 30-45 minutes at each location, trying multiple depths and presentations before moving on. This approach helps you understand what’s working rather than just covering water.
Can I find good fishing spots without a fish finder?
Yes, polarized sunglasses and visual structure identification work well in water under 10 feet deep. Focus on visible features like weed beds, docks, points, and color changes. Many successful kayak anglers fish without electronics by systematically covering obvious structure.
What’s the fastest way to find fish on a completely unfamiliar lake?
Launch at dawn, paddle directly to the nearest point or weed edge in 6-10 feet of water, and start fishing while observing. If you don’t get bites in 20 minutes, move to the next visible structure. Cover 3-4 spots in the first two hours, noting which depth and structure type produces.
Should I fish the same spots all day or keep moving?
Fish productive spots during peak feeding times (dawn and dusk), then scout new areas during midday when fish are less active. Return to your best morning spot in the evening. This maximizes both fishing and learning time.
How do I mark spots without a GPS?
Take photos with landmarks visible, use your phone’s map app to drop pins, or note compass bearings to two fixed objects on shore. Simple methods like “third dock on the north shore” or “point across from the boat ramp” work for returning to productive areas.
What if I don’t catch anything on my first trip?
A slow first trip is normal – you’re gathering information. Note water clarity, temperature, visible structure, and any fish you see or mark on electronics. This data helps you plan a better approach for trip two. Most lakes require 2-3 visits to establish productive patterns.
Are fishing apps accurate for finding spots?
Apps like Navionics provide accurate depth contours and structure, but community reports on apps like Fishbrain vary in reliability. Use apps for structure identification and general lake layout, then verify with your own scouting. Recent reports (within 2 weeks) are most trustworthy.
How deep should I fish in summer vs winter?
Summer: Target 15-25 feet near thermoclines or deep weed edges when water exceeds 75°F. Winter: Fish 20-35 feet in main lake basins and deep channel bends when water drops below 50°F. Spring and fall allow productive fishing in 5-15 feet near transitional structure.
What’s the best lure for exploring new water?
Use search baits that cover water quickly and provide bottom feedback: spinnerbaits, chatterbaits, or Texas-rigged worms in 1/4 to 1/2 oz. These lures help you feel structure while triggering reaction strikes from active fish. Switch to slower presentations once you locate fish.
Can I fish a new lake effectively from an inflatable kayak?
Yes, inflatable kayaks access the same shallow structure as hard-shell models and are often more stable for fishing. The main limitation is speed – you’ll cover water slower when paddling between spots. Focus on thoroughly fishing fewer areas rather than racing around the lake.
How do I know if I’m fishing the right depth?
You’re at the right depth when you see baitfish on your fish finder, feel bottom composition changes, or start getting bites. If you fish for 30 minutes without marks on electronics or follows on your lures, move 5 feet shallower or deeper and try again.
What should I do if the lake is crowded with other anglers?
Use your kayak’s advantage to access shallow areas and tight cover that boats avoid. Fish the back sides of points, shallow weed flats, and narrow channels. Often the best fishing is in 3-6 feet of water that everyone else is running past.
Conclusion
Learning how to find fishing spots on a new lake transforms from overwhelming guesswork into a systematic process when you combine pre-trip research, understanding of seasonal patterns, and efficient on-water scouting. The kayak angler’s advantage lies in accessing shallow structure and tight cover that boats can’t reach, giving you productive water that receives less pressure.
Your action plan for the next new lake:
- Before you go: Spend 15-20 minutes studying lake maps and satellite imagery to identify 3-4 high-probability areas based on structure and season
- Launch at dawn: Fish your top spot during the prime feeding window, then scout additional areas during midday
- Start shallow: Begin in 6-10 feet of water near visible structure, adjusting deeper if you’re not finding active fish
- Fish thoroughly: Spend 30-45 minutes at each spot before moving, trying multiple presentations and depths
- Mark everything: Use your phone, GPS, or landmarks to record productive spots and promising areas for future trips
- Adapt and learn: Note what worked (depth, structure, time of day) and apply those patterns to similar spots on your next visit
The difference between frustrated exploration and successful fishing comes down to preparation and patience. Even professional guides spend years learning a single lake, so give yourself permission to treat the first trip as reconnaissance. Finding 2-3 reliable spots that produce fish is a win that sets you up for better action on every return visit.
Remember that your kayak gives you access to water most anglers overlook. While boats race to mid-lake humps and channel edges, you can thoroughly work the shallow flats, weed edges, and tight shoreline structure where big fish feed but pressure is light. That advantage, combined with systematic scouting and willingness to adapt, will put you on fish faster than you think.
Get out there, trust the process, and enjoy the discovery. Every new lake is a puzzle waiting to be solved, and the satisfaction of figuring it out yourself beats following someone else’s map every time.
For more resources on improving your kayak fishing success, explore our guides on fishing gear, kayak accessories, and fishing from kayak techniques.