
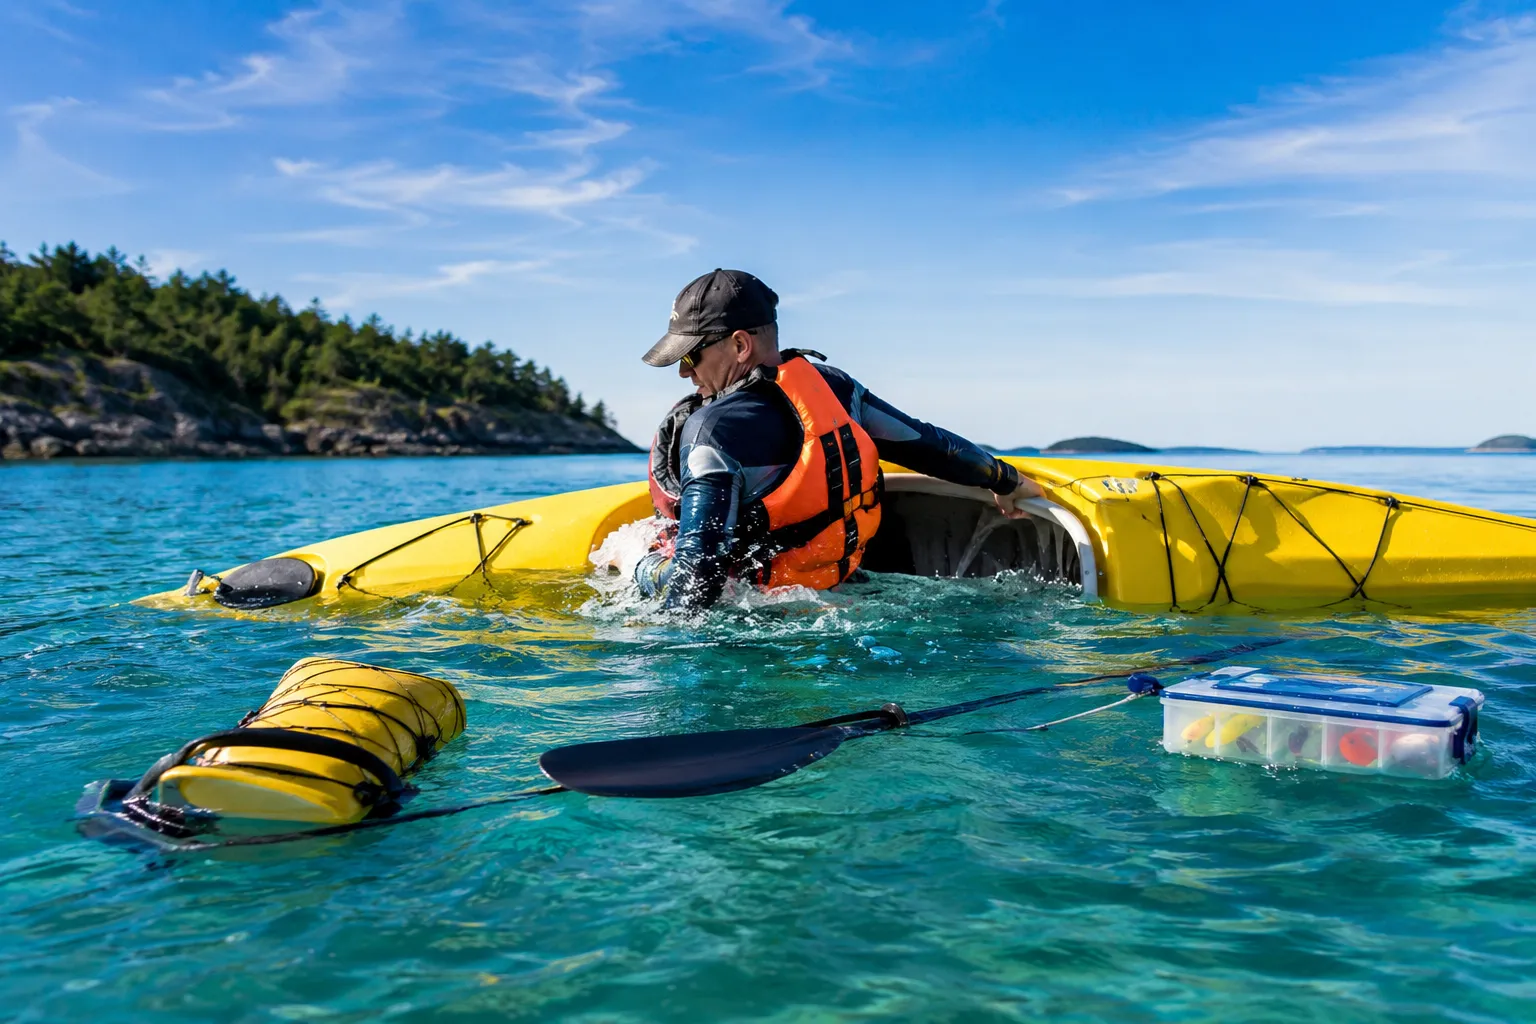
Quick Answer: If your kayak capsizes with gear, stay calm and hold onto your boat, it’s your largest flotation device. Secure your paddle first, then assess which gear is floating or sinking. In most situations, flip your kayak back over in the water and re-enter rather than swimming to shore, which can take longer and risk losing your boat in current or wind.
Key Takeaways
- Stay with your kayak after capsizing, it provides flotation and visibility to rescuers, and swimming to shore often takes longer than you expect
- Secure your paddle immediately,it’s your primary means of propulsion and easy to lose in current or wind
- Triage your gear quickly,grab high-value floating items first, but never risk your safety for replaceable equipment
- Flip and re-enter in deep water if conditions allow, it’s usually faster and safer than abandoning your kayak to swim
- Prevent gear loss before launch by using dry bags, gear tethers, and float bags rather than relying on recovery techniques
- Practice wet exits and re-entries in controlled conditions before you need the skills in an emergency
- Wear a PFD with pockets to keep essential items (whistle, knife, phone) on your body rather than loose in the kayak
What Does It Mean When a Kayak Capsizes
A kayak capsizes when it flips over or tips to the side, putting the paddler in the water. This happens when the boat loses stability due to waves, wind, shifting weight, collisions, or paddler error. Capsizing is different from swamping (when water fills the cockpit but the kayak stays upright) and is one of the most common kayaking incidents, especially for beginners.
Sit-on-top kayaks typically flip completely over, leaving the hull facing up. Sit-inside kayaks can capsize to either side or turtle (flip upside down), and often trap air in the cockpit that can make them harder to right. Both types are recoverable, but the technique differs.
Key factors that cause capsizing:
- Leaning too far to one side while reaching for gear or fish
- Entering the kayak from water or dock without proper balance
- Crossing boat wakes at the wrong angle
- Sudden weight shifts when standing or moving in the kayak
- Strong wind catching the kayak broadside
- Waves hitting from the side (beam seas)
Most capsizes happen close to shore during launch or landing, not in deep water. Understanding this helps you prepare for the most likely scenarios rather than worst-case open-water situations.
Should I Try to Flip My Kayak Back Over in Deep Water or Swim to Shore
Flip your kayak and re-enter in deep water whenever conditions allow, it’s almost always faster and safer than swimming to shore. Swimming while towing a kayak is exhausting, distances are deceptive, and you risk losing your boat to wind or current if you let go.
A kayaker can typically re-enter a flipped kayak in 2-5 minutes with practice, while swimming even 100 yards to shore while managing a boat and gear can take 15-30 minutes and leave you dangerously fatigued. Your kayak also provides visibility to other boaters and rescuers, which you lose if you abandon it.
Swim to shore only when:
- You’re within 50 feet of a safe landing spot with no obstacles
- Water temperature is dangerously cold and you need to get out immediately
- Conditions are deteriorating rapidly (storm, high winds, large waves)
- You’re injured and cannot perform a re-entry
- Your kayak is damaged and won’t support your weight
Stay with your boat and re-enter when:
- You’re more than 50 yards from shore
- Water is calm to moderate
- You’ve practiced re-entry techniques
- Your kayak is intact and buoyant
- You have the physical ability to climb back on
The re-entry decision also depends on kayak type. Sit-on-top kayaks are significantly easier to re-board in deep water because you simply climb onto the deck. Sit-inside kayaks require either a paddle float self-rescue or assisted rescue, which takes more skill but is still faster than a long swim.
How to Recover Gear After Your Kayak Flips Over
Immediately after surfacing from a capsized kayak, secure your paddle first, it’s your most critical piece of equipment and easily lost to wind or current. Then grab your kayak and assess which gear is floating nearby versus what has sunk or drifted away.
Immediate recovery steps (first 60 seconds):
- Surface and breathe,orient yourself and locate your kayak
- Grab your paddle,tuck it under your arm or secure it to your PFD with a leash
- Hold your kayak,position yourself at one end, not the side
- Scan for floating gear,identify items within arm’s reach
- Collect high-value items,phone, keys, wallet, GPS if in waterproof containers
Prioritize gear recovery in this order:
- Paddle (essential for propulsion)
- Kayak (your primary flotation)
- High-value electronics in waterproof cases (phone, GPS, fish finder)
- Safety equipment (VHF radio, signal devices)
- Fishing rods and reels (if floating and within reach)
- Tackle boxes and other gear (only if easily accessible)
Never dive for sinking gear or swim away from your kayak to chase floating items. Gear is replaceable; your safety is not. If an item is drifting away, make a mental note of its direction and consider retrieving it after you’ve re-entered your kayak and stabilized.
For sit-inside kayaks: You’ll need to drain water from the cockpit before recovering gear. Flip the kayak upright, then either perform a paddle-float re-entry or swim it to shallow water where you can tip it to drain. Gear stored in the cockpit may float out during this process, another reason to use tethers and dry bags.
For sit-on-top kayaks: Flip the kayak hull-down, let water drain from scupper holes, then climb back on. Gear in tank wells or bungee storage often stays in place if properly secured, but loose items will be gone.
What Gear Floats and What Sinks When a Kayak Tips
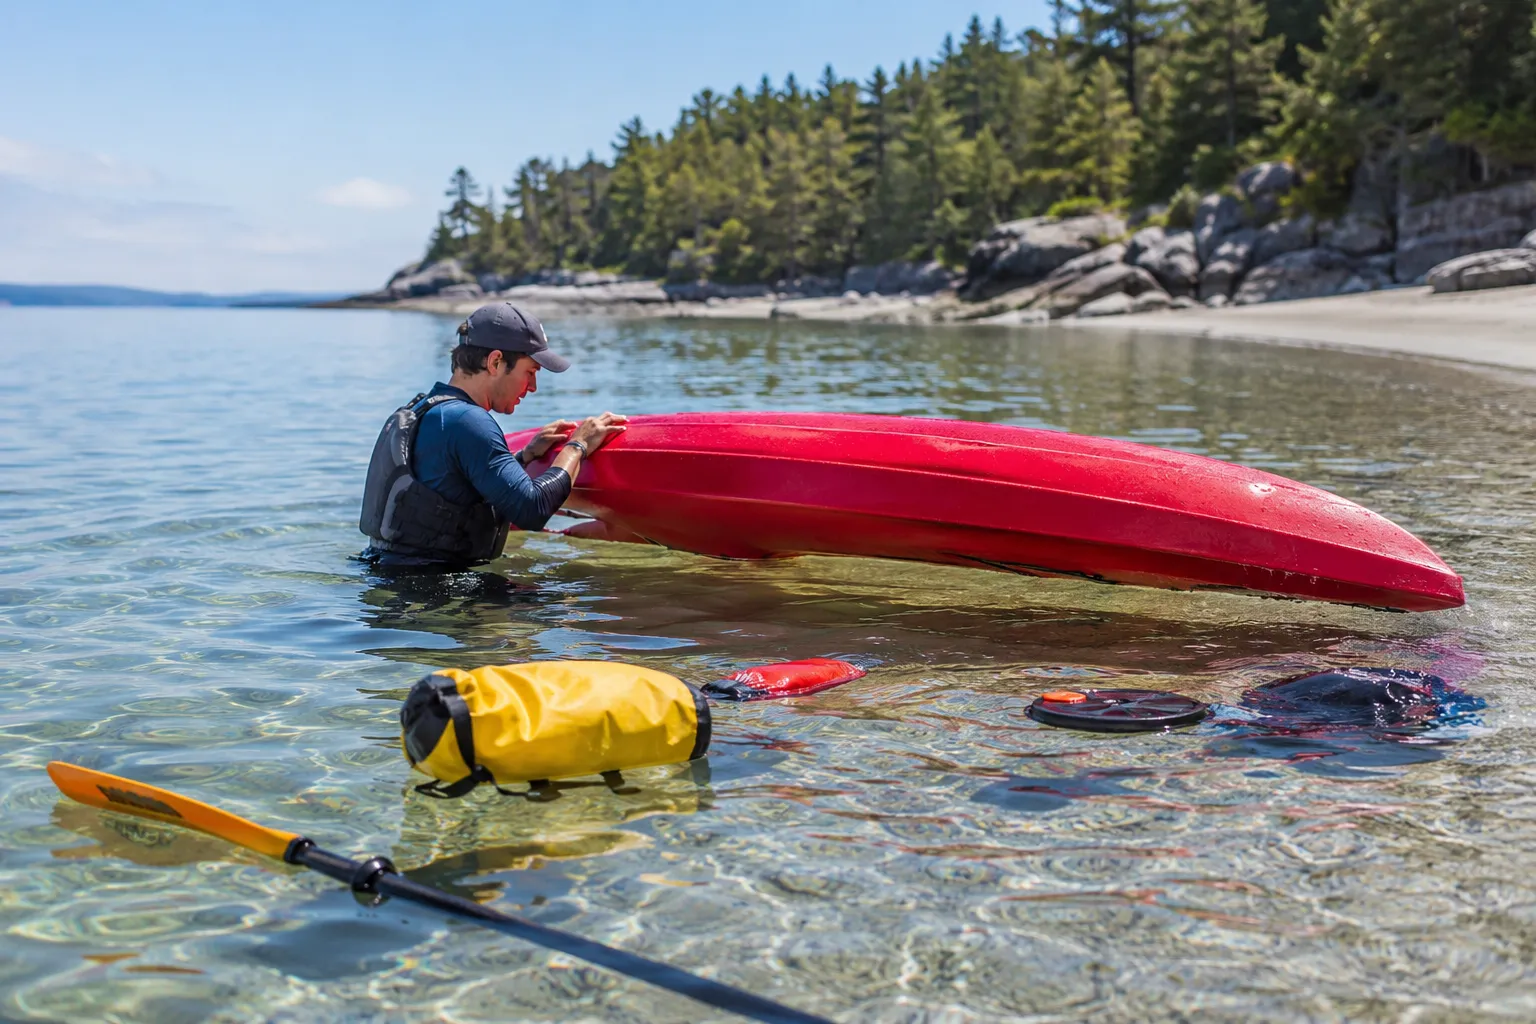
Most kayaking gear sinks unless specifically designed to float or stored in waterproof flotation bags. Understanding what stays on the surface versus what drops to the bottom helps you make smart packing decisions and prioritize recovery efforts after a capsizing.
Gear that typically floats:
- Properly sealed dry bags (if not overpacked)
- Foam-core fishing rods and some rod tubes
- Paddle floats and foam paddle grips
- Life jackets and throwable flotation devices
- Closed-cell foam seat cushions
- Empty water bottles and sealed coolers
- Kayak with built-in flotation chambers
Gear that sinks immediately:
- Metal tackle boxes and toolboxes
- Anchors and anchor rope (unless using a float)
- Fishing reels and most lures
- Knives, pliers, and metal tools
- Cameras and electronics without waterproof cases
- Filled water bottles and hydration packs
- Batteries and battery packs
- Most fishing nets (unless foam-handled)
Gear that sinks slowly (recovery window of 10-30 seconds):
- Soft-sided tackle bags (traps air initially)
- Fishing rods with cork handles
- Hats and some clothing
- Unsealed dry bags or bags with air pockets
- Plastic storage boxes (if they trap air)
The density and air content determine whether an item floats. A sealed dry bag with clothes inside will float; the same bag overstuffed with heavy gear may sink. A tackle box with closed compartments might float briefly before water seeps in and it drops.
Make gear float with these additions:
- Attach foam pool noodles to tackle boxes or crates
- Use floating key chains for keys and small tools
- Add foam rod floats to fishing rods
- Store heavy items in dry bags with extra air space
- Use gear tethers to keep sinking items attached to the kayak
The best strategy is prevention: assume everything will sink and secure it accordingly before you launch.
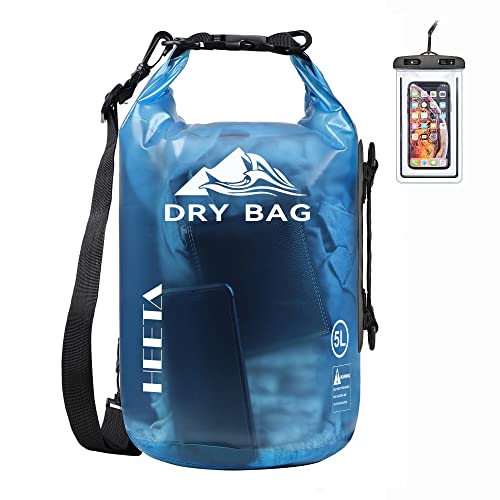
Waterproof - Built with professional seamless technology, our dry bag keeps your items and valuables dry during water sports like boating and kayaking. Note: It can handle accidental submersion, but should not be kept underwater for extended periods

100% WATERPROOF: Made of stiff 500D PVC material and designed with roll-top closure, Unigear waterproof bag protects your phones, camera, clothes, documents and snacks from Water, Sand, Dust and Dirt

Waterproof - Made with professional seamless technology, our dry bag has the overall waterproof capability, making sure to keep your items and valuables dry when you do some water sports like boating, kayaking, surfing, rafting (but not underwater sports)
Dry Bags vs Waterproof Cases: Which Is Better for Kayaking
Dry bags are better for clothing, food, and soft items that need bulk waterproof storage, while hard waterproof cases are superior for electronics, cameras, and fragile gear that requires impact protection. Most kayakers need both types for different purposes rather than choosing one over the other.
Dry bags excel at:
- Storing clothes, towels, and sleeping bags
- Keeping food and snacks dry
- Organizing soft gear by category (use different colors)
- Providing flotation when properly sealed
- Compressing to fit in tight spaces
- Budget-friendly protection (quality bags start around $15-30)
Dry bag limitations:
- No impact protection for fragile items
- Can puncture on sharp objects (hooks, rocks)
- Require proper rolling technique to seal correctly
- Difficult to access contents without fully opening
- Not ideal for items you need frequently during paddling
Waterproof cases excel at:
- Protecting phones, GPS units, and cameras
- Impact resistance from drops and collisions
- Quick access through latching lids
- Floating (most hard cases have built-in flotation)
- Clear cases allow touchscreen use without opening
- Crush protection for fragile electronics
Waterproof case limitations:
- More expensive ($20-100+ depending on size)
- Bulky and rigid (harder to pack efficiently)
- Limited size options compared to dry bags
- Heavier than soft storage
Best practice for kayak gear storage:
- Use a large dry bag (20-30L) for spare clothes and towels
- Store phone and keys in a floating waterproof case attached to your PFD
- Keep frequently used items (sunscreen, snacks) in a small dry bag in the cockpit
- Use hard cases for cameras, fish finders, and expensive electronics
- Store tackle in waterproof tackle boxes or bags with drainage
The roll-top closure on dry bags must be folded at least three times and clipped to create a waterproof seal. Many capsizing gear losses happen because paddlers assume a single fold is sufficient, it’s not. Test your dry bags at home by sealing them with paper towels inside and submerging them in a bathtub.
Waterproof - Built with professional seamless technology, our dry bag keeps your items and valuables dry during water sports like boating and kayaking. Note: It can handle accidental submersion, but should not be kept underwater for extended periods

Trusted on the water: this waterproof roll top dry bag keeps gear dry for kayaking, boating, paddleboarding, rafting, canoeing and fishing, and was named one of the top dry bags of 2024 by The NY Times Wirecutter, backed by a five year warranty.
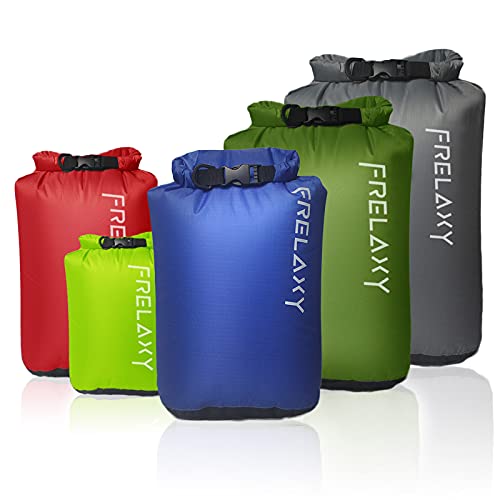
Keep Your Gear Organized: A set of 5 ultralight Dry Sacks in Five Different Colors and Sizes (3L,5L,10L,15L,20L), so you can easily recognize the contents. Best design for food, clothes, hats, and all of the outdoor gear.
How to Prevent Losing Gear When Kayaking in Rough Water
Prevent gear loss by using a three-layer system: secure storage (dry bags and closed compartments), physical tethers (leashes and carabiners), and flotation aids (foam floats and sealed containers). This approach ensures that even if your kayak capsizes, your gear stays attached, visible, and recoverable.
Layer 1: Secure storage
- Store all loose items in closed compartments, dry bags, or tank wells
- Use bungee deck rigging to hold bags and equipment in place
- Never leave gear loose in the cockpit or on the deck
- Close all hatch covers and screw-down lids before launching
- Distribute weight evenly to maintain kayak stability
Layer 2: Physical tethers
- Attach rod leashes to fishing rods and secure to kayak anchor points
- Use gear tethers (coiled or fixed-length) for paddles, nets, and tools
- Clip carabiners through dry bag handles and connect to deck rigging
- Tether your paddle to your PFD or kayak with a quick-release leash
- Connect high-value items (phone, GPS) to your PFD with retractable tethers
Layer 3: Flotation aids
- Add foam pool noodles to tackle crates and milk crates
- Use floating rod holders or attach foam floats to rod handles
- Store gear in sealed dry bags that provide flotation
- Attach bright-colored foam floats to anchors and anchor rope
- Use floating key chains for keys and small metal tools
Additional rough-water precautions:
- Reduce the amount of gear you bring, less to lose and better stability
- Pack gear lower in the kayak to lower center of gravity
- Avoid standing or making sudden movements in waves
- Cross boat wakes and waves at a 45-degree angle, not perpendicular
- Wear your PFD with essential items in the pockets (knife, whistle, phone)
In rough conditions, some kayakers use a “ditch bag”, a single waterproof bag containing essentials (phone, keys, wallet, emergency supplies) that’s tethered to their PFD. If you must abandon the kayak, you keep the most critical items with you.
The best prevention is practicing in rough water before you’re forced to deal with it. Deliberately paddle in moderate wind and waves (with a buddy or near shore) to learn your kayak’s limits and how gear behaves in real conditions.
Can Beginners Handle a Capsized Kayak or Do You Need Experience
Beginners can handle a capsized kayak if they’ve practiced the recovery techniques in controlled conditions before an actual emergency. The physical skills required, wet exit, kayak flip, and re-entry, are not difficult, but they require calm decision-making and muscle memory that only comes from repetition.
A first-time capsize without prior practice often leads to panic, exhaustion, and poor decisions like abandoning the kayak or attempting dangerous recovery methods. The same capsize with even one practice session typically results in a successful self-rescue within 5-10 minutes.
Skills beginners must practice before paddling in deep water:
- Wet exit (for sit-inside kayaks), releasing the spray skirt and exiting the cockpit underwater
- Kayak flip,righting an overturned kayak while in the water
- Paddle float self-rescue,using an inflatable paddle float to stabilize the kayak during re-entry
- Cowboy scramble (for sit-on-top kayaks), climbing onto the kayak from the water
- Gear triage,quickly assessing and securing floating gear
Beginner-friendly recovery options:
- Sit-on-top kayaks are significantly easier for beginners to re-board after capsizing, you simply climb back on the deck without needing to drain water from a cockpit
- Paddle float rescue provides extra stability for sit-inside kayak re-entry and can be learned in 30-60 minutes of practice
- Buddy rescue (T-rescue or assisted re-entry) is easier than solo rescue and is the best option when paddling with others
Experience advantages:
- Experienced paddlers stay calmer and make better decisions under stress
- Practiced techniques become automatic, reducing recovery time
- Better understanding of when to re-enter versus when to swim
- More efficient gear recovery and prioritization
- Stronger swimming and treading water endurance
Beginner safety guidelines:
- Take a kayaking safety course that includes capsize recovery practice
- Practice wet exits and re-entries in a pool or shallow, calm water with an instructor or experienced friend
- Start with sit-on-top kayaks, which are more forgiving for beginners
- Paddle in calm conditions within 100 yards of shore until you’ve mastered recovery skills
- Always wear a properly fitted PFD
- Paddle with a buddy, especially in the first year
The U.S. Coast Guard and paddling organizations recommend that all kayakers practice capsize recovery at least once per season, regardless of experience level. Skills degrade without practice, and conditions change throughout the year.
What Are the Biggest Mistakes People Make After Their Kayak Flips
The biggest mistake after a kayak capsizes is panicking and making impulsive decisions, particularly swimming away from the kayak to chase gear or attempting to swim long distances to shore. These reactions waste energy, increase drowning risk, and often result in losing both the kayak and the gear you were trying to save.
Critical mistakes that endanger safety:
1. Abandoning the kayak to swim to shore
Distances on water are deceptive, and swimming while cold and clothed is exhausting. Your kayak provides flotation, visibility, and rest, stay with it unless shore is very close (under 50 feet) or conditions are life-threatening.
2. Swimming away to chase floating gear
Gear drifts faster than you can swim, especially in wind or current. Chasing a floating tackle box can separate you from your kayak by 50+ yards in minutes, leaving you with neither boat nor gear.
3. Trying to climb in from the side
Attempting to re-enter a kayak by climbing over the side (rather than from the end) usually flips it again or pushes it away. Always approach from the bow or stern for stability.
4. Not securing the paddle first
Paddles drift quickly and are easy to lose while you’re focused on the kayak. Without a paddle, you’re stuck even if you successfully re-enter. Secure it immediately after surfacing.
5. Attempting to stand in deep water
Some paddlers panic and try to stand up, even in water over their head. This wastes energy and can lead to inhaling water. Accept that you’re swimming and focus on controlled breathing.
6. Overloading yourself with gear during recovery
Trying to hold the kayak, paddle, and multiple pieces of gear simultaneously makes re-entry nearly impossible. Secure the paddle, hold the kayak, and recover other gear after you’re back in the boat.
7. Not calling for help when needed
Pride or embarrassment prevents some paddlers from signaling nearby boaters or calling for assistance. If you’re struggling, signal for help early, before you’re exhausted.
8. Removing your PFD
Some paddlers remove their life jacket thinking it will make swimming or re-entry easier. This is extremely dangerous and eliminates your primary flotation and visibility.
Common mistakes that lose gear:
- Not using tethers or leashes on expensive equipment
- Storing gear loose in the cockpit instead of in closed compartments
- Overpacking dry bags so they sink instead of float
- Not practicing recovery, so you don’t know what to prioritize
- Diving underwater to retrieve sinking gear (risk of entanglement or disorientation)
The best way to avoid these mistakes is to practice capsize recovery in controlled conditions where you can make errors safely and learn from them. Most kayaking accidents happen because paddlers encounter their first capsize in challenging conditions without any prior experience.
How to Do a Wet Exit With a Lot of Gear Attached
A wet exit with gear attached to your kayak or PFD requires you to stay calm, release the spray skirt first, then push away from the kayak while keeping tethered items from tangling. The key is performing the exit in the correct sequence so gear leashes don’t wrap around your body or the cockpit.
Wet exit sequence with attached gear:
- Lean forward and reach for the spray skirt release tab (usually at the front of the cockpit)
- Pull the spray skirt off the cockpit rim completely, front to back
- Place both hands on the cockpit sides or gunwales for leverage
- Tuck your chin to your chest and lean forward (don’t arch backward)
- Push away from the kayak while sliding your legs out of the cockpit
- Surface beside the kayak, not under it
- Immediately locate your paddle and secure it
Managing tethered gear during wet exit:
- Rod leashes and gear tethers attached to the kayak (not your body) won’t interfere with your exit, they stay with the boat
- Paddle leashes attached to your PFD should have enough slack (3-4 feet minimum) to allow free movement during exit
- Gear on your PFD (knife, pliers, whistle) should be secured in pockets or with short retractable tethers that won’t dangle and catch
Potential entanglement risks:
- Anchor rope stored loose in the cockpit can wrap around legs during exit, always coil and secure anchor line
- Long gear tethers (over 6 feet) can loop around your body or the seat, use shorter, coiled leashes
- Fishing line on rods or loose in the boat can tangle, keep rods in holders and line managed
- Loose bungee cords on deck can catch on PFD or clothing, ensure all rigging is tight
Practice considerations:
Practice wet exits with your actual gear setup, not in an empty kayak. The presence of rods, tethers, and equipment changes how you move through the cockpit. Do this in a pool or shallow water (3-4 feet deep) where you can stand if something goes wrong.
If you feel resistance during a wet exit (something catching or pulling), stop pushing, reach down to identify what’s caught, and free it before continuing. Forcing your way out can tighten tangles or damage gear.
Sit-on-top kayaks: You don’t need a wet exit technique because there’s no cockpit to escape from, you simply fall off. However, gear tethers can still tangle around your legs or the seat, so the same principles about keeping tethers short and organized apply.
The most dangerous wet exit scenario is a capsized sit-inside kayak in cold water with a lot of loose gear in the cockpit. This is why experienced kayakers store gear in sealed compartments and hatches rather than piling it around their feet and legs.
Is It Safe to Kayak Alone If You Might Capsize
Kayaking alone is significantly riskier than paddling with a partner, especially if you capsize, because you have no one to assist with recovery, provide flotation support, or call for help if you’re injured or exhausted. However, experienced paddlers can solo kayak safely by mastering self-rescue techniques, carrying proper safety gear, and choosing appropriate conditions.
Solo kayaking is reasonably safe when:
- You’ve practiced self-rescue (paddle float rescue or cowboy scramble) multiple times and can execute it reliably
- You paddle in calm conditions within sight of shore or other boaters
- You wear a PFD and carry communication devices (phone in waterproof case, VHF radio, or PLB)
- You inform someone of your float plan (where you’re going and when you’ll return)
- You have the swimming ability and physical fitness to tread water for 10+ minutes
- You paddle a stable kayak appropriate for your skill level and the conditions
Solo kayaking becomes dangerous when:
- You’ve never practiced capsize recovery and don’t know if you can re-enter your kayak
- You paddle in rough water, strong current, or cold water (below 60°F) without appropriate skills
- You paddle far from shore (over 1/4 mile) without rescue skills or communication devices
- You have medical conditions that could be triggered by cold water immersion
- You paddle in areas with no other boaters or people on shore who could see you
Self-rescue skills required for solo paddling:
- Paddle float rescue (sit-inside kayaks), using an inflatable float to stabilize the kayak during re-entry
- Cowboy scramble (sit-on-top kayaks), climbing back onto the kayak from the water
- Swimming with kayak,towing your kayak while swimming if re-entry fails
- Cold water survival,understanding hypothermia risk and the 1-10-1 rule (1 minute of cold shock, 10 minutes of useful movement, 1 hour before unconsciousness)
Essential safety gear for solo paddling:
- Properly fitted PFD (worn, not stored)
- Waterproof VHF radio or cell phone in floating case
- Whistle (attached to PFD)
- Paddle float (for sit-inside kayaks)
- Bilge pump or sponge (to remove water from cockpit)
- Signal mirror and flares (for offshore paddling)
- Personal locator beacon (PLB) for remote areas
The paddling community generally recommends that beginners always paddle with at least one other person until they’ve developed solid self-rescue skills and water confidence. Even experienced paddlers often choose to paddle with a buddy because assisted rescues are faster, easier, and safer than self-rescues.
If you do paddle alone, stay close to shore (within 100 yards) and avoid challenging conditions until you’ve proven to yourself, through practice, that you can handle a capsize independently.
How Much Does Kayak Recovery Gear Cost
Basic kayak recovery and safety gear costs between $75 and $150 for essential items, while a comprehensive setup with premium equipment and electronics can run $300 to $500. Most of this gear lasts for years, making it a one-time investment that significantly improves your safety and confidence on the water.
Essential recovery gear (budget: $75-150):
- Paddle float (inflatable): $15-30, provides stability for self-rescue re-entry
- Bilge pump or large sponge: $10-25, removes water from sit-inside kayak cockpit
- Whistle (attached to PFD): $5-10, signals for help
- Waterproof phone case (floating): $15-30, communication and emergency calls
- Dry bags (set of 2-3 in various sizes): $30-60, protects gear and provides flotation
- Paddle leash: $10-15, prevents losing your paddle during capsize
Intermediate safety gear (adds $100-200):
- Throw rope bag: $25-40, assists in rescuing others or being pulled to shore
- Waterproof VHF radio: $60-150, more reliable than cell phones offshore
- Gear tethers and carabiners (set): $20-35, secures rods, nets, and equipment
- Floating key chain: $5-10, prevents losing keys overboard
- Signal mirror: $8-15, visual distress signal for daytime
Advanced recovery gear (adds $150-300):
- Personal locator beacon (PLB): $250-400, satellite emergency beacon for remote areas (one-time purchase, no subscription)
- Kayak rescue stirrup: $20-30, assists with re-entry by providing a foot step
- Spare paddle (breakdown): $50-100, backup if primary paddle is lost or broken
- Wetsuit or drysuit: $100-500+,cold water protection (essential for water below 60°F)
Gear that prevents capsizing (worth considering):
- Kayak outriggers/stabilizers: $100-200, adds stability for fishing or photography
- Anchor system with float: $40-80, prevents drift and maintains position
- Quality PFD with pockets: $60-150, keeps essential items on your body
Budget-friendly alternatives:
- Use a pool noodle instead of a commercial paddle float ($3-5)
- Make your own gear tethers from paracord and carabiners ($10-15 total)
- Use ziplock bags inside a backpack instead of premium dry bags (not as reliable but functional)
- Borrow or rent a VHF radio for offshore trips rather than buying ($15-25/day rental)
The most cost-effective approach is to buy essential safety gear first (PFD, whistle, paddle float, dry bags) and add advanced items as your paddling expands into more challenging conditions. A $100 investment in basic recovery gear can prevent the loss of a $1,500 kayak and $500+ in fishing equipment during a single capsize.
Many kayak anglers spend thousands on rods, reels, and electronics but skimp on safety gear, a dangerous prioritization. If your budget is limited, buy the safety equipment first and upgrade fishing gear later.

Quick-release buckles:The kayak floating bag has quick-release buckles for easy attachment to kayak paddles. Auto-valve makes single-handed inflation possible

Dual air chambers

paddle float is an essential piece of safety gear for any kayaker embarking on open water.
What to Do If Your Kayak Capsizes and You Can’t Find Your Paddle
If you lose your paddle after capsizing, stay with your kayak and use your hands to paddle to shore, or signal for help if you’re far from land. Hand-paddling a kayak is slow and exhausting but possible for short distances (under 200 yards), and your kayak remains your primary flotation and visibility to rescuers even without a paddle.
Immediate actions after losing your paddle:
- Don’t chase it,paddles drift faster than you can swim, and pursuing it separates you from your kayak
- Secure your kayak,hold onto it and assess your situation
- Look for the paddle,scan 360 degrees; it may be closer than you think or drifting back toward you
- Check if it’s tethered,if you used a paddle leash, pull it in
- Decide: hand-paddle or signal for help
Hand-paddling technique:
- Sit or lie on the kayak deck (sit-on-top) or re-enter the cockpit (sit-inside)
- Use alternating arm strokes like swimming freestyle
- Cup your hands to maximize water resistance
- Aim for the nearest safe shore, not your original destination
- Expect to cover only 20-50 yards per 10 minutes of hard effort
When to signal for help instead of hand-paddling:
- You’re more than 200 yards from shore
- Current or wind is pushing you farther out
- You’re exhausted or injured
- Water temperature is cold (below 60°F) and you need to minimize time in the water
- Other boats are visible and can assist
Signaling techniques without a paddle:
- Whistle (should be attached to your PFD), three short blasts is the universal distress signal
- Wave both arms overhead in a large, slow motion
- Use a signal mirror if you have one in your PFD pocket
- Call 911 or Coast Guard on VHF radio or cell phone if you have communication devices
Improvised paddling tools:
- Use a fishing rod (not effective but better than nothing for very short distances)
- Remove a seat cushion and use it as a hand paddle
- Use a tackle box lid or any flat object to increase hand surface area
Prevention for next time:
- Always use a paddle leash attached to your kayak or PFD
- Carry a breakdown spare paddle secured to your deck rigging
- Practice paddle recovery as part of your capsize drills
- Store a small emergency paddle (kayak paddle blade on a short handle) under deck bungees
Losing your paddle is one of the most common and preventable kayaking problems. A $12 paddle leash eliminates this risk entirely, making it one of the best investments you can make for kayak safety.
If you’re paddling with a buddy and lose your paddle, they can tow you to shore by attaching a rope to your bow and paddling while you hold your kayak stable. This is much faster than hand-paddling and is another strong argument for never paddling alone.
Do I Need a PFD With Pockets for Gear When Kayaking
A PFD with pockets is highly recommended for kayaking because it keeps essential safety and recovery items on your body rather than in the kayak, ensuring you have access to them even if you’re separated from your boat. Items like a whistle, knife, waterproof phone case, and signal mirror should always be on your person, not stored in a hatch or dry bag.
Essential items to carry in PFD pockets:
- Whistle,for signaling distress (required by law in many states)
- Knife or multi-tool,for cutting tangled lines or rope in an emergency
- Waterproof phone case,for emergency calls and communication
- Signal mirror,for visual distress signals in daylight
- Small LED flashlight,for visibility if paddling near dusk
- Sunscreen stick,for reapplication without digging through gear
Benefits of pocket-equipped PFDs:
- Keeps critical items accessible while paddling
- Ensures you have safety gear even if separated from your kayak
- Eliminates the need to dig through dry bags or hatches for frequently used items
- Distributes small item weight across your body rather than in the kayak
- Provides quick access to tools without removing your PFD
PFD pocket features to look for:
- Multiple pockets (at least 3-4) in various sizes
- Zippered or Velcro closures to prevent items from falling out during capsize
- D-rings or attachment points for tethering gear like pliers or a knife
- Mesh pockets for items that can get wet (sunscreen, lip balm)
- Internal security pocket for keys and wallet
Alternative: PFD without pockets
If your current PFD lacks pockets, you can add functionality with:
- Retractable gear tethers clipped to D-rings (for pliers, nippers, or small tools)
- Small waterproof pouch attached to a D-ring or lash tab
- Whistle attached directly to the PFD shoulder strap
- Knife sheath mounted on the PFD shoulder or chest strap
Fishing-specific PFDs typically have more and larger pockets than recreational kayaking PFDs, making them ideal for kayak anglers who carry pliers, line cutters, lures, and other small tackle items. These PFDs cost $60-150, compared to $30-60 for basic models without pockets.
The most important consideration is that the PFD fits properly and is comfortable enough that you’ll actually wear it. A basic PFD that you wear every time is better than a feature-rich PFD that stays in your hatch because it’s uncomfortable.
How to Practice Capsizing Before It Happens on a Real Trip
Practice capsizing in a controlled environment, a swimming pool, shallow lake area, or calm beach, with an instructor or experienced friend present. Start by practicing wet exits without gear, then progress to full recovery sequences with your actual equipment setup, repeating each skill until it becomes automatic.
Step-by-step practice progression:
Session 1: Basic wet exit (sit-inside kayaks)
- Wear your PFD and paddle in waist-deep water
- Deliberately flip the kayak while sitting in it
- Practice releasing the spray skirt and exiting the cockpit underwater
- Repeat 5-10 times until you’re comfortable and calm
- Progress to deeper water (where you can’t touch bottom)
Session 2: Kayak recovery and re-entry
- Capsize in deep water (pool or calm lake)
- Perform wet exit and surface
- Flip the kayak back to upright position
- Practice paddle float self-rescue or cowboy scramble (depending on kayak type)
- Repeat until you can re-enter within 5 minutes
Session 3: Recovery with gear
- Load your kayak with typical gear (rods, tackle, dry bags)
- Capsize and perform wet exit
- Practice gear triage, securing paddle, assessing floating items
- Flip kayak and re-enter while managing tethered gear
- Identify any equipment or techniques that need adjustment
Session 4: Challenging conditions (advanced)
- Practice in mild wind or small waves (still close to shore)
- Capsize and recover with a buddy to practice assisted rescue
- Practice hand-paddling if you “lose” your paddle
- Simulate exhaustion by treading water for 2-3 minutes before re-entry
Best practice locations:
- Swimming pool,ideal for initial wet exit practice; no waves, clear water, controlled depth
- Shallow lake or pond,good for progression to natural water; choose calm days
- Protected beach area,allows practice in mild waves; lifeguards often present
- Kayaking class or clinic,professional instruction and safety supervision
Practice frequency:
- Before your first trip: At least 2-3 practice sessions
- Seasonal refresher: Once at the beginning of each paddling season
- After equipment changes: Any time you modify your gear setup or buy a new kayak
- Skill maintenance: Every 3-4 months if you paddle regularly
What to bring to practice sessions:
- Your actual kayak and paddle (not a borrowed or rental boat)
- The PFD you normally wear
- Typical gear setup (rods, dry bags, tackle)
- A friend or instructor for safety and feedback
- Towel and warm clothes for after practice
- Waterproof camera to record your technique for review
Common practice mistakes:
- Practicing in an empty kayak without your normal gear load
- Only practicing once and assuming you’ll remember months later
- Practicing alone without supervision
- Skipping practice because “I’ll figure it out if it happens”
- Practicing only wet exit but not re-entry
Many kayaking clubs, outdoor retailers, and paddling schools offer capsize recovery clinics for $30-75 per session. These are excellent investments for beginners and provide professional feedback on your technique.
The goal of practice is to build muscle memory and confidence so that if you capsize on a real trip, your body knows what to do even if your mind is stressed. Paddlers who have practiced report feeling calm and in control during actual capsizes, while those who haven’t often panic and make dangerous decisions.
Frequently Asked Questions
How long can you survive in the water after a kayak capsizes?
Survival time depends primarily on water temperature. In water above 70°F, a healthy person wearing a PFD can survive for hours. In 50-60°F water, useful physical function lasts about 10-30 minutes before hypothermia impairs judgment and movement, with survival time of 1-3 hours. In water below 40°F, cold shock can cause drowning within minutes, and survival time is typically under one hour even with a PFD.
Should you tie gear to your kayak?
Yes, tether valuable and essential gear to your kayak using leashes, carabiners, or bungee cords, but never tie yourself or your PFD to the boat. Gear tethers prevent loss during capsizing while still allowing you to release items if necessary. Use quick-release clips for items that might need to be jettisoned in an emergency.
Can you flip a kayak back over by yourself?
Yes, most kayakers can flip a capsized kayak back over by themselves. For sit-on-top kayaks, reach across the hull, grab the far edge, and pull it toward you while pushing down on the near edge. For sit-inside kayaks, position yourself at one end, reach across to the far side, and flip it toward you. The kayak will be heavy with water inside, but the technique uses leverage rather than pure strength.
What should you do first after falling out of a kayak?
First, surface and take a breath to orient yourself. Second, locate and secure your paddle, it’s your primary means of propulsion and easy to lose. Third, grab your kayak and hold onto it for flotation and visibility. Only after these three steps should you assess gear recovery or plan your next move.
How do you get water out of a sit-inside kayak after capsizing?
In deep water, flip the kayak upside down and lift one end to break the suction, then flip it upright, most water will drain out. Use a bilge pump or sponge to remove remaining water after re-entry. In shallow water, drag the kayak to shore, tip it on its side, and let gravity drain the cockpit completely before re-entering.
Is it easier to recover from a capsize in a sit-on-top or sit-inside kayak?
Sit-on-top kayaks are significantly easier to recover from because you simply climb back onto the deck without needing to drain water from a cockpit. Sit-inside kayaks require more technique, you must perform a wet exit, flip the kayak, drain water, and execute a paddle float or assisted rescue to re-enter.
What is a paddle float and how does it help after capsizing?
A paddle float is an inflatable bag that attaches to one blade of your paddle, creating an outrigger for stability. After capsizing a sit-inside kayak, you inflate the float, position the paddle across the cockpit behind the seat, and use it as a stabilizing brace while climbing back into the kayak. This self-rescue technique is essential for solo paddlers.
Should you remove your shoes if you fall in the water?
No, keep your shoes on. They provide foot protection if you need to walk on sharp rocks or shells, offer some insulation in cold water, and the weight of wet shoes is negligible compared to the protection they provide. Only remove shoes if they’re extremely heavy boots that significantly impair swimming.
How far offshore is safe for kayaking if you might capsize?
For beginners, stay within 100-200 yards of shore in calm conditions. Intermediate paddlers with practiced self-rescue skills can safely paddle 1/4 to 1/2 mile offshore in moderate conditions. Advanced paddlers with proper safety gear (VHF radio, PLB, rescue skills) can paddle farther, but most kayaking organizations recommend staying within 1 mile of shore unless you’re on a guided expedition.
Can you drown while wearing a life jacket?
Yes, though it’s rare. A PFD keeps your head above water if you’re conscious and face-up, but it cannot prevent drowning if you’re unconscious, face-down, injured, or in extremely rough water where waves repeatedly wash over your face. This is why staying calm, signaling for help, and having rescue skills are essential even when wearing a PFD.
What do you do if your kayak drifts away after you fall out?
If your kayak drifts out of reach, do not chase it, you cannot swim faster than wind or current pushes the boat. Instead, focus on self-preservation: signal for help with your whistle, wave your arms to attract attention, and swim toward shore if it’s close (under 100 yards). Your PFD will keep you afloat while you wait for rescue. This scenario is why you should always paddle with a buddy or within sight of other boaters.
How much does a waterproof phone case cost and which type is best?
Quality waterproof phone cases cost $15-40 for soft pouch-style cases and $40-90 for hard cases. For kayaking, choose a floating case with a lanyard or attachment point so you can tether it to your PFD. Soft cases (like Aquapac or Geckobrands) are budget-friendly and allow touchscreen use, while hard cases (like Pelican or Otterbox) offer better impact protection but are bulkier.
Conclusion
Knowing what to do if your kayak capsizes with gear transforms a potential emergency into a manageable situation. The key principles are simple: stay with your kayak, secure your paddle first, triage your gear quickly, and re-enter in deep water rather than attempting long swims to shore. Prevention through proper gear storage, tethers, and flotation bags is always better than recovery, but when capsizing happens, practiced skills and calm decision-making make all the difference.
The paddlers who handle capsizing best are those who’ve practiced the skills in controlled conditions before facing a real emergency. Invest a few hours in wet exit and re-entry practice, equip yourself with basic safety gear like a paddle float and whistle, and always wear your PFD. These simple steps dramatically improve your odds of a successful recovery with minimal gear loss.
Take action before your next paddle:
- Schedule a capsize recovery practice session in a pool or calm water
- Inventory your gear and add tethers to expensive items
- Invest in quality dry bags and a floating waterproof case for your phone
- Check that your PFD fits properly and has pockets for essential items
- Paddle with a buddy, especially when trying new waters or conditions
Remember that gear is replaceable, but your safety is not. If you must choose between recovering equipment and ensuring your own well-being, always prioritize getting yourself and your kayak to safety first. With preparation, practice, and the right mindset, you can handle a capsizing confidently and get back to enjoying your time on the water.





