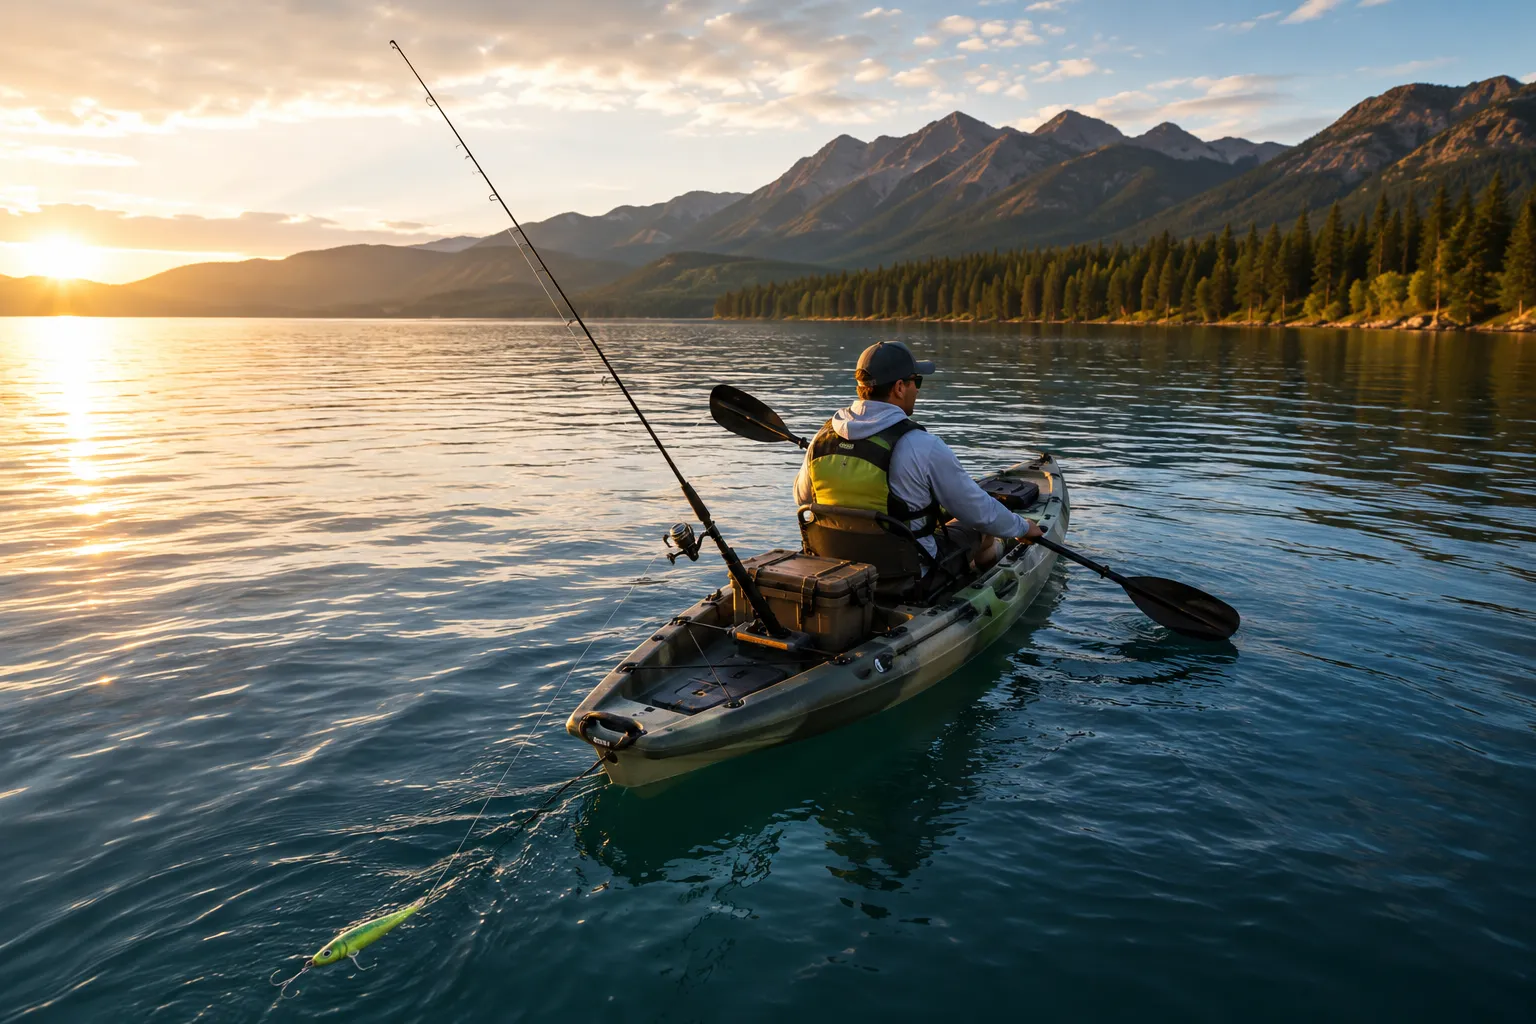
Quick Answer: Trolling from a kayak means dragging lures or bait behind your kayak while paddling or pedaling at a slow, steady pace (typically 1.5-3 mph) to cover water and trigger strikes from active fish. Set up one or two rods in rod holders angled away from the kayak, let out 50-100 feet of line, and maintain a consistent speed while navigating productive water. It’s an effective, hands-free fishing method that works well for species like bass, trout, walleye, and panfish.
Key Takeaways
- Trolling from a kayak involves dragging lures behind your kayak at 1.5-3 mph to cover water and locate active fish
- Sit-on-top kayaks are easier for trolling due to better rod holder access, but sit-inside kayaks work with proper setup
- Essential gear includes rod holders, medium-action rods, 50-100 yards of line, diving crankbaits or spoons, and snap swivels
- Basic equipment costs $150-400 for a complete trolling setup (rods, reels, holders, and lures)
- Common mistakes include trolling too fast, using too many lines, and improper rod holder angles that cause tangles
- Pedal kayaks offer significant advantages for trolling by maintaining consistent speed hands-free
- Shallow water trolling (under 10 feet) requires shallow-running lures and careful attention to structure
- Beginners can start trolling immediately with just one rod and basic crankbaits
What Does Trolling Mean in Kayak Fishing?
Trolling in kayak fishing means pulling lures or bait through the water behind your kayak as you paddle or pedal forward. Unlike casting and retrieving, trolling keeps your lures in the strike zone continuously while you cover large areas of water, making it an efficient search technique for locating active fish.
The method works because the kayak’s forward motion creates realistic lure action that mimics fleeing baitfish. You can troll a single line or multiple lines (where legal), adjusting depth and speed based on target species and conditions.
Key advantages of kayak trolling:
- Covers more water than stationary fishing
- Keeps hands free for paddling, navigation, or eating
- Works well for suspended fish in open water
- Allows you to fish while moving between spots
- Triggers reaction strikes from aggressive fish
The technique differs from boat trolling mainly in speed and scale. Kayaks naturally move slower (which many fish prefer) and handle fewer lines, but the fundamental principle remains the same: move lures through productive water at speeds that trigger strikes.
Best Trolling Speed for Kayak Fishing
The ideal trolling speed for kayak fishing ranges from 1.5 to 3 mph, depending on target species and lure type. Most kayak anglers naturally paddle at 2-2.5 mph, which falls perfectly within the strike zone for bass, walleye, trout, and panfish.
Species-specific speed guidelines:
- Bass and walleye: 2-2.5 mph with diving crankbaits
- Trout and salmon: 1.5-2 mph with spoons or small plugs
- Pike and muskie: 2.5-3 mph with larger lures
- Panfish (crappie, perch): 1-1.5 mph with small jigs or spinners
How to maintain consistent speed:
Pedal kayaks excel here because you can maintain steady speed without thinking about it. With paddle kayaks, focus on a rhythmic stroke pattern, count strokes if needed. Many anglers use GPS-enabled fish finders or smartphone apps to monitor speed in real time.
Common mistake: Trolling too fast is the number one error. If you’re breathing hard or paddling aggressively, you’re probably moving too quickly. The goal is a leisurely, sustainable pace you can maintain for 30-60 minutes. When in doubt, slow down, most fish prefer slower presentations.
Water conditions matter too. Add 0.3-0.5 mph when trolling into wind or current to maintain lure action, and reduce speed slightly when moving with current.
How to Set Up Trolling Lines on a Kayak
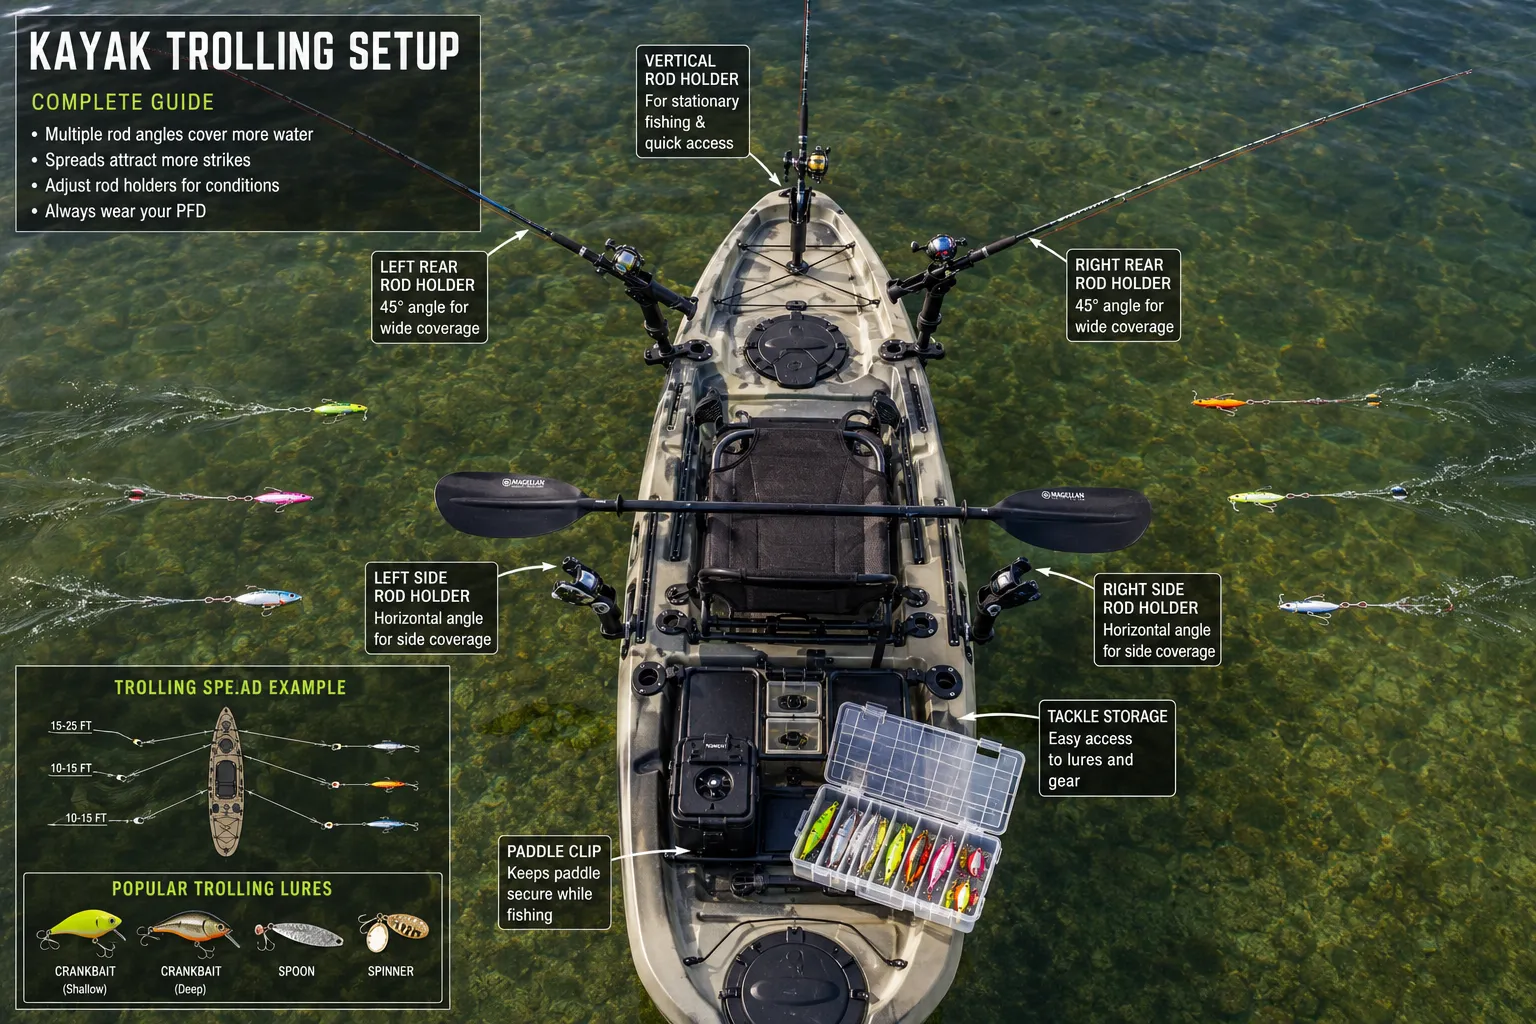
Setting up trolling lines on a kayak requires strategic rod holder placement and proper line management to avoid tangles. Mount rod holders at 45-60 degree angles pointing away from the kayak’s centerline, positioning them behind your seat where you can reach them but they won’t interfere with paddling.
Step-by-step setup process:
- Install rod holders: Mount flush-mount or clamp-on holders 12-18 inches behind your seat on each side of the kayak, angled outward and slightly back
- Rig your rods: Use 6.5-7 foot medium-action rods with 10-15 lb test line (mono or fluorocarbon for diving depth)
- Attach lures: Tie on diving crankbaits, spoons, or inline spinners using a snap swivel for easy changes
- Let out line: Deploy 50-100 feet of line behind the kayak (count pulls or use rod length as a measuring guide)
- Set the rod: Place rod in holder with a slight bend in the tip, enough tension to show lure action but not so much that small fish can’t pull it
For two-rod setups: Stagger your lines by letting one out 50 feet and the other 75-100 feet. Use different lure types or colors on each rod to determine what fish prefer. Keep rods on opposite sides of the kayak to minimize crossing.
Pro tip: Attach a rod leash to each rod before trolling. When a fish strikes, the rod often jumps out of the holder, and a leash prevents losing your entire setup overboard. Use bright-colored leashes so you can spot them quickly.
Line management: When turning, make wide, gradual arcs rather than sharp turns. Sharp turns cause outside lines to speed up and inside lines to sink, creating tangles. If you need to make a tight turn, reel in your lines first.

【Pioneering Stable Design】- PLUSINNO rod holders for fishing boat adopts innovative double V-shaped thread and anti-slip silicone design, providing a larger contact area. It generates 4 contact points at all times for higher stability. The silicone pad ensures a firm grip on boat without wobbling, and it won't cause any scratches to the boat. The brand new fishing pole holders secures your rod firmly, enabling you to focus entirely on battling the fish. Essential fishing gear for boat fishing.
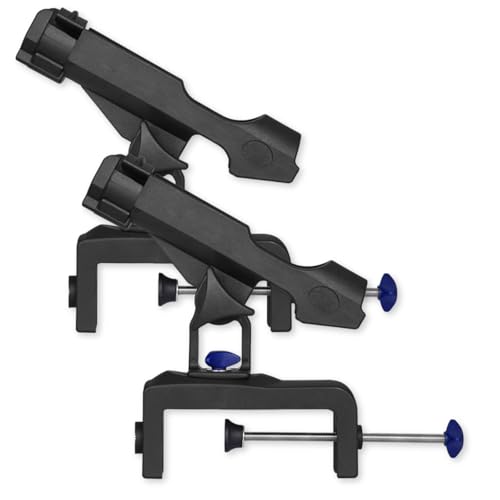
ZENFUN set of 2 adjustable boat rod holders for fishing with large clamp opening, including stainless steel screws hardware. Clamp max opening is 4.7in. Fishing rod holder gives you versatility and convenience while fishing.

One-Click Locking System: Featuring a unique patented design for effortless installation, truly achieving an upgraded one-second lock mechanism. Accommodate all HITORHIKE fishing gears, like cup holders, extensions, rod holders,fish finders, etc.
Trolling From a Kayak vs Trolling From a Boat: Key Differences
Trolling from a kayak differs from boat trolling in speed, scale, and access, with kayaks offering advantages in shallow water and tight spaces while boats excel at covering open water quickly. Kayaks naturally troll at 1.5-3 mph compared to boats at 3-6 mph, which often produces more strikes from finicky fish.
Major differences:
| Factor | Kayak Trolling | Boat Trolling |
|---|---|---|
| Speed range | 1.5-3 mph (ideal for many species) | 3-6+ mph (faster coverage) |
| Number of lines | 1-2 lines (legal limit varies) | 2-6+ lines with downriggers |
| Depth control | Diving lures, inline weights | Downriggers, planer boards, precise depth |
| Water access | Shallow water, tight cover, no-wake zones | Open water, deep structure |
| Cost | $150-400 for complete setup | $500-2,000+ for trolling gear |
| Stealth | Quiet, minimal disturbance | Engine noise, larger profile |
When kayak trolling wins:
- Shallow lakes and rivers (under 15 feet)
- Pressured waters where stealth matters
- No-wake zones and restricted areas
- Tight spaces between docks, vegetation, or structure
- Budget-conscious anglers
When boat trolling wins:
- Deep water targeting suspended fish (20+ feet)
- Large open water bodies (Great Lakes, big reservoirs)
- Covering miles of water quickly
- Targeting species that prefer faster speeds (salmon, stripers)
The kayak’s slower speed is actually an advantage for bass, walleye, trout, and panfish, which often ignore faster-moving boat lures. Many kayak anglers report better catch rates in shallow to mid-depth water precisely because of the slower, more natural presentation.
What Gear Do You Need to Troll From a Kayak?
To troll from a kayak, you need rod holders, medium-action rods (6.5-7 feet), reels with smooth drags, 10-15 lb test line, diving lures, snap swivels, and rod leashes. This basic setup costs $150-400 depending on quality level and allows you to start trolling effectively on your first trip.
Essential gear breakdown:
Rod holders ($20-60 each)
- Flush-mount holders for permanent installation
- Clamp-on Scotty or RAM mounts for flexibility
- Need at least one, ideally two for dual-rod setups
Rods ($40-100 each)
- 6.5-7 foot medium or medium-light action
- Moderate flex to absorb strikes and prevent pulled hooks
- Spinning or baitcasting depending on preference
Reels ($30-80 each)
- 2500-3000 size spinning reels or low-profile baitcasters
- Smooth drag system (fish often hook themselves)
- Capacity for 150+ yards of 10-15 lb line
Line ($10-20 per spool)
- Monofilament for diving depth (less dense than braid)
- 10-12 lb test for bass and walleye
- 15 lb test for pike or larger species
Lures ($5-12 each)
- Diving crankbaits (Rapala Shad Rap, Strike King, Bomber)
- Spoons (Kastmaster, Little Cleo)
- Inline spinners (Mepps, Rooster Tail)
- Start with 5-8 lures in different colors and diving depths
Accessories ($20-40 total)
- Snap swivels for quick lure changes
- Rod leashes to prevent losing rods overboard
- Pliers for hook removal
- Small tackle box for lure storage
Optional but helpful:
- Fish finder with GPS for speed monitoring ($150-400)
- Inline weights for deeper diving (add 1-3 oz as needed)
- Planer boards for spreading lines (advanced technique)
Budget setup: $150-200 gets you one rod, reel, basic holder, and starter lure selection. Mid-range setup: $300-400 includes two quality rods with holders and comprehensive lure collection.

HIGH QUALITY - The kayak fishing rod holder Made of High Quality Material PC+ABC, strong and durable, corrosion resistant, hard to damage.

【Strong Alumium Rod Holder】- HiUmi Rod holder is constructed from PVC coated aluminum.
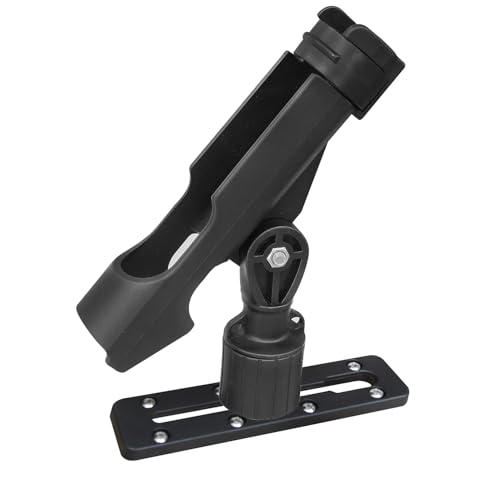
Made of UV stabilized fiberglass reinforced nylon.
How Much Does Kayak Trolling Equipment Cost?
A complete kayak trolling setup costs between $150 and $400 for most anglers, with budget-conscious beginners spending around $150-200 for a single-rod setup and experienced anglers investing $300-400 for a dual-rod system with quality components.
Cost breakdown by component:
- Rod holders: $20-60 each (need 1-2)
- Rods: $40-100 each (start with 1, add second later)
- Reels: $30-80 each
- Line: $10-20 per spool
- Lures: $5-12 each (start with 5-8)
- Accessories: $20-40 (swivels, leashes, pliers)
Three budget tiers:
Starter setup ($150-200):
- One clamp-on rod holder ($25)
- One medium-action combo rod/reel ($60-80)
- Basic lure selection ($40-50)
- Essential accessories ($20)
Mid-range setup ($250-350):
- Two flush-mount rod holders ($80-100)
- Two quality rods and reels ($200-250)
- Comprehensive lure collection ($60-80)
- Full accessory kit ($30-40)
Premium setup ($400-600):
- Two high-end rod holders with adjustability ($120-150)
- Two premium rods and reels ($300-400)
- Extensive lure selection with specialty items ($80-120)
- Fish finder with GPS speed ($150-300)
Money-saving tips:
Start with one rod and add a second only after you’ve mastered basic trolling. Buy combo rod-and-reel packages for better value. Purchase lures gradually based on what works in your local waters rather than buying large tackle boxes upfront. Many anglers already own suitable rods and reels, you may only need holders and lures.
What you probably already have: If you fish from your kayak already, your existing rods, reels, and tackle likely work fine for trolling. The only new purchases might be rod holders ($40-60) and a few diving crankbaits ($20-40), bringing your actual investment to under $100.
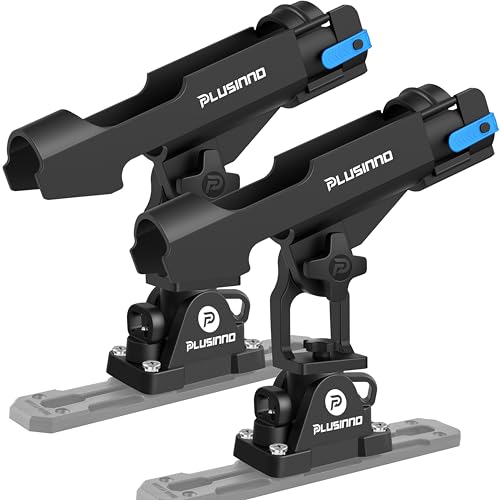
Innovative Stable Fishing Rod Holders: The rod holders for fishing boat features silicone gaskets that designed for optimal stability, maximize contact area and enhance friction, ensuring a secure and stable grip without leaving any scratches on your boat, which allows anglers to focus entirely on the thrill of the catch. A must-have boat pole holders fishing accessories for kayak fishing enthusiasts, this kayak rod holder enhances both convenience and performance on the water.

The Baitcaster/Spinning Rod holder is a versatile rod holder for any angler

UNIVERSAL QUICK-INSTALL FIT: Mounts to most fishing kayaks in minutes using existing flush rod holder recesses — no drilling, no permanent hull modifications. Minimum flush rod holder width: 4.1 cm; fits rod holder spacing from 11.5" to 24.5" apart. Not compatible with BKC PK series kayaks.
My Trolling Line Keeps Getting Tangled on My Kayak, What Am I Doing Wrong?
Trolling line tangles on kayaks typically result from improper rod holder angles, making sharp turns, or using too many lines without proper spacing. Position rod holders at 45-60 degree angles pointing outward and back, let out at least 50 feet of line before setting the rod, and make only wide, gradual turns while trolling.
Most common tangle causes and fixes:
Rod holders angled too vertical or forward
- Problem: Line drifts under the kayak or wraps around the hull
- Fix: Angle holders 45-60 degrees outward and 10-15 degrees back
- Test: Your lure should track 3-4 feet outside the kayak’s width
Insufficient line length
- Problem: Short lines (under 40 feet) run too close to the kayak
- Fix: Let out 50-100 feet minimum, longer lines run cleaner
- Rule: The farther back your lure, the less likely it tangles
Sharp turns
- Problem: Inside line sinks, outside line speeds up and crosses over
- Fix: Make only wide, sweeping turns; reel in before tight maneuvers
- Technique: If you must turn sharply, bring lines in first
Lines set at same length
- Problem: Two lines at identical distance cross when turning
- Fix: Stagger lines, one at 50 feet, one at 75-100 feet
- Bonus: Different depths help you find where fish are holding
Paddle blade contact
- Problem: Line catches on paddle during stroke
- Fix: Keep lines behind your seat position, not alongside
- Check: Sit in kayak and simulate paddling, lines should clear
Lure running too shallow
- Problem: Lure skips on surface and bounces toward kayak
- Fix: Use deeper-diving crankbaits or add inline weight
- Goal: Lure should run 3-8 feet deep for consistent tracking
Quick diagnostic: If tangles happen on every trip, your rod holder angle is wrong. If tangles occur only during turns, you’re turning too sharply. If one line tangles but the other doesn’t, the problem line is too short or at the wrong angle.
Can You Troll in a Sit-Inside Kayak or Only Sit-On-Top?
You can troll from both sit-inside and sit-on-top kayaks, but sit-on-top models offer easier rod holder access, better fish-fighting mobility, and simpler line management. Sit-inside kayaks work fine for trolling with proper rod holder placement, though you’ll have less flexibility for managing multiple lines or landing large fish.
Sit-on-top advantages for trolling:
- Rod holders mount anywhere on the deck without interference
- Easy to reach rods when fish strike
- More space to manage lines and land fish
- Can stand (on stable models) to clear tangles
- Gear stays accessible on deck
Sit-inside considerations:
- Limited mounting space around cockpit rim
- Harder to reach rod holders behind seat
- Cockpit space restricts fish-fighting movement
- Must be more careful with line management
- Works best with single-rod trolling
Making sit-inside kayaks work for trolling:
Mount rod holders on the rear deck behind the cockpit, positioned where you can reach them by twisting in your seat. Use longer rod holders (8-12 inches) to keep rods clear of the cockpit rim. Stick to single-rod trolling until you master line management in the confined space.
Best practice: If you’re buying a kayak specifically for trolling, choose a sit-on-top model. If you already own a sit-inside kayak, you can absolutely troll from it, just start with one rod and accept slightly less convenience than sit-on-top designs offer.
Many successful kayak anglers troll from sit-inside models in rivers and smaller lakes where single-rod setups dominate. The technique works; you just need to be more deliberate about rod placement and line management.
Is Kayak Trolling Good for Beginners or Too Advanced?
Kayak trolling is excellent for beginners because it requires minimal casting skill, keeps lures in the water continuously, and allows you to learn water reading while fishing. Start with a single rod, a simple crankbait, and a basic rod holder, you can be trolling effectively within 30 minutes of your first attempt.
Why trolling suits beginners:
- No casting required: Just let line out and paddle
- Hands-free fishing: Focus on paddling and navigation
- Constant coverage: Lures stay in strike zone while you learn
- Immediate feedback: Fish hook themselves; you just reel in
- Forgiving technique: Small mistakes rarely cost you fish
Beginner-friendly starting point:
- Install one clamp-on rod holder behind your seat
- Use a medium-action rod with 10 lb test line
- Tie on a shallow-diving crankbait (Rapala Shad Rap size 5)
- Paddle to productive water (points, weed edges, drop-offs)
- Let out 50-75 feet of line and set rod in holder
- Paddle at comfortable pace (2-2.5 mph) parallel to structure
What beginners should avoid initially:
- Multiple rods (master one first)
- Complex lure rigging (stick to simple crankbaits)
- Deep water trolling (start in 5-15 feet)
- Crowded areas (practice in open water)
Learning curve: Most beginners catch fish on their first or second trolling session. The technique is forgiving, even imperfect speed or lure choice often produces strikes. As you gain experience, add a second rod, experiment with different lures and depths, and refine your speed control.
Compared to other techniques: Trolling is easier than fly fishing, comparable to basic bait fishing, and simpler than advanced casting techniques. If you can paddle a kayak in a straight line, you can troll successfully.
Common Mistakes When Trolling From a Kayak
The most common trolling mistakes include moving too fast, using too many lines, ignoring rod holder angles, and failing to vary lure depth or color. Most beginners also troll in unproductive water rather than targeting structure, weed edges, or depth changes where fish concentrate.
Top mistakes and corrections:
Trolling too fast (over 3 mph)
- Why it fails: Lures lose action, fish can’t catch them
- Fix: Slow to 2-2.5 mph; use GPS or count paddle strokes
- Test: Your lure should wobble consistently, not spin
Using too many rods too soon
- Why it fails: Tangles, confusion, missed strikes
- Fix: Master one rod before adding a second
- Rule: Two rods maximum for kayak trolling
Poor rod holder positioning
- Why it fails: Lines tangle, rods fall out, lures run wrong
- Fix: 45-60 degree outward angle, 50+ feet of line
- Check: Lures should track 3-4 feet outside kayak width
Never changing lures or depth
- Why it fails: Fish preferences vary by day, time, conditions
- Fix: Change lure color/style every 20-30 minutes without strikes
- Strategy: Run different lures on each rod to find what works
Trolling random water
- Why it fails: Fish concentrate near structure, not open water
- Fix: Troll parallel to weed lines, points, drop-offs, channels
- Pattern: Follow depth contours rather than straight lines
Ignoring speed changes
- Why it fails: Constant speed can bore fish; variation triggers strikes
- Fix: Occasionally speed up or slow down for 10-15 seconds
- Bonus: Turns naturally create speed changes that trigger fish
Setting the hook too hard
- Why it fails: Fish usually hook themselves; hard sets pull hooks
- Fix: Simply lift rod from holder and start reeling
- Exception: Set hook firmly only for soft-mouthed species like crappie
Not using rod leashes
- Why it fails: Aggressive strikes pull rods overboard
- Fix: Attach leash to rod and kayak before every trip
- Cost: $5-10 prevents losing $100+ in gear
Trolling into wind constantly
- Why it fails: Exhausting, inconsistent speed, poor lure action
- Fix: Plan routes that use wind/current to your advantage
- Strategy: Troll with or across wind, not directly into it
Most mistakes are easy to fix once you recognize them. Pay attention to what’s working, if you’re not getting strikes after 30 minutes, change something (speed, lure, depth, or location).
Best Fish to Catch While Trolling From a Kayak
The best fish species for kayak trolling include largemouth and smallmouth bass, walleye, northern pike, trout (rainbow, brown, lake), crappie, white bass, and yellow perch. These species actively chase moving lures, inhabit depths accessible to kayak trolling (5-20 feet), and respond well to the 1.5-3 mph speed range kayaks naturally maintain.
Species-specific trolling strategies:
Largemouth and smallmouth bass
- Depth: 5-15 feet along weed edges, points, rocky structure
- Lures: Medium-diving crankbaits (Rapala Shad Rap, Strike King KVD)
- Speed: 2-2.5 mph
- Best times: Early morning, late afternoon, overcast days
Walleye
- Depth: 10-20 feet near drop-offs, river channels, rocky bottoms
- Lures: Deep-diving crankbaits, spinner rigs with nightcrawlers
- Speed: 2-2.5 mph
- Best times: Low-light conditions, dusk, dawn
Northern pike
- Depth: 5-12 feet near weed edges, shallow bays
- Lures: Large spoons, shallow crankbaits in bright colors
- Speed: 2.5-3 mph (pike like faster presentations)
- Best times: Spring through fall, all day
Trout (rainbow, brown, lake)
- Depth: 8-15 feet in lakes; 3-8 feet in rivers
- Lures: Small spoons (Kastmaster, Little Cleo), inline spinners
- Speed: 1.5-2 mph (slower than bass)
- Best times: Morning, evening, cooler water temps
Crappie
- Depth: 8-15 feet suspended near brush piles, docks
- Lures: Small jigs, tiny crankbaits, inline spinners
- Speed: 1-1.5 mph (slowest trolling speed)
- Best times: Spring spawn, early summer
White bass and yellow perch
- Depth: 10-20 feet in open water, near points
- Lures: Small crankbaits, spoons, inline spinners
- Speed: 2-2.5 mph
- Best times: When schooling (often mid-day in summer)
Species that don’t troll well from kayaks: Catfish (prefer stationary bait), bluegill (too small, prefer stationary presentations), carp (bottom feeders), and deep-water species like lake trout in summer (require downriggers for 40+ foot depths).
Local regulations: Check your state’s rules on number of rods while trolling. Some states limit trolling to one rod per angler, while others allow two. Always verify before adding multiple lines.
Do I Need a Fish Finder for Kayak Trolling?
You don’t need a fish finder for kayak trolling, but one with GPS speed tracking helps maintain optimal trolling speed and locate productive structure. Many successful kayak anglers troll without electronics by focusing on visible structure (weed lines, points, docks) and maintaining consistent paddle rhythm, making fish finders helpful but not essential.
What fish finders add to trolling:
Speed monitoring
- Shows real-time mph to maintain 2-2.5 mph target
- Helps you learn what “correct speed” feels like
- Particularly useful for beginners still developing paddle rhythm
Depth and structure mapping
- Identifies drop-offs, channels, and depth changes
- Shows suspended fish (though trolling finds them anyway)
- Helps you follow productive depth contours
Water temperature
- Indicates where fish are likely to be active
- Helps predict best trolling depths by season
GPS waypoints
- Marks spots where you caught fish
- Allows you to repeat successful trolling routes
Trolling without a fish finder:
Focus on visible structure like weed edges, rocky points, docks, and creek channels. Troll parallel to these features at a comfortable, sustainable paddle pace. Use your smartphone’s GPS app (free) to check speed occasionally until you develop a feel for 2-2.5 mph.
Budget consideration: Basic fish finders with GPS start at $150-200. If you’re just starting kayak trolling, invest that money in quality rod holders and lures first. Add electronics later once you’ve confirmed you enjoy trolling and want to refine your technique.
Best practice: If you already own a fish finder, absolutely use it for speed monitoring and structure identification. If you don’t own one, you can troll successfully without it, thousands of kayak anglers do.
How to Troll in Shallow Water From a Kayak
Trolling in shallow water (under 10 feet) from a kayak requires shallow-running lures, slower speeds (1.5-2 mph), and careful attention to bottom structure to avoid snagging. Use squarebill crankbaits, shallow-diving plugs, or spoons that run 2-5 feet deep, and troll parallel to weed edges, shallow flats, and shoreline structure where bass, pike, and panfish feed.
Shallow water trolling setup:
Lure selection
- Squarebill crankbaits (deflect off cover without snagging)
- Shallow-running Rapalas (Original Floater, Husky Jerk)
- Spoons (run just under surface)
- Inline spinners (adjustable depth by retrieve speed)
Speed and technique
- Slow to 1.5-2 mph (faster speeds drive lures deeper)
- Paddle smoothly to keep lures at consistent depth
- Make wide turns to prevent lures from diving or surfacing
Where to troll
- Parallel to weed edges (2-3 feet outside vegetation)
- Over shallow flats with scattered vegetation (5-8 feet)
- Along rocky shorelines (maintain 20-30 feet from shore)
- Through shallow bays and coves (early morning, late evening)
Avoiding snags in shallow water:
Watch your rod tip, if it starts bouncing erratically, your lure is hitting bottom or weeds. Reel in a few feet or switch to a shallower-running lure. Squarebill crankbaits are designed to bounce off rocks and wood without snagging, making them ideal for shallow trolling near structure.
Seasonal considerations:
Shallow trolling excels in spring (pre-spawn and spawn periods), early summer (fish still shallow), and fall (fish move shallow to feed). In mid-summer, fish often move deeper during the day but return to shallows morning and evening, time your shallow trolling accordingly.
Advantages of shallow trolling:
- Kayaks access water too shallow for most boats
- Less competition from boat anglers
- Fish are often more aggressive in shallow water
- Easier to see strikes and structure
- Fewer snags than deep trolling with weighted lines
Common mistake: Using deep-diving crankbaits in shallow water. They’ll dig into bottom constantly, collect weeds, and spook fish. Match your lure’s diving depth to the water depth, run lures at half the water depth or shallower.
Kayak Trolling vs Casting: Which Is Better for Lakes?
Kayak trolling and casting each excel in different lake situations, with trolling better for covering water to locate fish and casting superior for targeting specific structure once you’ve found active fish. Most successful kayak anglers combine both techniques: troll to find fish, then stop and cast to the productive areas.
When trolling wins:
- Searching large areas: Covering open water, long weed edges, or expansive flats
- Suspended fish: Targeting fish in open water away from structure
- Windy conditions: Trolling uses wind to your advantage; casting fights it
- Hands-free fishing: Eating, drinking, or navigating while fishing
- Consistent depth: Maintaining lures at specific depth for extended periods
- Multiple species: Catching whatever’s active (trolling is less species-specific)
When casting wins:
- Precise targets: Docks, laydowns, specific weed pockets, rock piles
- Shallow cover: Heavy vegetation, lily pads, submerged timber
- Finicky fish: Inactive fish that need repeated presentations
- Technique variety: Topwater, jigging, soft plastics (not trollable)
- Crowded areas: Tight spaces where trolling isn’t practical
- Sight fishing: Visible fish or structure you can see
Comparison table:
| Factor | Trolling | Casting |
|---|---|---|
| Water coverage | High (miles per hour) | Low (focused area) |
| Precision | Low (general area) | High (specific targets) |
| Physical effort | Low (steady paddling) | High (constant casting) |
| Learning curve | Easy (beginner-friendly) | Moderate (requires practice) |
| Fish location | Finds fish for you | Requires knowing where fish are |
| Lure variety | Limited (diving lures, spoons) | Unlimited (all lure types) |
Hybrid strategy for maximum success:
- Start by trolling productive areas (points, weed edges, depth changes)
- Mark locations where you get strikes or catch fish
- Return to hot spots and cast to specific structure
- Switch back to trolling when casting action slows
This combination approach is how many tournament kayak anglers fish: troll to locate active fish quickly, then exploit those areas with targeted casting. Neither technique is universally “better”, they complement each other.
Lake-specific recommendations:
- Large lakes (1,000+ acres): Trolling essential for covering water
- Small lakes (under 200 acres): Casting often more efficient
- Medium lakes: Combine both techniques
- Clear water: Casting often more effective (fish spook from trolling kayak)
- Stained water: Trolling works well (fish don’t see kayak until lure passes)
The best kayak anglers master both techniques and choose based on conditions, fish behavior, and time available. If you’re new to kayak fishing, start with trolling to learn where fish hold, then develop casting skills to exploit those locations more thoroughly.
Frequently Asked Questions
How many rods can you troll with from a kayak?
Most states allow one or two rods per angler while trolling, but regulations vary by location. Start with one rod to master the technique, then add a second rod on the opposite side of the kayak with lines staggered at different lengths (50 feet and 75-100 feet) to prevent tangles.
What’s the best lure color for kayak trolling?
Natural colors (shad, perch, silver) work well in clear water, while bright colors (chartreuse, firetiger, orange) excel in stained water or low-light conditions. Start with shad or perch patterns and switch to brighter colors if you’re not getting strikes after 20-30 minutes.
Can you troll with braided line?
You can troll with braided line, but monofilament or fluorocarbon work better because they’re less dense and allow lures to dive deeper. Braid’s lack of stretch also means more pulled hooks when fish strike aggressively. If you prefer braid, add a 6-8 foot monofilament or fluorocarbon leader.
How do you know if you’re trolling at the right depth?
Your rod tip should bounce rhythmically as the lure wobbles, and you should occasionally feel light ticks as the lure contacts bottom or vegetation. If you’re constantly snagging, you’re too deep; if the rod tip is motionless, you’re too shallow. Adjust by changing lures or adding/removing weight.
Do pedal kayaks troll better than paddle kayaks?
Pedal kayaks maintain more consistent speed hands-free, making them significantly better for trolling. They allow you to focus on rod management, navigation, and fish fighting without worrying about maintaining paddle rhythm. However, paddle kayaks work fine for trolling with practice.
Should you troll with the current or against it?
Troll with or across current rather than directly against it. Trolling against current is exhausting and makes it hard to maintain consistent speed. Trolling with current requires less effort and allows better lure action, though you may need to paddle slightly to maintain optimal speed.
How far behind the kayak should your lure be?
Let out 50-100 feet of line for most trolling situations. Longer lines (75-100 feet) keep lures farther from the kayak, reducing spooking in clear water. Shorter lines (50-60 feet) work in stained water or when trolling tight to structure. Never troll with less than 40 feet out.
Can you troll for bass in the summer?
Yes, summer bass trolling works well early morning, late evening, and on cloudy days when bass are active. Target deeper weed edges (10-15 feet), points, and channel edges during midday heat. Use medium-diving crankbaits in shad or bluegill patterns and slow your speed slightly to 1.5-2 mph.
What’s the best time of day for kayak trolling?
Early morning (dawn to 9 AM) and late afternoon (4 PM to dusk) produce the most consistent trolling action for most species. Midday trolling can work in summer if you target deeper water or on overcast days. Spring and fall offer good all-day trolling because fish are more active in cooler water.
How do you land a big fish while trolling from a kayak?
When a fish strikes, grab the rod from the holder and let the fish run against the drag. Reel in your other line if you’re running two rods. Keep the rod tip up and let the rod’s flex tire the fish. Once the fish is alongside the kayak, use a net or lip-grip tool to land it. Never try to lift large fish by the line alone.
Do you need a license to troll from a kayak?
You need a valid fishing license for the state where you’re fishing, just like any other fishing method. Trolling doesn’t require special permits in most states, but check local regulations for rod limits and species-specific rules. Some states have different rules for trolling versus casting.
Can you troll in rivers from a kayak?
River trolling works well by paddling upstream and letting current help control your speed, or by trolling across current along deeper channels and pools. Use shorter lines (40-60 feet) in rivers to maintain better control. Target eddies, current seams, and deeper holes where fish rest out of the main current.
Conclusion
Trolling from a kayak opens up an efficient, beginner-friendly fishing method that covers water, locates active fish, and produces consistent catches across multiple species. With basic equipment, rod holders, medium-action rods, diving crankbaits, and proper setup, you can start trolling successfully on your next kayak fishing trip.
Key points to remember:
- Maintain 1.5-3 mph trolling speed for most species
- Position rod holders at 45-60 degree angles outward and back
- Let out 50-100 feet of line to keep lures away from the kayak
- Start with one rod and master the basics before adding a second
- Troll parallel to structure (weed edges, points, drop-offs) rather than random water
- Make wide, gradual turns to prevent line tangles
- Use rod leashes to prevent losing gear overboard
Your next steps:
- Install rod holders on your kayak if you haven’t already (clamp-on models work great for testing)
- Gather basic gear: one medium-action rod, 10-12 lb mono line, and 3-5 diving crankbaits in different colors
- Choose a productive lake or reservoir with visible structure (weed lines, points, or depth changes)
- Start with a single rod trolling at a comfortable paddle pace (2-2.5 mph)
- Experiment with lure depth and color until you find what triggers strikes
- Mark successful spots and return to them on future trips
Trolling combines the peaceful rhythm of kayak paddling with the excitement of consistent fish catches. Whether you’re searching for bass on a local lake, targeting walleye on a reservoir, or exploring new water for trout, trolling helps you cover ground efficiently while keeping your lures in the strike zone. Start simple, focus on the fundamentals, and you’ll quickly discover why so many kayak anglers make trolling a core part of their fishing strategy.