Quick Answer
Planning a multi-day kayak fishing trip requires selecting a stable kayak with 300+ pound capacity, packing waterproof camping and fishing gear in dry bags, securing permits for overnight camping locations, and preparing detailed route plans with bailout points. Budget $500-2,000 for gear if starting from scratch, choose calm weather windows, and pack 1.5 gallons of water per person per day plus calorie-dense foods that don’t require refrigeration.
Key Takeaways
- Kayak selection matters most: Choose sit-on-top models at least 12 feet long with 33+ inch beam width and 400+ pound capacity for gear stability
- Weight distribution is critical: Keep heavy items low and centered, with total loaded weight at 70-80% of kayak’s rated capacity maximum
- Permits are often required: Check state and federal regulations for overnight camping on waterways; many areas require advance reservations
- Water and food planning: Pack 1.5 gallons of water per person daily, plus high-calorie freeze-dried meals and snacks totaling 3,000+ calories
- Safety gear is non-negotiable: Personal flotation device, VHF radio or satellite communicator, first aid kit, and multiple navigation tools
- Weather windows are everything: Avoid trips during fronts, thunderstorms, or winds above 15 mph; always have bailout plans
- Fish preservation requires planning: Use stringers in live wells, process and ice immediately, or practice catch-and-release to avoid spoilage
- Beginners should start small: First-timers should attempt overnight trips on calm lakes before progressing to multi-day river or coastal expeditions
What Gear Do You Need for a Multi-Day Kayak Fishing Trip?
A multi-day kayak fishing trip requires three categories of gear: kayaking equipment (paddle, PFD, safety gear), camping equipment (tent, sleeping bag, stove), and fishing equipment (rods, tackle, cooler). Everything must fit in waterproof dry bags and stay within your kayak’s weight capacity while maintaining proper balance.
Essential kayaking gear:
- Personal flotation device (PFD) rated for your weight
- Paddle with spare breakdown paddle
- Bilge pump and sponge
- Anchor system with 20-30 feet of rope
- Navigation tools (GPS, compass, waterproof maps)
- VHF radio or satellite communicator for emergencies
- Headlamp with extra batteries
- Whistle and signal mirror
Camping equipment:
- Lightweight 2-person tent (under 4 pounds)
- Compact sleeping bag rated for expected temperatures
- Sleeping pad (inflatable saves space)
- Portable camp stove with fuel
- Cookware and utensils
- Water filtration system or purification tablets
- Dry bags in multiple sizes (10L, 20L, 30L)
- Rope for bear bag or food storage
Fishing-specific gear:
- 2-3 fishing rods (medium-action spinning rods work best)
- Tackle box with lures, hooks, weights, and line
- Fishing pliers and knife
- Measuring tape and scale
- Fishing license and regulations booklet
- Stringer or fish basket
- Small cooler with ice packs (if keeping fish)
Choose a stable kayak designed for fishing with built-in rod holders and storage hatches. Most anglers prefer sit-on-top models for easier gear access and fish handling.
Common mistake: Packing too much gear. Prioritize multi-use items and test-pack your kayak before the trip to ensure everything fits and the boat remains stable.
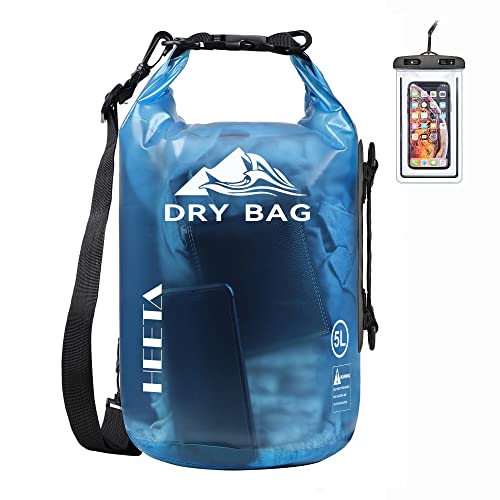
Waterproof - Built with professional seamless technology, our dry bag keeps your items and valuables dry during water sports like boating and kayaking. Note: It can handle accidental submersion, but should not be kept underwater for extended periods
Waterproof - Built with professional seamless technology, our dry bag keeps your items and valuables dry during water sports like boating and kayaking. Note: It can handle accidental submersion, but should not be kept underwater for extended periods

Fishing equipment tackle bags and boxes
What Are the Best Kayaks for Multi-Day Fishing Expeditions?
The best kayaks for multi-day fishing trips are sit-on-top models between 12-14 feet long with beam widths of 33-36 inches and weight capacities exceeding 400 pounds. Pedal-drive kayaks offer hands-free propulsion for covering distance while trolling, but traditional paddle kayaks are lighter and more affordable for beginners.
Top kayak features for extended trips:
| Feature | Minimum Spec | Why It Matters |
|---|---|---|
| Length | 12 feet | Tracks straighter, covers distance efficiently |
| Width | 33 inches | Provides stability for standing and gear weight |
| Capacity | 400 lbs | Accommodates angler plus 100-150 lbs of gear |
| Storage | 2+ hatches | Keeps gear dry and organized |
| Rod holders | 3+ | Allows trolling and hands-free rod storage |
| Seat type | Adjustable high-back | Comfort for 6+ hours of paddling daily |
Kayak type comparison:
- Sit-on-top kayaks: Best for warm weather, easy gear access, self-draining, safer for beginners. Choose these for coastal and lake trips.
- Sit-inside kayaks: Better for cold weather and rough water, but limited gear space and harder to re-enter after capsize.
- Pedal kayaks: Cover 30-50% more distance with less fatigue, hands-free for fishing, but heavier (80-120 lbs) and cost $2,000-4,000.
- Tandem kayaks: Distribute gear weight between two paddlers, but require coordination and aren’t ideal for solo fishing.
For multi-day trips, prioritize a fishing kayak with a 14-foot length for better tracking and storage capacity. Shorter 12-foot kayaks work for overnight trips on calm water but struggle with heavy loads over multiple days.
Decision rule: Choose a pedal kayak if you plan to cover 10+ miles daily or troll frequently. Stick with paddle kayaks if portaging is required or budget is under $1,500.

UV-Protected HDPE Construction for Durability: Built with high-density polyethylene (HDPE) plastic, this kayak is both lightweight and highly durable, offering long-lasting protection against UV rays for years of use in various conditions. Paddle included.

Great performance in the convenience of a sit-on-top

Ergolounge seating system : Extra-thick cushioning and an extra high and wide padded backrest.
How Much Does It Cost to Plan a Kayak Fishing Camping Trip?
A multi-day kayak fishing camping trip costs $500-2,000 for first-time participants purchasing all gear, or $50-200 per trip for experienced anglers who already own equipment. Major expenses include the kayak itself ($600-3,000), camping gear ($200-500), and fishing equipment ($150-400), while per-trip costs cover food, permits, and fuel.
Initial gear investment breakdown:
- Fishing kayak: $600-1,500 (paddle), $2,000-4,000 (pedal)
- Paddle and PFD: $100-250
- Camping gear: $200-500 (tent, sleeping bag, stove)
- Fishing tackle: $150-400
- Safety and navigation: $100-300
- Dry bags and storage: $80-150
- Total first-time cost: $1,230-7,100
Per-trip expenses:
- Permits and camping fees: $10-50
- Food and water: $30-80 (3-day trip)
- Fuel for transport: $20-60
- Ice and bait: $15-30
- Total per-trip cost: $75-220
Money-saving strategies:
- Rent kayaks for first trip ($40-80/day) to test before buying
- Buy used kayaks and gear (save 30-50%)
- Share tandem kayak with partner to split costs
- Camp on free public lands where permitted
- Bring freeze-dried meals instead of fresh food (lighter, no ice needed)
Budget an extra 20% for unexpected expenses like gear repairs, additional permits, or emergency supplies. Many anglers underestimate food costs and run short on calories during physically demanding multi-day paddles.

Fishing Tackle Backpack Storage: Fits two tackle boxes with organized compartments for lures, lines and accessories. Side features include a rod holder and water bottle pocket, plus MOLLE webs and D-rings for attaching pliers, fish gripper, and other fishing gear.

ALL-IN-ONE COMPLETE FISHING KIT – Most new anglers waste time and money buying fishing gear piece by piece, only to struggle with mismatched components. This complete fishing pole setup arrives pre‑assembled with a rod, reel, line, baits, fish gripper, pliers, bag, and 2 step‑by‑step manuals – everything pre‑matched, no guesswork. Even with zero experience, start fishing right out of the tackle box – no costly trial and error, no empty‑handed frustration. Perfect for beginners, kids, seniors

Microfiber Fishing Towel: this is the towel set for any fishing enthusiast. Perfectly sized at 16” x 16”, it is handy enough to be kept in your back pocket or clipped to your belt loop, always in position to clean your hand after handling bait or a quick release, dry your hand after a fillet, clean your fishing gears after your harvest.
Kayak Fishing Trip vs Regular Kayaking: What’s the Difference?
Kayak fishing trips require specialized boats with rod holders, tackle storage, and greater stability for standing and casting, while regular kayaking uses lighter, faster boats designed purely for paddling. Fishing kayaks are 20-40 pounds heavier, 4-8 inches wider, and cost $200-800 more than comparable recreational kayaks, but offer features essential for angling success.
Key differences:
Fishing kayaks:
- Width: 32-36 inches (more stable for casting)
- Weight: 65-90 lbs (heavier, more durable)
- Features: Rod holders, tackle storage, fish finders
- Speed: Slower (2-3 mph cruising)
- Price: $600-3,000
- Best for: Anglers prioritizing fishing over distance
Recreational kayaks:
- Width: 24-30 inches (faster, less stable)
- Weight: 35-55 lbs (easier to transport)
- Features: Minimal storage, no fishing accessories
- Speed: Faster (3-4 mph cruising)
- Price: $300-800
- Best for: Paddlers covering distance efficiently
For multi-day trips combining fishing and camping, fishing kayaks are essential because recreational kayaks lack the stability and storage for heavy gear loads. A recreational kayak will feel dangerously unstable once loaded with 80-100 pounds of camping equipment and fishing gear.
Common mistake: Buying a narrow recreational kayak to save money, then discovering it’s too unstable for fishing or heavy loads. The extra width of fishing kayaks is non-negotiable for multi-day trips.
How to Pack Food and Water for a 3-Day Kayak Fishing Trip
Pack 1.5 gallons of water per person per day (4.5 gallons total for 3 days) in collapsible water containers, plus high-calorie freeze-dried meals totaling 3,000-4,000 calories daily. Store water in multiple containers distributed throughout the kayak for weight balance, and pack food in waterproof dry bags with meals organized by day.
Water planning:
- Minimum requirement: 1 gallon per person per day
- Recommended: 1.5 gallons per person per day (accounts for exertion and heat)
- Storage: Use 2-3 collapsible water bladders (2-3 gallons each)
- Backup: Pack water purification tablets or filter for refilling from natural sources
- Weight consideration: Water weighs 8.3 lbs per gallon; 4.5 gallons = 37 lbs
Food selection criteria:
- High calorie-to-weight ratio (aim for 120+ calories per ounce)
- No refrigeration required
- Minimal cooking time and fuel use
- Packaged in waterproof containers
- Balanced nutrition (protein, carbs, fats)
Sample 3-day meal plan:
Day 1:
- Breakfast: Instant oatmeal with nuts (400 cal)
- Lunch: Tortillas with peanut butter and honey (600 cal)
- Dinner: Freeze-dried pasta meal (800 cal)
- Snacks: Trail mix, energy bars, jerky (1,200 cal)
- Total: 3,000 calories
Days 2-3: Repeat similar pattern with variety
Packing strategy:
- Use 20L dry bag for food
- Organize meals in labeled ziplock bags by day
- Pack heavy items (water, canned goods) low and centered in kayak
- Keep snacks and lunch in accessible deck bag
- Store stove fuel separately from food
- Hang food in bear bag at night if camping in bear country
Common mistake: Underestimating calorie needs. Paddling 10-15 miles daily while fishing burns 3,500-5,000 calories. Pack 20% more food than calculated to avoid energy depletion.
What Are Common Mistakes When Planning Overnight Kayak Fishing?
The most common mistakes when planning overnight kayak fishing trips are overloading the kayak beyond safe capacity, failing to secure required permits, underestimating weather impacts, and not testing gear before departure. These errors lead to capsizing, legal issues, dangerous conditions, and equipment failures that can turn trips into emergencies.
Critical planning mistakes:
1. Weight and balance errors
- Loading kayak above 80% of rated capacity
- Placing heavy gear too high or too far forward/aft
- Not securing loose items that shift during paddling
- Fix: Test-load kayak and paddle in calm water before trip
2. Permit and regulation failures
- Camping without required permits ($100-500 fines)
- Fishing without proper licenses
- Ignoring seasonal closures or restricted areas
- Fix: Research regulations 2-4 weeks ahead; reserve campsites early
3. Weather underestimation
- Launching during small craft advisories
- Ignoring wind forecasts (15+ mph creates dangerous conditions)
- Not checking multi-day forecasts
- Fix: Use NOAA marine forecasts; have flexible dates to wait for weather windows
4. Navigation and safety gaps
- Relying solely on phone GPS (batteries die)
- No backup communication device
- Inadequate float plan left with emergency contact
- Fix: Carry paper maps, compass, and satellite communicator
5. Gear testing failures
- Never practicing with new equipment
- Not waterproofing electronics
- Forgetting essential items (discovered after launch)
- Fix: Complete shakedown overnight trip close to home
6. Physical overestimation
- Planning 20+ mile days without training
- Underestimating fatigue from paddling plus fishing
- No bailout points for early exit
- Fix: Limit first multi-day trip to 8-10 miles daily; identify takeout points every 5 miles
Edge case: Tidal waters require planning around tide schedules. Paddling against strong tidal currents can reduce speed from 3 mph to under 1 mph, turning a 2-hour paddle into a 6-hour ordeal.
How Do You Stay Safe Camping on a Kayak Fishing Trip?
Stay safe on kayak fishing camping trips by wearing a PFD at all times on water, carrying VHF radio or satellite communicator, filing detailed float plans with emergency contacts, and choosing campsites on stable ground above high-water marks. Always paddle with a partner when possible, and establish check-in schedules with someone on shore.
Essential safety protocols:
On-water safety:
- Wear PFD every moment in kayak (not just nearby)
- Stay within 100 yards of shore if solo paddling
- Avoid paddling in winds above 15 mph or waves over 2 feet
- Carry whistle, signal mirror, and waterproof flashlight
- Know self-rescue techniques (re-entering kayak after capsize)
Communication and navigation:
- File float plan with launch/takeout points, route, and timeline
- Carry VHF radio (channel 16 for emergencies) or satellite messenger
- Check in with emergency contact daily at predetermined times
- Bring waterproof maps and compass as GPS backup
- Download offline maps to phone before trip
Campsite safety:
- Choose sites 200+ feet from water (flood protection)
- Avoid camping under dead trees or loose branches
- Secure kayak overnight (tie to tree or stake)
- Store food in bear-proof container or hang 12+ feet high
- Keep first aid kit and emergency supplies accessible
Weather monitoring:
- Check forecast twice daily (morning and evening)
- Watch for changing conditions (darkening skies, wind shifts)
- Have emergency shelter plan if storms develop
- Know signs of hypothermia and heat exhaustion
Medical preparedness:
- Pack comprehensive first aid kit with blister treatment
- Bring prescription medications plus 2-day backup
- Know location of nearest medical facilities along route
- Carry emergency blanket and fire-starting materials
Learn more about kayak safety protocols and fishing kayak safety specific to angling situations.
Decision rule: If conditions feel uncomfortable or uncertain, they probably are. Experienced kayakers postpone trips when weather, water, or personal readiness isn’t optimal.
Is Multi-Day Kayak Fishing Good for Beginners or Experienced Only?
Multi-day kayak fishing trips are best suited for intermediate to advanced paddlers with at least 20 hours of kayaking experience and basic camping skills. Complete beginners should start with single-day kayak fishing trips and progress to overnight trips on calm lakes before attempting multi-day expeditions on rivers or coastal waters.
Skill progression path:
Level 1 – Beginner (0-10 hours experience):
- Start with 2-4 hour day trips on calm lakes
- Practice basic paddling strokes and kayak control
- Learn fishing from stable kayak in protected water
- Master wet exit and re-entry techniques
- Not ready for: Overnight or multi-day trips
Level 2 – Novice (10-30 hours experience):
- Attempt first overnight trip on familiar calm water
- Practice packing and weight distribution
- Build endurance for 8-10 mile days
- Develop camping skills on land first
- Ready for: Single overnight trips in ideal conditions
Level 3 – Intermediate (30+ hours experience):
- Plan 2-3 day trips on lakes or slow rivers
- Handle moderate wind and small waves confidently
- Navigate using map and compass
- Perform self-rescue reliably
- Ready for: Multi-day trips with proper planning
Level 4 – Advanced (100+ hours experience):
- Tackle coastal trips with tides and currents
- Handle challenging weather and water conditions
- Navigate complex river systems
- Lead group trips
- Ready for: Extended expeditions in varied conditions
Beginner-friendly first trip characteristics:
- 1-2 nights maximum duration
- Calm lake or slow river with no rapids
- Established campsites with facilities
- Short daily distances (5-8 miles)
- Warm weather (60-80°F)
- Paddle with experienced partner
- Multiple bailout points
For those new to kayak fishing, consider starting with beginner kayak fishing day trips before adding the complexity of overnight camping.
Common mistake: Beginners attempting ambitious multi-day trips as their first kayak camping experience. The combination of paddling fatigue, gear management, and camping logistics overwhelms new paddlers and creates dangerous situations.
My Kayak Is Too Heavy with Camping Gear: What Do I Do?
If your kayak is too heavy with camping gear, reduce weight by switching to ultralight camping equipment, eliminating non-essential items, using a larger kayak with higher capacity, or splitting gear between two kayaks on tandem trips. Aim to keep total loaded weight at 70-80% of the kayak’s maximum capacity for safe handling and stability.
Weight reduction strategies:
Camping gear swaps (potential savings):
- Replace 6-lb tent with 2-lb ultralight tent (save 4 lbs)
- Switch to 1-lb sleeping bag from 3-lb bag (save 2 lbs)
- Use inflatable sleeping pad instead of foam (save 1 lb)
- Carry compact stove vs. full camp stove (save 2 lbs)
- Total potential savings: 9+ lbs
Food and water optimization:
- Plan water refill points instead of carrying all water (save 15-25 lbs)
- Use freeze-dried meals instead of canned goods (save 3-5 lbs)
- Eliminate glass containers and excess packaging (save 2-3 lbs)
- Total potential savings: 20-33 lbs
Fishing gear minimization:
- Bring 2 rods instead of 4 (save 3 lbs)
- Carry small tackle box with essentials only (save 2-4 lbs)
- Skip large cooler if practicing catch-and-release (save 8-12 lbs)
- Total potential savings: 13-19 lbs
Kayak capacity solutions:
If weight reduction isn’t enough, consider these options:
- Upgrade to higher-capacity kayak: Models with 450-550 lb capacity handle heavy loads better than 350-400 lb kayaks
- Use tandem kayak: Split 150 lbs of gear between two paddlers in a tandem fishing kayak
- Add gear barge: Tow small inflatable raft with extra gear (adds drag but increases capacity)
- Shorten trip: 2-day trips require 40% less gear than 4-day trips
Weight distribution checklist:
- Heavy items (water, food) centered between seat and feet
- Medium items in stern hatch
- Light items (sleeping bag, tent) in bow
- Frequently needed items in deck bag
- Nothing loose on deck (secure everything)
Check your kayak’s stability rating and ensure you’re not exceeding safe loading limits, which can lead to kayak capsize situations.
Edge case: Paddlers over 200 lbs need kayaks with 500+ lb capacity for multi-day trips, as personal weight plus 100-150 lbs of gear exceeds most standard fishing kayak ratings.
Where Can You Legally Camp While Kayak Fishing Overnight?
You can legally camp while kayak fishing overnight on designated campsites in state and national parks, Bureau of Land Management (BLM) lands, national forests with dispersed camping, and private campgrounds with water access. Most locations require advance permits or reservations, and wild camping on undeveloped shoreline is restricted or prohibited in many states.
Legal camping locations:
1. State and national park campsites
- Designated paddle-in campsites along waterways
- Require advance reservations (book 2-6 months ahead for popular sites)
- Cost: $10-35 per night
- Amenities: Fire rings, bear boxes, sometimes pit toilets
- Best for: Beginners wanting established facilities
2. National forest dispersed camping
- Camp on most undeveloped national forest land
- Must be 200+ feet from water sources
- Free or minimal fee ($5-10)
- No amenities or facilities
- Best for: Experienced campers wanting solitude
3. BLM lands
- Extensive free camping on public lands (Western states)
- 14-day stay limits in most areas
- Must follow Leave No Trace principles
- Research specific area regulations
- Best for: Budget-conscious trips in arid regions
4. Private campgrounds and marinas
- Kayak-accessible sites at waterfront campgrounds
- Cost: $25-60 per night
- Full amenities (showers, electricity, stores)
- Reservations recommended
- Best for: Comfort-oriented trips
5. Water trail campsites
- Designated sites along established water trails
- Managed by state DNR or local organizations
- Require permits (often free or low-cost)
- Spaced for typical paddling distances
- Best for: Multi-day river trips
Permit requirements by location type:
| Location | Permit Needed | Cost | Advance Booking |
|---|---|---|---|
| National Parks | Yes | $10-35/night | 2-6 months |
| State Parks | Yes | $10-30/night | 1-3 months |
| National Forests | Sometimes | Free-$10 | Usually not required |
| BLM Lands | Rarely | Free | No |
| Private Campgrounds | Reservation | $25-60/night | 1-4 weeks |
Research resources:
- State DNR websites for water trail maps and campsites
- Recreation.gov for federal land reservations
- Local paddling clubs for insider knowledge
- Waterway-specific guidebooks and maps
Illegal camping consequences:
- Trespassing on private property: $100-500 fines
- Camping in restricted areas: $50-250 fines
- Camping without permits: $75-300 fines
- Repeat violations: Equipment confiscation possible
Learn about kayak fishing permits and kayak laws in your state before planning trips.
Common mistake: Assuming all public shoreline allows camping. Many state-managed waterways prohibit camping except at designated sites, and enforcement has increased in recent years.
How to Keep Fish Fresh on a Multi-Day Kayak Trip
Keep fish fresh on multi-day kayak trips by using live wells or stringers to maintain fish alive until processing, immediately cleaning and icing fish in a high-quality cooler with 2:1 ice-to-fish ratio, or practicing catch-and-release to avoid spoilage issues entirely. Most experienced kayak anglers release fish on multi-day trips due to weight and refrigeration challenges.
Fish preservation methods:
Option 1: Catch-and-release (recommended)
- Eliminates weight and spoilage concerns
- Allows focus on fishing experience over harvest
- Reduces gear requirements (no cooler needed)
- Photograph trophy fish for memories
- Best for: Most multi-day trips
Option 2: Live well or stringer
- Keep fish alive in water until camp
- Use kayak live well (if equipped) or mesh stringer
- Process fish immediately upon reaching camp
- Consume same evening (no overnight storage)
- Best for: Overnight trips with evening fish fry
Option 3: Cooler with ice
- Requires 20-30 quart cooler (adds 15-25 lbs when loaded)
- Use 2 lbs ice per 1 lb fish minimum
- Bleed and gut fish immediately after catch
- Layer fish between ice in cooler
- Drain meltwater daily
- Best for: 2-day trips with vehicle access at takeout
Option 4: Vacuum sealing and freezing
- Process fish at camp
- Vacuum seal portions
- Store in cooler with dry ice (lasts 2-3 days)
- Requires vacuum sealer and power source
- Best for: Trips with base camp setup
Fish processing steps:
- Bleed fish immediately by cutting gills
- Place in cooler or live well within 10 minutes
- Clean fish at camp (fillet or gut/scale)
- Rinse thoroughly with clean water
- Pat dry and wrap in plastic
- Layer with ice in cooler
- Keep cooler in shade, drain daily
Weight considerations:
- 5 fish (2 lbs each): 10 lbs
- Ice (2:1 ratio): 20 lbs
- Cooler: 8 lbs
- Total added weight: 38 lbs
This weight significantly impacts kayak handling and may exceed safe capacity on smaller boats.
Regulations reminder:
- Follow state limits on fish possession
- Some species require immediate release
- Keep fishing license and regulations accessible
- Measure fish before keeping (size limits)
Common mistake: Attempting to keep fish fresh for 3+ days without adequate ice. Fish spoil rapidly in warm conditions, creating health risks and wasted catch.
What Weather Conditions Are Too Dangerous for Kayak Fishing Trips?
Weather conditions too dangerous for kayak fishing trips include sustained winds above 15 mph, thunderstorms with lightning, waves exceeding 2 feet, fog reducing visibility below 100 yards, and water temperatures below 60°F without proper cold-water gear. Additionally, avoid launching during small craft advisories, approaching frontal systems, or when air temperature plus water temperature totals less than 120°F.
Dangerous weather thresholds:
Wind:
- 10-15 mph: Challenging for beginners, manageable for experienced
- 15-20 mph: Difficult for all paddlers, waves develop
- 20+ mph: Dangerous, stay off water
- Wind direction matters: Offshore winds push kayaks away from shore (most dangerous)
Waves:
- Under 1 foot: Safe for all skill levels
- 1-2 feet: Challenging, experienced paddlers only
- 2+ feet: Dangerous for kayaks, high capsize risk
- Wave period matters: Short-period chop more dangerous than long swells
Thunderstorms:
- Lightning within 10 miles: Get off water immediately
- Dark clouds with thunder: Seek shelter
- Approaching storms: Paddle to shore before arrival
- Lightning danger: Kayakers are highest point on water (extreme risk)
Temperature:
- 120 Rule: Air temp + water temp should exceed 120°F
- Below 120°F: Hypothermia risk if capsized
- Water below 60°F: Wetsuit or drysuit required
- Air below 50°F: Dress for immersion, not air temperature
Visibility:
- Fog under 100 yards: Navigation becomes dangerous
- Rain reducing visibility: Increases collision risk with boats
- Darkness: Requires navigation lights and experience
Frontal systems:
- Cold fronts: Bring sudden wind shifts and storms
- Warm fronts: Create fog and precipitation
- Timing: Avoid paddling 6 hours before and during front passage
Safe weather windows:
- Winds: 5-10 mph or less
- Skies: Clear to partly cloudy
- Visibility: 1+ miles
- Forecast: Stable for next 24 hours
- Water: Calm to light chop
Weather monitoring tools:
- NOAA marine forecast (updated every 6 hours)
- Weather radio with alerts
- Smartphone apps (Windy, PredictWind)
- Local marina or harbor reports
- Visual observation of conditions
Emergency weather response:
- Monitor forecast twice daily
- Identify emergency takeout points every 2-3 miles
- Paddle to shore at first sign of deteriorating conditions
- Set up emergency shelter if caught in storm
- Wait out dangerous conditions rather than pushing through
Decision rule: If you question whether conditions are safe, they probably aren’t. Experienced paddlers postpone trips when weather is marginal rather than taking unnecessary risks.
Alternatives to Kayak Fishing for Multi-Day Water Camping
Alternatives to kayak fishing for multi-day water camping include canoe camping (more gear capacity and stability), stand-up paddleboard camping (minimalist approach), small boat camping with outboard motors (faster travel and easier fishing), and float tube fishing with backpacking (ultra-light option for small lakes). Each alternative offers different trade-offs in speed, capacity, cost, and fishing effectiveness.
Alternative comparison:
Canoe camping:
- Capacity: 600-900 lbs (2-3x kayak capacity)
- Speed: Slower than kayaks (2-2.5 mph)
- Stability: More stable, easier to stand and fish
- Cost: $400-1,500
- Best for: Families, heavy gear loads, calm water
- Drawback: Difficult in wind, requires two paddlers for efficiency
Stand-up paddleboard (SUP) camping:
- Capacity: 250-350 lbs (limited)
- Speed: 2-3 mph
- Stability: Excellent for fishing while standing
- Cost: $600-1,800
- Best for: Minimalist solo trips, calm water
- Drawback: Exhausting for long distances, limited gear space
Small motorized boat:
- Capacity: 800-1,200 lbs
- Speed: 5-15 mph (much faster)
- Stability: Excellent
- Cost: $2,000-8,000+
- Best for: Covering large distances, serious fishing
- Drawback: Requires trailer, fuel, boat ramp access, registration
Packraft with fishing:
- Capacity: 250-400 lbs
- Speed: 2-3 mph
- Stability: Moderate
- Cost: $500-1,200
- Best for: Backpacking to remote waters, portaging
- Drawback: Less stable for fishing, limited features
Float tube with backpacking:
- Capacity: 200-300 lbs
- Speed: 1-2 mph (very slow)
- Stability: Good for fishing
- Cost: $100-400
- Best for: Small alpine lakes, ultralight approach
- Drawback: Very limited range, cold water exposure
Choosing the right option:
- Choose kayak if: You want balance of speed, capacity, and fishing features
- Choose canoe if: Gear capacity and stability matter more than speed
- Choose SUP if: You prefer standing while fishing and traveling light
- Choose motorized boat if: Distance and fishing effectiveness are priorities
- Choose packraft if: You’re hiking to remote waters
For those interested in exploring different kayak types, compare inflatable fishing kayaks versus hard-shell models, or consider pedal kayaks for hands-free propulsion.
Common mistake: Choosing based solely on cost without considering how the craft matches your specific trip plans and fishing style.
Do I Need a Permit for Overnight Kayak Fishing?
You typically need multiple permits for overnight kayak fishing: a valid fishing license for your state, camping permits for overnight stays on public lands, and potentially watercraft registration depending on your state’s requirements. Some waters also require special-use permits for multi-day trips, and coastal areas may need additional permits for saltwater fishing or marine sanctuary access.
Required permits checklist:
1. Fishing license
- Required in all 50 states for anglers 16+
- Cost: $15-50 for residents, $50-150 for non-residents
- Available online or at sporting goods stores
- Must be carried while fishing
- Tip: Some states offer multi-day tourist licenses
2. Camping permits
- Required for most public land camping
- National parks: Reserve through Recreation.gov
- State parks: Reserve through state park system
- Cost: $10-35 per night
- Book 1-6 months in advance for popular sites
- Tip: Some dispersed camping is free but may still require self-registration
3. Watercraft registration
- Required in some states for all kayaks
- Other states require registration only for motorized kayaks
- Cost: $10-50 annually
- Registration numbers must be displayed on kayak
- Tip: Check your state’s DNR website for specific requirements
4. Special-use permits
- Required for some wilderness areas and wildlife refuges
- Lottery system for popular rivers (Grand Canyon, etc.)
- Cost: $0-100 depending on location
- Apply months in advance
- Tip: Check managing agency website for specific waterway
5. Saltwater fishing permits
- Required in addition to freshwater license in many coastal states
- Federal registration required for some species
- Cost: $0-30 (often free if you have state license)
- Tip: Register online before trip
State-specific variations:
- Some states exempt kayaks from registration
- Reciprocal fishing licenses exist between some states
- Tribal lands may require separate permits
- Marine protected areas have special restrictions
Permit research timeline:
- 3-6 months before: Research lottery permits for popular destinations
- 1-3 months before: Reserve campsites
- 2-4 weeks before: Purchase fishing licenses
- 1 week before: Print all permits and confirmations
Consequences of fishing or camping without permits:
- Fishing without license: $100-500 fine
- Camping without permit: $50-300 fine
- Unregistered watercraft: $50-200 fine
- Repeat violations: Equipment confiscation, court appearance
Where to find permit information:
- State DNR or fish and wildlife agency websites
- Recreation.gov for federal lands
- Local ranger stations
- Paddling guidebooks for specific waterways
Learn about kayak registration requirements and watercraft registration rules in your state.
Common mistake: Assuming fishing license covers all permit needs. Most multi-day trips require 3-5 different permits or registrations.
Frequently Asked Questions
How long does it take to plan a multi-day kayak fishing trip?
Planning a multi-day kayak fishing trip takes 4-8 weeks for first-timers and 2-4 weeks for experienced paddlers. This includes researching locations, securing permits (which may require 1-3 months advance booking for popular sites), purchasing or organizing gear, planning routes, and arranging logistics like vehicle shuttles.
Can you kayak fish in the ocean for multiple days?
You can kayak fish in the ocean for multiple days, but it requires advanced skills, specialized sea kayaks, careful weather monitoring, and coastal camping permits. Ocean kayak fishing demands experience with tides, currents, and marine conditions that make it unsuitable for beginners. Most multi-day ocean trips stay within 1 mile of shore with established landing sites.
What’s the ideal distance to paddle per day on a multi-day fishing trip?
The ideal distance to paddle per day on a multi-day fishing trip is 8-12 miles for experienced paddlers and 5-8 miles for intermediate paddlers, allowing time for fishing, breaks, and camp setup. This assumes 4-6 hours of paddling at 2-3 mph with favorable conditions. Factor in wind, current, and fishing stops when planning daily mileage.
How do you transport a kayak loaded with camping gear?
Transport a kayak loaded with camping gear by removing all loose items and packing them inside your vehicle, then securing the empty kayak to roof racks or truck bed using cam straps. Never transport a fully loaded kayak on a vehicle, as the weight (200+ lbs) exceeds roof rack limits and gear will blow out during highway travel. Reload the kayak at the launch site.
What’s the best time of year for multi-day kayak fishing trips?
The best time of year for multi-day kayak fishing trips is late spring (May-June) and early fall (September-October) when temperatures are moderate (60-75°F), water levels are stable, and insect populations are lower. Summer offers longer days but brings heat, storms, and crowds. Avoid winter unless you have cold-water safety training and appropriate gear.
Do you need a GPS or is a map enough for navigation?
You need both a GPS device and waterproof paper maps for multi-day kayak fishing trips. GPS provides real-time location and route tracking but can fail due to dead batteries, water damage, or satellite issues. Paper maps serve as essential backup and provide broader geographic context. Carry a compass as a third navigation tool.
How do you deal with bathroom needs on multi-day kayak trips?
Deal with bathroom needs on multi-day kayak trips by using established pit toilets at campsites when available, or following Leave No Trace principles: dig catholes 6-8 inches deep at least 200 feet from water sources, pack out toilet paper in sealed bags, and use natural cover for privacy. Some paddlers carry portable toilet systems for sensitive ecosystems.
Can you bring a dog on a multi-day kayak fishing trip?
You can bring a dog on a multi-day kayak fishing trip if your kayak has sufficient capacity (add 30-80 lbs for dog plus gear), your dog is comfortable in boats, and you pack dog-specific supplies including PFD, food, water, and first aid. Tandem kayaks work best for dogs. Practice short trips first and check campsite pet policies.
What’s the minimum kayak length for multi-day fishing trips?
The minimum kayak length for multi-day fishing trips is 12 feet, which provides adequate storage capacity and tracking ability for loaded boats. Kayaks under 12 feet lack sufficient volume for camping gear and become unstable when heavily loaded. 14-foot kayaks offer better performance for extended trips with heavy loads.
How do you stay comfortable sleeping after a full day of paddling?
Stay comfortable sleeping after a full day of paddling by using a quality sleeping pad (inflatable pads offer best comfort-to-weight ratio), stretching before bed to prevent muscle stiffness, staying hydrated throughout the day, and choosing level campsites free of rocks and roots. Bring ibuprofen for muscle soreness and consider a small camp pillow for neck support.
What should you do if weather turns bad mid-trip?
If weather turns bad mid-trip, immediately paddle to the nearest safe landing point, set up emergency shelter away from water and tall trees, and wait out dangerous conditions rather than attempting to paddle through them. Use your communication device to update your emergency contact, conserve food and water, and be prepared to extend your trip by 1-2 days if necessary.
Is it better to paddle or pedal for multi-day kayak fishing?
Pedal kayaks are better for multi-day fishing trips covering 12+ miles daily because they reduce fatigue by 30-40% and allow hands-free fishing while moving. However, paddle kayaks are lighter (easier to transport), less expensive ($1,000-2,000 cheaper), and better for shallow water or portaging. Choose based on your typical daily distances and budget.
Conclusion
Planning a multi-day kayak fishing trip requires careful attention to gear selection, weight management, permit requirements, and safety protocols. Success depends on choosing the right kayak with adequate capacity, packing efficiently with ultralight camping equipment, securing necessary permits well in advance, and monitoring weather conditions closely.
Start your journey by taking shorter overnight trips to build skills and test gear before committing to extended expeditions. Invest in a stable fishing kayak with 400+ pound capacity, quality kayak gear, and proper safety equipment including PFD and communication devices.
Take these next steps:
- Assess your skill level honestly and choose trip difficulty accordingly
- Research destinations and secure permits 1-3 months in advance
- Test-pack your kayak with all gear before departure
- Complete a shakedown trip close to home to identify issues
- File a detailed float plan with emergency contact
- Monitor weather up until launch day and be willing to postpone
The rewards of multi-day kayak fishing trips—remote fishing spots, pristine campsites, and the satisfaction of self-sufficient adventure—make the planning effort worthwhile. With proper preparation and respect for water conditions, these expeditions offer some of the most memorable fishing experiences available.
Remember that every expert kayak angler started as a beginner. Build your skills progressively, learn from each trip, and prioritize safety over ambition. The fish and the adventure will still be there when you’re fully prepared.