Quick Answer: Loading a kayak on a roof rack by yourself requires the right technique and often a simple assist tool. Position your vehicle near the kayak, lift one end onto the rear crossbar using a foam pad or blanket to protect your bumper, then slide and pivot the kayak forward onto both bars. Secure with cam-buckle straps and add bow and stern tie-downs for safety.
Key Takeaways
- The slide-and-pivot method is the easiest solo loading technique for most kayakers and works with vehicles of any height
- Foam pads or blankets on your rear bumper protect your car and create a low-friction surface for sliding the kayak
- Kayak loader assist systems cost between $50 and $300 and reduce lifting effort by 60-80% for heavier boats
- J-cradle racks are easier for solo loading than saddle racks because you only lift half the kayak’s width
- Kayaks over 60 pounds typically require either a mechanical assist device or alternative loading methods for safe solo handling
- Proper strap placement across the hull at both crossbars, plus bow and stern lines, prevents the kayak from sliding during transport
- Short vehicles and SUVs actually make solo loading easier because the roof height is lower and more accessible
- Common mistakes like lifting from the middle, skipping bumper protection, or over-tightening straps cause vehicle damage and back injuries
What Is the Easiest Way to Load a Kayak on a Roof Rack Alone?
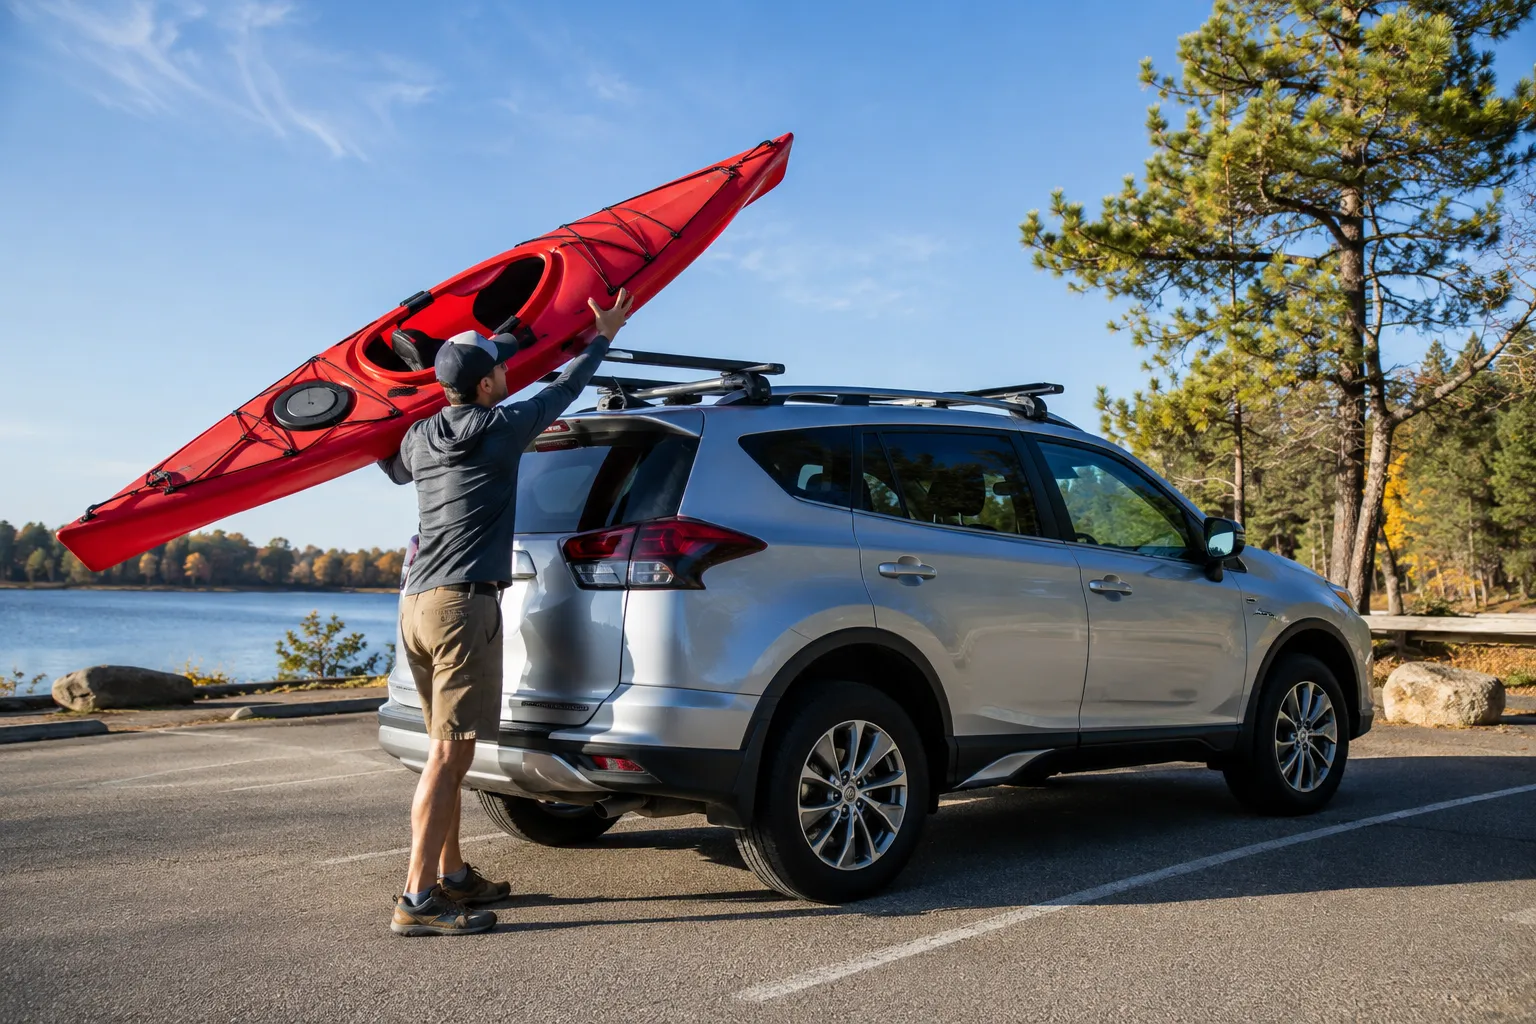
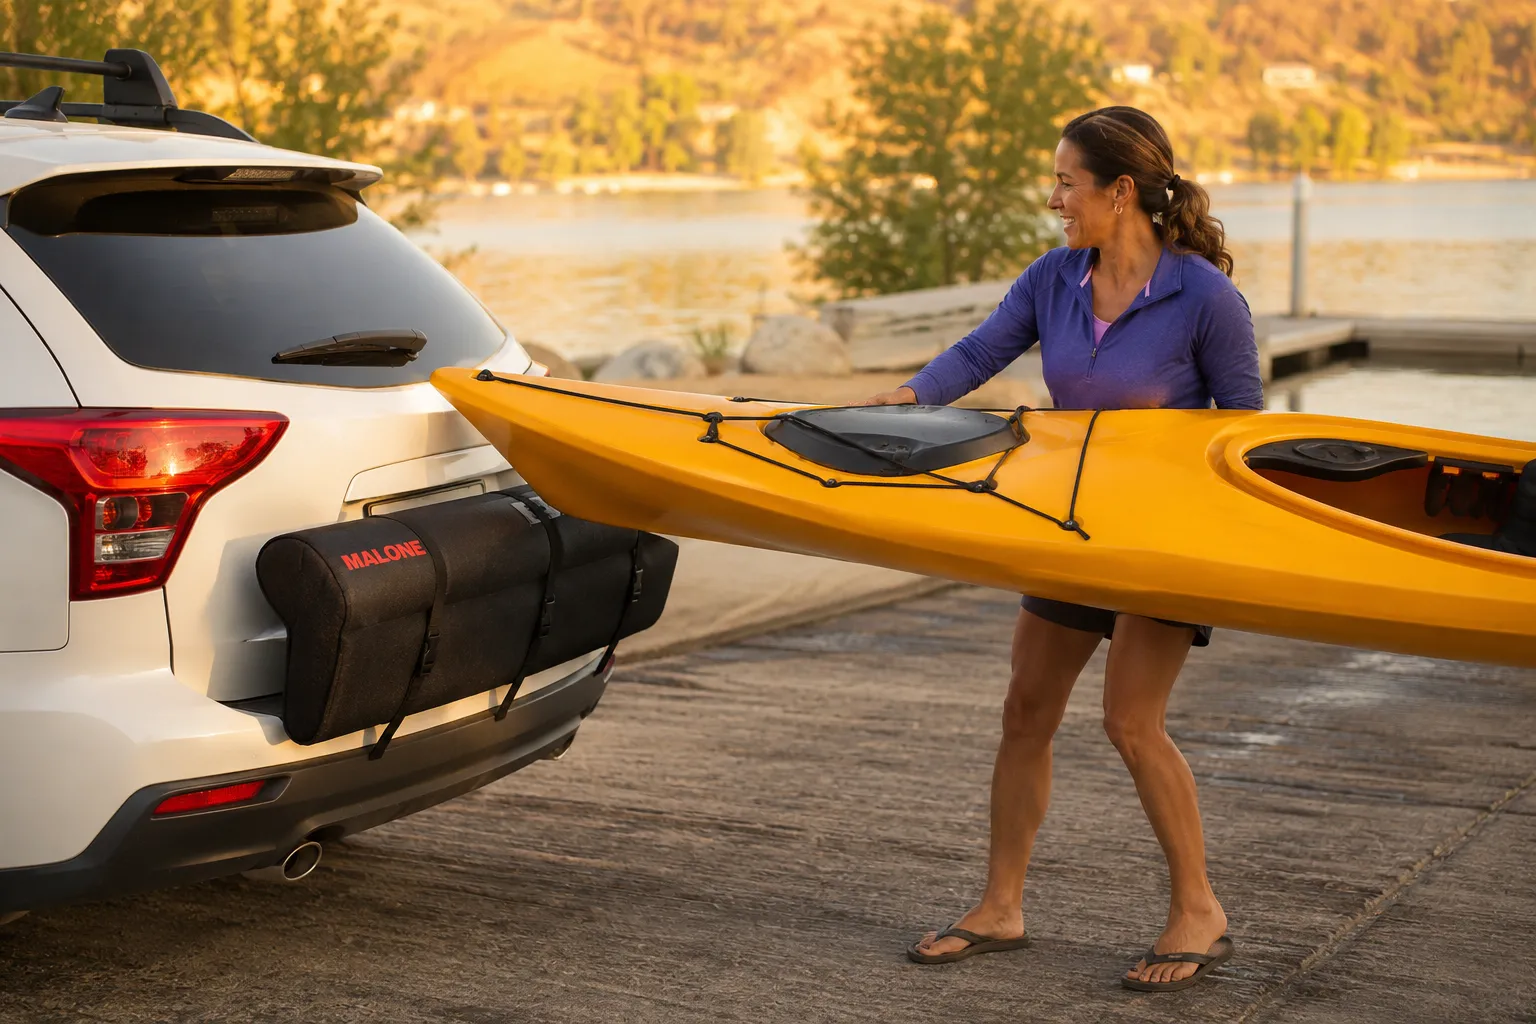
The slide-and-pivot method is the easiest way to load a kayak on a roof rack by yourself because it eliminates the need to lift the full weight overhead. You lift only one end of the kayak at a time, using your vehicle’s rear bumper as a staging point.
Here’s the step-by-step process:
- Park your vehicle so the rear faces the kayak with about 2-3 feet of clearance
- Place a foam pad or folded blanket on your rear bumper to protect the paint
- Lift the bow (front) of the kayak onto the foam pad, keeping the stern on the ground
- Walk to the stern and lift it while pushing the kayak forward
- Slide the kayak along the roof until the cockpit reaches the front crossbar
- Center the kayak on both crossbars and adjust for even overhang
- Secure with straps at both crossbars, then add bow and stern tie-downs
This method works for kayaks up to about 55-60 pounds for most adults. The key advantage is that you’re never lifting more than half the kayak’s weight at once, and gravity does much of the work as you slide the boat forward.
Choose this method if: You have a recreational or light touring kayak, your vehicle has standard roof height (not a lifted truck), and you can comfortably lift 30-40 pounds to shoulder height.
Common mistake: Trying to lift from the middle of the kayak instead of using the end-lift technique. This forces you to handle the full weight and increases injury risk.
How Much Does a Kayak Loader Assist System Cost?
Kayak loader assist systems range from $50 for basic foam rollers to $300 for premium hydraulic or telescoping models. Most recreational kayakers find that mid-range systems in the $100-150 range provide the best balance of functionality and value.
Here’s what you get at each price point:
Budget options ($50-80):
- Foam roller pads that attach to crossbars
- Basic load-assist straps with pulleys
- Temporary suction-cup rollers
- Best for kayaks under 45 pounds
Mid-range systems ($100-180):
- Permanent roller bars that mount to crossbars
- Telescoping load bars with pivoting arms
- Integrated strap systems
- Handle kayaks up to 70 pounds with ease
Premium systems ($200-300):
- Hydraulic-assist lifters
- Motorized hoist systems
- Heavy-duty commercial-grade rollers
- Designed for kayaks over 80 pounds or multiple boats
The Thule Hullavator and Yakima ShowBoat are popular premium options that reduce lifting effort by about 80%, but they cost $400-600. For most solo paddlers, a $120 roller system like the Malone SeaWing provides enough assistance without breaking the budget.
Decision rule: If your kayak weighs more than 50 pounds or you load it more than twice per month, a loader assist system pays for itself in reduced strain and faster setup time.
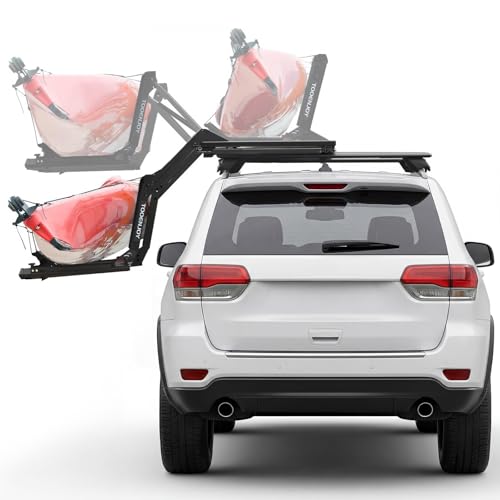
Important Notice: Verify Crossbar Compatibility Before Purchase! 1. Requires extended and adjustable crossbars. Your crossbar distance should be adjustable to approximately 29.76 inches to use this lift rack. 2. If your existing crossbars are fixed/non-extend, purchase our Accessory Adapter together. This accessory solves compatibility issues for many fixed crossbar setups

Ultimate Versatility for All Your Gear : This universal car roof rack is the perfect solution for transporting kayaks, surfboards, SUPs, canoes, snowboards, and more; Designed to fit SUVs, sedans, hatchbacks, and 2-door or 4-door cars;with or without side rails;it’s your go-to for beach trips, mountain adventures, or lake outings; Convenience and reliability guaranteed

Important Notice: Verify Crossbar Compatibility Before Purchase! 1. Requires extended and adjustable crossbars. Your crossbar distance should be adjustable to approximately 29.76 inches to use this lift rack. 2. If your existing crossbars are fixed/non-extend, purchase our Accessory Adapter together. This accessory solves compatibility issues for many fixed crossbar setups
Can One Person Lift a Kayak Onto an SUV Roof?
Yes, one person can lift a kayak onto an SUV roof, and SUVs are actually easier for solo loading than sedans because the lower roof height reduces the lifting distance. Most adults can solo-load kayaks up to 50-55 pounds onto an SUV using the slide-and-pivot technique.
The average SUV roof sits 5-6 feet off the ground, compared to 4.5-5 feet for a sedan and 6-7 feet for a full-size truck. This 12-18 inch difference significantly impacts how much effort solo loading requires.
Factors that determine if you can solo-load onto your SUV:
- Your kayak’s weight: Under 45 pounds is easy for most people; 45-60 pounds requires good technique; over 60 pounds typically needs assistance
- Your height and strength: Taller individuals (5’8″ and above) have an easier time with standard SUV heights
- Roof rack type: J-cradles and roller systems make solo loading much easier than flat saddles
- Your SUV’s height: Compact crossovers (Honda CR-V, Toyota RAV4) are easier than full-size SUVs (Chevy Tahoe, Ford Expedition)
Pro tip: If you struggle with the standard method, back your SUV up to a curb or small hill so the kayak starts at a higher elevation. This 6-8 inch boost can make the difference between manageable and impossible.
Edge case: If you have a lifted SUV with aftermarket suspension, the additional 2-4 inches of height may require a step stool or loader assist system even for lighter kayaks.
J-Rack vs Saddle Rack for Solo Kayak Loading
J-cradle racks are significantly easier for solo kayak loading than saddle racks because you only need to lift and position half the kayak’s width. With a J-rack, the kayak rests on its side, reducing the overhead clearance needed and making it easier to secure straps from one side of the vehicle.
J-Cradle advantages for solo loading:
- Kayak sits at an angle, so you lift only the lower edge to roof height
- Easier to reach across and secure straps without walking around the vehicle
- Takes up less roof space, leaving room for a second kayak
- Better for taller kayaks (sit-on-tops, fishing kayaks with high seats)
Saddle rack advantages:
- More stable for very long kayaks (14+ feet)
- Easier to center the kayak precisely
- Better aerodynamics and slightly quieter at highway speeds
- Simpler to load if you have a helper
For solo loading specifically, J-cradles win because the angled position means you’re sliding the kayak into a cradle rather than lifting it completely overhead and then lowering it onto saddles. The difference becomes more pronounced with heavier kayaks over 50 pounds.
Choose J-cradles if: You load solo more than 75% of the time, your kayak weighs over 45 pounds, or you have a taller vehicle (SUV, truck).
Choose saddles if: You frequently paddle with a partner who helps load, you have a very long touring kayak, or you prioritize fuel efficiency over loading convenience.

KAYAK CAR TOP CARRIER A simple, A practical solution to carrying your kayak solution to carrying your kayak QUANTITY: 2 PAIRS.

Durability & Strong Support: PIRIPARA Kayak roof rack are made of sturdy and high quality alloy steel. Come with 2 Pairs(4pcs) kayak rack, can hold 2 kayaks. Total load capcity up to 150 lbs.

【KAYAK CAR TOP CARRIER 】A simple, low-cost solution to carrying your kayak ITEM CONDITION: BRAND NEW.
Do I Need a Kayak Loader If I Have a Short Car?
You probably don’t need a kayak loader if you have a short car (sedan or compact hatchback) because the lower roof height makes the slide-and-pivot method manageable for most kayaks under 55 pounds. The 4.5-5 foot roof height of compact cars is actually ideal for solo loading without assistance.
Short cars offer three advantages for solo kayak loading:
- Lower lift height: You’re lifting to chest or shoulder level instead of overhead
- Better leverage: You can use your body weight more effectively when pushing the kayak forward
- Easier strap access: You can reach across the roof to secure straps without a step stool
When you DO need a loader on a short car:
- Your kayak weighs more than 60 pounds (heavy fishing kayak, tandem kayak)
- You have mobility limitations or back issues
- You load and unload multiple times per day (fishing guides, instructors)
- Your kayak is exceptionally wide (over 34 inches) and awkward to maneuver
Alternative for short cars: Many paddlers with sedans and hatchbacks use foam pool noodles or pipe insulation on their rear crossbar as a makeshift roller. This $5 solution provides 70% of the benefit of a $100 roller system.
Real-world example: A 12-foot recreational kayak weighing 48 pounds loads easily onto a Honda Civic using just a towel on the bumper and the slide method. The same kayak on a Ford F-250 with a 6-foot roof height requires either a step stool or a loader assist bar.
How to Load a Heavy Fishing Kayak by Yourself
Loading a heavy fishing kayak by yourself requires either a mechanical assist system or a modified technique that breaks the lift into smaller stages. Fishing kayaks typically weigh 65-90 pounds due to their wider hulls, elevated seats, and built-in storage, making them too heavy for the standard slide-and-pivot method for most people.
Three proven methods for heavy fishing kayaks:
Method 1: Roller-bar system ($100-180)
- Mount permanent rollers on your rear crossbar
- Lift the bow onto the rollers (lifting only 30-35 pounds)
- Push the kayak forward as the rollers spin
- Guide it onto the front crossbar
- Works for kayaks up to 85 pounds
Method 2: Telescoping load bar ($150-250)
- Attach a temporary bar that extends from your crossbars to the ground
- Rest the kayak on the bar at a 45-degree angle
- Lift the bar, which pivots the kayak onto the roof
- Remove the bar and secure the kayak
- Best for kayaks 70-100 pounds
Method 3: Two-stage lift with mid-point rest
- Lift the bow onto the rear crossbar
- Secure it temporarily with a strap
- Walk around and lift the stern onto the rear crossbar
- Push the entire kayak forward onto both bars
- Takes longer but requires less strength per lift
Safety note: Never attempt to deadlift a kayak over 70 pounds directly onto your roof. The awkward shape and overhead position create significant injury risk even if you can lift that weight in a gym setting.
Choose Method 1 if: You load frequently and want a permanent solution that works every time.
Choose Method 2 if: You load occasionally and want a system that stores easily when not in use.
Choose Method 3 if: You want to avoid buying equipment but have the time for a slower loading process.
What to Do If Your Kayak Is Too Heavy to Lift Alone
If your kayak is too heavy to lift alone, you have four practical options: invest in a mechanical assist system, use a kayak cart to position the boat, recruit a loading partner, or switch to a lighter kayak for solo trips. Kayaks over 75-80 pounds exceed safe solo-lifting capacity for most adults.
Immediate solutions:
Mechanical assist (best long-term solution):
- Hydraulic lifters like the Thule Hullavator reduce effort by 80%
- Cost: $400-600
- Installation: 30-60 minutes, permanent mount
- Allows solo loading of kayaks up to 120 pounds
Kayak cart positioning:
- Use a wheeled cart to roll the kayak alongside your vehicle
- Position the cart so the kayak is already at bumper height
- Reduces the initial lift distance by 2-3 feet
- Cost: $60-150 for a quality cart
Loading partner:
- Find a paddling buddy, family member, or marina staff to assist
- Two people can safely load a 100-pound kayak in under 2 minutes
- Free, but requires coordination
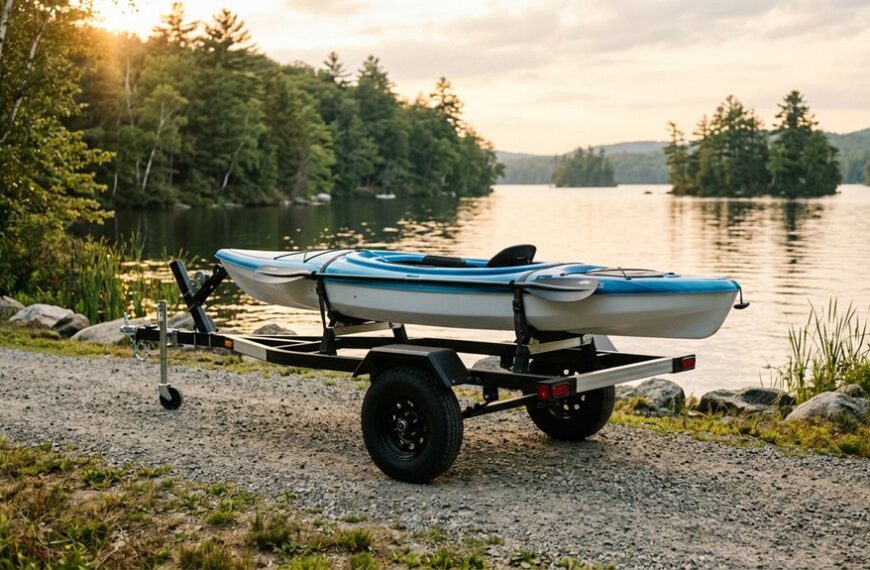
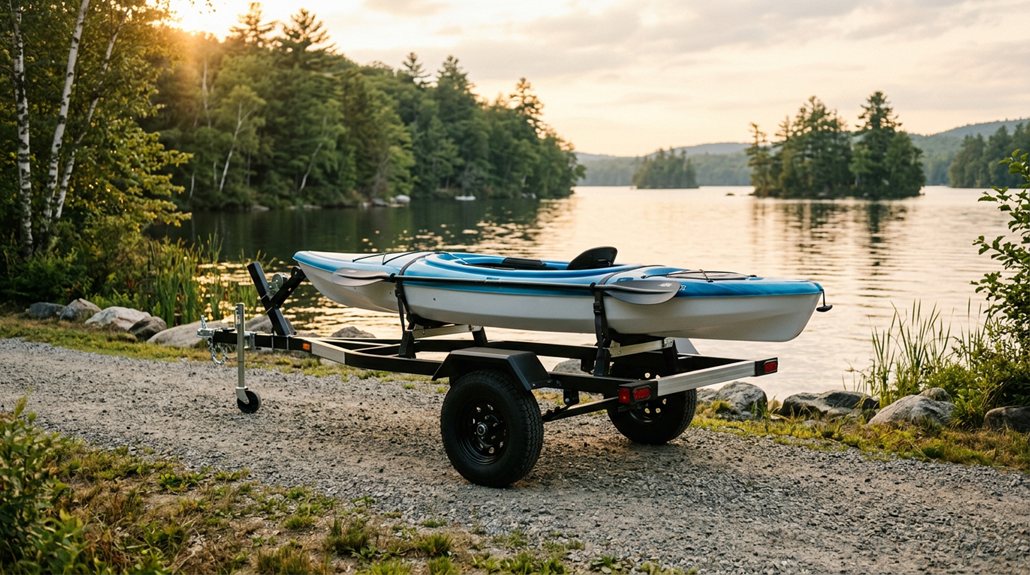
Trailer or truck bed:
- Eliminates roof loading entirely
- Small kayak trailers cost $300-800
- Truck bed loading is ground-level for most kayaks
When to consider a lighter kayak: If you paddle solo more than 80% of the time and your current kayak weighs over 80 pounds, switching to a lighter model (55-65 pounds) may be more cost-effective than buying a $500 loader system. Modern fishing kayaks in the 60-70 pound range offer most of the features of heavier models.
Edge case: If you have a medical condition, previous back injury, or are over 60, consider 60 pounds your maximum safe solo-loading weight regardless of technique or equipment.
Kayak Loading Mistakes That Damage Your Car
The most common kayak loading mistakes that damage vehicles are dragging the kayak across the roof without padding, over-tightening straps that dent the hull and roof, and skipping bumper protection during the initial lift. These errors cause scratches, dents, and paint damage that cost $200-800 to repair.
Top 5 damaging mistakes and how to avoid them:
1. No bumper protection
- Damage caused: Deep scratches in bumper paint, scuffed plastic trim
- Prevention: Always use a foam pad, towel, or blanket on the bumper before resting the kayak
- Cost to fix: $150-400 for bumper repaint
2. Over-tightening straps
- Damage caused: Crushed kayak hull, dented roof panels, bent crossbars
- Prevention: Tighten straps until snug with no movement, but don’t crank them down hard
- Rule of thumb: You should be able to slide two fingers under the strap
3. Dragging the kayak
- Damage caused: Scratched roof paint, damaged roof rack pads
- Prevention: Always lift and place the kayak; never slide it across bare roof or rack
- Cost to fix: $300-600 for roof repaint
4. Missing bow and stern tie-downs
- Damage caused: Kayak shifts forward under braking, damaging windshield or hood
- Prevention: Always use front and rear tie-down straps in addition to crossbar straps
- Safety note: This is also a major safety hazard at highway speeds
5. Loading on a dirty roof
- Damage caused: Dirt and sand act as sandpaper, creating fine scratches
- Prevention: Wipe down the roof and kayak hull before loading
- Takes: 30 seconds with a microfiber cloth
Insurance note: Most auto insurance policies don’t cover damage caused by improperly secured cargo, so prevention is critical.
Best Roof Rack Accessories for Loading a Kayak Solo
The best roof rack accessories for solo kayak loading are load-assist rollers, cam-buckle straps with built-in bow/stern lines, and foam kayak blocks for vehicles without permanent racks. These three accessories reduce loading time by 40-50% and significantly decrease the physical effort required.
Essential accessories ranked by impact:
1. Load-assist rollers ($80-150)
- Mount to rear crossbar
- Reduce lifting effort by 60%
- Most impactful upgrade for solo loading
- Top picks: Malone SeaWing, Thule Roller
2. Cam-buckle straps with integrated tie-downs ($25-40)
- Faster than ratchet straps
- Less likely to over-tighten
- Built-in bow/stern lines save time
- Look for: 12-15 foot length, 1-inch width
3. Foam kayak blocks ($30-50)
- Alternative to permanent racks
- Protect roof and kayak
- Work on any vehicle with rain gutters or bare roof
- Best for: Occasional paddlers, rental vehicles
4. Bow and stern tie-down kit ($15-25)
- Prevents forward/backward kayak movement
- Required for highway speeds over 55 mph
- Attaches to tow hooks or frame points
5. Step stool or truck bed step ($20-60)
- Provides stable platform for reaching roof
- Especially helpful for SUVs and trucks
- Folds flat for storage
6. Protective padding ($10-30)
- Foam bumper guard
- Crossbar pad covers
- Prevents scratches during loading
Budget priority: If you can only buy one accessory, choose load-assist rollers. They provide the biggest improvement in solo loading ease and work with any strap system.
Premium setup: Rollers + cam-buckle straps + bow/stern kit = $120-200 total, reduces loading time from 8-10 minutes to 3-4 minutes.

⛵【Why Slight Shaking】Due different car rear windows have different radians, so this kayak roller is specially designed for the slight shaking between the metal tube that fits inside the suction device to make the suction cup better fit the angle of the glass automatically therefore to achieve the best suction effect

Reason for slight wobble: The slight wobble between the metal tubes inside the suction cup unit is deliberately designed to accommodate the curvature of different rear window panes. In this way, the suction cups automatically adjust to the angle of the glass to ensure optimal suction and fit.

⛵ SAFETY:Both sides are equipped with rollers, which can effectively prevent the kayak from drifting and causing danger during installation.
Is Loading a Kayak Alone Safe for Older Adults?
Loading a kayak alone is safe for older adults if they use proper technique, choose an appropriately weighted kayak (under 50 pounds), and consider a mechanical assist system for heavier boats. The key factors are maintaining good form to protect the back and using equipment that reduces overhead lifting.
Safety considerations for older paddlers:
Weight limits by age and fitness:
- Active adults 60-70: Kayaks up to 50 pounds with good technique
- Adults 70+: Kayaks up to 40 pounds, or any weight with mechanical assist
- Those with previous injuries: Consult a doctor, consider 35-pound limit
Recommended modifications:
- Use a loader assist system even for lighter kayaks (reduces strain)
- Choose J-cradles over saddles (easier positioning)
- Park on a slight incline so the kayak starts higher
- Take breaks between lifting the bow and stern
- Use a step stool for better leverage and stability
Alternative approaches:
- Inflatable kayaks (15-30 pounds, no roof loading needed)
- Kayak cart to wheel the boat to the water (eliminates roof loading)
- Folding kayaks (35-45 pounds, easier to handle)
- Join a paddling club where members help each other load
Medical red flags: If you have osteoporosis, recent surgery, chronic back pain, or balance issues, consult your doctor before attempting solo kayak loading. A $200 mechanical assist system is cheaper than a back injury.
Real-world data: Many paddlers in their 70s and 80s continue to kayak solo by switching to lighter boats (under 40 pounds) and using roller systems. The activity itself is low-impact and excellent for fitness, so the loading challenge shouldn’t prevent participation.
Why Does My Kayak Slide Off When Loading by Myself?
Your kayak slides off during solo loading because of insufficient friction between the kayak hull and the roof rack, improper weight distribution during the lift, or attempting to load in windy conditions without temporary securing. The most common cause is pushing the kayak too far forward before it’s centered on both crossbars.
Five reasons kayaks slide and their fixes:
1. Slippery hull material
- Problem: Polyethylene and fiberglass hulls are naturally slick
- Solution: Place rubber shelf liner or foam pads on crossbars before loading
- Cost: $5-10 for shelf liner at any hardware store
2. Pushing too hard during the slide phase
- Problem: Momentum carries the kayak past the front crossbar
- Solution: Push in short bursts, checking position every 12 inches
- Technique: Stop when the cockpit reaches the front bar
3. Crossbars too far apart
- Problem: Kayak balances on only one bar during loading
- Solution: Position crossbars 24-30 inches apart for most kayaks
- Check: Kayak should rest on both bars with at least 6 inches of contact
4. Wind catching the kayak
- Problem: Crosswinds push the kayak sideways during positioning
- Solution: Load with the vehicle perpendicular to the wind, or use a temporary strap on the rear bar before pushing forward
- Wind limit: Avoid loading solo in winds over 15 mph
5. Wet or dirty surfaces
- Problem: Water or sand reduces friction dramatically
- Solution: Dry both the kayak hull and crossbar pads before loading
- Takes: 30 seconds with a towel
Pro tip: Once you get the bow onto the rear crossbar, loop a strap around it loosely before walking to the stern. If the kayak starts to slide, the strap catches it. Remove the strap once the kayak is centered on both bars.
How to Secure Kayak Straps When You Can’t Reach Both Sides
When you can’t reach both sides of your vehicle to secure kayak straps, use the throw-and-catch method: toss the strap over the kayak and roof, walk around to catch it, then return to your starting side to tighten. Alternatively, cam-buckle straps with pre-attached loops let you secure one end before loading the kayak.
Step-by-step throw-and-catch technique:
- Stand on the driver’s side (or whichever side is easier to access)
- Drape the strap over the kayak so the buckle end hangs down your side
- Throw the loose end over the kayak and roof to the passenger side
- Walk around and pull the strap through the crossbar or rack
- Return to your starting side and thread the strap through the buckle
- Tighten until snug with no kayak movement
- Repeat for the second crossbar
Alternative methods:
Pre-attached loop straps:
- Permanently attach one end of each strap to the crossbar
- Load the kayak
- Simply grab the free end and buckle it
- Cost: Same as regular straps ($20-35)
Magnetic strap holders:
- Small magnets hold the loose strap end on the roof
- Prevents the strap from falling to the ground
- Walk around and grab it easily
- Cost: $10-15 for a set of 4
Reach extender tool:
- Telescoping pole with a hook
- Grab the strap from the opposite side without walking around
- Useful for people with mobility limitations
- Cost: $15-25
For very tall vehicles (lifted trucks, vans):
- Use a step stool on both sides
- Consider a permanent strap system that stays attached to the rack
- Some paddlers drill small holes in their crossbars to permanently anchor one end of each strap
Common mistake: Trying to tighten the strap from the side where you can’t see the buckle. Always tighten from the side where you can see what you’re doing to avoid over-tightening or improper threading.
Alternative Methods to Lift a Kayak Without a Roof Loader
The best alternative methods to lift a kayak without a roof loader are the blanket-slide technique, foam pool noodle rollers, the two-person lift, and using a kayak cart for positioning. These methods cost under $20 and work for kayaks up to 60 pounds.
Four proven alternatives:
1. Blanket-slide technique
- Place a thick blanket or moving pad on your roof
- Lift the kayak bow onto the rear crossbar
- Slide the kayak forward on the low-friction blanket
- Center it on both crossbars
- Remove the blanket before strapping down
- Cost: $0 (use existing blanket)
- Best for: Smooth-hulled kayaks under 55 pounds
2. Pool noodle rollers
- Cut foam pool noodles to crossbar width
- Secure them to the rear crossbar with zip ties or strap
- Rest the kayak on the noodles and roll it forward
- Remove noodles before final strapping
- Cost: $5-8 for noodles
- Best for: Recreational kayaks, frequent loading
3. Kayak cart positioning
- Wheel the kayak on a cart next to your vehicle
- Position the cart so the kayak is at bumper height
- Lift from the cart directly onto the roof (shorter distance)
- Cost: $60-150 for cart (also useful for beach launches)
- Best for: Heavy kayaks, long walks to water
4. Curb or hill advantage
- Back your vehicle up to a curb, loading dock, or hillside
- Position the kayak on the elevated surface
- Lift onto the roof from the higher starting point
- Cost: $0
- Best for: Locations with terrain variation
DIY roller system:
- PVC pipe (3-4 inch diameter) cut to crossbar width
- Attach with reusable zip ties or bungee cords
- Creates a rolling surface for sliding the kayak
- Cost: $10-15 at hardware store
- Durability: Lasts 2-3 seasons with regular use
Comparison: Pool noodles provide the best value for occasional paddlers, while a kayak cart offers the most versatility if you also need to transport the kayak across parking lots or beaches.
What Weight Kayak Is Too Heavy to Load Solo?
A kayak over 70-75 pounds is generally too heavy to load solo onto a roof rack without mechanical assistance for most adults. This threshold accounts for the awkward shape, overhead lifting position, and safety margin to prevent injury. Individual limits vary based on height, strength, and technique.
Weight guidelines by loading method:
Without any assist equipment:
- Average adult: 50-55 pounds maximum
- Taller/stronger individuals: 60-65 pounds maximum
- Older adults or those with limitations: 40-45 pounds maximum
With basic assist (foam rollers, blanket):
- Average adult: 60-70 pounds
- Taller/stronger individuals: 75-80 pounds
- Older adults: 50-55 pounds
With mechanical assist (loader bars, hydraulic systems):
- Any adult: 100-120 pounds
- Upper limit based on equipment rating, not human strength
Factors that lower your safe weight limit:
- Vehicle roof height over 6 feet
- Previous back or shoulder injuries
- Loading frequency (daily loading requires lower weights)
- Age over 65
- Wet or windy conditions
Factors that raise your safe weight limit:
- Experience with proper technique
- Lower vehicle (sedan vs. SUV)
- J-cradle racks (easier than saddles)
- Assistance from a second person
Real-world examples:
- Recreational kayak (10-12 feet): 35-50 pounds ✓ Solo-friendly
- Light touring kayak (12-14 feet): 45-55 pounds ✓ Solo-friendly with technique
- Fishing kayak (11-13 feet): 65-85 pounds ⚠️ Requires assist equipment
- Tandem kayak (14-18 feet): 75-100 pounds ❌ Not recommended solo without mechanical assist
Decision rule: If you struggle to lift your kayak to chest height from the ground, it’s too heavy to safely load solo onto a roof rack. Consider a lighter kayak, mechanical assist, or alternative transport method (trailer, truck bed).
FAQ
How long does it take to load a kayak by yourself?
Loading a kayak by yourself takes 3-5 minutes with practice using the slide-and-pivot method, or 1-2 minutes with a mechanical assist system. First-time solo loaders should expect 8-10 minutes as they learn proper technique and strap placement.
Do I need to remove my kayak from the roof rack between trips?
You should remove your kayak from the roof rack between trips to prevent UV damage to the hull, reduce wind resistance and fuel consumption, and avoid theft. Leaving a kayak on the rack for more than a week can cause hull deformation from pressure points.
Can I load a kayak on a car without a roof rack?
Yes, you can load a kayak on a car without a roof rack using foam blocks that sit directly on the roof, protected by towels or blankets. This method works for short trips under 50 miles at speeds below 55 mph, but permanent racks are safer and more secure for regular use.
What’s the difference between cam-buckle and ratchet straps for kayaks?
Cam-buckle straps are easier to use and less likely to over-tighten, making them better for solo kayak loading. Ratchet straps provide more tension but can crush kayak hulls if over-tightened, and they’re harder to operate single-handedly.
Should the kayak be upside down or right-side up on the roof?
Most kayaks should be transported upside down (hull facing up) on saddle racks to prevent hull deformation and reduce wind resistance. J-cradle racks hold kayaks on their side, which is also acceptable and often easier for solo loading.
How far can a kayak hang over the front or back of my car?
A kayak can safely overhang your vehicle by up to 3-4 feet in front or back, but anything over 12 inches requires a red flag or marker in most states. Aim for even overhang on both ends, and always use bow and stern tie-downs for overhangs exceeding 2 feet.
Do I need bow and stern tie-downs in addition to crossbar straps?
Yes, you need bow and stern tie-downs in addition to crossbar straps for any highway driving or trips over 10 miles. Crossbar straps prevent side-to-side and rotational movement, while bow and stern lines prevent forward and backward sliding during braking or acceleration.
Can I drive through a car wash with a kayak on the roof?
No, never drive through a car wash with a kayak on the roof. The brushes and high-pressure water can damage the kayak, loosen straps, or even rip the kayak off the rack. Always remove the kayak before entering any automated car wash.
How tight should kayak straps be?
Kayak straps should be tight enough that the kayak doesn’t move when you push it firmly, but not so tight that they deform the hull. You should be able to slide two fingers under the strap with moderate resistance. Over-tightening causes more problems than under-tightening.
What’s the best way to practice loading a kayak alone?
Practice loading a kayak alone in your driveway or garage before your first trip, with someone nearby in case you need help. Start with the kayak on the ground parallel to your vehicle, and work through each step slowly. After 3-4 practice sessions, the process becomes natural.
Can I load a kayak in the rain?
You can load a kayak in the rain, but wet surfaces reduce friction and make the kayak more likely to slide. Dry the roof rack pads and the kayak hull contact points with a towel before loading, and use extra caution when pushing the kayak forward onto the crossbars.
Do inflatable kayaks need roof racks?
Inflatable kayaks don’t need roof racks because they pack into a bag weighing 15-35 pounds that fits inside your vehicle. This makes them ideal for solo paddlers who want to avoid roof loading entirely, though they sacrifice some performance compared to hard-shell kayaks.
Conclusion
Loading a kayak on a roof rack by yourself is a manageable skill that becomes routine with the right technique and equipment. The slide-and-pivot method works for most recreational kayaks under 55 pounds, while heavier fishing kayaks benefit from load-assist rollers or mechanical systems. Protecting your vehicle with foam pads, using proper strap tension, and adding bow and stern tie-downs ensures safe transport every time.
Your next steps:
- Measure your kayak’s weight to determine if you need assist equipment
- Practice the slide-and-pivot technique in your driveway before your first solo trip
- Invest in quality cam-buckle straps and bow/stern tie-downs ($40-60 total)
- Consider load-assist rollers if your kayak weighs over 50 pounds or you load frequently
- Check your strap tension and tie-downs before every trip, especially for the first few miles
The freedom to load your kayak solo opens up spontaneous paddling opportunities and eliminates the need to coordinate schedules with others. Whether you’re heading out for a quick evening paddle or a full day of fishing, mastering solo loading makes kayaking more accessible and enjoyable. Start with lighter boats and proper technique, and you’ll be loading confidently within a few practice sessions.