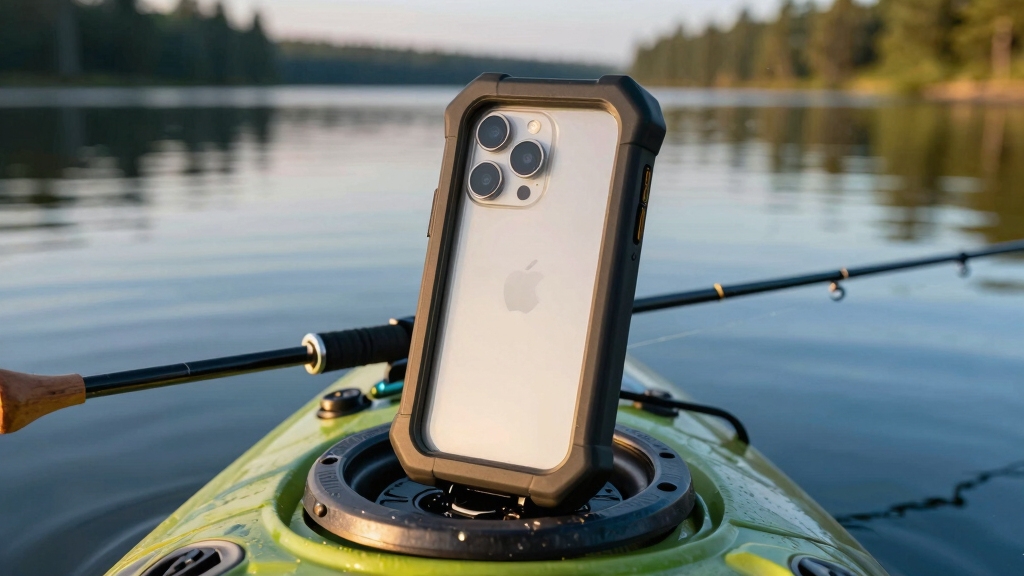
A dropped phone in open water can sink in under three seconds, and even “water-resistant” smartphones rarely survive full submersion beyond their rated depth. Keeping your phone safe while kayak fishing requires a combination of waterproof protection, secure mounting or tethering, and backup plans for when things go wrong.
Key Takeaways
- Waterproof cases rated IPX8 or higher provide the best protection for phones during kayak fishing, while dry bags offer backup storage but limit phone functionality
- Floating phone cases and lanyards are essential safety features that prevent your phone from sinking if it goes overboard
- Quality waterproof pouches cost $10-$40, while hard cases with full protection range from $40-$100
- Phone mounts designed for marine use keep your device accessible and secure, reducing the risk of accidental drops
- Rice doesn’t work for water-damaged phones; immediate power-off and silica gel desiccant offer better recovery chances
- Ziplock bags provide minimal emergency protection but aren’t reliable for active kayak fishing conditions
- Test your waterproof case before every trip by sealing it with a tissue inside and submerging it in a sink
What Is the Best Waterproof Phone Case for Kayak Fishing?
The best waterproof phone case for kayak fishing is one rated IPX8 (submersible beyond 1 meter) that also floats, allows touchscreen use, and includes a secure attachment point. Hard cases like OtterBox Defender Series or Lifeproof FRĒ offer maximum protection with full phone functionality, while soft pouch-style cases like Aqua Quest or JOTO provide budget-friendly waterproofing with touchscreen access through clear film.
Hard waterproof cases create a sealed environment around your phone with gaskets and screw-down or snap-lock closures. They typically allow full camera use, speaker function, and charging port access while maintaining waterproof integrity. Choose a hard case if you frequently use your phone for navigation, fish finders, or photography during your trips.
Soft waterproof pouches use heat-sealed seams and roll-top or zip-lock closures. They’re lighter, more affordable, and can accommodate phones with existing cases still on. The trade-off is reduced audio quality and sometimes limited camera clarity through the plastic window.
Key features to look for:
- IPX8 rating minimum (submersible to 2+ meters)
- Built-in flotation or bright colors for visibility
- Lanyard attachment point that won’t tear under stress
- Clear front and back for camera use
- Touchscreen sensitivity through the case material
- Easy one-handed opening when you need quick access
For kayak anglers who fish in ocean conditions or rough water, hard cases provide better impact protection when your phone gets knocked around. For calm river fishing, a quality pouch often suffices and costs half as much.

IPX8 Waterproof & Floating Protection:Certified IPX8 waterproof phone pouch protects your device from water, splashes and moisture. Built-in floating padding keeps your phone safely on the water surface, preventing it from sinking during swimming, boating or kayaking

IPX8 Certified Waterproof Phone Pouch: This IPX8-certified floating waterproof phone pouch is expertly designed for outdoor activities, protects devices up to 30m (100ft) underwater. Suitable for beach trips, swimming, kayaking, snorkeling, boating, rafting, surfing, skiing, hiking, and to store your cash and cards. Advanced triple-lock technology shields against water, dust, and sand. It also offers impact resistance, making it an essential accessory for travel, vacations and adventures
![PEDVSTY Large Waterproof Phone Pouch Floating, [Double Seals], Blue](https://m.media-amazon.com/images/I/410fP-+XoQL._SL500_.jpg)
[LARGE CAPACITY SPACE & FIT MORE] The large capacity waterproof phone pouch features a bottom triangle design to expand the space, 6" wider opening, makes it easier to put in/out. With 2 pockets, main pocket for all small items such as wallet, card, sunglasses, sunscreen, lipstick, keys, powers, headphones, small fan and other valuables; front pocket for all phone sizes such as iPhone 17 16 15 14 13 Pro Max Plus, Galaxy S26 S25 S24 S23 Ultra Google Pixel, etc
Dry Bag vs Waterproof Case: Which Is Better for Fishing?
Waterproof cases are better for active fishing because they keep your phone accessible and functional while protecting it, whereas dry bags excel at storage but require you to open them each time you need your device. Use a waterproof case as your primary protection and a dry bag as backup storage for when your phone isn’t needed.
Waterproof cases win for accessibility. You can check weather radar, use fishing apps, take photos, and answer calls without breaking the seal. This matters when you’re tracking a school of fish or need to quickly check your GPS position.
Dry bags win for absolute protection. A quality roll-top dry bag creates a more reliable seal than most cases and provides cushioning against impacts. They’re ideal for storing your phone during rough launches, long paddles, or when you’re focused on landing fish and don’t want distractions.
The smart approach: Keep your phone in a waterproof case attached to a lanyard for active use, and stash a small dry bag in your kayak’s hatch for times when you want to put the phone away completely. This two-layer strategy gives you both convenience and maximum protection.
Common mistake: Relying solely on a dry bag means you’ll be tempted to leave it unsealed for “just a minute” to check something, which is exactly when accidents happen. A case you can use while sealed prevents this risk.

Cruise-Ready IPX8 Waterproof Protection: Fully sealed IPX8 waterproof pouch protects your phone from splashes, rain, pool water and beach sand—perfect for cruises, pool decks, water rides, beach days and tropical excursions.

Silicone case wraps around the 4 corners of your phone Works with side mounted and center mounted cameras.

IP68 Certified Waterproof Protection: A 3.3 feet/1 meter IP68 certified professional floating waterproof phone pouch is perfect for swimming pools, beaches, kayaking, fishing, surfing, sailing, skiing, boating, snorkeling, tubing, rafting, showering, sauna, other water park activities, and to store your ID; This waterproof pouch will keep your phone fully functional and 100% protected from the water, making it one of the best cruise, vacation, and travel essentials/accessories to have (Best for Phone Screen Sizes Up to 6.1 Inches)
How Much Do Waterproof Phone Pouches Cost?
Waterproof phone pouches cost between $10 and $40 for quality options, while premium hard cases range from $40 to $100 depending on features and brand. Budget pouches under $15 often fail within a few trips, making mid-range options ($20-$30) the best value for regular kayak anglers.
Price breakdown by type:
- Basic pouches ($10-$20): Simple zip-lock or velcro closure, basic IPX8 rating, minimal flotation
- Mid-range pouches ($20-$40): Better seals, guaranteed flotation, clearer windows, reinforced attachment points
- Hard cases ($40-$70): Full protection, precise phone fit, port access, tested to military drop standards
- Premium hard cases ($70-$100+): Lifeproof, OtterBox, or Pelican cases with lifetime warranties and maximum durability
What affects the price:
The seal quality and testing standards drive most of the cost difference. A $12 pouch might claim IPX8 but hasn’t been independently tested, while a $30 pouch from a reputable brand includes batch testing and warranty coverage. Hard cases cost more because they’re molded to specific phone models and include multiple seal points.
Budget tip: If you’re just starting with kayak fishing, buy a $25-$30 universal pouch first. Test it thoroughly at home, and upgrade to a hard case if you find yourself using your phone constantly on the water.

Materials: The Waterproof case is made of durable PC and transparent PVC materials. Super thin 0.3mm material makes touch sensitive, not any delay. IP68 Certified 30 meter underwater. It is easy to touch, Response, Type, Take Photos and Videos sensitive, Not any delay. No Bad Effect Upon Your Skin.
![Lamicall Waterproof Phone Pouch, [Easy Lock] IPX8 Water Proof Phone Case | 2Pack, Clear HD Touch Screen, Beach Dry Bag for iPhone 18 17 16 15 14 13 12 Pro Max Plus, Glaxy S25, for 7.5" with Case](https://m.media-amazon.com/images/I/51qx4t2JcZL._SL500_.jpg)
IPX8 Rating Waterproof : Upgraded locking clips, high quality materials and latest seamless heat-press technology allow Lamicall waterproof phone case an excellent waterproof (IPX8 Rating). It is waterproof to a depth of 100 feet, which protects your smart phone from water, snow, sand, dust, etc. Whether you're on a cruise deck, at the beach, snorkeling, kayaking, or hitting the water park, this heavy-duty dry bag delivers reliable protection where you need it most. Tested to submerge depths — not just splash-resistant.
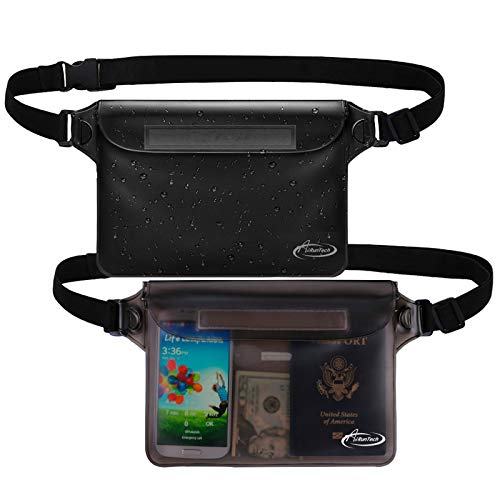
Beach Accessories for Vacation Must haves: Waterproof Protection and Confident Impermeable! Triple zip lock protection up to 32 feet (10 meters) underwater. No worries of your valuables getting wet. Keep your phone and wallet perfectly dry and safe from a splash, a spill, or total immersion whether you're snorkeling, swimming, sailing, paddle boarding, tubing, kayaking, river rafting, water slides or water activities and the like!
My Phone Got Wet in My Waterproof Case: What Do I Do?
Power off your phone immediately without pressing any buttons repeatedly, remove it from the case, dry the exterior, and place it in a sealed container with silica gel packets for 48-72 hours. Do not attempt to charge it, use rice (which leaves starch residue), or turn it on to “test” if it works.
Immediate steps (first 5 minutes):
- Power down by holding the power button until it shuts off completely
- Remove from case and any other accessories
- Shake out visible water from ports and openings
- Pat dry with a lint-free cloth or paper towel
- Remove SIM card and case if you haven’t already
Drying process (next 48-72 hours):
Place your phone in a sealed plastic bag or container with silica gel packets (the kind that come with shoes or electronics). If you don’t have silica gel, leave the phone in a warm, dry location with good airflow. Never use a hair dryer or oven, as heat can damage internal components.
Why cases fail: Most waterproof case failures happen because the seal wasn’t properly closed, debris got caught in the gasket, or the case was damaged from a previous impact. Some cases also degrade over time, especially if exposed to sunlight and saltwater.
After drying: Once 48 hours have passed, attempt to power on in a safe location. If it works, back up your data immediately. If it doesn’t, a professional repair shop may be able to recover data even if the phone is dead.
Prevention: Before each trip, test your waterproof case by sealing a tissue inside and submerging it in a sink for 5 minutes. If the tissue stays dry, your seal is good.
Are Ziplock Bags Good Enough to Protect a Phone While Kayaking?
Ziplock bags provide minimal emergency protection for brief exposure but are not reliable for kayak fishing, where your phone faces repeated splashes, humidity, and the risk of full submersion. They lack proper seals, puncture easily, and don’t float, making them suitable only as a temporary backup when you’ve forgotten your real case.
Why ziplock bags fail on kayaks:
- Seals aren’t designed for water pressure and often leak within minutes of submersion
- Plastic tears easily on rod tips, hooks, and kayak hardware
- No flotation means your phone sinks immediately if the bag goes overboard
- Condensation builds up inside from temperature changes
- Touchscreen rarely works through the plastic, forcing you to open it repeatedly
When they might work: If you’re on a short paddle in calm conditions and only need to protect against light spray, a freezer-weight ziplock can buy you an hour or two. Double-bagging adds a small margin of safety.
Better budget alternative: A $15-$20 waterproof pouch from a sporting goods store offers dramatically better protection than any ziplock and costs less than replacing a water-damaged phone. For kayak anglers serious about kayak safety, proper waterproof protection isn’t optional.
Do I Really Need a Floating Phone Case for Kayak Fishing?
Yes, a floating phone case is essential for kayak fishing because even brief submersion can destroy a phone, and non-floating cases sink in seconds, making recovery nearly impossible in most fishing environments. Floating cases give you a 30-60 second window to retrieve your phone if it goes overboard, which can mean the difference between a $20 inconvenience and a $1,000 loss.
Why phones sink so fast: Modern smartphones are dense with glass, metal, and batteries. An iPhone 15 Pro sinks at roughly 1 meter per second in calm water, faster in current. By the time you realize it’s gone and look around, it’s already out of reach in anything deeper than 2-3 feet.
How floating cases work: They incorporate closed-cell foam in the case structure or use air pockets sealed within the design. Quality floating cases keep your phone at the surface even when fully sealed and loaded with the phone inside.
Floating case options:
- Built-in flotation: Cases like Ghostek Nautical or Temdan have foam integrated into the case body
- Floating pouches: Most soft waterproof pouches include flotation as a standard feature
- Add-on floats: Some hard cases accept stick-on foam floats, though these can detach over time
Test before trusting: Fill your case with something phone-sized and weighted (a similar phone in a dummy case works), seal it, and toss it in water. It should float with at least 30% of the case above the waterline. If it barely floats or sinks slowly, it won’t help in real conditions.
Alternative: If your case doesn’t float, a brightly colored lanyard attached to your kayak or PFD serves as a backup, but you’re relying on the lanyard not breaking, which is a single point of failure.
Why Did My Waterproof Case Stop Working After One Trip?
Waterproof cases typically fail after one trip due to incomplete seal closure, debris in the gasket, damage during use, or manufacturing defects that weren’t caught during initial testing. Saltwater, sand, and UV exposure accelerate seal degradation, especially in budget cases that use lower-grade materials.
Most common failure points:
- Gasket contamination: A single grain of sand or piece of fishing line in the seal creates a leak path
- Incomplete closure: Many cases require specific closing sequences (like tightening screws in a pattern) that users skip
- Impact damage: Dropping the case on rocks or boat decks can crack seals even if the exterior looks fine
- UV degradation: Rubber gaskets break down quickly under sun exposure, especially in cheaper cases
- Manufacturing defect: Some cases ship with flaws that only show up under real-world water pressure
How to prevent premature failure:
- Rinse after every saltwater trip with fresh water, especially around seals
- Inspect gaskets before each use for cracks, debris, or deformation
- Store out of direct sunlight when not in use
- Follow closing instructions exactly – don’t rush the seal
- Replace gaskets annually if your case has replaceable seals
When to replace: If your case fails a tissue test (see earlier section) or shows visible damage to seals, replace it immediately. Don’t gamble with “it might be okay” – cases that failed once will fail again.
Warranty tip: Quality brands like OtterBox and Lifeproof offer warranties that cover seal failures. Document your purchase and test your case within the return window so you can exchange it if it’s defective.
What Is the Best Phone Mount for Kayak That Keeps Phone Safe?
The best phone mount for kayak fishing is a RAM Mount with X-Grip or similar ball-joint system that attaches to your kayak’s rail or track system, providing secure hold, 360-degree adjustability, and quick release when needed. These mounts keep your phone accessible while reducing drop risk, and they work with waterproof cases already on your phone.
Why RAM Mounts lead the category:
- Ball-joint system absorbs shock and vibration better than rigid mounts
- Adjustable tension lets you set how firmly the mount holds
- Modular design means you can swap phone holders without replacing the entire mount
- Marine-grade materials resist corrosion from saltwater
- Track compatibility works with most kayak rail systems
Alternative mounting systems:
- Scotty mounts: Use the same track system as rod holders, familiar to most kayak anglers
- Suction cup mounts: Work on smooth kayak surfaces but can fail in heat or cold
- Handlebar clamps: Attach to kayak frames or crossbars, good for sit-on-top kayaks
- Adhesive mounts: Permanent solution but limits repositioning
Mounting location matters: Position your mount where you can see the screen without turning your body (usually near the cockpit on the right side for right-handed anglers). Avoid mounting directly in front of you where it blocks paddle strokes or in splash zones near the bow.
Use with waterproof case: Mount your phone while it’s in its waterproof case for double protection. The mount prevents drops during normal use, and the case protects if the mount fails or you need to remove the phone quickly.
Common mistake: Mounting your phone without a backup lanyard. Even the best mounts can fail if you hit a rock or capsize. Run a lanyard from your case to a secure point on your kayak as insurance.
For more essential fishing gear recommendations, check our comprehensive guides.
What to Do If Your Phone Falls in Water While Kayak Fishing
If your phone falls in water while kayak fishing, note the exact location immediately, attempt retrieval only if safe and shallow, and follow water-damage protocols if recovered. In water deeper than 6 feet or with current, mark the GPS coordinates and consider professional recovery services rather than risking your safety.
Immediate response (first 30 seconds):
- Mark the spot – note landmarks, GPS coordinates, or drop a marker buoy if you have one
- Assess safety – only attempt retrieval if water is calm, shallow, and you can see the bottom
- Use a retrieval tool – a fishing net or grappling hook is safer than diving
- Stay in your kayak – capsizing while trying to save your phone creates a bigger emergency
If you can see it (shallow water):
Use your paddle, a fishing net, or a grappling hook to retrieve it. Don’t lean over the side of your kayak far enough to risk capsizing. If you’re in a stable kayak and the water is under 3 feet, you might carefully step out while keeping one hand on the kayak.
If it’s gone (deep or murky water):
Accept the loss and focus on getting safely back to shore. Phones aren’t worth risking hypothermia or drowning. If the location is accessible from shore and the water is clear, you might return with snorkel gear later, but success rates are low after the first hour as current and sediment move the phone.
After recovery: Follow the wet phone protocol from the earlier section: power off immediately, dry externally, and desiccate for 48-72 hours.
Prevention is everything: This scenario is why floating cases and lanyards exist. A $30 floating case prevents a $1,000 loss and a potentially dangerous retrieval attempt.
Is a Lanyard Necessary for Your Phone on a Kayak?
A lanyard is necessary for kayak fishing because it provides a critical backup when cases fail, mounts break, or you fumble your phone during use. Even with a floating case and secure mount, a lanyard attached to your kayak or PFD ensures your phone stays with you rather than drifting away in current or wind.
Why lanyards matter: Floating cases keep your phone at the surface, but they don’t keep it near your kayak. In current, wind, or waves, a floating phone can drift 20-30 feet away in the time it takes you to turn your kayak around. A lanyard keeps it within arm’s reach.
Lanyard attachment points:
- To your kayak: Attach to a deck rigging, D-ring, or rod holder base using a carabiner
- To your PFD: Clip to a D-ring on your personal flotation device so the phone stays with you if you capsize
- Retractable lanyards: Spring-loaded retractable lanyards (like key-chain style) give you 2-3 feet of reach while keeping the phone tethered
Lanyard specifications: Use a lanyard rated for at least 10 pounds of pull force with a locking carabiner or secure clip. Avoid thin cords that can cut into your waterproof case’s attachment point. Bright colors help you spot the phone if it does go in the water.
Common mistake: Attaching the lanyard to your belt loop or clothing instead of your PFD or kayak. If you capsize and separate from your kayak, a phone attached to your clothing can become a dangerous entanglement or pull you down.
When to skip it: If you’re using a hard-mounted phone holder and never remove your phone during the trip, a lanyard adds clutter. But the moment you take your phone out of the mount to snap a photo or check an app, you need that lanyard attached.
Cheap Ways to Protect Your Phone While Kayak Fishing
The cheapest effective way to protect your phone while kayak fishing is a $20-$30 universal waterproof pouch with built-in flotation, combined with a $5 lanyard and careful handling habits. This setup costs under $35 and provides 90% of the protection of premium systems while fitting any phone model.
Budget protection strategy:
- Universal waterproof pouch ($20-$30): Brands like JOTO, Syncwire, or Mpow offer IPX8-rated pouches that fit phones up to 7 inches
- Lanyard with carabiner ($5-$10): Any marine-grade lanyard from a sporting goods store works
- Dry bag for backup ($10-$15): A small 2-liter dry bag stores your phone when not in use
- Total cost: $35-$55
Free or nearly-free options:
- Ziplock + lanyard: Emergency-only solution, costs under $5, but unreliable (see earlier section)
- Waterproof pouch from old gear: Check if you have a waterproof pouch from a previous phone or water sport activity
- DIY testing: Test any case you already own using the tissue-in-sink method before buying new
Where budget cases fall short: Cheaper pouches often have less durable seals, cloudier windows that reduce photo quality, and weaker attachment points. They typically last one season of regular use versus 2-3 years for premium cases.
When to upgrade: If you fish more than twice a month, use your phone for navigation or fish-finding apps, or fish in ocean conditions, invest in a $60-$80 hard case. The improved reliability and functionality justify the cost when you’re on the water frequently.
Money-saving tip: Buy last year’s model of premium cases when new phone models release. A Lifeproof case for an iPhone 14 drops to $40-$50 when the iPhone 15 version launches, and it still provides excellent protection.
Can You Use Your Phone Underwater in a Waterproof Case?
You can use your phone underwater in a waterproof case rated IPX8 or higher, but functionality is limited because touchscreens don’t work reliably underwater and most cases reduce camera quality. Underwater use is practical for shallow photography (1-3 feet) but not for extended submersion or deep-water use.
What works underwater:
- Physical buttons: Volume and power buttons usually function through case membranes
- Camera trigger: Many waterproof cases include a physical shutter button for underwater photos
- Video recording: Start recording before submersion, as touchscreen control fails underwater
- Viewing: You can see your screen, but can’t interact with it reliably
What doesn’t work:
- Touchscreen: Water conducts electricity differently than air, confusing capacitive touchscreens
- Fingerprint sensors: Won’t read through case material or underwater
- Face ID: Doesn’t work through most case windows
- Audio: Speakers and microphones are blocked by waterproofing
Practical underwater use: If you want to photograph a fish underwater or capture underwater structure, set your camera to video mode or burst photo mode before putting the phone underwater. Use the physical volume button as a shutter if your case supports it.
Depth limits: Even cases rated to 2 meters (6.5 feet) shouldn’t be used at their maximum rated depth regularly. Water pressure increases seal stress, and ratings assume brief submersion, not extended use. Stay in the top 1-2 feet for best results and case longevity.
Better alternative for serious underwater work: If you regularly need underwater photos or video, a dedicated action camera like a GoPro offers better image quality, easier controls, and more reliable waterproofing than any phone case.
How Do Kayak Anglers Take Photos Without Risking Their Phone?
Kayak anglers take photos safely by using waterproof cases with lanyards, mounting their phones securely before shooting, and employing voice commands or timer functions to avoid handling the phone with wet hands. Many also use action cameras or waterproof point-and-shoot cameras as dedicated fishing photography tools, keeping their phones stored safely.
Safe photography techniques:
1. Prepare before the catch: Set your phone to camera mode, adjust settings, and position it in your mount or have it ready on a lanyard before you land the fish. Don’t try to dig your phone out while holding a fish.
2. Use voice commands: “Hey Siri, take a photo” or “OK Google, take a picture” lets you trigger the camera without touching your phone. Enable this feature before your trip.
3. Timer or burst mode: Set a 3-second timer, position the fish, and let the camera fire automatically. Burst mode takes multiple shots, increasing your chances of getting a good one.
4. Dry your hands: Keep a fishing towel clipped to your kayak. Dry your hands before touching your phone, even in a waterproof case, to prevent fumbles.
5. Mount-based photography: If your phone is in a mount, position your kayak and the fish so the camera can capture the shot without removing the phone.
Alternative tools for serious photographers:
- Action cameras ($200-$500): GoPro, DJI Osmo Action, or Insta360 offer better waterproofing and mounting options
- Waterproof point-and-shoot ($150-$400): Olympus Tough or Nikon Coolpix cameras are purpose-built for water sports
- Smartphone backup: Keep an older phone in a waterproof case as a dedicated fishing camera, leaving your primary phone safely stored
The buddy system: If you fish with a partner, have them handle photography while you handle the fish. This is safer for both the fish (less handling time) and your phone.
Post-catch protocol: After releasing or storing your fish, immediately check that your phone is still secure in its case and properly attached to its lanyard. This is when most drops happen – in the excitement after a catch.
For more tips on staying safe while fishing, visit our kayak safety resource center.
FAQ
How often should I replace my waterproof phone case?
Replace your waterproof phone case annually if you fish regularly (more than 20 trips per year) or immediately if it fails a submersion test, shows visible seal damage, or has been dropped hard. UV exposure and saltwater degrade seals over time even if the case looks fine.
Can I charge my phone while it’s in a waterproof case?
Most hard waterproof cases require you to open a sealed port cover to charge, which compromises waterproofing during charging. Soft pouches require complete removal. Charge your phone before trips or use a waterproof power bank with sealed connections designed for marine use.
What phone features stop working in waterproof cases?
Waterproof cases typically reduce speaker volume, muffle microphone quality, block wireless charging, disable fingerprint sensors, and may interfere with Face ID. Touchscreen sensitivity also decreases through case material, though quality cases minimize this effect.
Should I get a case specific to my phone model or a universal pouch?
Choose a model-specific hard case if you use your phone constantly for apps, photography, and navigation, as it offers better functionality and protection. Choose a universal pouch if you primarily store your phone and only check it occasionally, or if you upgrade phones frequently.
How do I test if my waterproof case actually works?
Seal a dry tissue or paper towel inside your empty case, submerge it in a sink or bucket for 5 minutes at the depth you’ll be fishing, then check if the tissue stayed completely dry. Repeat this test before every fishing season and after any drops or impacts.
What’s the difference between water-resistant and waterproof phone cases?
Water-resistant cases (IPX4-IPX6) protect against splashes and rain but will leak during submersion. Waterproof cases (IPX7-IPX8) are sealed for full submersion at specified depths. For kayak fishing, you need IPX8 minimum, which means submersible beyond 1 meter.
Can I use my phone’s camera underwater with a waterproof case?
Yes, but with limitations – touchscreens don’t work underwater, so use physical volume buttons as shutter triggers or start video recording before submersion. Image quality decreases underwater due to case material and water refraction. Keep underwater use brief and shallow (under 3 feet) for best results.
Do I need a floating case if I have a lanyard?
Yes, because lanyards can break, clips can fail, and you might drop your phone before attaching the lanyard. Floating cases provide independent backup protection. The best setup uses both – a floating case AND a lanyard for redundant safety.
What should I do if condensation forms inside my waterproof case?
Remove your phone immediately, as internal condensation means the seal has failed or moisture was trapped during closing. Dry both phone and case completely, inspect the seal for damage, and test the empty case with tissue before using again. Replace the case if the seal is compromised.
Are expensive waterproof cases worth it for casual kayak fishing?
For casual anglers (under 10 trips per year), a quality $25-$35 universal pouch provides adequate protection. Invest in a $60-$100 hard case if you fish frequently, use your phone for navigation or fish finders, or fish in challenging conditions where phone access is critical for safety.
How do I attach a lanyard to my phone if my case doesn’t have a loop?
Use a phone case with a built-in lanyard loop, add an adhesive lanyard anchor to your existing case, or thread the lanyard through the case’s charging port opening if it’s large enough. Never rely on adhesive-only attachment for water use – it will fail when wet.
Can I use a waterproof case with a phone mount?
Yes, most phone mounts accommodate phones in waterproof cases, though you may need to adjust the grip width. RAM Mounts with X-Grip holders work well with cases up to 4 inches wide. Test the fit before heading out to ensure the mount holds securely with the case on.
Conclusion
Keeping your phone safe while kayak fishing comes down to three layers of protection: a quality waterproof case rated IPX8 or higher, a secure attachment system (lanyard or mount), and smart handling habits that minimize risk. A floating case provides critical backup if your phone goes overboard, while a lanyard ensures it stays within reach even in current or wind.
Start with a mid-range waterproof pouch ($20-$30) if you’re new to kayak fishing or on a budget, and upgrade to a hard case ($60-$100) as your time on the water increases. Test your case before every season using the tissue submersion method, and replace it annually or after any failure. Mount your phone where you can see it without compromising paddle strokes, and always attach a lanyard as backup.
Take action today: Before your next fishing trip, test your current phone protection using the methods outlined in this guide. If your case fails the test or you don’t have proper protection yet, invest in a quality waterproof solution – it’s far cheaper than replacing a water-damaged phone. Set up your lanyard attachment points on your kayak, practice using voice commands for photography, and make phone safety a standard part of your pre-launch checklist.
The water will always be there, but your phone won’t survive it without proper protection. Make these changes now, and you’ll spend your time on the water focused on fishing instead of worrying about your device.
For more guidance on kayak fishing essentials and safety practices, explore our comprehensive resource library.