
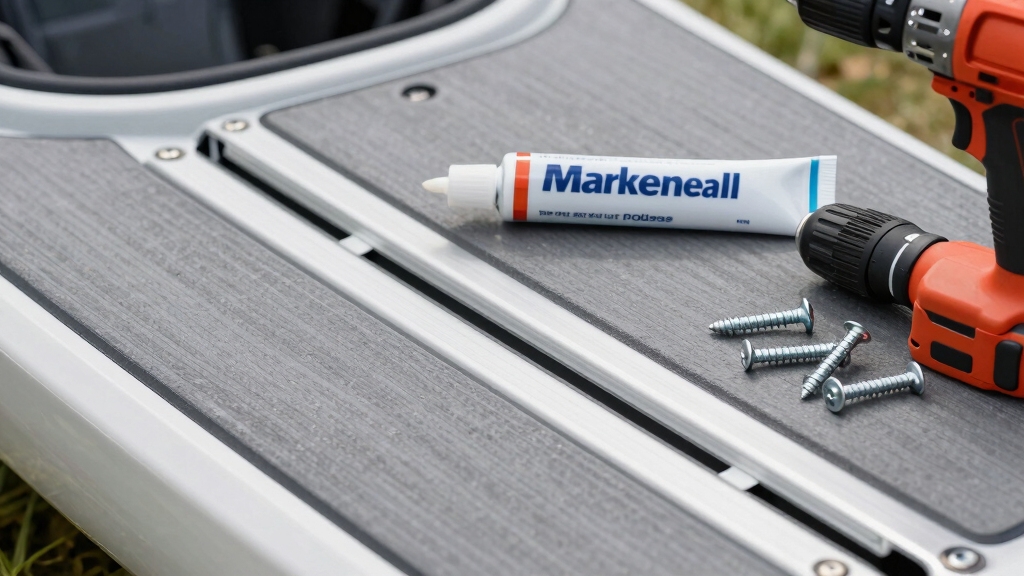
Quick Answer: Installing gear tracks without leaks requires proper surface preparation, high-quality marine-grade sealant, correct torque specifications, and strategic placement of sealant both under the track base and around each bolt hole. The key is creating multiple waterproof barriers and allowing adequate cure time before exposing the installation to water.
Key Takeaways
- Surface preparation is critical – clean the roof with isopropyl alcohol and ensure it’s completely dry before installation
- Use marine-grade butyl tape or silicone sealant – automotive products often fail under UV exposure and temperature cycling
- Apply sealant in multiple locations – under the track base, around bolt holes, and on bolt threads
- Torque bolts to manufacturer specifications – over-tightening can crack sealant and create leak paths
- Allow 24-48 hours cure time – rushing the process is the most common cause of leaks
- Test with a hose before loading gear – identify and fix leaks before they damage your vehicle interior
- Consider drill-free alternatives if you’re uncomfortable with permanent modifications
- Professional installation costs $150-400 but includes warranty protection against leaks
What Are Gear Tracks and How Do They Work
Gear tracks are modular aluminum or steel rails that mount to your vehicle’s roof, creating a versatile attachment system for kayak roof racks, cargo boxes, and other outdoor equipment. Unlike traditional fixed racks, gear tracks use T-slot channels that accept sliding mounting hardware, letting you reposition accessories without drilling new holes.
The system works through a simple mechanical principle: specialized bolts with T-shaped heads slide into the track’s channel and rotate 90 degrees to lock in place. This design distributes weight across the entire track length rather than concentrating stress at individual mounting points.
For fishing kayak enthusiasts, gear tracks offer significant advantages:
- Quick reconfiguration between fishing trips and daily driving
- Multiple kayak positions to optimize weight distribution
- Accessory mounting for rod holders, lights, and storage boxes
- Resale value – tracks are transferable to new vehicles
Most gear track systems handle 150-300 pounds of dynamic load (equipment in motion), making them suitable for one or two fishing kayaks when properly installed. The tracks themselves rarely fail – leaks occur at the mounting points where bolts penetrate your roof.
Gear Tracks vs Traditional Roof Racks: Which Is Better
Gear tracks provide superior versatility compared to traditional roof racks, but they require drilling holes in your vehicle’s roof. Traditional racks that clamp to door frames or rain gutters avoid permanent modifications but offer less flexibility and lower weight capacity.
Choose gear tracks if:
- You frequently change equipment configurations
- You own multiple kayaks or outdoor gear requiring different mounting positions
- Your vehicle lacks factory roof rails or crossbars
- You need maximum weight capacity (200+ pounds)
- You plan to keep the vehicle long-term
Choose traditional racks if:
- You transport the same kayak setup every trip
- Your vehicle has factory roof rails already installed
- You’re leasing or plan to sell within 1-2 years
- You’re uncomfortable drilling into your roof
- Budget is tight (traditional racks cost $100-300 vs. $200-600 for gear track systems)
The leak risk with gear tracks is real but manageable – proper installation techniques eliminate 95% of potential problems. Traditional racks avoid this issue entirely but sacrifice the modularity that makes gear tracks valuable for serious kayak fishing enthusiasts who also camp, bike, and ski.
For those seeking middle ground, consider roof rack alternatives like hitch-mounted carriers or foam block systems for occasional use.

TRUCK BED COVER ROOF RACK - Made to add a roof rack system on your truck bed cover (cap, topper, canopy, camper shell, hard tonneau cover, fiberglass cover, aluminum cover,...
What Tools Do You Need to Install Gear Tracks Without Leaks
Installing gear tracks leak-free requires specific tools beyond basic hand tools. At minimum, you need: a variable-speed drill with sharp metal bits, a torque wrench (inch-pounds range), degreasing cleaner, marine-grade sealant, masking tape, and a center punch or template for accurate hole marking.
Complete tool list:
- Drill and bits: Corded drill (more consistent power) with sharp cobalt or titanium bits matching your bolt size
- Torque wrench: 20-120 inch-pound range for precise bolt tightening
- Measuring tools: Tape measure, carpenter’s square, and level
- Marking tools: Center punch, permanent marker, and installation template (usually included with tracks)
- Cleaning supplies: Isopropyl alcohol (90%+), lint-free cloths, and degreaser
- Sealants: Marine-grade butyl tape or silicone sealant rated for automotive use
- Safety gear: Safety glasses, gloves, and drop cloths to protect paint
Optional but helpful:
- Step stool or ladder for comfortable roof access
- Magnetic parts tray to prevent losing hardware
- Vacuum to remove metal shavings immediately
- UV flashlight to check sealant coverage
The torque wrench is non-negotiable – it’s the difference between a leak-free installation and one that fails within months. Hand-tightening or using a regular ratchet leads to inconsistent bolt tension, which either crushes the sealant (creating gaps) or leaves bolts loose enough for water infiltration.
Most fishing kayak owners already have basic tools, so expect to spend $40-80 on specialized items if starting from scratch. Quality sealant alone costs $15-30 but prevents thousands in water damage repairs.

DEVELOPED SPECIFICALLY AS A MARINE SEALANT – Stays tough and flexible for a wide range of uses above the waterline

CURES FAST – One-part adhesive sealant requires no mixing, typically cures within 48 hours so you can get back on the water faster
![[Clear] 5200 Marine Adhesive Sealant Fast Cure – Waterproof Permanent Bond for Boats, RVs, Ponds, Above & Below Waterline, 3 oz](https://m.media-amazon.com/images/I/41xHNt3UaTL._SL500_.jpg)
⛴【Watertight Bonding and Sealing for Marine Use】:Creates watertight seals on fiberglass, gelcoat, and wood surfaces. Engineered for boat hardware, deck fittings, through-hull fastenings, railings, and transducers where reliable waterproofing is required in harsh environments.
How to Install Gear Tracks Without Leaks: Step-by-Step Process
Installing gear tracks without leaks follows a precise sequence that cannot be rushed. The process takes 3-4 hours for two tracks and requires dry weather with temperatures between 50-85°F for optimal sealant performance.
Step 1: Plan Your Layout
Measure your kayak’s hull and determine track placement that distributes weight evenly. Most fishing kayaks need tracks positioned 24-36 inches apart, centered on the roof. Use masking tape to mark positions and verify door clearance when opened.
Step 2: Clean the Mounting Surface
Wash the roof thoroughly, then wipe the mounting area with isopropyl alcohol. Remove all wax, oils, and contaminants – sealant won’t bond to dirty surfaces. Let the roof dry completely (30+ minutes in humid conditions).
Step 3: Mark and Punch Hole Locations
Place the gear track on your marked position and use the mounting holes as a template. Mark each hole with a permanent marker, then use a center punch to create a dimple that prevents drill bit wandering. Double-check measurements before drilling.
Step 4: Drill Pilot Holes
Start with a small pilot bit (1/8 inch) to establish accurate holes. Drill slowly to avoid overheating the metal, which can damage your roof’s protective coating. Vacuum metal shavings immediately – they rust quickly and stain paint.
Step 5: Drill Final Holes
Switch to your final bit size (typically 5/16 or 3/8 inch, per manufacturer specs). Drill straight down – angled holes create uneven pressure and leak paths. Deburr holes with a larger bit rotated by hand.
Step 6: Apply Sealant to Holes
Fill each hole with sealant, working it into the edges. Some installers prefer butyl tape around the hole perimeter; others use silicone. Both work if applied generously. The goal is creating a gasket when the bolt compresses the sealant.
Step 7: Apply Sealant to Track Base
Run a continuous bead of sealant along the track’s underside, focusing on the area surrounding mounting holes. Use enough that excess will squeeze out when bolts are tightened – you’ll clean this up later.
Step 8: Mount and Torque the Track
Position the track carefully (sealant makes it slippery) and insert all bolts finger-tight. Starting from the center and working outward, torque each bolt to specification (typically 40-60 inch-pounds). Use a cross-pattern like changing a tire.
Step 9: Clean Excess Sealant
Immediately wipe away squeezed-out sealant with isopropyl alcohol before it cures. Clean sealant lines look professional and prevent dirt accumulation.
Step 10: Cure and Test
Wait 24-48 hours before exposing the installation to water. Test with a gentle hose spray, then a car wash. Check your vehicle’s interior for moisture after each test.
Common mistake: Skipping the pilot hole step leads to wandering drill bits and misaligned tracks. The extra five minutes prevents hours of frustration.
Best Sealant for Gear Track Installation to Prevent Leaks
Marine-grade butyl tape and automotive silicone sealant are the two best options for leak-free gear track installation, with butyl tape offering easier application and silicone providing stronger long-term bonds. For fishing kayak roof installations, butyl tape is the preferred choice because it remains flexible through temperature extremes and never fully hardens.
Top sealant options:
Butyl tape (recommended for beginners):
- 3M Marine Adhesive Sealant Tape – industry standard, $20-25 per roll
- Permanently tacky, conforms to irregular surfaces
- Easy to apply, no cure time required
- Removes cleanly if you need to reposition tracks
Silicone sealants:
- Permatex Clear RTV Silicone – $8-12 per tube, excellent UV resistance
- GE Silicone II – $6-10, widely available, good for painted surfaces
- Requires 24-hour cure time before water exposure
- Creates stronger permanent bond than butyl
Avoid these products:
- Standard construction silicone (breaks down under UV)
- Plumber’s putty (not designed for exterior use)
- Cheap automotive gasket makers (insufficient flexibility)
- Any sealant not rated for continuous water exposure
Application tips: Apply sealant in temperatures above 50°F for proper adhesion. For butyl tape, stretch it slightly during application to ensure it fills gaps. For silicone, use a caulk gun for consistent bead size and smooth with a wet finger immediately after application.
Many professional installers use both – butyl tape around bolt holes for its gap-filling properties, plus silicone under the track base for structural bonding. This belt-and-suspenders approach costs an extra $10-15 but virtually eliminates leak risk.
Store unused sealant properly: butyl tape in a cool, dry place (it becomes sticky in heat), silicone tubes with caps sealed tight (it cures when exposed to moisture).

Butyl Sealing Rope Purpose: Butyl rubber 13Ft/4M suitable for sealing car doors, windshield, waterproof film, hood, lights, body plate joints and other parts of the shock seal

PROFESSIONAL GRADE BUTYL SEALANT TAPE: With a length of 4M/13FT and a diameter of 8mm, Taglly butyl tape is an effective sealing, sound deadening and water proofing solution commonly used in construction, car, RVs, marine, headlights, windshield and more.
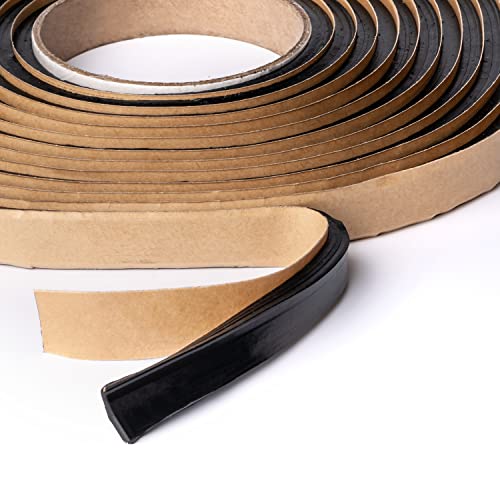
PURE BUTYL MATERIAL: Made from 100% pure extruded butyl rubber for a clean, permanent seal. This butyl sealant tape is backed with release paper and free of fillers or asphalt. Zero shrinkage. Won’t crack, melt, or bleed. It is an ideal sealing tape for auto, RV & home.
Common Mistakes When Installing Gear Tracks That Cause Leaks
The most common installation mistake is insufficient sealant application – installers worry about mess and use too little, creating gaps where water infiltrates. A proper installation should have visible sealant squeeze-out around every bolt and along the track edges when torqued correctly.
Top mistakes and how to avoid them:
1. Drilling in cold weather
Metal contracts in cold temperatures, and sealant doesn’t cure properly below 40°F. Wait for a warm day or use a garage heater. Cold-weather installations fail within the first winter.
2. Over-torquing bolts
Exceeding manufacturer torque specs crushes the sealant completely, leaving metal-to-metal contact with microscopic gaps. Always use a torque wrench – “tight enough” isn’t a measurement.
3. Skipping surface preparation
Wax, oils, and dirt prevent sealant adhesion. Even new vehicles have factory protective coatings that must be removed with alcohol. This step takes 10 minutes but prevents 90% of leaks.
4. Using the wrong drill bit size
Oversized holes allow bolts to shift and create uneven pressure. Undersized holes stress the roof metal and can crack paint. Match the bit size exactly to manufacturer specifications.
5. Installing during rain or high humidity
Moisture in drill holes prevents sealant bonding. Check the weather forecast and plan for 48 hours of dry conditions (installation day plus cure time).
6. Reusing hardware
Bolts stretch during initial installation. Reused bolts may not achieve proper torque, and old washers lose their sealing capability. New hardware costs $10-20 and guarantees proper compression.
7. Not testing before loading gear
Many installers discover leaks only after the first rain with a kayak mounted. Test with a hose at various angles before your first trip. Finding leaks early means simple fixes; discovering them after interior water damage is expensive.
8. Ignoring roof contours
Most vehicle roofs have subtle curves. Tracks must conform to these contours, which may require shimming or additional sealant in gaps. Forcing a track flat against a curved roof creates stress points and leaks.
For those new to DIY installations, consider practicing on scrap metal first. The muscle memory of proper drill pressure and sealant application builds confidence before working on your vehicle.
Why Is My Gear Track Leaking After Installation
Post-installation leaks typically occur at bolt holes rather than along the track base, caused by insufficient sealant, improper torque, or premature water exposure before the sealant cured. If your gear track is leaking, identify the leak source first – water can travel along the track before dripping inside, making the actual entry point difficult to locate.
Diagnosis steps:
- Dry the roof completely and mark suspected leak areas with tape
- Spray with a hose at low pressure, starting at the front of the vehicle and working back
- Check interior immediately after each spray section to pinpoint the leak
- Look for water trails on the track itself – they lead back to the source
Common leak causes and fixes:
Bolt holes (70% of leaks):
- Cause: Sealant didn’t fill the gap between bolt and metal
- Fix: Remove the bolt, clean the hole, inject fresh sealant, and reinstall with proper torque
Track base gaps (20% of leaks):
- Cause: Insufficient sealant under the track or roof contour mismatch
- Fix: Remove the track, add more sealant (especially in low spots), and reinstall
Cracked sealant (5% of leaks):
- Cause: Over-torqued bolts or thermal cycling before full cure
- Fix: Remove track, clean all old sealant completely, and start fresh
Damaged roof coating (5% of leaks):
- Cause: Drill bit overheating or metal burrs cutting through paint
- Fix: Touch up paint around holes, apply rust inhibitor, then reseal
Quick temporary fix: For emergency repairs before a trip, apply clear silicone sealant around the leaking bolt from the outside. This buys you a few weeks but isn’t a permanent solution – proper repair requires removing the track.
Prevention tip: After installation, inspect tracks monthly for the first six months. Sealant can take multiple heat/cold cycles to fully set, and small leaks caught early are simple fixes.
If leaks persist after resealing, the roof may have structural issues (rust, previous damage) that prevent proper sealing. In these cases, consider drill-free mounting alternatives or professional assessment.
How to Fix a Leaking Gear Track on Your Roof
Fixing a leaking gear track requires removing the affected section, thoroughly cleaning all old sealant, and reinstalling with fresh materials. Most leak repairs take 1-2 hours per track and should be done in dry conditions with temperatures above 60°F for optimal sealant performance.
Repair process:
Step 1: Remove the Track
Unload all gear and accessories. Using your torque wrench in reverse, carefully remove bolts starting from the ends and working toward the center. Keep hardware organized – you may reuse bolts if they’re not damaged.
Step 2: Clean Everything Thoroughly
Remove all old sealant from the track base and roof using a plastic scraper (avoid metal tools that scratch paint). Clean with isopropyl alcohol until no residue remains. This step is critical – new sealant won’t bond to old.
Step 3: Inspect for Damage
Check bolt holes for elongation, cracks, or rust. Inspect the track for bends or damage. Small rust spots can be treated with rust converter; significant damage requires professional repair before reinstalling tracks.
Step 4: Apply Fresh Sealant
Use the same technique as initial installation: fill bolt holes, apply sealant to the track base, and ensure complete coverage. Don’t skimp – sealant is cheap compared to interior water damage.
Step 5: Reinstall and Torque Properly
Position the track carefully and torque bolts to specification using the center-outward pattern. Verify that sealant squeezes out around each bolt – if it doesn’t, you didn’t use enough.
Step 6: Extended Cure Time
Because you’re repairing a leak, give the sealant extra cure time – 48-72 hours before water exposure. This ensures complete bonding.
Step 7: Comprehensive Testing
Test more aggressively than the first installation. Use a pressure washer on low setting (if available) or have someone spray the roof while you check the interior with a flashlight. Test at multiple angles to simulate driving rain.
When to call a professional: If you find rust, multiple leaking bolts, or structural damage to the roof, professional repair is worth the $150-300 cost. They have access to specialized sealants and can assess whether the roof needs metal repair before reinstalling tracks.
Preventive maintenance: After repair, inspect tracks every 3-4 months. Look for sealant cracking, loose bolts, or new rust spots. Catching issues early prevents major leaks and extends track life to 10+ years.
Can I Install Gear Tracks Myself or Do I Need a Professional
Most fishing kayak enthusiasts with basic DIY skills can successfully install gear tracks themselves, saving $150-400 in professional installation costs. Choose DIY installation if you’re comfortable drilling into metal, own or can borrow the necessary tools, and have 4-6 hours for careful work.
DIY makes sense when:
- You have experience with automotive modifications or home improvement projects
- Your vehicle has a flat or gently curved roof (easier than complex curves)
- You can work in a garage or covered area with good lighting
- You’re willing to research your specific vehicle model for hidden obstacles (wiring, sunroof drains)
- Budget is a primary concern
Professional installation is worth considering if:
- Your vehicle has a complex roof shape or carbon fiber panels
- You’re installing on a leased vehicle (professionals carry insurance)
- You lack confidence in drilling accurately or using a torque wrench
- Your vehicle has a sunroof or roof-mounted equipment requiring special care
- You want warranty protection against leaks
Professional installation costs:
- Basic gear track installation: $150-250 for two tracks
- Complex installations (curved roofs, multiple tracks): $300-400
- Includes: proper tools, insurance against damage, leak warranty (typically 1 year)
DIY cost breakdown:
- Gear track kit: $200-600 (tracks, hardware, mounting template)
- Tools (if you don’t own them): $40-80 (torque wrench, quality bits)
- Sealant and supplies: $25-40
- Total: $265-720 vs. professional $350-650 (installed)
The DIY savings are significant, but factor in your time value and stress tolerance. A professional completes the job in 2-3 hours with guaranteed results. DIY takes longer but provides valuable learning for future modifications.
Hybrid approach: Some enthusiasts buy tracks and have a professional install them, saving on markup while getting expert installation. This typically costs $100-150 in labor and combines cost savings with peace of mind.
For those interested in other DIY kayak modifications, check out our guides on anchor trolley installation and fish finder installation.
How Much Does It Cost to Install Gear Tracks Professionally
Professional gear track installation costs $150-400 depending on vehicle complexity, track quality, and regional labor rates. Most fishing kayak owners pay $200-300 for a standard two-track installation on a pickup truck or SUV with a relatively flat roof.
Cost breakdown by vehicle type:
- Pickup trucks (flat bed caps): $150-250 – simplest installation, flat surface
- SUVs and crossovers: $200-300 – moderate complexity, some roof curvature
- Vans and commercial vehicles: $250-350 – larger roof area, more mounting points
- Vehicles with sunroofs or complex roofs: $300-400 – requires careful planning around obstacles
What’s included in professional installation:
- Site assessment and track positioning consultation
- All labor and installation expertise
- Professional-grade sealants and materials
- Proper torque specifications and testing
- Leak warranty (typically 1 year, some shops offer lifetime)
- Cleanup and final inspection
Additional costs to consider:
- Gear track systems: $200-600 (not included in installation price)
- Kayak mounting accessories: $50-150 (saddles, J-hooks, tie-downs)
- Removal of old racks: $50-100 if replacing existing systems
Regional price variations:
- Urban areas and coastal regions: 20-30% higher than national average
- Rural areas: 10-20% below average
- Mobile installation services: Add $50-75 for on-site work
Finding qualified installers:
Look for shops specializing in truck accessories, off-road modifications, or marine equipment. Auto body shops can install tracks but may lack experience with waterproofing techniques specific to roof-mounted systems. Ask about their leak warranty and request photos of previous installations.
DIY vs. professional value calculation:
If you value your time at $25/hour and the DIY installation takes 5 hours, that’s $125 in time cost plus tool investment ($40-80). Professional installation at $200-250 becomes competitive, especially considering the warranty and guaranteed leak-free results.
For occasional kayak users questioning whether any roof system is worthwhile, our article on car top kayak transport explores simpler alternatives.
Alternatives to Drilling Holes for Roof-Mounted Gear Storage
Several drill-free alternatives exist for fishing kayak transport, though each involves trade-offs in versatility, weight capacity, or convenience compared to permanent gear tracks. The best alternative depends on your vehicle type and how frequently you transport kayaks.
Clamp-style roof racks:
- Attach to door frames or rain gutters without drilling
- Weight capacity: 100-165 pounds (sufficient for most fishing kayaks)
- Cost: $150-400 for quality systems
- Best for: Vehicles with factory roof rails or rain gutters
- Limitation: Not compatible with all vehicle designs
Foam block systems:
- Foam blocks sit on the roof, kayak rests on top, secured with straps
- Weight capacity: 80-120 pounds
- Cost: $30-60
- Best for: Occasional use, short trips, budget-conscious paddlers
- Limitation: Less secure, can damage paint over time, not suitable for highway speeds
Hitch-mounted carriers:
- Attach to trailer hitch, carry kayaks vertically or horizontally
- Weight capacity: 150-300 pounds
- Cost: $200-500
- Best for: Vehicles with 2-inch receiver hitches, multiple kayak transport
- Limitation: Requires hitch installation, affects rear visibility and access
Truck bed extenders:
- For pickup owners, kayak rests in bed with tailgate down
- Weight capacity: Limited by truck bed capacity (500+ pounds)
- Cost: $100-300 for extenders and tie-downs
- Best for: Pickup truck owners, shorter kayaks
- Limitation: Kayak extends past tailgate, requires red flag for safety
Inflatable roof racks:
- Inflatable bars create temporary crossbars
- Weight capacity: 80-100 pounds
- Cost: $80-150
- Best for: Rental vehicles, occasional use, travel
- Limitation: Lower weight capacity, less stable at highway speeds
Suction cup systems:
- Heavy-duty suction cups attach to smooth roof surfaces
- Weight capacity: 100-150 pounds (when properly installed)
- Cost: $150-250
- Best for: Smooth-roofed vehicles, temporary installations
- Limitation: Requires perfectly clean surface, not suitable for textured roofs
Comparison factors:
| System Type | Installation Time | Removability | Weight Capacity | Cost Range |
|---|---|---|---|---|
| Gear tracks | 3-4 hours (permanent) | Difficult | 200-300 lbs | $200-600 |
| Clamp racks | 30-60 minutes | Easy | 100-165 lbs | $150-400 |
| Foam blocks | 5 minutes | Very easy | 80-120 lbs | $30-60 |
| Hitch carriers | 1-2 hours (hitch install) | Moderate | 150-300 lbs | $200-500 |
For serious fishing kayak enthusiasts who transport gear weekly, gear tracks remain the best long-term solution despite requiring drilling. Casual paddlers who make 5-10 trips per season often find clamp-style racks or foam blocks adequate.
Explore more options in our comprehensive guide to kayak roof rack alternatives.
Are Gear Tracks Worth It for Occasional Kayak Users
Gear tracks are generally not worth the investment for occasional kayak users who transport their fishing kayak fewer than 15-20 times per year. For occasional use, removable rack systems or foam blocks provide adequate functionality at lower cost and without permanent vehicle modification.
Calculate your use case:
Heavy users (30+ trips/year):
- Gear tracks pay for themselves in convenience and versatility
- Frequent reconfiguration justifies the modular design
- Long-term ownership makes permanent installation worthwhile
Regular users (15-30 trips/year):
- Gear tracks are worthwhile if you also transport bikes, skis, or cargo boxes
- Consider your total outdoor gear ecosystem, not just kayaking
- Clamp-style racks may suffice if you only transport kayaks
Occasional users (5-15 trips/year):
- Foam blocks or basic clamp racks are more cost-effective
- Drilling into your roof isn’t justified by usage frequency
- Removable systems work fine for seasonal use
Rare users (fewer than 5 trips/year):
- Rent roof racks when needed or use foam blocks
- Gear tracks are overkill for your usage pattern
- Consider kayak rental instead of ownership
Break-even analysis:
If professional installation costs $300 and a quality removable rack costs $200, you’re paying $100 premium for permanent tracks. Factor in the versatility value – if you’ll use tracks for multiple sports or frequently adjust positions, the premium is justified. If you transport one kayak the same way every time, you’re paying for features you won’t use.
Resale considerations:
Gear tracks can increase resale value for outdoor-oriented buyers but may decrease appeal to general buyers who see drilled holes as damage. If you plan to sell within 2-3 years, removable systems preserve more resale options.
The verdict for fishing kayak enthusiasts:
If kayak fishing is your primary hobby and you’re committed long-term, gear tracks are worth it. If you’re exploring the sport or kayaking is one of many occasional activities, start with removable racks and upgrade later if your usage increases.
Do Gear Tracks Void Vehicle Warranty
Gear tracks do not automatically void your entire vehicle warranty, but they can void warranty coverage for specific components damaged by improper installation. Under the Magnuson-Moss Warranty Act, manufacturers must prove that an aftermarket modification directly caused a failure before denying warranty coverage.
What this means in practice:
Warranty coverage that remains intact:
- Engine, transmission, and drivetrain warranties
- Electrical systems unrelated to the roof
- Suspension and brake components
- Interior components (unless damaged by leaks from improper installation)
Warranty coverage that may be affected:
- Roof structural integrity if installation causes damage
- Headliner and interior components if leaks occur
- Paint and corrosion warranty around installation points
- Factory roof rails or crossbars if removed for track installation
Manufacturer-specific policies:
Some manufacturers explicitly allow roof modifications; others discourage them. Check your owner’s manual or contact the manufacturer’s customer service for written clarification before installation. Document this communication for future reference.
Protecting your warranty:
- Use professional installation – shops carry insurance and provide documentation
- Keep all receipts and photos of the installation process
- Follow manufacturer torque specifications exactly
- Use appropriate sealants rated for automotive use
- Document that no factory components were damaged during installation
Leased vehicles:
Lease agreements typically prohibit modifications requiring drilling. Installing gear tracks on a leased vehicle may result in charges at lease end for “excessive wear” or restoration to original condition. If you must install tracks on a lease, get written permission from the leasing company first.
Insurance considerations:
Gear tracks themselves don’t affect auto insurance rates, but damage caused by improperly secured cargo (kayak coming loose due to faulty track installation) may not be covered. Ensure your installation meets manufacturer specifications and use appropriate tie-downs.
Real-world experience:
Most kayak enthusiasts report no warranty issues from gear track installation. Problems arise when leaks damage interior components and the owner tries to claim warranty coverage for water damage. Proper installation eliminates this risk.
For peace of mind, consider having tracks installed by a shop that provides written warranty protection against leaks and installation damage. This documentation helps if warranty disputes arise.
Will Gear Tracks Leak If I Don’t Use Enough Sealant
Yes, insufficient sealant is the primary cause of gear track leaks, creating gaps where water infiltrates around bolt holes and along the track base. Even small sealant gaps allow water entry because wind pressure while driving forces water into openings that would remain dry under static conditions.
How much sealant is enough:
Around bolt holes:
- Fill the entire hole depth with sealant before inserting the bolt
- Sealant should squeeze out around the washer when torqued
- If no squeeze-out occurs, you used too little
Under track base:
- Apply a continuous 1/4-inch bead along the entire mounting surface
- Focus extra sealant around bolt hole areas (1/2-inch diameter coverage)
- Expect 20-30% of applied sealant to squeeze out during installation
Visual indicators of proper sealant amount:
✅ Correct: Small bead of sealant visible around each bolt and along track edges after torquing
✅ Correct: Sealant fills any gaps between track and roof contours
❌ Too little: No visible sealant squeeze-out, track sits flush with no excess
❌ Too much: Large amounts of sealant oozing out, difficult to clean (wasteful but not harmful)
Why “better safe than sorry” applies:
Excess sealant is messy but harmless – it wipes away easily before curing. Insufficient sealant creates leaks that require complete reinstallation to fix. Always err on the side of too much sealant rather than too little.
Sealant quantity needed:
- Butyl tape: One 3/4-inch x 10-foot roll covers two standard gear tracks
- Silicone sealant: One 10-ounce tube covers two tracks with some left over
- Cost: $15-30 total – cheap insurance against leaks
Common misconception:
Some installers believe torque alone creates a waterproof seal through metal-to-metal contact. This is false. The sealant creates the waterproof barrier; torque simply compresses the sealant to fill gaps. Without adequate sealant, even perfect torque won’t prevent leaks.
Testing sealant coverage:
After installation but before the sealant cures, inspect each bolt from multiple angles. You should see a thin, consistent ring of sealant around every washer. If you see bare metal anywhere, remove that bolt, add more sealant, and reinstall.
For those working with other kayak modifications requiring waterproof seals, similar principles apply to transducer mounting and other through-hull installations.
How to Seal Gear Track Bolt Holes Properly
Sealing gear track bolt holes properly requires filling the entire hole with sealant before inserting the bolt, ensuring the sealant creates a continuous barrier between the bolt threads and the roof metal. The bolt itself doesn’t create the seal – the compressed sealant does.
Proper bolt hole sealing technique:
Method 1: Silicone injection (most reliable)
- Apply sealant around the hole perimeter on the roof surface
- Inject sealant into the hole using a caulk gun with a narrow tip
- Fill the hole approximately 75% full (sealant will compress when bolt enters)
- Insert the bolt through the track and into the hole
- Torque to specification – sealant should squeeze out around the washer
Method 2: Butyl tape wrap (easier for beginners)
- Cut a small square of butyl tape (1 inch x 1 inch)
- Press it firmly over the hole, ensuring complete coverage
- Use a pencil or dowel to push tape slightly into the hole
- Position the track and insert the bolt through tape and hole
- Torque to specification – tape compresses to form a gasket
Method 3: Combination approach (maximum protection)
- Apply butyl tape around the hole perimeter
- Inject silicone into the hole center
- Install bolt through both sealant layers
- This creates redundant sealing for critical installations
Thread sealing:
Some installers also apply sealant to bolt threads before insertion. This is optional but adds another barrier against water following the threads into the vehicle. Use a thin coat – too much sealant on threads can cause inaccurate torque readings.
Washer considerations:
Always use the washers provided with your gear track kit. They’re sized to compress sealant properly without over-stressing the roof metal. Aftermarket washers may be too large (crushing too much sealant) or too small (leaving gaps).
Special case – existing holes:
If reinstalling tracks in existing holes, clean them thoroughly first. Old sealant residue prevents new sealant from bonding. Use a drill bit slightly larger than the hole, rotated by hand, to clean the edges without enlarging the hole significantly.
Verification:
After torquing each bolt, inspect the washer perimeter. You should see a thin, consistent ring of sealant. If any section shows bare metal, that bolt needs more sealant – remove it, add sealant, and reinstall immediately.
Cure time before testing:
Even though bolts are installed, don’t test with water for 24-48 hours. Sealant needs time to cure fully under compression. Premature water exposure can wash away uncured sealant and create leak paths.
FAQ
How long does it take to install gear tracks?
Installing two gear tracks takes 3-4 hours for a DIY installation, including surface preparation, drilling, sealing, and cleanup. Professional installers complete the job in 2-3 hours due to experience and specialized tools.
Can gear tracks be removed without damaging the vehicle?
Yes, gear tracks can be removed, but the bolt holes remain permanently. Fill holes with body filler, sand smooth, and touch up paint to restore the roof appearance. Complete restoration costs $100-200 if done professionally.
What’s the weight limit for gear tracks?
Most gear track systems handle 150-300 pounds of dynamic load (equipment in motion). Check your specific track’s rating and never exceed it – overloading can cause track failure or roof damage.
Do I need to seal both sides of the roof?
No, seal only the exterior (top) side where the track mounts. The interior side remains untouched in proper installations. If water reaches the interior, your exterior seal has failed.
Can I install gear tracks on a fiberglass truck cap?
Yes, but use larger backing plates or washers on the interior to distribute load across the fiberglass. Fiberglass is more flexible than metal and requires additional reinforcement to prevent cracking.
How often should I check gear tracks for leaks?
Inspect tracks monthly for the first six months after installation, then quarterly thereafter. Look for loose bolts, cracked sealant, or rust spots. Early detection prevents major leaks.
Will gear tracks rust over time?
Quality aluminum tracks won’t rust, but steel hardware can. Use stainless steel bolts and washers to prevent rust. If rust appears around holes, treat it immediately with rust converter before it spreads.
Can I install gear tracks in winter?
Avoid installation when temperatures are below 50°F. Cold weather prevents proper sealant curing and makes materials brittle. Wait for a warm day or use a heated garage.
Do gear tracks affect fuel economy?
Unloaded gear tracks have minimal aerodynamic impact (less than 1% fuel economy reduction). Loaded kayaks reduce fuel economy by 5-15% depending on kayak size and driving speed.
What if my vehicle has a sunroof?
Plan track placement to avoid sunroof drain channels, which run along the roof edges. Drilling into drains causes interior leaks unrelated to track sealing. Consult your vehicle’s service manual for drain locations.
Can I use gear tracks with a roof-mounted tent?
Yes, many roof-top tents mount to gear tracks. Verify that your tracks’ weight rating exceeds the tent’s weight plus occupants (typically 400-600 pounds static load required).
How do I transport multiple kayaks on gear tracks?
Use stacker-style mounts that hold kayaks on edge, allowing 2-4 kayaks depending on track length and kayak width. Ensure total weight stays within track capacity and secure each kayak independently.
Conclusion
Installing gear tracks without leaks is entirely achievable when you follow proper techniques: thorough surface preparation, generous sealant application, accurate drilling, and correct torque specifications. The key is understanding that the sealant creates the waterproof barrier, not the hardware itself.
For fishing kayak enthusiasts committed to the sport, gear tracks offer unmatched versatility in transporting kayaks and fishing gear while maintaining quick reconfiguration for other activities. The initial investment of time and money pays dividends through years of reliable, leak-free service.
Your next steps:
- Assess your needs – determine if gear tracks suit your usage pattern or if alternatives better fit your situation
- Gather quality materials – invest in marine-grade sealant and proper tools, especially a torque wrench
- Choose ideal conditions – wait for dry weather with temperatures above 60°F
- Take your time – rushing the installation is the most common cause of leaks
- Test thoroughly – verify leak-free installation before your first trip
Whether you choose DIY installation or professional service, understanding the process helps you make informed decisions and maintain your tracks properly. A well-installed gear track system serves reliably for 10+ years, making it one of the best investments for serious kayak anglers.
Ready to upgrade your kayak transport system? Start by measuring your roof, researching track options compatible with your vehicle, and gathering the tools and materials outlined in this guide. With careful attention to detail, you’ll enjoy leak-free gear tracks that enhance every fishing adventure.





