Installing a kayak rudder kit involves mounting a stern-mounted blade assembly, routing control cables through your hull, and connecting foot pedals in the cockpit to steer the rudder. Most installations take 2-4 hours and require drilling holes in your kayak’s stern deck and hull sides. The process is straightforward for touring and fishing kayaks with pre-marked mounting points, but requires careful measurement and waterproof sealing to prevent leaks.
Key Takeaways
- Rudder kits cost $150-$400 depending on brand and materials, with installation adding $100-$200 if done professionally
- Installation takes 2-4 hours for someone with basic DIY skills and the right tools
- You’ll need to drill holes in most cases, no-drill options exist but are limited to specific kayak models
- Cable routing is the trickiest part, plan your path before drilling to avoid obstructions inside the hull
- Not all kayaks accept rudders, check for stern deck space, hull thickness, and manufacturer compatibility before buying
- Rudders excel in wind and current but add complexity compared to skegs, which are simpler passive tracking aids
- Common mistakes include improper cable tension and inadequate sealant application around mounting holes
- Fishing kayaks benefit most when covering long distances or dealing with crosswinds while hands are busy with gear
What Is a Kayak Rudder Kit and How Does It Work?
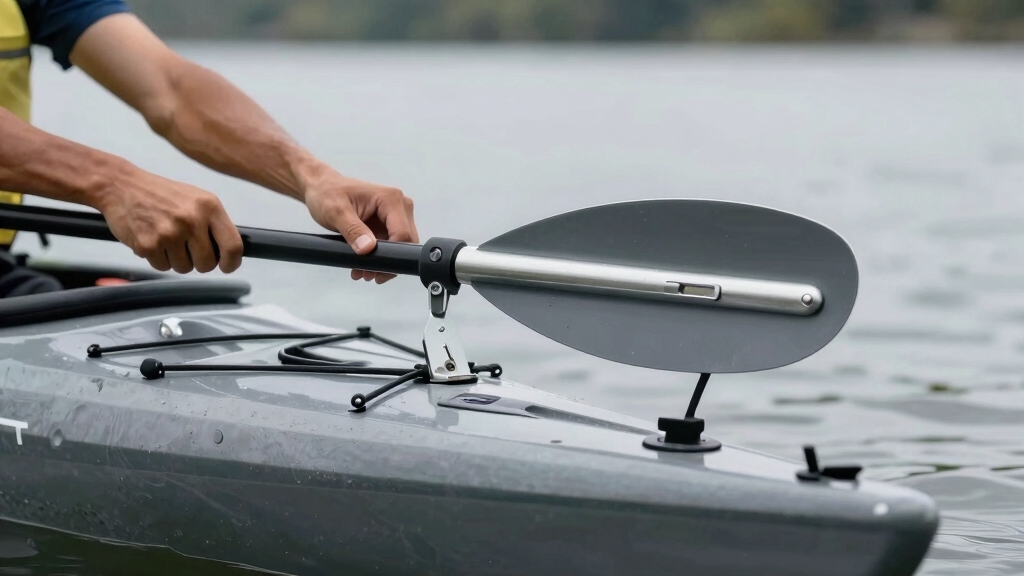
A kayak rudder kit is a steering system that mounts to your kayak’s stern and pivots left or right to control direction. The system includes a retractable blade, mounting hardware, stainless steel control cables, and foot pedals that connect to your existing footrests or replace them entirely.
When you push the right foot pedal forward, the rudder blade swings right, turning your kayak right. Push the left pedal, and you turn left. The rudder blade deploys down into the water when you need steering control and retracts up onto the stern deck when launching, landing, or paddling in shallow water.
How the mechanics work:
- Foot pedals pull control cables that run along each side of your kayak
- Cables connect to a steering arm on the rudder assembly
- The rudder blade pivots on a vertical pin through the mounting bracket
- A deployment line (usually bungee cord) lets you raise and lower the blade from the cockpit
- Spring tension keeps the blade deployed until you pull the retraction cord
Rudders work best when you’re already moving, they redirect water flow past the blade to change your heading. Unlike a skeg (which is fixed and only prevents weathercocking), a rudder actively steers your kayak and compensates for wind, current, and waves without constant paddle correction.
For fishing kayak enthusiasts, this means you can maintain course while your hands are busy rigging lines, landing fish, or managing gear.
Kayak Rudder vs Skeg: Which Is Better for Beginners?
A skeg is simpler and better for beginners who paddle in moderate conditions, while a rudder offers more control but adds mechanical complexity. Skegs are fixed vertical blades that drop from a slot in your hull to prevent the stern from being pushed around by wind (weathercocking). Rudders actively steer and correct course but require foot pedal coordination and more maintenance.
Skeg advantages:
- No moving parts in the cockpit, just a slider control
- Less maintenance (no cables to adjust or replace)
- Cheaper ($100-$250 vs $150-$400 for rudders)
- Easier installation with fewer hull penetrations
- Better for paddlers who want to focus on paddle technique
Rudder advantages:
- Active steering lets you change direction without paddle strokes
- Superior control in strong crosswinds and following seas
- Hands-free course correction while fishing or taking photos
- Essential for tandem kayaks where coordinated steering is difficult
- Better for long-distance touring in variable conditions
Choose a skeg if you paddle mostly calm to moderate water, want minimal gear complexity, and prefer traditional paddling technique. Choose a rudder if you fish frequently, cover long distances in open water, or regularly face wind and current that make constant paddle correction exhausting.
Many experienced kayakers prefer skegs for their simplicity and the “purer” paddling experience. Beginners often find rudders easier because they reduce the learning curve for tracking and turning, especially in recreational kayaking conditions.
Can You Install a Rudder on Any Kayak?
No, not all kayaks can accept rudder installations, you need adequate stern deck space, sufficient hull thickness for mounting hardware, and a hull shape that won’t interfere with blade deployment. Most touring kayaks 12 feet and longer are rudder-compatible, but short recreational kayaks, whitewater kayaks, and some sit-on-top kayaks lack the necessary mounting area or structural support.
Check these compatibility factors before buying a kit:
- Stern deck space: You need 8-12 inches of flat or gently curved deck behind the cockpit for the mounting bracket
- Hull thickness: Minimum 3/16 inch (ideally 1/4 inch) to support through-bolted hardware without cracking
- Deck width: The stern must be narrow enough (typically under 24 inches) for the rudder bracket to span properly
- Internal obstructions: Bulkheads, foam flotation, or storage compartments can block cable routing paths
- Manufacturer support: Some brands void warranties if you drill mounting holes
Kayak types that usually accept rudders:
- Touring and sea kayaks 12-18 feet
- Fishing kayaks designed for open water
- Tandem kayaks
- Pedal kayaks (though many come with rudders pre-installed)
Kayak types that rarely work:
- Whitewater kayaks (too short, too much rocker)
- Inflatable kayaks (no rigid mounting surface)
- Very short recreational kayaks under 10 feet
- Kayaks with extreme stern rocker or upturned ends
Common mistake: Buying a universal rudder kit without measuring your stern deck first. Universal kits fit a range of kayaks but still require specific dimensions. Always check the manufacturer’s compatibility chart or contact them with your kayak’s make, model, and year before purchasing.
How Much Does a Kayak Rudder Kit Cost Installed?
A complete rudder kit costs $150-$400 for the parts, plus $100-$200 for professional installation if you don’t do it yourself. Budget-friendly kits from brands like Harmony and Seattle Sports start around $150-$180, mid-range options from Wilderness Systems and Perception run $250-$300, and premium stainless steel systems from Feathercraft or custom builders reach $350-$400.
Cost breakdown by component:
- Rudder blade and mounting bracket: $80-$150
- Control cables and housing: $30-$60
- Foot pedal assemblies: $40-$100
- Hardware, bolts, and sealant: $15-$30
- Installation labor (if hiring out): $100-$200
DIY installation saves money but requires 2-4 hours of work and tools you may need to buy (drill bits, rivet gun, cable cutters). Professional installation at a kayak shop ensures proper cable routing, correct tension adjustment, and waterproof sealing, which matters if you’re not confident drilling holes in your hull.
Hidden costs to consider:
- Marine-grade sealant (Sikaflex or 3M 5200): $8-$15 per tube
- Stainless steel hardware upgrades if kit includes cheap bolts: $10-$20
- Replacement foot brace rails if your existing system isn’t compatible: $30-$50
- Repair costs if you drill in the wrong spot (rare but expensive)
For fishing kayak enthusiasts who already own basic tools and feel comfortable with DIY projects, self-installation is the best value. If your kayak is expensive or you’re unsure about drilling, the $100-$200 professional installation fee is worth the peace of mind.

HIGH-QUALITY AND GOOD MATERIALS: Crafted with high-quality materials, the Fishing Boat Rudder is designed to withstand the harsh conditions of the water. Its robust construction ensures strength, while its wear-resistant and serviceable nature guarantees long-lasting performance. Feel confident in the reliability of this rudder as it withstands the rigors of your fishing adventures.

PREMIUM for KAYAK RUDDER CONTROL KIT: Complete control system for kayak and canoe navigation, featuring a ABS handle (11.5*7.5*3.8cm) and square base (14.5*12cm) designed to enhance steering for precision and maneuverability on water adventures.
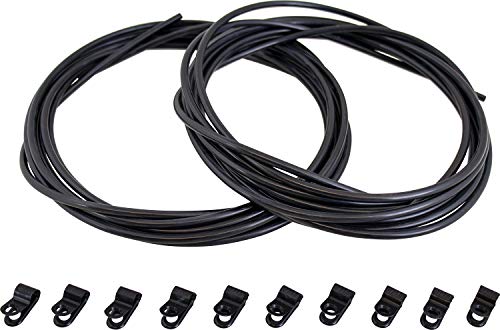
Use to either replace worn-out rudder cable tubing, or for installing a new rudder into your boat
What Tools Do I Need to Install a Kayak Rudder?
You’ll need a variable-speed drill, marine-grade drill bits (1/8-inch and 1/4-inch), a rivet gun or socket wrench set, cable cutters, marine sealant, measuring tape, and a marker. Most installations also require a small file or sandpaper, a level or straight edge, and masking tape to protect your kayak’s finish while drilling.
Essential tools:
- Variable-speed electric drill (cordless is easier to maneuver)
- Drill bits: 1/8-inch pilot bit, 1/4-inch or 5/16-inch for mounting bolts (match your kit’s hardware)
- Step drill bit (optional but cleaner for plastic hulls)
- Rivet gun if your kit uses pop rivets, or socket wrench set for through-bolts
- Cable cutters or heavy-duty wire cutters for trimming control cables
- Marine-grade sealant (Sikaflex 291 or 3M 5200)
- Measuring tape (at least 12 feet)
- Permanent marker and masking tape
- Small file or 220-grit sandpaper for deburring holes
Nice-to-have tools:
- Inspection mirror to see inside the hull when routing cables
- Flashlight or headlamp for interior work
- Clamps to hold the rudder bracket in place while marking holes
- Caulk gun if your sealant comes in a tube
- Utility knife for trimming excess sealant
Common mistake: Using a standard twist bit on a high-speed drill setting, which can crack or melt plastic hulls. Always use a slow drill speed (under 500 RPM) and let the bit do the work without forcing it. Step bits create cleaner holes in polyethylene and ABS plastic because they cut gradually and reduce the risk of cracking.
If you don’t own these tools, borrowing from a friend or renting from a hardware store costs $20-$40 for a day, which is still cheaper than professional installation.

Package Details: This set contains 8 titanium-coated high-speed steel metal drill bits, covering the most commonly used sizes: 3mm, 4mm, 5mm, 6mm, 6.5mm, 7mm, 8mm and 10mm. These hexagonal shank drill bits are designed to fit most electric drills on the market, ensuring you have the right size for every task

Milwaukee 48-89-4630 Kit TiN Shockwave (15-Piece Titanium)

Full size set kits includes from 3/64-inch to 1/2-inch in tough plastic case
Step-by-Step Kayak Rudder Installation Instructions
Installing a kayak rudder kit involves five main stages: planning and measurement, mounting the stern bracket, routing control cables, installing foot pedals, and adjusting cable tension. Follow these steps carefully to avoid mistakes that could compromise your kayak’s watertight integrity or rudder performance.
Stage 1: Plan Your Installation
- Read the manufacturer’s instructions completely before starting, every kit has slight variations
- Lay out all components and verify you have every part listed in the kit
- Measure your stern deck to confirm the mounting bracket will fit centered and level
- Mark the centerline of your kayak from bow to stern using masking tape as a guide
- Check for internal obstructions by looking inside hatches or removing the seat to see where cables will run
Stage 2: Mount the Rudder Bracket
- Position the mounting bracket on your stern deck, centered on the kayak’s centerline
- Mark the mounting holes with a permanent marker through the bracket’s holes
- Apply masking tape around each mark to prevent the drill from slipping
- Drill pilot holes using a 1/8-inch bit at slow speed (under 500 RPM)
- Enlarge to final size with the bit specified in your kit (usually 1/4-inch or 5/16-inch)
- Deburr the holes with sandpaper or a file to remove rough edges
- Apply marine sealant around each hole and on the underside of the bracket
- Insert bolts or rivets and tighten firmly but not so tight you crack the deck
- Wipe away excess sealant and let cure for 24 hours before water testing
Stage 3: Route the Control Cables
- Identify your cable path from the rudder bracket along each side of the hull to the cockpit
- Drill cable exit holes on each side of the stern, 2-3 inches forward of the rudder bracket and just above the waterline
- Thread cable housing through the exit holes from inside the hull
- Secure housing with cable guides or adhesive-backed clips every 12-18 inches along the hull interior
- Run cables through the housing from the rudder end toward the cockpit
- Attach cables to the rudder’s steering arm using the provided hardware (usually clevis pins or cable clamps)
- Apply sealant around cable exit holes and let cure
Common mistake: Routing cables too close to the hull’s bottom where they can snag on rocks or debris. Keep cables at least 2 inches above the waterline and secure them firmly so they don’t rattle or shift during paddling.
Stage 4: Install Foot Pedals
- Remove your existing foot braces if the rudder kit replaces them
- Position the rudder foot pedals at a comfortable distance (your knees should have a slight bend when bracing)
- Mark and drill mounting holes for the pedal rails or brackets
- Attach the pedal assemblies using the provided bolts or screws
- Connect the control cables to the pedals using the adjustment hardware (usually threaded cable ends with lock nuts)
- Test the pedal movement, they should slide smoothly with even resistance on both sides
Stage 5: Adjust Cable Tension and Test
- Set the rudder blade to center position (straight behind the kayak)
- Adjust cable tension so both pedals are even and the rudder stays centered when pedals are neutral
- Test the full range of motion, push each pedal fully forward and verify the rudder swings smoothly to each side
- Fine-tune tension using the adjustment nuts on the pedal cables until steering feels responsive but not loose
- Install the deployment line (usually a bungee cord from the rudder to a deck cleat near the cockpit)
- Water test in calm conditions before heading out on a longer trip
Adjustment tip: Proper cable tension means the rudder returns to center when you release the pedals, but doesn’t spring back so hard it’s difficult to hold a turn. If one side feels tighter than the other, loosen the cable on that side slightly until both pedals feel balanced.
For more guidance on kayak accessories and modifications, check our related installation guides.
How to Install Rudder Cables Through Kayak Hull
Cable routing is the most challenging part of rudder installation because you’re working inside a confined hull space and need to avoid obstructions while maintaining a clean, secure path. The cables must run from the stern rudder bracket forward to the cockpit foot pedals, typically along the inside of each hull side just above the waterline.
Best practices for cable routing:
Map your route first: Before drilling any holes, look inside your kayak through hatches or by removing the seat. Identify bulkheads, foam blocks, or storage compartments that could block cable paths.
Use cable housing: Plastic or metal housing protects the cables from abrasion and keeps them from snagging on internal hull features. Most kits include housing, cut it to length with cable cutters, leaving a few extra inches for adjustment.
Drill exit holes strategically: Position cable exit holes 2-3 inches forward of the rudder bracket and 2-4 inches above the waterline. This keeps cables clear of rocks and debris while maintaining a clean angle to the steering arm.
Secure cables every 12-18 inches: Use adhesive-backed cable guides, zip ties, or small stainless steel clips to prevent cables from rattling or shifting. Loose cables can catch on gear or create annoying noise.
Avoid sharp bends: Cables should follow gentle curves, not 90-degree angles. Sharp bends create friction that makes steering stiff and can cause cables to fray over time.
Seal all hull penetrations: Every hole you drill is a potential leak point. Apply marine-grade sealant (Sikaflex 291 or 3M 5200) around cable exit holes and let it cure fully before launching.
Common mistake: Drilling cable exit holes too low on the hull, below the waterline. This creates a leak risk and exposes cables to underwater obstacles. Always position exit holes at least 2 inches above your kayak’s normal waterline, even when loaded with gear.
For sit-on-top kayaks: Cable routing is easier because you have access to the entire deck. Run cables through existing scupper holes or along the deck’s underside, securing them with clips or zip ties. You may not need to drill additional holes if your kayak has convenient scupper placement.
Can I Install a Kayak Rudder Without Drilling Holes?
True no-drill rudder installations are rare and limited to specific kayak models with factory-installed mounting points or track systems. Most rudder kits require drilling at least 4-8 holes for the stern bracket, cable exits, and foot pedal mounts. However, some workarounds minimize drilling or use existing hull features.
Limited no-drill options:
Factory-ready kayaks: Some touring and fishing kayaks come with pre-drilled mounting points and threaded inserts specifically for rudder installation. Check your owner’s manual or contact the manufacturer.
Track-mount systems: A few universal rudder kits attach to existing gear track (like YakAttack or RAM track) already installed on your stern deck. This works only if you already have track in the right position.
Clamp-on rudders: Rare and generally not recommended, these use straps or clamps to attach to the stern without drilling. They’re less secure, can damage your deck finish, and don’t perform as well as through-bolted systems.
Why drilling is usually necessary:
- Structural integrity: Through-bolted mounting provides the strength needed to handle steering forces, especially in rough water
- Waterproof sealing: Properly sealed bolt holes are more reliable than clamps or adhesive mounts
- Cable routing: Cables must pass through the hull to reach foot pedals in the cockpit
Minimizing drilling: If you’re hesitant about drilling, consider these approaches:
- Use a professional installer who has experience with your kayak model
- Choose a kit designed for your specific kayak brand (often requires fewer holes)
- Install a skeg instead, which typically requires fewer hull penetrations
Reality check: Drilling holes in your kayak sounds scary, but it’s a standard modification that thousands of paddlers do successfully. When done correctly with proper sealant and hardware, drilled holes don’t compromise your kayak’s integrity or resale value. In fact, a well-installed rudder often increases resale value for buyers looking for a ready-to-use touring or fishing kayak.
How Long Does It Take to Install a Kayak Rudder Kit?
A complete rudder installation takes 2-4 hours for someone with basic DIY skills and the right tools. First-time installers should budget 4-5 hours to allow time for reading instructions, measuring carefully, and troubleshooting any unexpected issues. Experienced kayakers who’ve done the job before can complete it in 90 minutes to 2 hours.
Time breakdown by stage:
- Planning and measuring: 20-30 minutes
- Mounting the stern bracket: 30-45 minutes
- Routing control cables: 45-90 minutes (the most time-consuming step)
- Installing foot pedals: 20-30 minutes
- Adjusting and testing: 15-30 minutes
- Sealant curing time: 24 hours (not active work, but required before water testing)
Factors that affect installation time:
- Kit quality: Well-designed kits with clear instructions and pre-cut cables install faster than generic universal kits
- Kayak design: Simple hull shapes with easy interior access are quicker than complex designs with bulkheads and storage compartments
- Your experience level: Comfort with power tools and DIY projects makes a big difference
- Workspace setup: A well-lit garage or workshop is faster than working outdoors in poor conditions
Common time wasters:
- Not reading the full instructions before starting (leads to backtracking)
- Drilling holes in the wrong location and having to fill and re-drill
- Struggling with cable routing because you didn’t plan the path first
- Making multiple trips to the hardware store for forgotten supplies
Pro tip: Set aside a full afternoon or weekend day for the installation. Rushing leads to mistakes, and you’ll want time to let the sealant cure before testing your rudder on the water. Many kayakers find the installation process satisfying, it’s a chance to understand your kayak’s mechanics and customize it for your specific kayak fishing needs.
Why Is My Kayak Rudder Not Deploying Properly?
Rudder deployment problems usually stem from incorrect cable tension, a tangled or kinked deployment line, or debris blocking the rudder blade’s pivot mechanism. The rudder should drop smoothly into the water when you release the retraction line and stay deployed until you pull it back up. If it won’t deploy, deploys partially, or drops unexpectedly, you need to troubleshoot the system.
Common deployment issues and fixes:
Problem: Rudder won’t drop down
- Cause: Deployment bungee is too tight or the retraction line is stuck
- Fix: Loosen the bungee tension or check that the retraction line isn’t caught on deck hardware. The bungee should pull the rudder down with moderate force, not slam it.
Problem: Rudder drops on its own while paddling
- Cause: Retraction line is too loose or the cleat isn’t holding
- Fix: Tighten the retraction line and ensure it’s properly cleated. Check that the cleat is securely mounted and the line isn’t slipping.
Problem: Rudder deploys but sits at an angle
- Cause: Bent rudder blade, damaged pivot pin, or uneven cable tension
- Fix: Inspect the blade for damage. Check that the pivot pin moves freely and isn’t corroded. Adjust cable tension so both sides are equal.
Problem: Rudder is stiff or won’t pivot smoothly
- Cause: Debris in the pivot mechanism, corroded hardware, or overtightened mounting bolts
- Fix: Rinse the rudder assembly with fresh water after each use, especially in saltwater. Apply a small amount of marine grease to the pivot pin. Loosen mounting bolts slightly if they’re preventing smooth rotation.
Problem: Rudder blade wobbles or rattles
- Cause: Loose mounting hardware or worn pivot bushings
- Fix: Tighten all bolts and check for worn plastic bushings in the pivot assembly. Replace bushings if they’re cracked or compressed.
Maintenance tip: Rinse your rudder system with fresh water after every outing, especially in saltwater kayak fishing conditions. Salt buildup causes corrosion and stiffness in cables and pivot points. Every few months, disconnect the cables and inspect them for fraying or rust. Replace cables at the first sign of damage, a broken cable while you’re miles from shore is a serious safety issue.
Best Kayak Rudder Kits for Touring Kayaks
The best rudder kits for touring kayaks balance durability, smooth operation, and compatibility with long-distance paddling demands. Top choices include the Feathercraft Rudder System ($350-$400), Wilderness Systems Rudder Kit ($280-$320), and Harmony Rudder Kit ($150-$180), each suited to different budgets and kayak types.
Premium choice: Feathercraft Rudder System
- Best for: Serious touring kayakers and expedition paddlers
- Price: $350-$400
- Features: Stainless steel construction, oversized blade for strong tracking, sealed cable system, lifetime warranty
- Pros: Exceptional durability, smooth operation even in rough seas, minimal maintenance
- Cons: Expensive, heavier than budget options
Mid-range choice: Wilderness Systems Rudder Kit
- Best for: 14-foot kayaks and longer touring models
- Price: $280-$320
- Features: Corrosion-resistant aluminum and stainless steel, integrated foot pedals, pre-cut cables
- Pros: Excellent quality-to-price ratio, widely available, good manufacturer support
- Cons: Designed primarily for Wilderness Systems kayaks (may require modification for other brands)
Budget choice: Harmony Rudder Kit
- Best for: Recreational touring and beginner kayakers
- Price: $150-$180
- Features: Universal fit design, basic stainless steel hardware, standard cable system
- Pros: Affordable, adequate performance for calm to moderate conditions, easy to find parts
- Cons: Less durable than premium kits, may require more frequent cable replacement
What to look for in a touring rudder kit:
- Blade size: Larger blades (8-10 inches) provide better tracking in wind and waves
- Cable quality: Stainless steel cables with sealed housing resist corrosion and last longer
- Foot pedal design: Adjustable pedals that integrate with or replace your existing foot braces
- Deployment system: Reliable bungee and cleat system that won’t fail mid-trip
- Warranty: At least 1-year coverage on hardware and cables
Compatibility note: Always verify that a rudder kit fits your specific kayak model before purchasing. Many manufacturers offer model-specific kits that install more easily and perform better than universal kits. Check with your kayak’s manufacturer or a specialty kayak shop for recommendations.
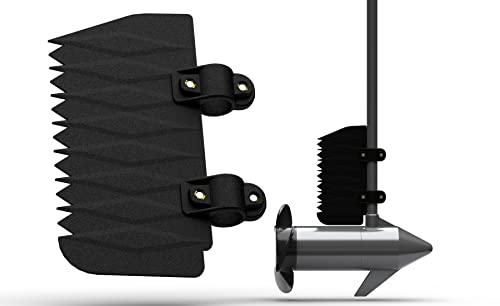
OBVIOUSLY IMPROVED-Adding the boat rudder to your boat trolling motor made the trolling motor more stable as trolling motors are known for lack of steering especially when the big wind picks up. With trolling motor stabilizer, even in the big wind, the direction is in your own hand, don't worry rudder out of control any more.

【Nylon for kayak Tail Canoe Rudder Direction Foot Control Steering System Tool Kit】
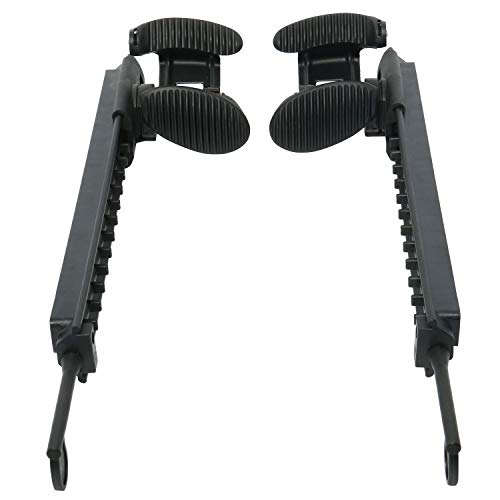
Range of foot pedal adjustment:16.7"
Do I Need a Rudder If I Only Kayak on Calm Lakes?
You probably don’t need a rudder for calm lake paddling, but it can still be useful if you cover long distances, fish frequently, or want easier steering without constant paddle correction. Rudders shine in wind, current, and waves, conditions that are less common on protected lakes. For casual recreational kayaking on small, sheltered lakes, a rudder is a convenience rather than a necessity.
Skip the rudder if:
- You paddle mostly on small, protected lakes with minimal wind
- Your trips are short (under 2 miles) and you don’t mind occasional course correction
- You prefer the simplicity of a rudder-free setup
- Your kayak already tracks well in calm conditions
- You want to minimize gear complexity and maintenance
Consider a rudder if:
- You fish from your kayak and want hands-free steering while managing gear
- You paddle long distances (5+ miles) and want to reduce fatigue from constant correction
- Your lake experiences afternoon winds that push you off course
- You’re a beginner and find tracking difficult with paddle strokes alone
- You plan to eventually paddle in more challenging conditions (coastal waters, rivers, open bays)
Alternative for calm water: If you occasionally struggle with tracking but don’t want the complexity of a rudder, try improving your kayak stability and paddling technique first. A longer kayak (12+ feet) tracks better than a short one, and proper paddle stroke technique (torso rotation, even strokes on both sides) reduces the need for steering aids.
The fishing kayak exception: Even on calm lakes, fishing kayak enthusiasts often appreciate rudders because they allow precise positioning while both hands are busy with rods, nets, or tackle. If you frequently fish in your kayak, a rudder pays off in convenience even if water conditions don’t strictly require it.
Common Mistakes When Installing Kayak Rudder System
The most common rudder installation mistakes include drilling holes in the wrong location, using inadequate sealant, setting incorrect cable tension, and failing to test the system thoroughly before heading out on the water. These errors can lead to leaks, poor steering performance, or even rudder failure in challenging conditions.
Critical mistakes to avoid:
1. Not measuring twice before drilling
- Problem: Holes drilled off-center or at the wrong angle can’t be easily fixed
- Solution: Use masking tape to mark your drill points, measure from multiple reference points, and have someone verify your measurements before drilling
2. Skimping on marine sealant
- Problem: Water leaks through mounting holes and cable exits, potentially damaging internal foam or gear
- Solution: Use high-quality marine sealant (Sikaflex 291 or 3M 5200) on every hull penetration. Apply generously and let cure for 24 hours before water testing.
3. Over-tightening mounting bolts
- Problem: Cracked deck or hull around mounting holes, especially in plastic kayaks
- Solution: Tighten bolts firmly but stop when you feel resistance. Use large backing washers to distribute pressure.
4. Routing cables too tight or too loose
- Problem: Tight cables bind and make steering stiff; loose cables create slack and imprecise steering
- Solution: Adjust cable tension so the rudder returns to center when pedals are neutral, but doesn’t spring back forcefully. Test and fine-tune on the water.
5. Ignoring cable routing path
- Problem: Cables that rub against sharp edges or internal obstructions will fray and fail
- Solution: Use cable housing throughout the run, secure cables every 12-18 inches, and inspect the full path for potential snag points
6. Forgetting to waterproof test before a real trip
- Problem: Discovering leaks or steering problems miles from shore
- Solution: After installation, paddle in calm water near shore for 30 minutes. Check all mounting points for leaks and test full rudder range of motion.
7. Using cheap hardware from the kit
- Problem: Low-quality bolts and nuts corrode quickly, especially in saltwater
- Solution: Consider upgrading to stainless steel hardware from a marine supply store. The extra $10-$20 extends your rudder’s lifespan significantly.
8. Not reading the manufacturer’s instructions completely
- Problem: Missing critical steps or using incorrect installation sequence
- Solution: Read the full instruction manual before starting. Watch installation videos if available. Contact the manufacturer with questions before drilling.
Recovery tip: If you drill a hole in the wrong spot, don’t panic. Fill the mistake hole with marine epoxy or a plastic welding kit, let it cure, sand smooth, and re-drill in the correct location. It’s not ideal, but it’s fixable and won’t compromise your kayak’s integrity if done properly.
Is a Rudder Worth It for Fishing Kayaks?
Yes, a rudder is worth it for fishing kayaks if you cover long distances, fish in windy conditions, or want hands-free steering while managing rods and gear. The ability to maintain course without constant paddle correction lets you focus on fishing rather than fighting wind and current. However, if you fish only in protected coves or small ponds, a rudder may be unnecessary complexity.
Rudder benefits for fishing kayaks:
- Hands-free steering: Keep your kayak positioned over structure or along a drift line while both hands work rods, nets, or tackle
- Reduced fatigue: Long paddles to fishing spots are less tiring when you’re not constantly correcting course
- Better boat control in wind: Maintain precise position for casting or trolling even in 10-15 mph winds
- Easier trolling: Hold a straight course at consistent speed without paddle strokes that spook fish
- Improved safety: Better control in rough conditions means less risk of kayak capsizing when you’re focused on landing a fish
When a rudder isn’t worth it:
- You fish only in small, protected waters with minimal wind
- Your trips are short (under 1 mile each way)
- You prefer the simplicity of a rudder-free setup
- Your kayak is very short (under 10 feet) and wouldn’t benefit from a rudder
- You already have a pedal kayak with integrated steering
Cost-benefit analysis: A $150-$400 rudder kit plus 3-4 hours of installation time is a significant investment. It pays off if you fish frequently (10+ times per season) in conditions where steering control matters. For weekend anglers on calm water, the money might be better spent on other fishing gear or kayak accessories.
Alternative consideration: Some fishing kayaks come with rudders pre-installed or as factory options. If you’re buying a new kayak and know you’ll want a rudder, choosing a model with a factory rudder saves installation hassle and often costs less than adding an aftermarket kit.
Frequently Asked Questions
Can I install a rudder on a sit-on-top kayak?
Yes, most sit-on-top kayaks can accept rudder installations if they have adequate stern deck space and hull thickness. Sit-on-top installations are often easier because you have better access to the hull interior for cable routing. Check that your kayak is at least 12 feet long and has a stern deck wide enough for the mounting bracket.
How often do rudder cables need replacement?
Rudder cables typically last 3-5 years with regular use and proper maintenance. Saltwater paddlers should inspect cables every season and replace them at the first sign of fraying or corrosion. Freshwater paddlers can often go 5+ years if they rinse the system after each use and store the kayak properly.
Will a rudder slow down my kayak?
A properly installed rudder adds minimal drag when deployed, typically less than 2-3% speed reduction. When retracted, there’s no speed penalty. The steering efficiency gained from not making constant correction strokes usually offsets any minor drag, resulting in faster overall progress on long trips.
Can I remove the rudder for shallow water paddling?
Yes, most rudder systems let you retract the blade up onto the stern deck for launching, landing, and shallow water. Some kits also allow you to remove the entire rudder assembly by loosening a few bolts, though this isn’t practical for mid-trip adjustments.
Do I need special skills to install a kayak rudder?
Basic DIY skills are sufficient, if you can use a drill, measure accurately, and follow instructions, you can install a rudder. The job requires patience and attention to detail but no specialized kayak knowledge. First-time installers should budget extra time and consider watching installation videos before starting.
Will drilling holes void my kayak warranty?
It depends on the manufacturer. Some brands explicitly allow owner modifications, while others void warranties for any drilling. Check your warranty documentation or contact the manufacturer before starting. Many kayak shops offer installation services that preserve warranties.
Can I install a rudder on an inflatable kayak?
No, standard rudder kits require rigid mounting surfaces and through-bolted hardware that inflatable kayaks can’t support. Some high-end inflatable kayaks have proprietary rudder systems designed specifically for inflatable construction, but aftermarket kits won’t work.
How do I maintain my rudder system?
Rinse with fresh water after every use, especially in saltwater. Every few months, disconnect cables and inspect for fraying. Apply marine grease to pivot points annually. Store your kayak with the rudder retracted to prevent UV damage to the blade. Replace cables at the first sign of corrosion or wear.
What’s the difference between a retractable and fixed rudder?
Retractable rudders (most common) pivot up onto the stern deck when not needed, making launching and landing easier. Fixed rudders stay deployed at all times and are simpler but more vulnerable to damage in shallow water. Retractable systems are better for most kayakers.
Can I use my rudder in reverse?
Rudders are designed for forward paddling only. When paddling backward, the rudder blade should be retracted to avoid damage and because it won’t steer effectively in reverse. Use paddle strokes to steer when backing up.
Will a rudder help with kayak stability?
No, rudders don’t improve stability, they only affect steering and tracking. For better kayak stability, you need a wider hull, lower center of gravity, or outriggers. A rudder helps you maintain course but won’t prevent tipping.
How much does a rudder weigh?
Most rudder systems add 3-6 pounds to your kayak’s weight. Premium stainless steel systems are heavier (5-6 pounds), while budget aluminum kits are lighter (3-4 pounds). This weight is negligible for most paddlers and doesn’t noticeably affect performance.
Conclusion
Installing a kayak rudder kit transforms your paddling experience by providing hands-free steering control, reducing fatigue on long trips, and improving boat handling in wind and current. The installation process requires 2-4 hours, basic DIY skills, and careful attention to measurement and sealing, but the result is a professional-grade steering system that enhances your kayak’s capabilities for years to come.
Your next steps:
- Verify compatibility: Measure your kayak’s stern deck and check with the manufacturer or a kayak shop to confirm your model can accept a rudder
- Choose the right kit: Match your budget and paddling style to a kit that fits your kayak, don’t compromise on quality for critical components like cables and hardware
- Gather tools and supplies: Assemble everything you need before starting, including marine-grade sealant and proper drill bits
- Take your time: Follow the manufacturer’s instructions carefully, measure twice before drilling, and don’t rush the installation
- Test thoroughly: Paddle in calm water near shore after installation to verify proper operation and check for leaks before heading out on longer trips
For fishing kayak enthusiasts, a well-installed rudder system is one of the most valuable upgrades you can make. It lets you focus on fishing rather than fighting your kayak’s tendency to weathercock, and the hands-free steering is invaluable when you’re managing rods, landing fish, or working with fishing gear. Whether you’re a weekend angler or a serious tournament competitor, the investment in a quality rudder kit pays dividends every time you launch.
Remember that proper maintenance extends your rudder’s lifespan significantly, rinse after every use, inspect cables regularly, and address any issues before they become serious problems. With care, your rudder system will provide reliable service for many seasons of paddling and fishing adventures.