
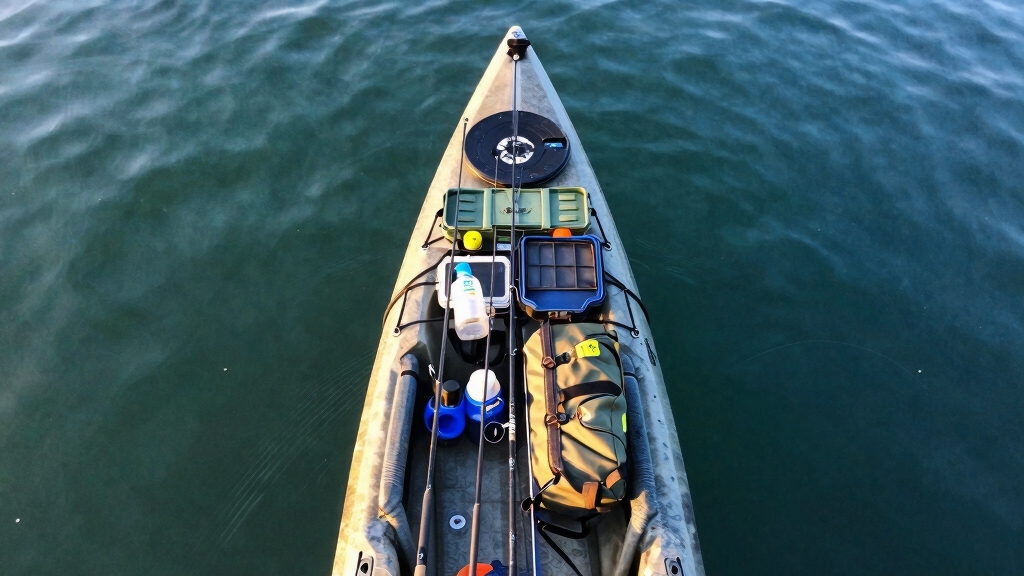
Quick Answer
Building a DIY kayak crate involves cutting PVC pipes to size, assembling them into a rectangular frame with corner joints, adding rod holders and accessories, then securing the finished crate to your kayak’s rear deck with bungee cords or straps. Most anglers can complete a basic crate in 2-3 hours for $30-60 using materials from any hardware store. The result is a customized storage solution that keeps fishing gear organized and accessible while you’re on the water.
Key Takeaways
- A DIY kayak crate costs $30-60 to build compared to $80-150 for commercial options, saving you 50-70% while offering full customization
- PVC pipe (3/4-inch or 1-inch diameter) is the most popular material because it’s waterproof, lightweight, and easy to cut and assemble
- The ideal crate size for most fishing kayaks is 13×13 inches or 16×13 inches, fitting comfortably on standard sit-on-top rear decks
- Rod holders, tool clips, and accessory mounts can be added directly to the PVC frame using zip ties, hose clamps, or PVC cement
- Proper attachment using bungee cords through the crate and kayak deck prevents tipping and keeps your gear secure in choppy water
- Building your own crate takes 2-3 hours and requires only basic tools: a PVC cutter or hacksaw, measuring tape, and marker
- Milk crates work as quick solutions but lack customization, proper rod holder placement, and secure mounting options
- Common mistakes include making the crate too large for your kayak model, using pipes that are too thin, and forgetting to account for rod holder angles
What Is a Kayak Crate Used For?
A kayak crate is a storage container that sits on the rear deck of a fishing kayak and organizes tackle, tools, and fishing rods while keeping them within easy reach during your trip. The crate typically includes built-in rod holders, attachment points for pliers and nets, and compartments for tackle boxes or bait containers. For kayak fishing enthusiasts, a well-designed crate transforms a cluttered deck into an organized command center.
Primary functions of a kayak crate:
- Rod storage – Holds 2-6 fishing rods vertically, preventing tangles and keeping them ready for quick deployment
- Gear organization – Creates dedicated spaces for tackle boxes, pliers, fish grippers, and other essential tools
- Accessibility – Positions frequently used items behind your seat where you can reach them without turning around completely
- Protection – Keeps gear elevated above water that may splash or pool on the deck
- Customization – Provides mounting points for lights, flags, camera mounts, and other accessories
The crate works best on sit-on-top kayaks with flat rear decks and existing bungee rigging. Anglers who fish in saltwater, lakes, or rivers all benefit from the organized storage, though the specific configuration may vary based on your fishing style and target species.
DIY Kayak Crate vs Buying One: Which Is Better?
Building your own kayak crate costs $30-60 and takes 2-3 hours, while purchasing a pre-made crate costs $80-150 but arrives ready to use. The DIY route wins if you want custom dimensions, specific rod holder placement, or enjoy hands-on projects, whereas buying makes sense if you value convenience and don’t need specialized features.
Cost comparison:
| Option | Price Range | Time Investment | Customization |
|---|---|---|---|
| DIY PVC crate | $30-60 | 2-3 hours | Complete control over size, rod holders, accessories |
| Commercial crate | $80-150 | 0 hours (ready to use) | Limited to manufacturer’s design |
| Modified milk crate | $5-15 | 30-60 minutes | Basic modifications only |
Choose DIY if you:
- Need specific dimensions to fit your kayak model perfectly
- Want rod holders angled for your preferred fishing technique
- Enjoy building gear and take pride in custom equipment
- Fish in unique conditions requiring specialized accessory placement
- Own multiple kayaks and want to build matching crates
Buy a commercial crate if you:
- Prefer plug-and-play solutions without assembly
- Don’t have access to tools or workspace for cutting PVC
- Want a proven design with included mounting hardware
- Need the crate immediately for an upcoming fishing trip
- Value manufacturer warranties and customer support
The DIY approach also lets you repair or modify the crate easily since you understand its construction. Many anglers start with a basic DIY build, then upgrade components over time as they discover what works best for their fishing style.

All-in-One Kayak Fishing Solution – Includes a heavy-duty 13” x 13” milk crate, double rod holder, accessory pouch, anchor kit, and two utility leashes for streamlined...
What Materials Do You Need to Build a Kayak Crate?
Building a basic DIY kayak crate requires 20-30 feet of PVC pipe, 8-12 corner fittings, PVC cement, and basic cutting tools, with total material costs ranging from $30-60 depending on size and accessories. Most builders use 3/4-inch or 1-inch diameter Schedule 40 PVC pipe because it balances strength, weight, and cost while remaining easy to work with using standard tools.
Essential materials list:
- PVC pipe – 20-30 feet of 3/4-inch or 1-inch Schedule 40 (white or gray)
- Corner fittings – 8 three-way corner elbows for the main frame
- PVC cement – One small can for permanent joints (optional if using zip ties)
- Rod holders – 2-6 PVC rod holder tubes (1.5-2 inch diameter) or pre-made holders
- Zip ties – 20-30 heavy-duty ties (8-inch or longer) for accessories and temporary joints
- Bungee cord – 10-15 feet for securing the crate to your kayak deck
- Measuring tape – For accurate cuts
- Marker – To mark cut lines on PVC
Tools needed:
- PVC cutter or hacksaw (a ratcheting PVC cutter costs $10-15 and makes cleaner cuts)
- Sandpaper or deburring tool to smooth cut edges
- Drill with 1/4-inch bit (if adding custom mounting holes)
- Utility knife for trimming zip ties
Optional upgrades:
- Waterproof LED lights for night fishing
- Tool clips or carabiners for pliers and fish grippers
- Mesh bag or cargo net for storing soft items
- Flag holder for visibility in boat traffic
- Camera mount for documenting catches
You can find all materials at hardware stores like Home Depot or Lowe’s, typically in the plumbing section. Buying PVC in 10-foot lengths is more economical than pre-cut pieces, and you’ll have extra material for future modifications or repairs.
How Much Does It Cost to Build Your Own Kayak Crate?
A basic DIY kayak crate costs $30-45 for materials, while a fully equipped version with premium rod holders and accessories runs $50-75, representing a 50-70% savings compared to commercial crates priced at $80-150. The exact cost depends on crate size, PVC diameter, number of rod holders, and whether you choose permanent PVC cement joints or removable zip-tie assembly.
Detailed cost breakdown (basic 13×13-inch crate):
- PVC pipe (20 feet of 3/4-inch) – $12-18
- Corner fittings (8 three-way elbows) – $8-12
- PVC cement (small can) – $4-6
- Rod holder tubes (4 pieces) – $6-10
- Heavy-duty zip ties (pack of 50) – $5-8
- Bungee cord (10 feet) – $3-5
- Total: $38-59
Premium build cost (16×13-inch with upgrades):
- PVC pipe (30 feet of 1-inch) – $20-28
- Corner fittings (12 pieces for reinforced frame) – $12-18
- Pre-made rod holders (4 adjustable) – $16-24
- Waterproof LED lights (2) – $8-12
- Tool clips and accessories – $6-10
- Mesh storage bag – $5-8
- Total: $67-100
The cost per hour of use makes DIY crates extremely economical. If you fish 20 times per season, a $50 crate costs just $2.50 per trip in the first year, then essentially free afterward. Commercial crates at $120 would cost $6 per trip under the same usage.
Money-saving tips:
- Buy PVC during hardware store sales (often 15-20% off)
- Use zip ties instead of PVC cement for a removable design that’s easier to transport
- Repurpose household items like carabiners and bungee cords you already own
- Start with a basic frame and add accessories gradually as budget allows
- Check local fishing forums for anglers selling unused PVC materials
The investment pays off quickly for regular anglers, and the crate will last 5-10 years with proper care, making it one of the most cost-effective fishing gear upgrades you can make.
Best PVC Pipe Size for Kayak Crate
The best PVC pipe size for a kayak crate is 3/4-inch diameter Schedule 40 for lightweight builds or 1-inch diameter for added strength and durability, with 3/4-inch being the most popular choice among DIY builders because it offers sufficient rigidity while keeping the overall weight under 5 pounds. Pipe diameter affects both the crate’s structural integrity and how well accessories like rod holders and tool clips attach to the frame.
3/4-inch PVC (most common choice):
- Weight – Completed crate weighs 3-5 pounds empty
- Strength – Adequate for typical fishing gear loads (15-25 pounds)
- Cost – Most economical option at $0.60-0.90 per foot
- Best for – Anglers who prioritize light weight and easy transport
- Limitation – May flex slightly under heavy loads or rough water
1-inch PVC (heavy-duty option):
- Weight – Completed crate weighs 5-7 pounds empty
- Strength – Handles heavier loads (25-35 pounds) without flexing
- Cost – Slightly more expensive at $0.80-1.20 per foot
- Best for – Anglers who carry multiple tackle boxes, coolers, or fish in rough conditions
- Benefit – Provides more surface area for mounting accessories
1/2-inch PVC (not recommended):
- Too thin and flexible for most applications
- Tends to crack at joints under stress
- Difficult to attach standard rod holders securely
- Only suitable for ultra-minimalist builds with very light gear
Schedule 40 vs Schedule 80:
Schedule 40 PVC is the standard choice for kayak crates because it balances strength and weight. Schedule 80 has thicker walls and greater strength but adds unnecessary weight and cost for this application. Stick with Schedule 40 unless you’re building a crate for commercial or extreme-use scenarios.
The pipe diameter also affects how you attach the crate to your kayak. Thicker 1-inch pipes provide more surface area for bungee cord contact, creating a more stable connection to the deck rigging. For most fishing kayak setups, 3/4-inch offers the best combination of performance, weight, and cost.

Size - Length of each: 17";The 3/4 inch Schedule 40 PVC pipe has an outer diameter of 1.05 inches and an inner diameter of 0.80 inches. This PVC pipe is suitable for various DIY projects.Please confirm before purchase.

Durable Sch40 Material: made from heavy-duty PVC pipe with SCH40 wall thickness, with high plasticity, low temperature resistance, ultraviolet resistance, impact resistance and corrosion resistance, long service life

DIMENSIONS: Precise measurements of 1.05 inches outer diameter and 0.824 inches inner diameter for accurate fitting and installation
Step-by-Step: How to Build a DIY Kayak Crate
Building a DIY kayak crate involves measuring and cutting PVC pipes to create a rectangular frame, assembling the pieces with corner fittings, adding rod holders and accessories, then securing the finished crate to your kayak’s rear deck. The entire process takes 2-3 hours for beginners and produces a customized storage solution perfectly sized for your specific kayak model.
Step 1: Measure your kayak’s rear deck
Measure the flat area behind your seat where the crate will sit, typically 13-16 inches wide and 13-15 inches deep on most sit-on-top kayaks. Leave 1-2 inches of clearance on each side so the crate doesn’t interfere with paddle strokes. Check the existing bungee cord pattern to ensure your crate design will align with attachment points.
Step 2: Cut PVC pipes to size
For a standard 13×13-inch crate with 12-inch height, cut the following pieces from 3/4-inch PVC:
- 4 pieces at 13 inches (top frame front/back)
- 4 pieces at 13 inches (top frame sides)
- 4 pieces at 12 inches (vertical corner posts)
- 4 pieces at 13 inches (bottom frame front/back)
- 4 pieces at 13 inches (bottom frame sides)
Use a PVC cutter or hacksaw for clean cuts, then smooth the edges with sandpaper to remove burrs that could catch on gear or bungee cords.
Step 3: Assemble the bottom frame
Connect four 13-inch pieces using three-way corner elbows to create a square bottom frame. If using PVC cement, apply it to both the pipe end and fitting interior, then twist the pieces together and hold for 30 seconds. For a removable design, skip the cement and use zip ties to secure joints after assembly.
Step 4: Add vertical corner posts
Insert the four 12-inch vertical pieces into the upward-facing openings of the bottom corner elbows. These posts determine your crate’s height, adjust this measurement based on how much gear you typically carry.
Step 5: Complete the top frame
Attach three-way corner elbows to the top of each vertical post, then connect them with the remaining 13-inch pieces to form the top frame. The completed structure should be a rigid rectangular box.
Step 6: Install rod holders
Cut 8-10 inch pieces of 1.5-2 inch diameter PVC for rod holders. Drill or cut mounting holes in the crate’s top frame, then insert the rod holder tubes at a 30-45 degree angle (angled toward the rear for easy access). Secure with zip ties or PVC cement. Most anglers install 2-4 rod holders spaced evenly across the back edge.
Step 7: Add accessories and customization
Attach tool clips, carabiners, or mesh bags using zip ties threaded through the frame. Install LED lights if fishing at night. Add a flag holder for visibility in boat traffic. The PVC frame provides countless attachment points for customization.
Step 8: Secure to your kayak
Place the completed crate on your kayak’s rear deck. Thread bungee cords through the crate’s frame and under the kayak’s existing deck rigging, creating an X-pattern for maximum stability. The crate should sit firmly without rocking or sliding when you shake it. Test the setup on land before your first water trip.
Common assembly mistakes to avoid:
- Making the crate too tall (over 15 inches), which raises the center of gravity and affects kayak stability
- Forgetting to account for rod holder angles before cementing joints
- Using too few attachment points, allowing the crate to tip in rough water
- Cutting all pieces before test-fitting, which makes it hard to correct measurement errors
Start with a basic frame and fish with it once or twice before adding permanent accessories. This trial period helps you identify the best placement for rod holders and tools based on your actual fishing movements and gear preferences.
How Do You Attach a Kayak Crate to a Kayak?
Attach a kayak crate by threading bungee cords or cam straps through the crate’s frame and under the kayak’s existing deck rigging in an X-pattern or grid pattern, creating multiple contact points that prevent tipping and sliding. Most fishing kayaks come with factory-installed bungee rigging on the rear deck specifically designed for securing gear, making crate attachment straightforward without drilling or permanent modifications.
X-pattern attachment (most common):
- Place the crate on the rear deck centered between the side rails
- Thread a bungee cord from the front-left corner of the crate, under the kayak’s deck rigging, to the rear-right corner
- Thread a second bungee cord from the front-right corner to the rear-left corner, creating an X
- Pull the bungee cords tight and secure with hooks or knots
- Add a third bungee cord straight across the middle for extra security
Grid-pattern attachment (maximum stability):
Use 4-6 shorter bungee cords to create a grid, with each cord running straight from one side of the crate to the opposite side. This method distributes pressure more evenly and works better for heavier loads or rough water conditions.
Attachment hardware options:
- Bungee cord with hooks – Quick to install and remove, allows easy crate access on shore
- Cam straps – More secure than bungee, better for offshore or rough water fishing
- Ratchet straps – Maximum security but can over-tighten and damage the crate or kayak
- Paracord – Lightweight and adjustable but requires knot-tying skills
Testing crate security:
Before launching, grab the crate and try to tip it forward, backward, and side-to-side. It should barely move. Rock the entire kayak back and forth, the crate should stay firmly in place. If you notice any shifting, add more attachment points or tighten existing cords.
Preventing crate tip-over:
The most common attachment mistake is using only two bungee cords (one front, one back), which allows the crate to pivot and tip when you reach for gear. Always use at least three attachment points, and ensure the cords pass through the lower portion of the crate frame rather than just over the top. This low attachment point creates a more stable connection.
For anglers who frequently remove their crate for transport or storage, consider installing quick-release buckles on the bungee cords. This modification lets you detach the crate in seconds while maintaining security during fishing trips.
Milk Crate vs Custom Built Kayak Crate
A milk crate costs $5-15 and works as an immediate storage solution but lacks proper rod holder placement, secure mounting points, and size customization, while a custom-built PVC crate costs $30-60 and offers tailored dimensions, integrated rod holders, and purpose-built accessory mounting. The milk crate serves as a quick starter option for new kayak anglers, but most upgrade to a custom build within one season after experiencing the limitations.
Milk crate advantages:
- Immediately available at low cost
- No tools or assembly required
- Built-in grid structure provides some organization
- Durable plastic construction
- Easy to replace if damaged
Milk crate limitations:
- Fixed size (typically 13×13 inches) may not fit all kayak decks optimally
- No integrated rod holders, must add aftermarket tubes
- Grid openings allow small items to fall through
- Difficult to attach securely without drilling holes
- Limited customization options for accessories
- Often too tall, raising the center of gravity and affecting balance
Custom PVC crate advantages:
- Exact dimensions to fit your specific kayak model
- Rod holders built into the frame at optimal angles
- Solid frame prevents small items from falling through
- Multiple attachment points for secure mounting
- Unlimited customization for lights, flags, cameras, and tools
- Lower profile improves kayak balance and stability
- Easier to repair or modify over time
Custom PVC crate limitations:
- Requires 2-3 hours of assembly time
- Needs basic tools (PVC cutter, measuring tape)
- Higher upfront cost ($30-60 vs $5-15)
- More complex to transport if not permanently attached
Hybrid approach:
Some anglers start with a milk crate and modify it by zip-tying PVC rod holders to the sides, adding a mesh bottom to prevent item loss, and drilling mounting holes for better attachment. This hybrid costs $15-25 and takes about an hour, splitting the difference between convenience and customization.
Choose a milk crate if you:
- Need storage immediately for an upcoming trip
- Want to test kayak fishing before investing in custom gear
- Fish casually a few times per season
- Prefer minimal DIY projects
Choose a custom PVC crate if you:
- Fish regularly (10+ times per season)
- Need specific rod holder angles for your fishing technique
- Want a professional-looking setup
- Enjoy building and customizing your own gear
- Fish in conditions where secure attachment is critical
Most experienced kayak anglers recommend building a custom crate from the start, as the milk crate’s limitations become frustrating quickly. The extra $25-40 and few hours of assembly time pay off in improved organization, security, and fishing efficiency.
Common Mistakes When Building a Kayak Crate
The most common mistakes when building a DIY kayak crate are making it too large for the kayak’s rear deck, using insufficient attachment points that allow tipping, and installing rod holders at the wrong angle for comfortable access. These errors reduce functionality and can compromise safety, but all are easily avoided with proper planning and test-fitting before final assembly.
Mistake 1: Oversized dimensions
Building a crate that’s too wide (over 16 inches) or too tall (over 15 inches) interferes with paddle strokes and raises the center of gravity, making the kayak less stable. Always measure your kayak’s rear deck and leave 1-2 inches of clearance on each side. Test-fit the frame before cementing joints.
Mistake 2: Wrong rod holder angle
Installing rod holders vertically or at extreme angles makes rods difficult to grab while seated. The optimal angle is 30-45 degrees tilted toward the rear, positioning rod handles within easy reach over your shoulder. Test the angle by sitting in your kayak and reaching back before permanently attaching holders.
Mistake 3: Weak attachment system
Using only one or two bungee cords allows the crate to pivot and tip when loaded with gear. Always use at least three attachment points in an X-pattern or grid, and ensure cords pass through the lower frame rather than just over the top. Test security by trying to tip the crate before launching.
Mistake 4: Forgetting about weight distribution
Loading all heavy items (tackle boxes, coolers) on one side of the crate creates imbalance. Design your crate with symmetrical storage areas and plan to distribute weight evenly. Consider adding dividers or compartments to organize gear and maintain balance.
Mistake 5: Using thin or low-quality PVC
Choosing 1/2-inch pipe or non-Schedule 40 PVC results in a flimsy crate that flexes under load and cracks at joints. Stick with 3/4-inch or 1-inch Schedule 40 PVC from reputable hardware stores. The few extra dollars for quality materials prevent frustrating failures on the water.
Mistake 6: Cementing all joints immediately
Permanently gluing joints before testing the crate on your kayak makes modifications impossible. Build the frame with dry-fit joints first, test it on your kayak for at least one trip, then cement only the joints that need permanent strength. Use zip ties for accessory attachments to maintain flexibility.
Mistake 7: Ignoring rod holder capacity
Installing rod holder tubes that are too narrow (under 1.5 inches) won’t accommodate larger rod handles or reels. Use 1.5-2 inch diameter tubes for rod holders, and test-fit your actual rods before final installation. Different fishing styles require different holder sizes.
Mistake 8: Poor accessory placement
Attaching tool clips, lights, or flags without considering how you’ll actually use them leads to awkward reaching and tangled lines. Sit in your kayak and simulate your fishing movements to identify the best placement for each accessory before permanently mounting it.
Mistake 9: Skipping edge smoothing
Leaving rough edges on cut PVC creates snag points that catch fishing line, bungee cords, and clothing. Always smooth cut edges with sandpaper or a deburring tool. This five-minute step prevents countless frustrations and potential line breaks.
Mistake 10: Building without a plan
Starting construction without measuring your kayak or sketching a design leads to wasted materials and poor fit. Spend 15-20 minutes measuring your kayak’s deck, planning rod holder placement, and listing required materials before making any cuts.
Learning from these common errors saves time, money, and frustration. Many experienced builders recommend joining online kayak fishing forums to see photos of successful builds and ask questions before starting your first crate project.
Do I Need a Kayak Crate for Fishing?
A kayak crate is not strictly necessary for fishing but significantly improves organization, rod accessibility, and gear security for anglers who fish regularly or carry multiple rods and tackle boxes. Casual anglers who fish occasionally with minimal gear can manage with a simple dry bag or mesh storage, while serious kayak anglers find that a crate’s organized storage and quick rod access directly improve fishing efficiency and catch rates.
You need a crate if you:
- Fish with 3+ rods for different techniques or species
- Carry multiple tackle boxes, pliers, nets, and other tools
- Fish in areas with boat traffic where rod visibility matters
- Want quick access to gear without digging through bags
- Fish all day and need organized storage for food, water, and safety equipment
- Frequently switch between fishing techniques that require different setups
You can skip a crate if you:
- Fish with only 1-2 rods and minimal tackle
- Prefer ultra-minimalist setups for lightweight paddling
- Fish primarily in calm, protected waters close to shore
- Have a kayak with built-in rod holders and storage compartments
- Focus on paddling and exploring rather than serious fishing
- Transport your kayak frequently and want to minimize accessories
Alternative storage solutions:
- Dry bags – Waterproof storage for tackle and electronics, but no rod organization
- Mesh bags – Lightweight and drains water, good for soft items like clothing
- Deck bags – Attach to front deck for easy access to frequently used items
- Built-in storage – Many modern fishing kayaks include molded rod holders and storage wells
- Milk crate – Quick budget option as discussed earlier
The decision often comes down to fishing frequency and style. Anglers who fish 10+ times per season almost universally benefit from a crate’s organization and efficiency. Those who fish 2-3 times per year may find simpler storage adequate for their needs.
For beginner kayak fishing enthusiasts, starting without a crate and adding one after a few trips helps identify actual storage needs rather than over-building for imagined requirements. Many anglers discover they need fewer accessories than expected, while others realize they want more specialized storage than a basic crate provides.
How to Waterproof a DIY Kayak Crate
PVC kayak crates are inherently waterproof because Schedule 40 PVC pipe is a non-porous plastic that doesn’t absorb water, so the frame itself requires no waterproofing treatment. However, items stored inside the crate need protection from splashing water and rain, which you can achieve by adding a waterproof dry bag liner, installing a mesh bottom to allow drainage, or covering the crate with a waterproof deck bag during transport and rough conditions.
PVC frame waterproofing (not needed):
The PVC pipe and fittings are already waterproof and won’t degrade from water exposure. Saltwater anglers should rinse the crate with fresh water after each trip to prevent salt buildup, but no sealants or coatings are necessary.
Protecting gear inside the crate:
- Dry bag liner – Place a roll-top dry bag inside the crate to protect electronics, phones, and documents
- Waterproof tackle boxes – Use sealed tackle boxes like Plano or Flambeau models with gasket lids
- Mesh bottom – Install plastic mesh or netting across the bottom to allow water drainage while preventing item loss
- Elevated storage – Keep sensitive items in the upper portion of the crate, away from water that may pool at the bottom
- Waterproof pouches – Store small electronics and keys in individual waterproof pouches
Drainage considerations:
Unlike solid plastic crates, PVC frame crates naturally allow water to drain through the open structure. This is an advantage because water doesn’t pool inside, but it means items stored in the crate will get wet from splashing. Plan your storage accordingly, keep waterproof items loose in the crate and protect sensitive gear in sealed containers.
Covering the crate:
For extended paddling in rain or rough water, throw a waterproof deck cover over the entire crate. These covers typically cost $15-25 and attach with bungee cords. Remove the cover when fishing to access your gear.
Saltwater protection:
Saltwater doesn’t damage PVC, but it can corrode metal accessories like screws, carabiners, and tool clips. Use stainless steel or plastic hardware for all crate accessories, and rinse everything with fresh water after saltwater trips. This simple maintenance prevents rust and extends the life of your accessories.
The open frame design of PVC crates is actually superior to solid plastic crates for water management because it allows continuous drainage and air circulation, preventing mildew and odors that can develop in enclosed storage containers.
Will a Homemade Kayak Crate Fit in a Sit-On-Top Kayak?
A properly sized homemade kayak crate will fit on the rear deck of most sit-on-top kayaks, which typically feature a flat 13-16 inch wide storage area behind the seat with bungee rigging designed specifically for securing gear. The key is measuring your specific kayak model’s rear deck before building, as dimensions vary between manufacturers and models, with some compact kayaks offering only 11-12 inches of usable space while larger fishing models provide 16-18 inches.
Standard sit-on-top rear deck dimensions:
- Recreational kayaks – 11-13 inches wide, suitable for compact crates
- Fishing kayaks – 13-16 inches wide, accommodates standard crates
- Tandem kayaks – 14-18 inches wide, allows larger crates with more storage
Measuring your kayak for crate fit:
- Measure the flat area behind your seat from side rail to side rail
- Subtract 2 inches for clearance (1 inch per side)
- Measure front-to-back depth, typically 13-15 inches
- Check the height clearance, ensure the crate won’t block your paddle stroke
- Note the bungee cord attachment points to align with your crate design
Crate size recommendations by kayak type:
- 10-foot kayaks – Build a 11×11 or 12×12 inch crate
- 12-foot kayaks – Standard 13×13 inch crate fits most models
- 14+ foot kayaks – Can accommodate 16×13 or larger crates
Sit-on-top vs sit-inside kayaks:
Sit-on-top kayaks are ideal for crate mounting because they have flat, open rear decks with factory bungee rigging. Sit-inside kayaks have enclosed rear decks with limited flat space, making crate mounting difficult or impossible. If you own a sit-inside kayak, consider alternative storage like deck bags or dry bags in the rear hatch instead.
Testing fit before final assembly:
Build your crate frame with dry-fit joints (no cement) and test it on your kayak before permanently gluing. Sit in the kayak and simulate paddling to ensure the crate doesn’t interfere with your stroke. Reach back to test rod holder accessibility. Make any necessary adjustments before cementing joints.
Kayak-specific considerations:
Some kayak models have raised seat backs or unusual deck contours that affect crate placement. Check online forums or manufacturer specifications for your specific kayak model to see what crate sizes other anglers have successfully used. Many popular fishing kayak models have established “standard” crate dimensions that work well.
For anglers researching fishing kayak buying guides, rear deck size and bungee rigging should be key considerations if you plan to use a crate. Models with larger, flatter rear decks offer more flexibility for crate size and placement.
Kayak Crate Keeps Tipping Over: How to Fix
A kayak crate tips over due to insufficient attachment points, improper weight distribution, or a top-heavy design, and you can fix it by adding more bungee cord attachment points in an X-pattern, lowering the crate’s height, and distributing heavy items evenly throughout the storage space. Most tipping issues stem from using only one or two attachment cords, which allows the crate to pivot when you reach for gear or encounter waves.
Immediate fixes for tipping:
- Add more attachment points – Use at least 3-4 bungee cords in an X or grid pattern
- Lower attachment position – Thread cords through the bottom frame rails, not the top
- Tighten existing cords – Ensure all bungee cords are pulled tight with no slack
- Redistribute weight – Move heavy items to the bottom and center of the crate
- Add a center anchor – Run a bungee cord straight through the middle of the crate for extra stability
Permanent solutions:
Redesign attachment system:
Replace standard bungee cords with cam straps or ratchet straps for a more secure connection. These don’t stretch like bungee cords and maintain constant tension even when the crate shifts slightly.
Lower the crate height:
If your crate is taller than 14 inches, rebuild it with shorter vertical posts (10-12 inches). Tall crates have a higher center of gravity and tip more easily, especially when loaded with gear.
Add a bottom plate:
Attach a piece of plastic mesh, thin plywood, or corrugated plastic to the bottom of the crate frame. This creates a solid base that distributes weight more evenly and provides additional attachment surface for bungee cords.
Install anti-tip brackets:
Create L-shaped brackets from PVC or aluminum that extend from the crate’s bottom corners down to the kayak’s side rails. These brackets prevent lateral tipping and work especially well for anglers who fish in rough water.
Weight distribution strategy:
- Place heaviest items (tackle boxes, coolers) in the bottom center of the crate
- Distribute weight symmetrically, if you have a heavy item on the left, balance it with similar weight on the right
- Keep rod holders empty when not in use, or balance rods evenly across all holders
- Store lightweight items (nets, rain gear) in the upper portion
Testing stability:
After making adjustments, test the crate’s stability by:
- Grabbing the top corners and trying to tip it in all directions
- Rocking the kayak side-to-side while the crate is loaded
- Simulating reaching for gear while seated in the kayak
- Paddling in calm water before venturing into rough conditions
When to start over:
If your crate continues tipping despite multiple fixes, the design may be fundamentally flawed. Common unfixable issues include:
- Frame dimensions that don’t match your kayak’s deck shape
- PVC that’s too thin (1/2-inch) and flexes under load
- Crate positioned too far forward or back on the deck
In these cases, rebuilding with correct dimensions and materials is more effective than continued modifications. The good news is that PVC is inexpensive, and you can reuse many components from the failed design.
What Size Should a Kayak Crate Be?
The ideal kayak crate size for most fishing kayaks is 13×13 inches with a height of 10-12 inches, fitting comfortably on standard sit-on-top rear decks while providing enough storage for 2-4 tackle boxes, 3-4 rod holders, and essential tools. Crate dimensions should be customized based on your specific kayak’s rear deck measurements, with 1-2 inches of clearance on each side to avoid interfering with paddle strokes and maintain proper weight distribution.
Standard crate dimensions by kayak size:
| Kayak Length | Recommended Crate Size | Storage Capacity |
|---|---|---|
| 10-11 feet | 11x11x10 inches | 2 tackle boxes, 2-3 rods |
| 12-13 feet | 13x13x12 inches | 3 tackle boxes, 3-4 rods |
| 14+ feet | 16x13x12 inches | 4+ tackle boxes, 4-6 rods |
Height considerations:
- 10-12 inches – Standard height for most applications, balances storage and stability
- 8-10 inches – Low-profile design for minimalist anglers or rough water conditions
- 12-15 inches – Maximum height for anglers who carry extensive gear, but reduces stability
Width and depth guidelines:
Measure your kayak’s rear deck and subtract 2 inches from the width measurement to determine maximum crate width. For example, if your deck measures 15 inches wide, build a crate no wider than 13 inches. This clearance prevents the crate from interfering with your paddle stroke and allows proper bungee cord attachment.
Customizing for fishing style:
- Inshore/lake fishing – Standard 13×13 inch crate with 3-4 rod holders
- Offshore fishing – Larger 16×13 inch crate with 4-6 rod holders and extra storage for safety gear
- Fly fishing – Compact 11×11 inch crate with 2 rod holders and space for fly boxes
- Tournament fishing – Maximum size crate with specialized compartments for livewell, measuring board, and camera
Rod holder spacing:
Plan for 3-4 inches between rod holders to prevent tangling. A 13-inch wide crate comfortably accommodates 3-4 rod holders across the back edge, while a 16-inch crate can hold 4-5 holders.
Testing size before building:
Create a cardboard mockup of your planned crate dimensions and place it on your kayak’s rear deck. Sit in the kayak and simulate paddling to ensure the size doesn’t interfere with your movements. This five-minute test prevents building a crate that’s too large or poorly positioned.
Common sizing mistakes:
- Building too large and interfering with paddle stroke
- Making the crate too tall and raising the center of gravity
- Not accounting for rod holder height when measuring clearance
- Forgetting to measure with the kayak seat in the fishing position (some seats adjust)
Most experienced builders recommend starting with a conservative size (13x13x12 inches) for your first crate. You can always build a larger version later if you need more storage, but an oversized crate is difficult to modify and may compromise your kayak’s performance and stability.
Alternatives to Building a Kayak Crate from Scratch
Alternatives to building a DIY kayak crate include purchasing a commercial pre-made crate ($80-150), modifying a milk crate with aftermarket accessories ($15-30), using a kayak-specific tackle bag or deck bag ($40-80), or installing individual rod holders and storage pouches directly on the kayak deck ($30-60). Each option offers different trade-offs between cost, customization, and convenience.
Commercial pre-made crates:
Brands like YakGear, Plano, and Seattle Sports sell ready-to-use kayak crates with integrated rod holders, tool clips, and mounting systems. These cost $80-150 but arrive fully assembled and include manufacturer warranties. Choose this option if you value convenience over customization and don’t mind the higher price.
Modified milk crate:
Purchase a standard milk crate for $5-15 and add aftermarket rod holder tubes, mesh bottom, and tool clips using zip ties. Total cost runs $15-30 and takes about an hour. This hybrid approach offers some customization while avoiding the full DIY build process.
Kayak tackle bags:
Soft-sided tackle bags designed for kayaks feature multiple compartments, rod holder sleeves, and attachment straps. They cost $40-80 and work well for anglers who want organized storage without a rigid crate structure. The downside is less stability for rod holders and limited capacity compared to crates.
Deck bags and dry bags:
Waterproof deck bags ($30-60) attach to the kayak’s deck rigging and provide organized storage for tackle, electronics, and personal items. Pair these with separate rod holders mounted directly to the kayak for a crate-free setup. This approach works well for minimalist anglers who prioritize lightweight gear.
Individual rod holders:
Install flush-mount or rail-mount rod holders ($10-20 each) directly on your kayak’s gunwales or deck. Combine these with mesh storage bags or bungee cargo nets for tackle and tools. Total cost runs $30-60 depending on the number of rod holders. This modular approach allows precise placement but lacks the integrated organization of a crate.
Kayak cart with storage:
Some kayak carts include storage compartments or attachment points for tackle boxes. While primarily designed for transport, these can double as on-water storage for anglers who fish from anchored positions and don’t need constant gear access.
Comparison of alternatives:
| Option | Cost | Setup Time | Customization | Best For |
|---|---|---|---|---|
| DIY PVC crate | $30-60 | 2-3 hours | Complete | Regular anglers who enjoy DIY |
| Commercial crate | $80-150 | 0 hours | Limited | Anglers who value convenience |
| Modified milk crate | $15-30 | 1 hour | Moderate | Budget-conscious beginners |
| Tackle bag | $40-80 | 0 hours | Moderate | Minimalist anglers |
| Individual holders | $30-60 | 1-2 hours | Complete | Anglers with built-in storage |
Choosing the right alternative:
Consider your fishing frequency, budget, and customization needs. Anglers who fish weekly benefit most from a DIY or commercial crate’s organization and capacity. Those who fish monthly may find a tackle bag or modified milk crate sufficient. Casual anglers fishing a few times per year can manage with individual rod holders and simple storage bags.
Many kayak anglers start with a budget alternative like a modified milk crate or tackle bag, then upgrade to a custom DIY crate after a season or two once they understand their specific storage needs and fishing style. This progressive approach prevents over-investing in gear before you know what works best for your situation.
Conclusion
Building a DIY kayak crate transforms your fishing kayak from a basic paddlecraft into an organized fishing platform, providing secure rod storage, accessible tool placement, and customized gear organization for $30-60 and 2-3 hours of work. The process involves measuring your kayak’s rear deck, cutting PVC pipes to size, assembling a rectangular frame with corner fittings, adding rod holders and accessories, then securing the finished crate with bungee cords in an X-pattern.
The investment pays off quickly for regular anglers through improved fishing efficiency, better gear organization, and the satisfaction of using equipment you built yourself. Start with a basic 13x13x12 inch frame using 3/4-inch Schedule 40 PVC, test it on your kayak before cementing joints, and add accessories gradually as you discover what works best for your fishing style.
Next steps to get started:
- Measure your kayak’s rear deck dimensions and note the bungee attachment points
- Sketch a simple crate design with rod holder placement based on your fishing technique
- Purchase materials from your local hardware store (budget $40-50 for a complete build)
- Build the frame with dry-fit joints and test it on your kayak before cementing
- Add rod holders and accessories based on your actual fishing needs
- Secure the crate with at least three bungee cords in an X-pattern
- Test stability on land before your first water trip
Whether you’re a beginner kayak fishing enthusiast or an experienced angler upgrading your setup, a well-designed DIY kayak crate improves every aspect of your time on the water. The customization options are endless, the cost is minimal, and the result is a purpose-built storage solution that perfectly matches your kayak and fishing style.
Frequently Asked Questions
How long does it take to build a DIY kayak crate?
Building a basic DIY kayak crate takes 2-3 hours for beginners, including measuring, cutting PVC pipes, assembling the frame, and adding rod holders. Experienced builders can complete a simple crate in 1-2 hours, while complex designs with multiple accessories may take 4-5 hours.
Can you use PVC glue or should you use zip ties?
Both PVC cement and zip ties work for kayak crate construction, with cement creating permanent joints and zip ties allowing disassembly for transport or modifications. Most builders use cement for the main frame structure and zip ties for accessories and rod holders that may need adjustment.
What tools do I need to build a kayak crate?
You need a PVC cutter or hacksaw, measuring tape, marker, and sandpaper to build a basic kayak crate. Optional tools include a drill for custom mounting holes, utility knife for trimming zip ties, and a deburring tool for smoothing cut edges.
How much weight can a DIY PVC kayak crate hold?
A properly built kayak crate using 3/4-inch Schedule 40 PVC can safely hold 20-30 pounds of fishing gear, while 1-inch PVC crates handle 30-40 pounds. The limiting factor is usually your kayak’s weight capacity and stability rather than the crate’s structural strength.
Do kayak crates work on sit-inside kayaks?
Kayak crates work poorly on sit-inside kayaks because these models lack the flat rear deck and bungee rigging found on sit-on-top designs. Sit-inside kayak anglers should use deck bags, dry bags in the rear hatch, or individual rod holders mounted on the gunwales instead.
How do you transport a kayak with a crate attached?
Transport a kayak with an attached crate by either removing the crate before loading (if using quick-release bungees) or ensuring the crate is secured and doesn’t extend beyond the kayak’s width. Most roof racks and truck beds accommodate kayaks with crates, but check clearance before driving.
Can you paint or customize a PVC kayak crate?
You can paint PVC kayak crates using plastic-specific spray paint or acrylic paint after cleaning and lightly sanding the surface. Customization options include adding reflective tape for visibility, LED lights for night fishing, or vinyl decals for personalization.
What’s the best way to clean a kayak crate?
Clean a kayak crate by rinsing with fresh water after each trip, especially after saltwater use. For deep cleaning, use mild soap and a brush to remove algae or grime, then rinse thoroughly and allow to air dry before storage.
How do you prevent rod holders from cracking?
Prevent rod holder cracking by using 1.5-2 inch diameter PVC tubes, securing them with multiple zip ties or PVC cement, and avoiding over-tightening when inserting rods. Choose Schedule 40 PVC rather than thinner-walled pipe for better durability.
Can you add a cooler to a kayak crate?
You can add a small soft-sided cooler inside a kayak crate by securing it with bungee cords or zip ties to prevent shifting. Hard coolers work better mounted separately on the kayak deck rather than inside the crate, as they’re heavy and reduce available storage space.
Do you need a flag holder on your kayak crate?
A flag holder on your kayak crate improves visibility to other boaters and is required by law in some states for kayaks fishing in areas with motorboat traffic. The flag mounts easily to the crate’s frame using a PVC tube holder and costs $5-10.
How do you fix a cracked PVC kayak crate?
Fix a cracked PVC kayak crate by cutting out the damaged section, inserting a new piece of PVC, and securing with couplings and PVC cement. For small cracks, wrap the area with waterproof tape or apply PVC cement as a temporary repair until you can replace the section.





