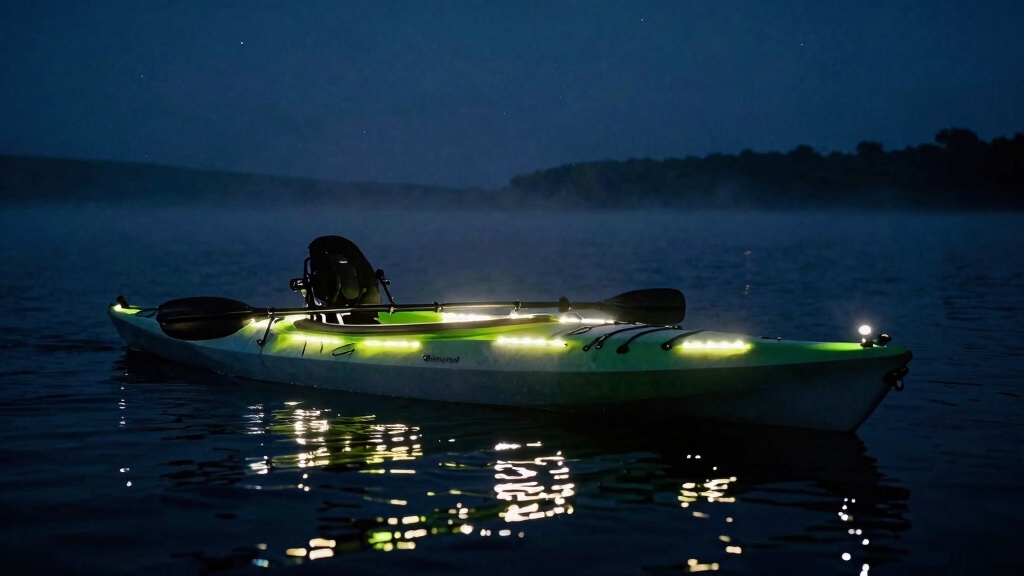
Night fishing from a kayak opens up prime feeding times when trophy fish move into shallow water, but paddling after dark without proper lighting is both illegal and dangerous. Adding lights to a kayak for night fishing involves installing navigation lights for legal compliance and visibility, plus optional underwater or deck lights to attract fish. Most anglers choose between battery-powered LED strips that mount with adhesive backing or hardwired systems connected to a marine battery, with installation taking 1-3 hours depending on complexity.
Key Takeaways
- Legal requirement: Most states mandate white 360-degree visibility lights on kayaks between sunset and sunrise, visible from at least 2 miles
- Two lighting systems needed: Navigation lights for safety/compliance and fishing lights (optional) to attract baitfish and gamefish
- Battery-powered wins for beginners: Adhesive-mounted LED strips with rechargeable battery packs require no drilling and cost $30-80
- Hardwired systems last longer: Marine-grade wiring connected to sealed 12V batteries provides all-night power but requires permanent mounting
- Mount navigation lights high: Position white visibility lights on a pole or flag mount 3+ feet above the waterline for maximum boat visibility
- Green/blue underwater lights attract fish: Mount submersible LEDs near the bow or stern to create a feeding zone without spooking fish
- Waterproofing is critical: Use IP67-rated or higher lights, seal all connections with heat-shrink tubing and marine-grade sealant
- Common mistake: Mounting lights too low or using non-marine batteries that fail when exposed to spray and humidity
What Are the Legal Requirements for Kayak Lights at Night
Federal and state regulations require kayaks operating between sunset and sunrise to display a white light visible from 360 degrees for at least 2 miles. This applies to all kayaks on navigable waters, including coastal areas, rivers, and most lakes. The U.S. Coast Guard allows kayakers to carry a flashlight or lantern that can be displayed in time to prevent collision, but most states now require a permanently mounted or readily accessible white light.
State-specific requirements vary:
- Most coastal states: Require a fixed white light mounted at least 3 feet above the hull
- Inland states: Often allow a portable white light (flashlight) that can be shown when other vessels approach
- California, Florida, Texas: Mandate 360-degree visibility lights; handheld lights alone are insufficient
- Penalty range: $50-500 fines for non-compliance, plus liability in collision incidents
Check your state registration requirements before heading out, as some jurisdictions also require red/green sidelights for kayaks over 16 feet or when using a motor. When in doubt, a white LED pole light mounted on a RAM mount or PVC pipe flag holder satisfies most regulations and costs $15-40.
Common mistake: Relying solely on a headlamp or glow stick. These don’t provide 360-degree visibility and won’t protect you legally if a powerboat strikes your kayak.
Best Waterproof LED Lights for Kayak Fishing
Marine-grade LED lights rated IP67 or IP68 provide the waterproofing needed for kayak fishing, where lights face constant spray, humidity, and occasional submersion. IP67 lights withstand temporary immersion up to 1 meter for 30 minutes, while IP68-rated lights handle continuous submersion, making them ideal for underwater fishing lights.
Top light types for kayak fishing:
- LED strip lights (12V, 5050 SMD): Flexible adhesive-backed strips for deck lighting, gunwale mounting, or interior illumination. Choose marine-grade with silicone coating. Cost: $12-35 per 16-foot reel.
- Submersible fishing lights (green/blue): Attract baitfish and gamefish. Green penetrates water best in most conditions; blue works better in clear offshore water. Mount on suction cups or through scupper holes. Cost: $25-80 each.
- 360-degree navigation lights: White LED pole lights with 2-mile visibility. Look for battery-powered models with 8+ hour runtime. Cost: $15-60.
- Deck flood lights: Small LED pucks or spotlights for rigging tackle and landing fish. Red LEDs preserve night vision. Cost: $10-30 per light.
Battery-powered vs. hardwired decision:
- Choose battery-powered if you fish 2-4 hours per trip, want easy removal, or paddle multiple kayaks. Rechargeable 12V battery packs ($20-40) run LED strips for 6-10 hours.
- Choose hardwired if you fish all night, want permanent installation, or run multiple high-draw lights. Sealed lead-acid or lithium marine batteries ($40-150) provide 12+ hours of power.
Avoid regular automotive LED strips or hardware-store lights. They lack proper sealing and corrode quickly in saltwater environments, typically failing within weeks.

IP68 WATERPROOF GRADE : Top IP68 waterproof marine grade led lights , can be both used in Indoor and outdoor (underwater), LEDs are completely sealed in silicone for protection

Package Included : Full kit for your boat project, no other accessories need, our kit included 1pcs 5m(16.4ft) Marine LED Strip Lights + 2M/6.56FT extension cable, 10 pcs tape hooks and 10pcs led strip clips and screws

IP68 WATERPROOF GRADE : Top IP68 waterproof marine grade led lights , can be both used in Indoor and outdoor (underwater), LEDs are completely sealed in silicone for protection
How to Wire Lights on a Kayak Without Drilling Holes
Adhesive mounting and existing scupper holes eliminate the need to drill into your kayak hull, preserving structural integrity and resale value. Battery-powered LED systems with heavy-duty marine adhesive backing provide secure attachment for most kayak fishing applications without permanent modification.
No-drill installation methods:
Adhesive-backed LED strips: Clean mounting surface with isopropyl alcohol, apply 3M VHB marine adhesive tape or included backing, press firmly for 30 seconds. Add zip ties through existing anchor points every 12 inches for redundancy.
RAM mount systems: Use existing gear tracks, rod holder sockets, or scupper holes to mount light poles and battery boxes. RAM ball mounts ($15-30) accept standard light fixtures and adjust for optimal positioning.
Scupper hole routing: Thread waterproof wiring through existing scupper holes using rubber grommets to protect cables. Seal with marine silicone if needed, but avoid permanent plugging that prevents drainage.
Suction cup mounts: Heavy-duty marine suction cups (rated 20+ lbs) work for temporary underwater lights. Test hold strength before each trip and use backup safety tethers.
Clamp-on fixtures: Spring-loaded or screw-tightened clamps attach to gunwales, seat frames, or gear tracks without drilling. Pad contact points with rubber to prevent hull scratches.
Wire management without drilling:
- Run wires along existing channels, under bungee cords, or through gear track slots
- Use adhesive cable clips (marine-grade) every 8-12 inches to prevent snagging
- Protect connections with heat-shrink tubing and store battery packs in waterproof dry boxes
- Label all connections with waterproof tags for quick troubleshooting on the water
This approach works for 90% of kayak lighting setups. Only drill if you’re installing through-hull underwater lights or need permanent conduit for complex multi-light systems on dedicated fishing kayaks.
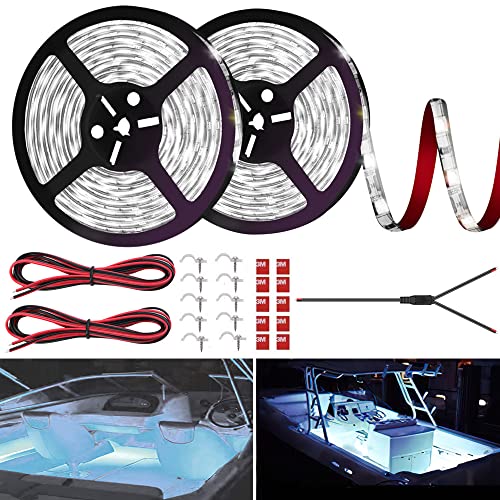
UPGRADED 32.8FT BOAT LIGHTS : Full kit for your boats, no other accessories need, our kit included 2 x 5m(16.4ft) Marine LED Strip Lights + 1-2 Splitter cable + 2 x 2M/6.56FT extension cable, 10 pcs 3M tape hooks and 10pcs led strip clips and screws, The boat led strip light is an ideal gift for your friends or family on birthday, Christmas or party, especially for boat lovers

UPGRADED 32.8FT BOAT LIGHTS : Full kit for your boats, no other accessories need, our kit included 2 x 5m(16.4ft) Marine LED Strip Lights + 1-2 Splitter cable + 2 x 2M/6.56FT extension cable, 10 pcs 3M tape hooks and 10pcs led strip clips and screws, The boat led strip light is an ideal gift for your friends or family on birthday, Christmas or party, especially for boat lovers

More Complete Boat Lights Kit: A complete kit can meet your boat lighting: 2x20FT led strip lights, 1X2 Splitter cable, 2x9.8FT extension cable, 24x fixing clips & screws and 24x adhesive hooks. Good for boat lovers, boat owners, fishing enthusiasts, men who love night fishing. 40FT kit (2 rolls) – Best for medium to large boats (25+ft), full hull coverage, or combining multiple lighting zones. 20FT kit-Best for small boats (under 25ft), focused lighting areas like cabin interior or transom
Battery Powered vs Hardwired Kayak Lights
Battery-powered lights use self-contained rechargeable battery packs (typically 12V, 5000-10000mAh) that connect directly to LED fixtures, while hardwired systems run all lights from a central marine battery installed in the hull. Battery-powered setups cost less upfront ($30-80 total), install in under an hour, and allow quick removal, but provide 4-8 hours of runtime. Hardwired systems cost more ($100-250 with battery) and require permanent installation, but deliver 12+ hours of continuous power and support multiple high-draw lights simultaneously.
Choose battery-powered lights if:
- You fish 2-4 hour sessions and don’t need all-night power
- You want to remove lights between trips or switch between kayaks
- You’re new to kayak fishing and want a reversible setup
- Your kayak lacks interior storage space for a large marine battery
- You primarily need navigation lights and 1-2 small fishing lights
Choose hardwired systems if:
- You regularly fish dawn-to-dawn or multi-day trips
- You run 3+ lights simultaneously (navigation, deck, underwater, spotlight)
- You want a permanent setup on a dedicated fishing kayak
- You already have a fish finder or other electronics requiring a marine battery
- You fish in cold weather (lithium marine batteries perform better than small packs)
Hybrid approach: Many experienced kayak anglers use a hardwired system for navigation and primary fishing lights, plus battery-powered backup lights for redundancy. This provides the reliability of a marine battery with the flexibility of portable lights for specific situations.
Cost comparison (2026 typical prices):
- Basic battery-powered setup: $30-80 (LED strips + rechargeable pack)
- Mid-range battery-powered: $80-150 (multiple lights + quality battery pack)
- Hardwired system: $100-250 (marine battery + wiring + multiple lights)
- Professional hardwired: $250-500+ (lithium battery + switch panel + 4+ lights)
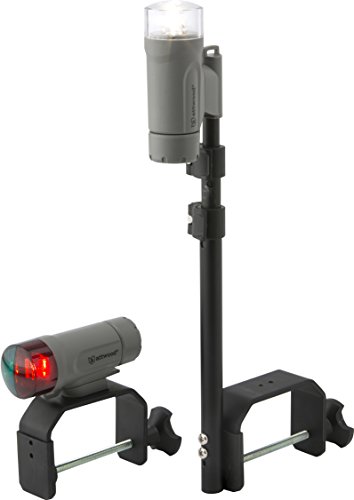
ULTIMATE NIGHTTIME VISIBILITY: Stay safe on small boats or tenders without 12V systems using these compact, high-intensity LED navigation lights

【ADVANCED DESIGN】This Navigation Light is built with a 330mAh rechargeable lithium battery; you can charge it anywhere and anytime with a power bank or from your computer, AC/DC adapter, or any device with a USB port with the supplied cable.

Wireless Boat Lighting, No Wiring Needed: Battery powered design lets you add colorful lighting to your boat without drilling, wiring, or complicated installation. Great for boat decks, cabins, consoles, kayaks, pontoons, and fishing boats.
Where to Mount Lights on a Fishing Kayak for Visibility
Navigation lights must mount high enough for 360-degree visibility to approaching boats, typically 3-4 feet above the waterline on a pole, flag mount, or elevated rod holder. Fishing lights mount lower based on function: underwater lights go near the waterline at bow or stern, deck lights position near the cockpit for tackle work, and spotlights mount on adjustable arms for directional use.
Navigation light placement:
- Optimal position: Center-mounted on a 3-4 foot PVC pole or telescoping flag mount behind the seat
- Alternative: Elevated rod holder or RAM mount on the stern if center mounting interferes with casting
- Height matters: Every foot of elevation roughly doubles your visibility distance to approaching boats
- Avoid: Mounting navigation lights on the deck or gunwales where they’re blocked by your body and gear
Fishing light placement by type:
- Underwater green/blue lights: Mount 6-12 inches below waterline at bow (attracts baitfish ahead of you) or stern (creates feeding zone behind you). Use scupper holes or suction mounts on hull sides.
- Deck/cockpit lights: Position near your seat for hands-free tackle rigging. Red LEDs preserve night vision better than white. Mount on gear tracks or under gunwales pointing down.
- Spotlights: Adjustable arm mounts on gunwales or gear tracks allow you to direct light for landing fish or navigating. Keep off when not actively needed to avoid spooking fish.
Visibility vs. fish-spooking balance:
Bright white navigation lights can spook fish in shallow water. Mount them high and angled slightly upward to maximize boat visibility while minimizing water penetration. Keep deck lights dim (use dimmers or lower-wattage LEDs) and use red or amber colors when possible. Turn off all non-essential lights when actively fishing, keeping only navigation lights and subtle underwater lights active.
Common mistake: Mounting all lights low on the deck for convenience. This reduces your visibility to boats and creates a collision hazard, especially in areas with powerboat traffic or commercial vessels.
Do I Need Navigation Lights and Fishing Lights on My Kayak
Yes, you need both if you fish at night in most jurisdictions. Navigation lights (white 360-degree visibility) are legally required for safety and collision avoidance, while fishing lights (green/blue underwater or deck lights) are optional accessories that improve your catch rate by attracting baitfish and illuminating your workspace. The two systems serve completely different purposes and don’t substitute for each other.
Navigation lights are mandatory because:
- Federal and state boating laws require all vessels to display proper lighting between sunset and sunrise
- Powerboats, sailboats, and commercial vessels need to see you from at least 2 miles to avoid collision
- Your kayak sits low in the water and is nearly invisible without lighting, even in moonlight
- Liability in any collision falls heavily on the unlighted vessel
Fishing lights are optional but valuable because:
- Green and blue underwater LEDs attract phytoplankton, which draws baitfish, which attracts gamefish
- Deck lighting lets you rig tackle, unhook fish, and handle gear safely in darkness
- Spotlights help you navigate tight channels, find markers, and land fish
- Red deck lights preserve your night vision while providing enough illumination for tackle work
Minimum legal setup: One white LED pole light mounted 3+ feet high, visible 360 degrees, with 8+ hour battery life. Cost: $15-40. This satisfies legal requirements in most states but provides no fishing advantage.
Recommended fishing setup: White navigation light (high-mounted) + one green underwater light (bow or stern) + red deck light (cockpit). Cost: $60-120. This covers legal requirements and significantly improves night fishing success.
Check your kayak safety requirements before heading out, as some states have additional rules for kayaks with motors or in specific water bodies.
How Much Do Kayak Light Kits Cost
Complete kayak lighting kits range from $30 for basic battery-powered navigation lights to $300+ for professional hardwired systems with multiple fixtures. Most recreational kayak anglers spend $60-150 for a mid-range setup that includes navigation lighting, one or two fishing lights, and a rechargeable battery pack or small marine battery.
Price breakdown by system type (2026):
Budget battery-powered ($30-80):
- Single white LED pole light or 360-degree navigation light
- One 16-foot LED strip for gunwale or deck lighting
- Rechargeable 12V battery pack (5000mAh)
- Adhesive mounting hardware and zip ties
- Best for: Occasional night fishing, legal compliance, beginner kayak fishing
Mid-range battery-powered ($80-150):
- White navigation light on adjustable pole mount
- One submersible green/blue fishing light
- Red deck light for cockpit
- Higher-capacity battery pack (10000mAh) or two smaller packs
- Marine-grade adhesive mounts and waterproof connectors
- Best for: Regular night fishing, multiple light functions
Hardwired system ($150-300):
- Marine battery (sealed lead-acid 12V 18Ah or small lithium)
- White navigation light
- Two underwater fishing lights
- Deck lighting strips
- Waterproof switch panel or inline switches
- Marine-grade wiring, connectors, fuses
- Best for: Dedicated fishing kayak, all-night sessions
Professional hardwired ($300-600+):
- Lithium marine battery (12V 50Ah+) with built-in USB charging
- Multiple navigation and deck lights
- 2-3 underwater fishing lights
- Spotlight with adjustable mount
- Professional switch panel with circuit protection
- Custom wiring harness
- Best for: Serious tournament anglers, multi-day trips
Individual component costs:
- Navigation lights: $15-60
- Underwater fishing lights: $25-80 each
- LED strip lights (16 ft): $12-35
- Battery packs (rechargeable): $20-50
- Marine batteries: $40-200
- Mounting hardware: $10-40
Most anglers start with a $60-80 battery-powered setup and add lights as they identify specific needs. This approach avoids overspending on features you won’t use while ensuring legal compliance from day one.
Can I Use Regular LED Strips on a Kayak
Regular LED strips from hardware stores or automotive suppliers will fail quickly on a kayak due to inadequate waterproofing and corrosion from moisture exposure. Standard LED strips typically carry IP20-IP44 ratings, which protect against dust and light splashing but not the constant spray, humidity, and occasional submersion that kayaks experience. Marine-grade LED strips rated IP67 or IP68 cost only $5-15 more per reel but last years instead of weeks in kayak environments.
Why regular LED strips fail on kayaks:
- Insufficient sealing: Exposed solder joints and circuit boards corrode within days in saltwater environments
- Adhesive failure: Standard 3M tape backing loses grip when wet, causing strips to peel off
- Connector corrosion: Non-marine connectors oxidize and fail, creating intermittent operation or complete failure
- Cold weather cracking: Non-marine silicone coatings become brittle and crack in temperatures below 40°F
Marine-grade LED strip requirements:
- IP67 minimum rating: Withstands temporary submersion up to 1 meter for 30 minutes
- Silicone coating: Fully encapsulated LEDs and circuit board, not just a thin overlay
- Tinned copper wiring: Resists corrosion in saltwater environments
- Marine adhesive backing: 3M VHB tape or equivalent that maintains grip when wet
- Sealed connectors: Heat-shrink or potted connections that prevent moisture intrusion
Cost comparison (16-foot reel, 2026 prices):
- Regular LED strip: $8-15 (fails in 2-8 weeks on kayak)
- Marine-grade LED strip: $18-35 (lasts 2-5+ years with proper installation)
When regular LEDs might work: Interior dry storage compartments that never see water exposure. Even then, humidity from temperature changes can cause corrosion over time, making marine-grade strips the safer choice for any kayak application.
If you already have regular LED strips, you can extend their life by coating all connections with liquid electrical tape or marine sealant and adding an extra layer of clear silicone over the entire strip. This adds waterproofing but won’t match true marine-grade construction.
Why Do My Kayak Lights Keep Falling Off
Kayak lights fall off due to adhesive failure from improper surface preparation, using non-marine mounting tape, or installing lights on textured or curved surfaces without proper bonding techniques. The constant flexing of kayak hulls, temperature cycling, and water exposure break down standard adhesives within days or weeks. Proper installation requires cleaning with isopropyl alcohol, using marine-grade VHB tape, adding mechanical fasteners as backup, and allowing 24-48 hours cure time before water exposure.
Top reasons for light mounting failure:
Dirty mounting surface: Oils, waxes, and residue from manufacturing prevent adhesive bonding. Always clean with isopropyl alcohol (90%+) and let dry completely.
Wrong adhesive tape: Standard double-sided tape or foam tape fails when wet. Use 3M VHB (Very High Bond) tape rated for marine use, or the marine-grade adhesive backing that comes with quality LED strips.
Insufficient cure time: Most marine adhesives need 24-48 hours to reach full strength. Installing lights and immediately launching causes premature failure.
Textured surfaces: Kayak hulls with heavy texture or non-skid patterns don’t provide enough contact area for adhesive. Sand smooth or use mechanical fasteners instead.
Extreme curves: Adhesive struggles on tight radius curves. Use shorter light segments, heat the adhesive backing with a hair dryer during installation to improve conformity, or switch to mechanical mounting.
Temperature extremes: Installing adhesive in cold weather (below 50°F) prevents proper bonding. Warm the surface and adhesive to 70°F+ before installation.
Permanent mounting solutions:
- Add zip ties: Run through existing anchor points, scupper holes, or around frames every 8-12 inches as mechanical backup
- Use marine silicone: Apply a bead along the edge of LED strips after adhesive installation for extra hold
- Install mounting channels: Adhesive or screw aluminum channels to the hull, then slide LED strips into the channel
- Mechanical fasteners: Small stainless steel screws with rubber washers for permanent installations (requires drilling)
Quick fix for failed lights: Clean the surface and light backing thoroughly, apply fresh 3M VHB tape, add zip ties or marine silicone, and let cure 48 hours before use. This repair typically lasts longer than the original installation because you’re addressing the root cause.
Are Glow Sticks Enough for Night Kayak Fishing
Glow sticks are not sufficient for legal night kayak operation because they don’t provide the required 360-degree white light visible from 2 miles that federal and state boating regulations mandate. While glow sticks can serve as backup emergency markers or rod tip indicators, they produce only 5-15 lumens of light visible from 100-300 feet at most, far below the legal requirement. A proper white LED navigation light costs $15-40 and provides legal compliance plus genuine safety.
Why glow sticks fail as primary lighting:
- Insufficient brightness: 5-15 lumens vs. 100+ lumens required for 2-mile visibility
- Limited duration: 4-8 hours before dimming significantly, often less in cold water
- Poor visibility angle: Directional light doesn’t provide 360-degree coverage
- No legal standing: Won’t protect you in collision liability cases
- Environmental waste: Single-use plastic tubes that must be disposed of after each trip
Where glow sticks do work on kayaks:
- Emergency backup if primary lights fail (attach to paddle or PFD)
- Rod tip indicators to see strikes in darkness
- Marking anchor lines or drift paths
- Interior compartment lighting where waterproof LEDs aren’t practical
- Teaching kids about night safety before investing in permanent lights
Better alternatives at similar cost:
A basic white LED pole light ($15-25) provides legal compliance, 8-12 hour battery life, reusable operation, and genuine 2-mile visibility. Over just 3-4 trips, it costs less than buying glow sticks while providing superior safety and legal protection.
Common misconception: “I fish in a small lake with no boat traffic, so I don’t need real lights.” Even on small waters, kayaks are nearly invisible at night. Other kayakers, canoes, and small fishing boats pose collision risks, and game wardens can cite you for non-compliance regardless of traffic levels.
What Color Lights Attract Fish at Night From a Kayak
Green LED lights (520-530nm wavelength) attract the most fish in most kayak fishing situations because they penetrate water effectively, trigger phytoplankton response that draws baitfish, and create a feeding chain that brings gamefish to your kayak. Blue lights (450-470nm) work better in clear offshore water where they penetrate deeper, while white lights provide the brightest illumination but can spook fish in shallow water. Red lights preserve your night vision for deck work but don’t attract fish because red wavelengths don’t penetrate water.
Light color effectiveness by water type:
Green lights (best all-around choice):
- Penetrates 15-30 feet in most water conditions
- Attracts phytoplankton within 10-15 minutes
- Draws baitfish (shad, minnows, glass minnows) within 20-30 minutes
- Brings predator fish (bass, crappie, snook, redfish, trout) within 30-60 minutes
- Works in stained, murky, or moderately clear water
- Cost: $25-60 for quality submersible units
Blue lights (clear water specialist):
- Penetrates 30-50 feet in clear offshore water
- Less effective in stained or murky water (penetrates only 10-15 feet)
- Attracts squid, baitfish, and pelagic species in deep water
- Preferred for offshore kayak fishing and clear lakes
- Cost: $30-80 for submersible units
White lights (brightest but can spook):
- Maximum brightness for seeing underwater structure
- Attracts baitfish but can spook wary gamefish in shallow water
- Best for deep water (20+ feet) where fish are less light-sensitive
- Good for landing fish and checking lines
- Cost: $20-50 for submersible units
Color combination strategy:
Many experienced kayak anglers run one green underwater light continuously to establish a feeding zone, plus a white deck light (kept off until needed) for landing fish and tackle work. This balances fish attraction with practical illumination needs.
Brightness matters too: 1000-3000 lumens works for most kayak fishing. Higher lumens attract fish from farther away but drain batteries faster and can spook fish in very shallow water (less than 4 feet). Start with 1500-2000 lumens and adjust based on your specific fishing conditions.
Common mistake: Using multiple bright white lights all over your kayak. This creates a “stadium lighting” effect that spooks fish instead of attracting them. One or two strategically placed green or blue lights work better than flooding your kayak with white light.
Common Mistakes When Installing Kayak Lights
The most common kayak light installation mistakes include mounting navigation lights too low for proper visibility, using non-marine components that corrode quickly, failing to waterproof electrical connections, and not securing battery packs properly. These errors lead to premature equipment failure, legal non-compliance, and safety hazards. Proper installation requires marine-grade components, elevated navigation light placement, fully sealed connections, and secure battery mounting with backup retention.
Critical installation mistakes to avoid:
1. Low navigation light mounting
- Mistake: Mounting white lights on deck or gunwales where they’re blocked by your body and gear
- Fix: Mount 3-4 feet high on pole or flag mount for true 360-degree visibility
- Why it matters: Low lights don’t meet legal requirements and create collision risk
2. Inadequate waterproofing
- Mistake: Using electrical tape or wire nuts for connections, leaving exposed terminals
- Fix: Heat-shrink tubing over all connections, marine sealant on terminals, IP67+ rated components
- Why it matters: Corrosion causes intermittent operation and complete failure within weeks
3. Unsecured battery packs
- Mistake: Loose batteries in cockpit that shift during paddling or can fall overboard
- Fix: Mount in waterproof boxes with bungee retention or use RAM mounts with locking mechanisms
- Why it matters: Shifting weight affects stability; lost batteries end your fishing trip
4. Wrong wire gauge
- Mistake: Using thin wire (20-22 gauge) for long runs or high-draw lights
- Fix: 16-18 gauge marine tinned copper wire for runs over 6 feet or lights drawing 2+ amps
- Why it matters: Voltage drop reduces light output; undersized wire can overheat
5. No backup retention
- Mistake: Relying solely on adhesive without mechanical backup
- Fix: Add zip ties, marine silicone, or screws as secondary retention
- Why it matters: Adhesive fails from flexing, temperature, and water exposure
6. Drilling without sealing
- Mistake: Drilling mounting holes without sealing, creating leak points
- Fix: Use marine sealant on all fasteners, install backing plates, seal holes completely
- Why it matters: Water intrusion damages kayak foam core and creates structural weakness
7. Mixing battery types
- Mistake: Connecting lights designed for different voltages or mixing battery chemistries
- Fix: Match all components to same voltage (typically 12V), use single battery type per system
- Why it matters: Voltage mismatch damages LEDs; mixed batteries create charging problems
8. Ignoring wire routing
- Mistake: Loose wires that snag fishing line, get caught in paddle strokes, or rub on sharp edges
- Fix: Secure wires every 8-12 inches with adhesive clips, route through protected channels
- Why it matters: Snagged wires create safety hazards and damage insulation
Installation checklist to avoid mistakes:
- Clean all surfaces with isopropyl alcohol before mounting
- Test all lights and connections before permanent installation
- Allow 24-48 hours cure time for adhesives before water exposure
- Use marine-grade components throughout (lights, wire, connectors, fasteners)
- Mount navigation lights high (3+ feet) for visibility
- Waterproof all connections with heat-shrink tubing and sealant
- Secure batteries in waterproof boxes with backup retention
- Route and secure all wiring to prevent snagging
- Label all connections for easy troubleshooting
- Test entire system in daylight before first night trip
Taking time to install lights correctly the first time saves money, prevents equipment failure, and ensures your safety on the water.
Do I Need a Marine Battery for Kayak Lights or Can I Use Regular Batteries
You can use regular rechargeable battery packs (12V lithium-ion or NiMH) for basic kayak lighting setups that run 4-8 hours, but marine batteries are necessary for all-night operation, multiple high-draw lights, or when powering fish finders and other electronics simultaneously. Marine batteries (sealed lead-acid or lithium) provide higher capacity (18-100Ah vs. 5-10Ah for packs), better cold-weather performance, and proper charging systems, but cost more ($40-200) and require secure mounting in waterproof compartments.
When regular battery packs work fine:
- Running 1-2 LED lights for 4-6 hours
- Occasional night fishing trips (not weekly)
- Budget under $100 for entire lighting system
- Easy removal between trips desired
- Kayak lacks interior storage for large battery
- Warm weather fishing only (above 50°F)
When marine batteries are necessary:
- All-night fishing sessions (8+ hours)
- Running 3+ lights simultaneously
- Powering fish finder + lights from same battery
- Cold weather fishing (below 50°F)
- Dedicated fishing kayak with permanent installation
- Need for reliable power without mid-trip failures
Battery type comparison:
Rechargeable battery packs ($20-50):
- Capacity: 5000-10000mAh (5-10Ah at 12V)
- Runtime: 4-8 hours for basic LED setup
- Weight: 1-2 lbs
- Charging: USB or wall adapter, 2-4 hours
- Lifespan: 300-500 charge cycles
- Best for: Casual night fishing, portable setups
Sealed lead-acid marine batteries ($40-80):
- Capacity: 18-35Ah at 12V
- Runtime: 12-24 hours for basic LED setup
- Weight: 12-25 lbs
- Charging: Marine battery charger, 6-12 hours
- Lifespan: 200-300 charge cycles
- Best for: Budget hardwired systems, heavy use
Lithium marine batteries ($120-300):
- Capacity: 20-100Ah at 12V
- Runtime: 20-80+ hours for basic LED setup
- Weight: 4-15 lbs (much lighter than lead-acid)
- Charging: Lithium-specific charger, 3-6 hours
- Lifespan: 2000-3000 charge cycles
- Best for: Serious anglers, tournament fishing, multi-day trips
Power consumption reference (typical LED lights):
- Navigation light (white LED): 0.5-1.5 watts (0.04-0.12 amps at 12V)
- LED strip (16 feet): 10-20 watts (0.8-1.6 amps at 12V)
- Underwater fishing light: 10-30 watts (0.8-2.5 amps at 12V)
- Deck spotlight: 5-15 watts (0.4-1.2 amps at 12V)
Example runtime calculation:
A 10Ah battery pack running one 1-watt navigation light (0.08 amps) and one 15-watt underwater light (1.25 amps) draws 1.33 amps total. Runtime = 10Ah ÷ 1.33A = 7.5 hours. A 35Ah marine battery running the same setup would last 26+ hours.
Hybrid approach: Many kayak anglers use a small marine battery (18-35Ah sealed lead-acid, $40-60) for primary lighting and keep a rechargeable battery pack as backup. This provides all-night power with emergency redundancy if the main battery fails.
How to Make Kayak Lights Visible to Boats But Not Scare Fish
Mount navigation lights high (3-4 feet above water) with the beam angled slightly upward to maximize visibility to boats while minimizing light penetration into the water where fish feed. Use separate low-mounted fishing lights (green or blue) positioned to illuminate the water column without creating surface glare. This two-tier lighting strategy satisfies legal requirements for boat visibility while maintaining the dark, calm environment that keeps fish feeding around your kayak.
Navigation light optimization for boat visibility:
- Height is critical: Every foot of elevation doubles your visibility distance to approaching boats
- Angle upward 10-15 degrees: Directs light toward boat operators’ sight lines, not into the water
- Use clear or white dome: Maximizes omnidirectional visibility without color filtering
- Position behind you: Keeps bright light out of your eyes and away from your fishing zone
- Add reflective tape: Apply marine-grade reflective tape to paddle blades and hull for passive visibility
Fishing light optimization to avoid spooking fish:
- Mount underwater or at waterline: Keeps light below the surface where it attracts rather than spooks
- Use green or blue, not white: Colored lights are less alarming to fish than bright white
- Lower intensity in shallow water: 1000-1500 lumens in water under 6 feet deep; 2000-3000 lumens in deeper water
- Position away from casting zone: Mount at bow if you cast toward stern, or vice versa
- Turn off when fish are near: Once fish arrive, dim or turn off fishing lights to avoid spooking them during the strike
Deck lighting strategy:
- Use red LEDs: Preserve your night vision and don’t penetrate water to spook fish
- Keep lights low and directed down: Illuminate only your immediate work area
- Install dimmers: Adjust brightness based on task (bright for rigging, dim for landing fish)
- Turn off when not actively needed: Only use deck lights for specific tasks, not continuous operation
Light separation distances:
- Navigation light: 3-4 feet above water, centered or stern-mounted
- Fishing lights: At or below waterline, bow or stern
- Deck lights: Cockpit level, directed downward
- Spotlight: Adjustable mount, used only when needed
This separation creates distinct lighting zones: high bright light for boats, low colored light for fish attraction, and minimal deck lighting for your work. The result is maximum safety visibility without compromising fishing effectiveness.
Common mistake: Using a single bright white light for both navigation and fishing. This creates a “lighthouse effect” that’s visible to boats but floods your fishing area with light that spooks fish. Separate systems for separate purposes always work better.
For more guidance on safe night fishing practices, check our kayak safety resources and kayak gear recommendations.
FAQ
How long do kayak LED lights last on a single charge?
Battery-powered LED lights typically run 4-8 hours on rechargeable battery packs (5000-10000mAh) and 12-24+ hours on marine batteries (18-35Ah), depending on the number and brightness of lights. A single navigation light can run 20+ hours on a small battery pack, while multiple fishing lights drain power faster.
Can I install kayak lights myself or do I need professional help?
Most kayak anglers successfully install lights themselves in 1-3 hours using basic tools (scissors, zip ties, screwdriver). Battery-powered adhesive systems require no special skills. Hardwired systems need basic electrical knowledge (connecting wires, using heat-shrink tubing) but are still DIY-friendly for most people.
Will underwater lights drain my battery faster than deck lights?
Yes, underwater fishing lights typically draw 10-30 watts (0.8-2.5 amps at 12V) compared to 1-5 watts for navigation and deck lights. A 1500-lumen underwater light uses as much power as 10-20 navigation lights, so factor this into your battery capacity planning.
Do I need different lights for saltwater vs freshwater kayak fishing?
The water type doesn’t change light requirements, but saltwater demands marine-grade components (IP67+ rating, tinned copper wire, sealed connectors) because salt accelerates corrosion. Freshwater is less corrosive but still requires waterproof components. Green lights work well in both environments.
How do I prevent my kayak lights from interfering with my night vision?
Use red LED deck lights (red wavelengths don’t affect night vision), keep navigation lights behind you and angled away from your eyes, and turn off all non-essential lights when actively fishing. Your eyes adapt to darkness in 20-30 minutes if you avoid looking at white lights.
Can I use solar panels to charge my kayak light batteries?
Yes, small 10-20 watt solar panels can trickle-charge marine batteries during the day, extending multi-day trip capacity. However, solar panels won’t provide enough power to run lights in real-time at night. They work best for topping off batteries between fishing sessions.
What’s the minimum light setup I need to be legal for night kayak fishing?
One white LED light visible 360 degrees from at least 2 miles, mounted high enough to be seen over your body and gear (typically 3+ feet). This costs $15-40 and satisfies federal and most state requirements. Check your specific state registration requirements for any additional rules.
How do I troubleshoot kayak lights that work intermittently?
Check for corroded connections (clean with contact cleaner), loose wiring (re-secure all connections), low battery voltage (recharge or replace), and damaged wire insulation (repair with heat-shrink tubing). Most intermittent problems stem from moisture in connections or loose terminals.
Are there kayak lights that work as both navigation and fishing lights?
No single light serves both purposes effectively. Navigation lights must be white, bright, and elevated for boat visibility, while fishing lights should be green/blue, lower-mounted, and directed into the water. Using one light for both compromises safety and fishing effectiveness.
How much does it cost to run kayak lights per fishing trip?
Electricity cost is negligible (under $0.10 per charge for most battery packs). The real cost is battery replacement every 2-4 years ($20-50 for packs, $40-200 for marine batteries) and occasional LED replacement ($15-60 per fixture). Total operating cost averages $10-30 per year for regular use.
Can I leave lights installed on my kayak between trips?
Battery-powered lights with quality marine adhesive can stay installed, but remove battery packs to prevent drainage and corrosion. Hardwired systems can stay fully installed if your kayak is stored indoors or under cover. Remove all lights if storing outdoors in direct sun, as UV degrades adhesives and plastics.
Do kayak lights attract mosquitoes and bugs at night?
Yes, white and warm-colored lights attract insects. Green and blue lights attract fewer bugs, and red lights attract the fewest. Use red deck lights when possible and turn off all non-essential lights to minimize bug problems. Bug spray remains necessary for most night fishing situations.
Conclusion
Adding lights to a kayak for night fishing combines legal compliance, safety, and fishing effectiveness into one essential upgrade. Start with a high-mounted white navigation light to meet legal requirements and ensure your visibility to boats, then add green or blue underwater fishing lights to attract baitfish and gamefish to your location. Battery-powered systems offer the easiest entry point for most anglers, requiring no drilling and costing $60-150 for a complete setup, while hardwired systems provide all-night power for serious night fishing enthusiasts.
The key to successful kayak light installation is using marine-grade components rated IP67 or higher, properly waterproofing all electrical connections with heat-shrink tubing and sealant, and mounting lights strategically to balance boat visibility with fish attraction. Avoid common mistakes like mounting navigation lights too low, using non-marine adhesives, or flooding your fishing area with bright white light that spooks fish.
Take action now:
- Check your state’s legal requirements for kayak lighting to ensure compliance
- Choose between battery-powered (easier, portable) or hardwired (longer runtime) based on your fishing frequency
- Purchase marine-grade LED lights and mounting hardware from reputable suppliers
- Install navigation lights first (legal requirement), then add fishing lights based on your target species
- Test your entire system in daylight before your first night trip
- Bring backup lighting (flashlight, extra battery pack) on every night fishing trip
Night fishing from a kayak opens up productive hours when big fish feed aggressively in shallow water, and proper lighting makes these sessions both legal and safe. With the right setup installed correctly, you’ll enjoy better catches, improved safety, and full confidence that you’re visible to other boaters while maintaining the low-light conditions that keep fish feeding around your kayak.
For more guidance on outfitting your kayak for success, explore our fishing kayak resources and kayak gear recommendations.