
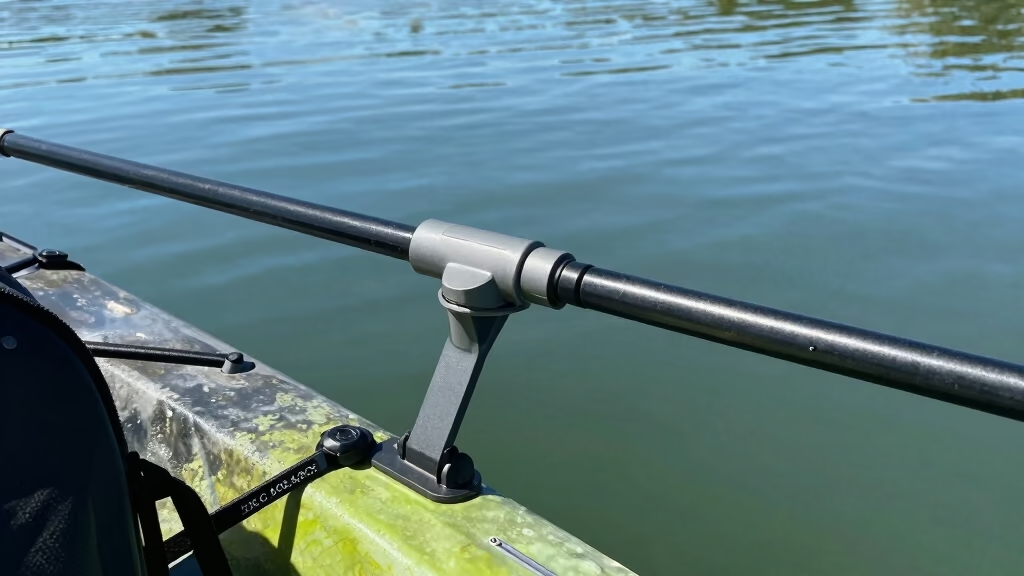
Quick Answer: DIY kayak rod holder ideas range from simple PVC pipe holders costing under $10 to milk crate setups and adjustable rail mounts, offering kayak anglers affordable alternatives to commercial rod holders that can cost $30-80 each. Most homemade rod holders can be built in under an hour using basic materials from hardware stores, with options for both permanent flush-mount installations and removable designs that don’t require drilling into your kayak hull.
Key Takeaways
- PVC pipe rod holders are the most popular DIY option, costing $5-15 per holder and requiring only basic cutting and drilling skills
- Flush mount holders provide a clean, permanent solution but require drilling into your kayak hull, while rail mount designs attach to existing tracks without modifications
- Milk crate setups offer the cheapest multi-rod solution at $10-20 total, combining rod storage with gear organization
- Proper mounting angle (30-45 degrees for most applications) prevents rod tip damage and keeps lines clear during paddling
- No-drill alternatives like clamp-on holders and suction cup mounts work for anglers who want to preserve their kayak’s resale value
- Adjustable DIY holders using PVC ball valves let you switch between trolling and casting angles without building multiple holders
- Common mistakes include drilling without backing plates, using incorrect PVC cement, and mounting holders too close to the seat
What Materials Do I Need to Make a Kayak Rod Holder?
Building a basic DIY kayak rod holder requires PVC pipe (1.5-2 inch diameter), PVC cement, a hacksaw or PVC cutter, sandpaper, and mounting hardware like stainless steel bolts with backing plates. For the simplest vertical holder, you’ll need about 8-12 inches of PVC pipe, an end cap, and a 45-degree elbow joint.
Essential materials for most DIY rod holder projects:
- PVC pipe (Schedule 40, 1.5″ or 2″ diameter depending on rod handle size)
- PVC fittings (45° or 90° elbows, T-joints, end caps)
- PVC cement and primer (purple primer, clear cement)
- Stainless steel hardware (bolts, washers, nuts – marine grade to prevent rust)
- Backing plates (aluminum or plastic, 3×3 inches minimum)
- Foam padding (pipe insulation or pool noodle sections to protect rods)
- Measuring tape and marker
- Drill with bits (appropriate size for your bolts, typically 1/4″ or 5/16″)
- Hacksaw or PVC cutter
- Sandpaper (120-220 grit for smoothing cut edges)
Optional upgrades:
- Rubber grommets for drain holes
- Marine sealant (silicone or 3M 5200) for waterproofing bolt holes
- Reflective tape for visibility
- Bungee cord or rod leashes for extra security
Choose X if you’re building flush mounts: add a hole saw (2.5-3 inch) to cut clean openings in your kayak deck. Choose Y if you’re making rail mounts: get track-compatible clamps or bolts that fit your kayak’s existing rail system.
Common mistake: Buying furniture-grade PVC instead of Schedule 40. Furniture-grade PVC has thinner walls and can crack under the stress of a fighting fish. Always use Schedule 40 or heavier for structural integrity.
The total material cost for a single PVC rod holder typically runs $5-15, compared to $30-80 for commercial options like Scotty or RAM mounts. For more ideas on customizing your fishing kayak setup, check out our gear guides.
PVC Pipe Rod Holder for Kayak: Step-by-Step Instructions
A basic PVC pipe rod holder takes 30-45 minutes to build and costs under $10 in materials. Cut a 10-inch section of 2-inch PVC pipe, attach a 45-degree elbow to the bottom, cement an end cap to the elbow, drill drain holes, and mount it to your kayak using stainless steel bolts with backing plates.
Step-by-step construction process:
Measure and cut your PVC pipe – Cut a 10-12 inch section of 2-inch Schedule 40 PVC pipe using a hacksaw or PVC cutter. Sand the cut edges smooth to prevent scratching your rod handles.
Prepare the base fitting – Attach a 45-degree elbow to one end of the pipe. Apply purple PVC primer to both the inside of the elbow and outside of the pipe, then apply PVC cement and twist the pieces together firmly. Hold for 30 seconds.
Add the end cap – Cement an end cap to the open end of the elbow to create a closed bottom. This prevents water from pooling inside and adds structural strength.
Drill drain holes – Using a 1/4-inch drill bit, make 2-3 small holes near the bottom of the vertical pipe section to allow water drainage. Space them evenly around the circumference.
Create mounting holes – Drill two holes through the elbow section where it will contact your kayak surface. Space them 2-3 inches apart for stability.
Add foam padding – Cut a section of foam pipe insulation and insert it into the top of the holder to protect your rod from scratches and reduce rattling.
Mount to kayak – Position the holder on your kayak, mark the bolt locations, drill through the kayak hull, and secure with stainless steel bolts, washers, and backing plates on the interior. Apply marine sealant around bolt holes before tightening.
Pro tip: Test-fit your thickest rod handle before cementing the PVC joints. Some larger baitcasting rods may require 2.5-inch pipe instead of 2-inch.
Choose this design if: You want the most affordable option and don’t mind a permanent installation. The 45-degree angle works well for trolling and keeps rods out of your paddling zone.
Common mistake: Forgetting to dry-fit all pieces before applying cement. PVC cement sets in seconds, so you can’t adjust the angle once it’s applied. Always assemble everything without cement first to verify your design works.
For anglers who prefer removable solutions, consider building a rail-mounted version using the same PVC construction but attaching it to a track-compatible base instead of bolting directly to the hull. This approach is popular among kayak fishing enthusiasts who switch between fishing and recreational paddling.

Conveniently and securely holds rod grip sizes up to 1 ¾ inches in diameter

Size Guide: Includes 10pcs PVC pipe straps with a 2" (51mm) inner diameter, compatible with pipes of 2.01" / 50.9–51.1 mm OD for installation and repair. Note: As outer diameter may vary by material, please measure your pipe's actual diameter before ordering to ensure correct sizing
Flush Mount vs Rail Mount Kayak Rod Holder: Which Is Better?
Flush mount rod holders install directly into your kayak deck for a clean, permanent solution, while rail mount holders attach to existing track systems and can be repositioned or removed. Flush mounts offer better stability and lower profile but require drilling large holes in your kayak, whereas rail mounts preserve your hull and provide flexibility at the cost of slightly more bulk.
Flush mount advantages:
- Sleek appearance – sits nearly flush with deck surface
- Maximum stability – no wobble or movement during fights
- Lower profile – less likely to snag lines or interfere with paddling
- More mounting locations – can be placed anywhere on the deck
- Better for rough water – secured directly to hull structure
Flush mount disadvantages:
- Permanent modification – drilling 2.5-3 inch holes affects resale value
- Difficult to relocate – you’re committed to the position
- Requires more skill – cutting clean holes in curved surfaces is challenging
- Potential leak points – improper sealing can let water into hull
- Not suitable for all kayaks – inflatable or thin-hulled kayaks can’t support them
Rail mount advantages:
- No hull drilling – preserves kayak integrity and warranty
- Adjustable positioning – slide along tracks to find optimal placement
- Removable – take them off for recreational paddling or transport
- Easy installation – just tighten track bolts or clamps
- Transferable – move to a new kayak if you upgrade
Rail mount disadvantages:
- Requires existing tracks – not all kayaks have rail systems
- Higher profile – sticks up more, can interfere with paddle strokes
- Limited positions – restricted to track locations
- Potential movement – can loosen over time with vibration
- More expensive hardware – track-compatible bases cost more than simple bolts
Choose flush mount if: You have a dedicated fishing kayak you plan to keep long-term, want the cleanest setup, and have the skills to cut precise holes. Best for serious anglers who fish in rough water conditions where stability matters most.
Choose rail mount if: You want flexibility, share your kayak with non-fishing family members, lack confidence drilling large holes, or frequently adjust your setup for different fishing styles. Ideal for beginners and anglers who value versatility.
Hybrid option: Some kayak anglers install flush-mount track sections, then use rail-mount rod holders. This gives you the low profile of flush mounting with the flexibility of rail systems. The track sections are easier to install than individual rod holders and create a platform for multiple accessories.
Edge case: If you’re fishing from a sit-on-top kayak with a flat deck, flush mounts are significantly easier to install than on sit-inside models with curved decks. The flat surface makes cutting clean holes and achieving proper sealing much simpler.

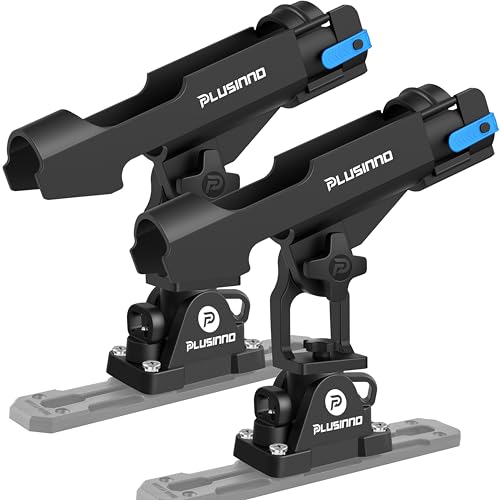
Innovative Stable Fishing Rod Holders: The rod holders for fishing boat features silicone gaskets that designed for optimal stability, maximize contact area and enhance friction, ensuring a secure and stable grip without leaving any scratches on your boat, which allows anglers to focus entirely on the thrill of the catch. A must-have boat pole holders fishing accessories for kayak fishing enthusiasts, this kayak rod holder enhances both convenience and performance on the water.
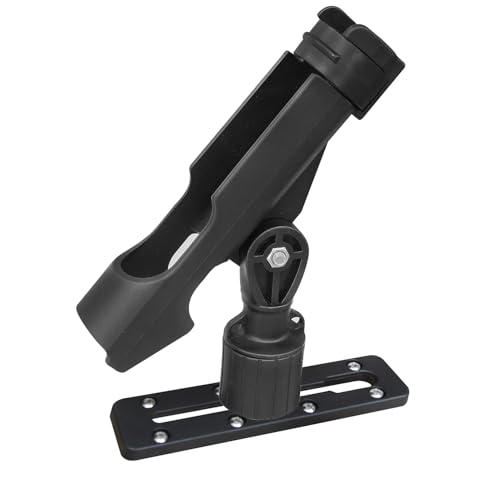
Made of UV stabilized fiberglass reinforced nylon.
How Much Does It Cost to Build Your Own Kayak Rod Holders?
Building DIY kayak rod holders costs $5-20 per holder depending on materials and design complexity, compared to $30-80 for commercial rod holders. A basic PVC pipe holder runs $5-10, while more advanced designs with adjustable angles or stainless steel components may cost $15-25 per holder.
Cost breakdown by holder type:
Basic PVC vertical holder – $5-10
- 2-foot section of 2″ PVC pipe: $3-4
- 45° elbow fitting: $1-2
- End cap: $0.50-1
- Stainless steel bolts and washers: $2-3
- Foam padding: $1-2
Rail-mounted PVC holder – $15-25
- PVC materials (as above): $5-10
- Track-compatible mounting base: $8-12
- Hardware: $2-3
Milk crate multi-rod system – $10-20 total (holds 4-6 rods)
- Milk crate: $5-10
- Bungee cords: $3-5
- Foam pipe insulation: $2-5
Adjustable PVC holder with ball valve – $15-25
- PVC pipe and fittings: $5-8
- 2″ PVC ball valve: $8-12
- Mounting hardware: $2-5
Flush-mount with purchased base – $20-35
- Commercial flush-mount base: $15-25
- PVC pipe for tube: $2-3
- Marine sealant: $3-5
- Hardware: $2-3
Cost comparison: Building four DIY PVC rod holders costs approximately $20-40 total, while purchasing four Scotty or RAM commercial holders would cost $120-320. The savings increase dramatically when outfitting a kayak with multiple holders.
Hidden costs to consider:
- Tools – If you don’t own a drill, hole saw, or PVC cutter, factor in $30-80 for basic tools (though these are reusable for future projects)
- Mistakes – Budget an extra 20-30% for materials in case you cut something wrong or need to remake a piece
- Sealant and maintenance – Marine-grade sealant costs $5-10 per tube but is essential for preventing leaks
- Backing plates – Aluminum or plastic backing plates add $2-5 per holder but prevent stress cracks
Choose DIY if: You need multiple holders, enjoy hands-on projects, or want to customize angles and positions for your specific fishing style. The break-even point is typically after building 2-3 holders compared to buying commercial options.
When to buy commercial: If you only need one rod holder, value warranty coverage, or want features like quick-release mechanisms that are difficult to replicate in DIY builds, the $30-50 premium for a quality commercial holder may be worth it. Commercial holders also maintain better resale value if you sell your kayak.
For anglers setting up a complete fishing kayak rig, the savings from DIY rod holders can fund other essential gear like a quality paddle or fish finder.
My DIY Rod Holder Keeps Loosening While Paddling: How to Fix
DIY rod holders loosen during paddling because of inadequate backing plates, insufficient bolt tension, or vibration-induced loosening. Fix this by installing larger backing plates (minimum 3×3 inches), using lock washers or nylon-insert lock nuts, and applying marine-grade thread locker to bolt threads.
Immediate fixes for loose holders:
Upgrade to lock nuts – Replace standard nuts with nylon-insert lock nuts (Nylock nuts) that resist vibration loosening. These cost $0.25-0.50 each and prevent the nut from backing off.
Add lock washers – Install split lock washers or star washers under the nut to create tension that resists rotation. Use stainless steel versions to prevent rust.
Apply thread locker – Use medium-strength thread locker (blue Loctite 242) on bolt threads. This allows future removal but prevents loosening from vibration. Avoid red thread locker, which creates a permanent bond.
Increase backing plate size – Small backing plates concentrate stress and allow the kayak material to flex. Upgrade to 3×3 inch or larger aluminum or HDPE plastic plates to distribute load across a wider area.
Add more mounting points – If your holder uses only two bolts, consider redesigning with three or four bolts in a wider pattern for better stability.
Preventive solutions:
- Use proper bolt size – 1/4-inch bolts are minimum; 5/16-inch provides better resistance to loosening
- Tighten to proper torque – Snug but not over-tight; over-tightening can crack the kayak material and actually reduce holding power
- Check regularly – Inspect and re-tighten bolts every 3-4 fishing trips during the first month, then monthly thereafter
- Add rubber gaskets – Place thin rubber or neoprene gaskets between the holder base and kayak surface to reduce vibration transmission
Common mistake: Using hardware store zinc-plated bolts instead of stainless steel. Zinc plating wears off in saltwater, causing corrosion that makes nuts difficult to tighten and eventually seize. Always use 304 or 316 stainless steel hardware for marine applications.
Edge case for rail-mounted holders: If your rail-mount holder loosens, the track itself may be flexing. Add backing plates under the track mounting points or switch to a track system with more mounting screws for better rigidity.
Choose this solution if: Your holder wobbles side-to-side or the entire assembly rotates when you insert or remove a rod. This indicates the mounting system is inadequate rather than the holder design itself.
If loosening persists after these fixes, the mounting location may be on a high-flex area of the kayak. Consider relocating to a more rigid section of the deck, typically closer to the cockpit or over structural ribs. For more tips on maintaining your kayak gear, check our maintenance guides.
Best Alternatives to Expensive Scotty Rod Holders
The best budget alternatives to Scotty rod holders include DIY PVC pipe holders ($5-10), milk crate systems ($10-20), generic flush-mount bases with PVC tubes ($15-25), and off-brand rail-mount holders from manufacturers like YakAttack or Brocraft ($15-30). These options provide 60-90% of Scotty’s functionality at 20-40% of the cost.
Top DIY and budget alternatives:
PVC pipe holders with homemade mounts – $5-15
- Functionality: 70% of Scotty performance
- Best for: Anglers who need multiple holders on a budget
- Limitation: No quick-release, fixed angle
- Build time: 30-45 minutes per holder
Milk crate multi-rod system – $10-20
- Functionality: 60% of Scotty (less secure, but holds more rods)
- Best for: Bank anglers who also kayak fish, need gear storage
- Limitation: Bulky, not adjustable, rods less secure in rough water
- Setup time: 15 minutes
Generic flush-mount bases – $15-25
- Functionality: 80% of Scotty (similar design, lower quality materials)
- Best for: Anglers who want flush-mount look without premium price
- Limitation: Plastic may be less UV-resistant, fewer angle options
- Brands: Amarine Made, Five Oceans, Shoreline Marine
Off-brand rail-mount holders – $15-30
- Functionality: 85% of Scotty (very similar designs)
- Best for: Track-equipped kayaks, anglers who want adjustability
- Limitation: Slightly less robust locking mechanisms
- Brands: YakAttack (mid-tier), Brocraft, Goture
Pool noodle holders – $3-5
- Functionality: 40% of Scotty (temporary solution only)
- Best for: Testing rod positions before permanent installation
- Limitation: Not secure, purely vertical, no adjustability
- Setup: Cut pool noodle sections, wedge into existing deck fittings
RAM Mounts with DIY tubes – $20-35
- Functionality: 90% of Scotty (excellent quality, different mounting system)
- Best for: Anglers who want commercial quality with DIY savings
- Limitation: RAM ball system requires compatible bases
- Approach: Buy RAM mount base, build custom PVC tube insert
Comparison table:
| Solution | Cost | Durability | Adjustability | Installation Difficulty |
|---|---|---|---|---|
| Scotty (baseline) | $30-80 | Excellent | High | Easy-Moderate |
| DIY PVC | $5-15 | Good | Low | Moderate |
| Milk crate | $10-20 | Fair | None | Easy |
| Generic flush-mount | $15-25 | Good | Medium | Moderate-Hard |
| Off-brand rail-mount | $15-30 | Good | High | Easy |
| Pool noodle | $3-5 | Poor | None | Very Easy |
Choose DIY PVC if: You’re comfortable with basic tools, need 3+ holders, and fish primarily in calm to moderate conditions. The cost savings are substantial when outfitting a full kayak.
Choose generic commercial if: You want one or two holders with better aesthetics and don’t mind spending slightly more for convenience and warranty coverage.
Choose milk crate if: You prioritize gear storage equally with rod holding and fish from stable platforms in protected waters.
Common mistake: Buying the cheapest possible generic holders without checking reviews. Some ultra-budget holders ($8-12) use brittle plastic that cracks after a season of UV exposure. Stick with known budget brands or DIY solutions rather than no-name imports.
Edge case: For beginner kayak fishing setups, start with one or two DIY holders to learn your preferred rod positions, then invest in commercial holders for your most-used locations once you’ve dialed in your layout.

Convenient: This flush-mount rod holder allows you to turn your recreational kayak into a fishing kayak. It's an essential tool for kayak fishing.
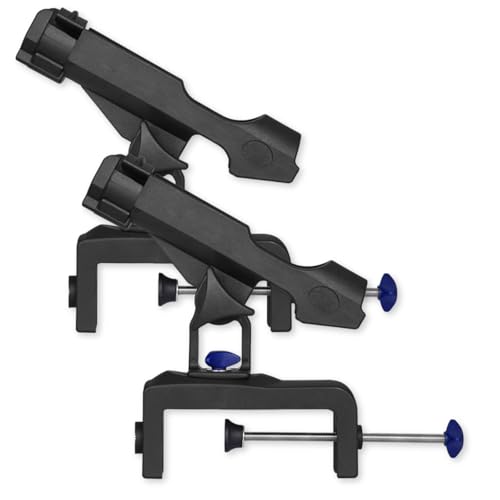
ZENFUN set of 2 adjustable boat rod holders for fishing with large clamp opening, including stainless steel screws hardware. Clamp max opening is 4.7in. Fishing rod holder gives you versatility and convenience while fishing.

HIGH QUALITY - The kayak fishing rod holder Made of High Quality Material PC+ABC, strong and durable, corrosion resistant, hard to damage.
Are Homemade Kayak Rod Holders Safe for Fishing in Rough Water?
Homemade kayak rod holders are safe for rough water fishing if properly designed with adequate backing plates, marine-grade hardware, and secure mounting to structural areas of the kayak. The key safety factors are preventing rod loss (use rod leashes), avoiding stress cracks in the hull (use large backing plates), and ensuring holders don’t interfere with stability or emergency exits.
Safety requirements for rough water use:
Structural integrity:
- Backing plates minimum 3×3 inches, preferably 4×4 inches for rough water
- Stainless steel bolts (1/4-inch minimum, 5/16-inch preferred)
- Mount to solid areas of deck, not thin or flexible sections
- Use marine sealant on all through-hull penetrations
- Inspect regularly for cracks around mounting points
Rod security:
- Add rod leashes (coiled or straight) attached to holder and rod
- Consider holders with deeper tubes (12+ inches) for rough water
- Angle holders 30-45 degrees to prevent rods from bouncing out
- Add foam inserts to reduce rattling and create friction fit
- Use bungee cord across holder tops for extra security in big waves
Safety considerations:
- Position holders away from paddling zone to avoid interference during emergency maneuvers
- Avoid mounting holders that block access to safety equipment
- Ensure holders don’t create snag points for PFD straps or clothing
- Test holder security in controlled conditions before venturing into rough water
- Consider quick-release designs that allow rapid rod removal if needed
Choose DIY holders for rough water if: You’ve used proper marine-grade materials, installed adequate backing plates, and tested the system in progressively rougher conditions. Many experienced kayak anglers use DIY holders successfully in ocean surf and tidal currents.
Upgrade to commercial if: You regularly fish in extreme conditions (ocean swells over 3 feet, strong tidal rips, whitewater), where the consequences of equipment failure are severe. Commercial holders like Scotty or RAM have been tested to higher standards and include warranties.
Common mistake: Mounting DIY holders to thin deck areas or using only the outer hull skin without backing plates. In rough water, the repeated stress from wave impacts and rod vibration will crack the mounting area, potentially causing catastrophic failure and rod loss.
Edge case: For ocean kayak fishing in serious offshore conditions, consider a hybrid approach: use commercial holders for your primary fishing rods (the expensive ones) and DIY holders for backup rods or less critical applications.
Real-world test: Before trusting any DIY holder in rough water, conduct a “bounce test” – secure a rod in the holder, then vigorously rock and bounce the kayak while on shore or in shallow water. If the rod stays secure and the holder shows no movement or flexing, it’s likely adequate for rough conditions. Add a rod leash as backup regardless of test results.
DIY Kayak Rod Holder Ideas for Beginners with No Tools
Beginners without tools can create functional rod holders using milk crates with bungee cords ($10-20), pool noodle sections wedged into existing deck fittings ($3-5), or clamp-on holders that attach to kayak rails without drilling ($20-35). These no-drill, no-cut solutions provide immediate rod storage while you decide on permanent installations.
Tool-free rod holder options:
Milk crate system – $10-20, 15 minutes setup
- Buy a standard milk crate from hardware or farm supply store
- Position on rear tank well or deck
- Secure with bungee cords through crate holes to kayak pad-eyes or handles
- Insert rods through crate grid holes at various angles
- Add foam pipe insulation inside holes to protect rods (optional)
- Pros: Holds 4-6 rods, provides gear storage, completely removable, no tools needed
- Cons: Bulky, less secure in rough water, limited angle options
Pool noodle holders – $3-5, 5 minutes setup
- Cut pool noodle into 8-12 inch sections using a bread knife
- Wedge sections into existing deck fittings, cup holders, or gear tracks
- Insert rod handles into the foam
- Pros: Cheapest option, instantly removable, won’t damage kayak
- Cons: Very insecure, vertical only, suitable for calm water transport only
Clamp-on rail holders – $20-35, 10 minutes installation
- Purchase rail-mount holders with tool-free clamps (some use thumb screws)
- Position on kayak rail or gunwale
- Tighten clamps by hand or with included wing nuts
- Pros: Secure, adjustable, no permanent modification, professional appearance
- Cons: Requires existing rails, more expensive than DIY options
Suction cup holders – $15-25, 2 minutes installation
- Attach commercial suction cup rod holders to smooth kayak surfaces
- Press firmly to create seal
- Pros: Instant installation, completely removable, repositionable
- Cons: Unreliable in rough water, won’t work on textured surfaces, limited weight capacity
Bungee cord rod retention – $5-10, 10 minutes setup
- String bungee cord across existing deck rigging or handles
- Create loops that hold rod handles against hull
- Adjust tension to secure rods
- Pros: Uses existing kayak features, no modifications, very cheap
- Cons: Rods lie flat (not ideal for fishing), awkward to access, tips may drag in water
Choose milk crate if: You need to carry multiple rods and want gear storage. This is the most popular beginner solution for kayak fishing because it’s functional, cheap, and completely reversible.
Choose clamp-on if: Your kayak has rails and you want a more professional setup without committing to drilling. This bridges the gap between temporary and permanent solutions.
Choose pool noodle if: You’re testing rod positions before making permanent installations or need a temporary solution for a single trip.
Progression path: Most beginners start with a milk crate or pool noodle system, use it for 3-5 trips to understand their preferred rod positions and fishing style, then graduate to properly installed DIY or commercial holders in their most-used locations.
Common mistake: Relying on suction cup holders for actual fishing. These are suitable only for rod transport between fishing spots, not for holding rods under load from fighting fish. The suction fails unpredictably, especially in hot sun or cold water.
Safety note: Any tool-free system requires extra vigilance. Always use rod leashes as backup, and check security frequently during your trip. These solutions are best for protected waters and calm conditions while you learn the sport.
What Angle Should a Kayak Rod Holder Be Mounted At?
Kayak rod holders should be mounted at 30-45 degrees from vertical for most fishing applications, with 45 degrees being ideal for trolling and 30-35 degrees working better for casting and jigging. The angle affects rod tip height, line management, and how easily you can grab the rod when a fish strikes.
Angle recommendations by fishing style:
Trolling – 45-60 degrees
- Keeps rod tips high and visible
- Provides good hook-setting leverage when fish strikes
- Allows multiple rods without tangling lines
- Rod is easy to grab quickly
- Works well for both spinning and conventional reels
Casting and jigging – 30-40 degrees
- Rod more vertical for better feel and control
- Easier to grab rod without changing grip
- Better for working lures with rod tip action
- Reduces strain on rod when setting hook from seated position
Bait fishing – 60-75 degrees (nearly horizontal)
- Keeps rod tip low to reduce wind resistance
- Better bite detection with less rod flex
- Allows rod to bend more before pulling from holder
- Reduces false strikes from wave action
Vertical jigging – 15-30 degrees (nearly vertical)
- Maintains direct line to lure below kayak
- Allows quick rod retrieval for hook sets
- Reduces rod tip movement in current
- Better for deep water applications
Factors that influence optimal angle:
- Rod length – Longer rods (7+ feet) need steeper angles to keep tips clear of water
- Kayak width – Wider kayaks can use more horizontal angles without tips hitting water
- Seat height – Higher seats require steeper angles for comfortable rod access
- Fishing location – Tight cover requires more vertical angles to avoid snags
- Number of rods – Multiple rods need varied angles to prevent line tangles
Adjustability advantage: Consider building or buying adjustable holders that let you change angles. A simple PVC ball valve joint ($8-12) allows 360-degree adjustment, letting you switch from trolling to casting angles without building multiple holders.
Common mistake: Mounting all holders at the same angle. Vary angles by 10-15 degrees between holders to prevent line tangles when running multiple rods. For example, use 45°, 35°, and 50° for three holders rather than three at 45°.
Testing method: Before permanently installing holders, use duct tape or clamps to temporarily position holders at different angles during a fishing trip. Mark your preferred angles, then install permanently. This prevents costly mistakes and ensures optimal ergonomics for your specific kayak and fishing style.
Edge case: For river kayak fishing in current, angle holders slightly forward (toward bow) rather than straight out to the side. This prevents current from pushing rod tips backward and potentially pulling rods from holders.
Common Mistakes When Drilling Holes in Kayak for Rod Holders
The most common mistakes when drilling kayak rod holder holes are failing to use backing plates (causing stress cracks), drilling in thin or flexing areas, not sealing holes properly (leading to leaks), and using incorrect drill bit sizes that create loose or over-tight fits. Always drill pilot holes first, use backing plates, and apply marine sealant to prevent long-term damage.
Critical mistakes and how to avoid them:
No backing plates – Most serious error
- Problem: Stress concentrates around bolt holes, causing cracks that spread over time
- Solution: Use 3×3 inch minimum backing plates (aluminum, HDPE, or marine plywood) on interior surface
- Material: 1/8-inch thick aluminum or 1/4-inch HDPE plastic
- Cost: $2-5 per backing plate
Wrong drill location – Second most common
- Problem: Drilling through thin deck areas, over hollow sections, or near seams causes weak mounting
- Solution: Tap deck to find solid areas (dull sound = solid, hollow sound = avoid). Mount over structural ribs or thick sections
- Test: Press firmly on proposed location – minimal flex indicates good mounting area
Incorrect hole size – Creates loose or cracked fittings
- Problem: Too large = bolts don’t grip; too small = cracks when forcing bolt through
- Solution: Use drill bit 1/16 inch larger than bolt diameter for clearance. For 1/4-inch bolt, use 5/16-inch bit
- Verification: Bolt should slide through with minimal resistance
No sealant – Allows water intrusion
- Problem: Water enters hull through bolt holes, potentially causing mold or adding weight
- Solution: Apply marine silicone or 3M 5200 around bolts before tightening. Wipe excess immediately
- Timing: Apply sealant to bolt threads and hole edges, then install while wet
Drilling without pilot holes – Causes bit wandering
- Problem: Large bits skip across curved surfaces, creating oblong holes
- Solution: Start with 1/8-inch pilot hole, then step up to final size
- Technique: Use center punch to create starting dimple, preventing bit slip
Over-tightening bolts – Cracks kayak material
- Problem: Polyethylene and ABS plastic crack under excessive compression
- Solution: Tighten until snug with slight resistance, then 1/4 turn more. Use lock washers instead of excessive torque
- Feel: Backing plate should be firm against interior but not deforming the hull
Drilling in cold weather – Increases crack risk
- Problem: Cold plastic is brittle and prone to cracking
- Solution: Warm kayak to 60°F+ before drilling, or at minimum warm the drill area with hair dryer
- Temperature: Ideal drilling temperature is 70-80°F
Wrong bit type – Creates rough holes
- Problem: Standard twist bits grab and crack plastic; hole saws leave rough edges
- Solution: Use brad-point bits for small holes, sharp hole saws for large openings. Drill slowly with light pressure
- Speed: 500-800 RPM for plastic (slower than wood or metal)
No test fit – Wastes materials
- Problem: Discovering holder doesn’t fit or angle is wrong after drilling
- Solution: Use duct tape or clamps to temporarily position holder, test with rod inserted, mark final position
- Verification: Fish for 30 minutes with temporary setup before drilling
Drilling from outside only – Creates rough interior holes
- Problem: Drill bit tears plastic as it exits, leaving sharp edges inside hull
- Solution: Drill from outside until bit tip just breaks through, then finish from inside
- Alternative: Place masking tape on interior surface to reduce tear-out
Choose professional installation if: You’re uncomfortable drilling into your kayak, lack proper tools, or are working with an expensive kayak where mistakes are costly. Many kayak shops offer installation services for $20-40 per holder.
Edge case: For inflatable fishing kayaks, never drill through the hull. Use only clamp-on or adhesive-mount holders designed specifically for inflatable materials.
Can I Make a Rod Holder Without Drilling Into My Kayak?
Yes, you can make effective no-drill rod holders using rail-mount clamps, milk crate systems secured with bungee cords, suction cup mounts, or holders that attach to existing kayak features like handles and gear tracks. These solutions preserve your kayak’s resale value and allow complete removal when not fishing.
No-drill rod holder solutions:
Rail-mount clamp holders – Most secure no-drill option
- Attach to existing kayak rails or tracks using clamps or track bolts
- Provide adjustable positioning along rail length
- Can be tightened securely without drilling
- Cost: $20-40 for commercial versions, $15-25 for DIY with purchased clamps
- Build approach: Construct PVC holder, attach to track-compatible clamp base
- Limitation: Requires kayak with rail system
Milk crate secured with bungee – Best multi-rod solution
- Position crate on rear tank well or flat deck area
- Thread bungee cords through crate holes and around kayak handles, pad-eyes, or through existing deck rigging
- Insert rods through crate grid openings
- Cost: $10-20 total
- Limitation: Bulky, less secure in rough water
Strap-on holders – Portable option
- Use heavy-duty straps or cam buckles to secure PVC holders to kayak hull
- Wrap straps around hull or through cockpit
- Tighten to create friction hold
- Cost: $10-15 for DIY version
- Limitation: May shift during use, requires periodic re-tightening
Suction cup mounts – Temporary solution
- Commercial suction cup rod holders attach to smooth kayak surfaces
- Work best on flat areas of deck or hull sides
- Cost: $15-30
- Limitation: Unreliable for actual fishing, best for rod transport only
Gear track accessories – If kayak has tracks
- Many kayaks come with gear tracks for accessories
- Purchase track-compatible rod holder bases
- Slide into track and tighten set screw
- Cost: $25-45 for commercial track-mount holders
- Advantage: Secure, adjustable, no drilling required
Existing fitting adapters – Use what’s there
- Some kayaks have molded-in cup holders or gear mounts
- Create PVC inserts sized to fit existing openings
- Add foam for snug fit
- Cost: $3-8 per adapter
- Limitation: Limited to existing fitting locations and angles
DIY clamp-on design:
- Build standard PVC rod holder (10-12 inches of 2″ pipe with 45° elbow)
- Attach holder to a flat base plate (6×4 inch HDPE or aluminum)
- Mount two C-clamps or quick-grip clamps to base plate
- Clamp assembly to kayak gunwale or rail
- Cost: $12-18 per holder
Choose no-drill if: You share your kayak with family members who don’t fish, plan to sell or upgrade your kayak soon, lack confidence in your drilling skills, or want the flexibility to completely remove fishing gear for recreational paddling.
Upgrade to drilled holders when: You’ve confirmed your preferred rod positions through testing, committed to keeping your kayak long-term, and want maximum security and clean aesthetics.
Common mistake: Trusting suction cups for fishing under load. Suction mounts work for transporting rods between spots but will fail when a fish puts pressure on the rod. Always use rod leashes with any no-drill system.
Hybrid approach: Use no-drill solutions for your first season while learning your preferred setup, then drill permanent holders in your most-used positions while keeping removable holders for secondary locations. This gives you flexibility while optimizing your primary fishing positions.
For more information on setting up your fishing kayak without permanent modifications, check our beginner setup guides.
Do I Need Different Rod Holders for Trolling vs Casting?
Yes, trolling and casting benefit from different rod holder angles and designs. Trolling holders should be angled 45-60 degrees to keep rod tips high and visible while allowing easy rod retrieval when fish strike, while casting holders work best at 30-40 degrees for quick access and better rod control during active fishing.
Trolling rod holder requirements:
- Angle: 45-60 degrees from vertical
- Depth: 10-12 inches deep to secure rod during boat movement
- Position: Side-mounted or rear-facing to spread lines
- Features: Deeper tube prevents rod from bouncing out during paddle strokes
- Rod orientation: Reel facing up for easy line monitoring
- Spacing: 18-24 inches apart to prevent line tangles
Casting rod holder requirements:
- Angle: 30-40 degrees from vertical
- Depth: 8-10 inches (shallower for faster rod retrieval)
- Position: Within easy reach of seat, slightly forward
- Features: Quick-access design, may include rod leash attachment
- Rod orientation: Reel facing up or sideways depending on preference
- Spacing: Can be closer together (12-18 inches) since lines aren’t deployed simultaneously
Key differences:
| Feature | Trolling Holder | Casting Holder |
|---|---|---|
| Primary angle | 45-60° | 30-40° |
| Tube depth | 10-12″ | 8-10″ |
| Access priority | Moderate | High |
| Security priority | High | Moderate |
| Typical position | Sides/rear | Near seat |
Adjustable solution: Build DIY holders using PVC ball valves ($8-12 each) that allow angle adjustment. This lets you switch from trolling to casting mode without building separate holders. Simply loosen the ball valve, adjust the angle, and re-tighten.
DIY adjustable holder design:
- Cut 10-inch section of 2″ PVC pipe
- Attach 2″ PVC ball valve to bottom
- Connect ball valve to mounting base (45° elbow with mounting holes)
- Tighten ball valve for trolling angle, loosen to adjust for casting
- Cost: $15-20 per adjustable holder
Choose dedicated holders if: You primarily do one style of fishing and want optimized performance. Trolling specialists benefit from multiple holders at consistent angles, while casting-focused anglers want holders positioned for ergonomic rod access.
Choose adjustable holders if: You switch between techniques during trips, fish different species requiring different approaches, or want maximum flexibility from fewer holders.
Common mistake: Using vertical or near-vertical holders for trolling. This causes rod tips to bounce and flex excessively during paddling, leading to false strikes and potential rod damage. The 45-60 degree angle absorbs paddle stroke vibration better.
Edge case: For vertical jigging directly below the kayak, use a nearly vertical holder (15-30 degrees) positioned between your legs or just in front of the seat. This specialized application requires its own holder design separate from trolling or casting holders.
Multi-technique setup: Outfit your kayak with 2-3 adjustable holders near your seat for active fishing, plus 2-3 fixed trolling holders on the sides or rear. This covers all fishing styles without cluttering your deck with excessive holders.
How to Make Adjustable Rod Holders for Different Rod Sizes
Create adjustable DIY rod holders using PVC ball valves for angle adjustment and foam inserts for diameter adjustment. A 2-inch PVC holder with removable foam pipe insulation accommodates rod handles from 0.75 to 1.75 inches in diameter, while ball valve joints allow 360-degree angle positioning for different fishing techniques.
Building an adjustable diameter holder:
Materials needed:
- 2″ or 2.5″ Schedule 40 PVC pipe (12 inches)
- Foam pipe insulation in multiple sizes (1/2″, 3/4″, 1″)
- PVC ball valve (2″ diameter)
- 45° PVC elbow for mounting base
- Stainless steel bolts and backing plate
- PVC cement and primer
Construction steps:
Build the main tube – Cut 12-inch section of 2″ PVC pipe for the rod holder body. This size accommodates most rod handles with foam inserts.
Install ball valve – Cement a 2″ PVC ball valve to the bottom of the tube. This allows 360-degree rotation and angle adjustment from vertical to nearly horizontal.
Create mounting base – Attach a 45° elbow to the ball valve output, then add a short section of pipe with mounting holes drilled through it.
Prepare foam inserts – Cut foam pipe insulation into 10-inch sections in various diameters:
- 1/2″ foam for large baitcasting handles (1.5-1.75″ diameter)
- 3/4″ foam for standard spinning rods (1-1.25″ diameter)
- 1″ foam for ultralight rods (0.75-1″ diameter)
Install foam – Slit foam lengthwise and insert into PVC tube. Foam compresses to grip different rod handle sizes securely.
Mount to kayak – Bolt the mounting base to your kayak using stainless steel hardware and backing plates.
Angle adjustment mechanism:
The ball valve allows you to:
- Loosen the valve handle to rotate the holder
- Position at any angle from vertical (90°) to horizontal (0°)
- Tighten to lock in place for fishing
- Adjust between trolling (45-60°), casting (30-40°), or storage (vertical) positions
Diameter adjustment system:
For multiple rod sizes:
- Keep 2-3 foam inserts in different sizes in your kayak
- Swap inserts based on rod being used
- Mark inserts with permanent marker (UL, M, H for ultralight, medium, heavy)
- Store extra inserts in dry hatch or milk crate
Universal sizing approach:
- Use 2.5″ PVC pipe with 1″ foam insert as default
- This accommodates 95% of freshwater and inshore saltwater rods
- Only swap foam for extreme sizes (ultralight or big game rods)
Quick-change design:
For anglers who frequently switch rods:
- Build multiple complete PVC tubes with different foam inserts
- Use the same ball valve mounting base
- Make tubes friction-fit into ball valve (don’t cement)
- Swap entire tube when changing rod types
- Cost: $5-8 per additional tube
Choose adjustable holders if: You use multiple rod types (spinning, baitcasting, fly), fish for different species requiring different tackle, or share your kayak with anglers who use different rod sizes.
Choose fixed holders if: You use the same 2-3 rods consistently and prefer the simplicity and lower cost of non-adjustable designs.
Common mistake: Making holders too tight for your largest rods. Always test-fit your biggest rod handle before cementing PVC joints. It’s easier to add foam to reduce diameter than to rebuild a holder that’s too small.
Maintenance tip: Foam inserts degrade from UV exposure and compression over time. Replace foam annually ($2-3 per insert) to maintain proper rod grip and prevent rattling.
Advanced option: Some kayak anglers install quick-disconnect couplings (cam-lock or twist-lock) between the holder tube and mounting base, allowing complete holder removal in seconds. This is useful for anglers who switch between fishing and recreational paddling frequently.
Frequently Asked Questions
What is the best PVC size for DIY kayak rod holders?
Two-inch Schedule 40 PVC pipe is the best all-around size for DIY kayak rod holders, accommodating most spinning and baitcasting rod handles with room for foam inserts. Use 1.5-inch PVC only for ultralight rods, and 2.5-inch for large offshore or musky rods with oversized handles.
How many rod holders should I install on my fishing kayak?
Install 2-4 rod holders on a fishing kayak depending on your fishing style. Trolling anglers benefit from 3-4 holders to run multiple lines, while casting-focused anglers typically need only 2 holders (one active, one backup). Start with two holders and add more based on actual fishing needs rather than over-building initially.
Can I use regular PVC cement for kayak rod holders?
Yes, standard PVC cement works perfectly for kayak rod holders. Use purple primer followed by clear PVC cement for Schedule 40 pipe. Avoid using ABS cement or multi-purpose adhesives, as these don’t create proper chemical welds in PVC. The cement sets in 30 seconds and fully cures in 24 hours.
Where should I position rod holders on my kayak?
Position rod holders within arm’s reach of your seat (18-24 inches) for casting, or on the sides and rear for trolling. Avoid placing holders in your paddle stroke zone or where they’ll interfere with getting in and out of the kayak. Test positions with temporary mounts before drilling permanent holes.
Do DIY rod holders void my kayak warranty?
Drilling holes in your kayak typically voids the manufacturer’s warranty for that specific area, though the rest of the kayak remains covered. Check your warranty terms before drilling. No-drill solutions like rail mounts and milk crates preserve full warranty coverage.
How do I prevent my DIY rod holder from cracking my kayak?
Prevent cracks by using backing plates (minimum 3×3 inches) on the interior surface, avoiding over-tightening bolts, and mounting to solid deck areas rather than thin or flexing sections. Apply marine sealant around bolt holes and use stainless steel hardware with lock washers.
What’s the difference between Schedule 40 and Schedule 80 PVC for rod holders?
Schedule 40 PVC has thinner walls and is lighter and cheaper, making it ideal for kayak rod holders. Schedule 80 has thicker walls and is stronger but heavier and more expensive. Schedule 40 provides more than adequate strength for rod holders while keeping weight down, which matters on a kayak.
Can I paint PVC rod holders to match my kayak?
Yes, paint PVC rod holders using plastic-specific spray paint or marine paint after lightly sanding the surface. Clean with acetone first, apply plastic primer, then 2-3 light coats of paint. This improves appearance and can add UV protection, though unpainted PVC is naturally UV-resistant.
How deep should a kayak rod holder tube be?
Make rod holder tubes 10-12 inches deep for trolling and general use, or 8-10 inches for casting-focused holders. Deeper tubes provide more security but make rod retrieval slightly slower. The tube should hold at least 6-8 inches of rod handle for adequate support.
Are PVC rod holders strong enough for big fish?
Yes, properly built PVC rod holders are strong enough for most freshwater and inshore saltwater fish. Schedule 40 PVC can handle 20-30 pounds of pulling force when properly mounted with backing plates. For offshore big game fishing (tuna, marlin), consider commercial aluminum holders designed for extreme loads.
How do I stop water from pooling in my DIY rod holders?
Drill 2-3 small drain holes (1/4 inch diameter) near the bottom of the holder tube to allow water to escape. Position holes on the lowest point when the holder is at its typical fishing angle. This prevents water accumulation that can cause corrosion and add weight.
Can I make rod holders for fly fishing rods?
Yes, but fly rods require larger diameter holders (2.5-3 inches) to accommodate the oversized cork handles and reel seats. Build holders at 30-40 degree angles for easy access, and add extra foam padding since fly rods are more delicate than conventional rods. Consider vertical storage holders for fly rods when not actively fishing.
Conclusion
DIY kayak rod holder ideas offer fishing kayak enthusiasts practical, affordable alternatives to expensive commercial options. From basic PVC pipe holders costing under $10 to versatile milk crate systems and adjustable designs using ball valves, homemade rod holders can match 70-90% of commercial performance at 20-40% of the cost. The key to success is choosing the right design for your fishing style, using proper materials like Schedule 40 PVC and stainless steel hardware, and installing holders correctly with adequate backing plates and marine sealant.
Whether you opt for permanent flush-mount installations or removable no-drill solutions, the most important factors are security, proper angle (typically 30-45 degrees), and positioning within easy reach of your seat. Start with simple designs like milk crates or basic PVC holders to test your preferred rod positions, then graduate to more sophisticated adjustable holders or permanent installations once you’ve dialed in your setup.
Next steps to get started:
- Assess your needs – Determine how many rods you typically fish with and whether you primarily troll or cast
- Choose your approach – Select no-drill options if you want flexibility, or plan permanent installations for dedicated fishing kayaks
- Gather materials – Visit your local hardware store with a list based on your chosen design
- Start simple – Build one or two basic holders first to gain confidence before tackling complex projects
- Test before committing – Use temporary mounting methods to verify positions before drilling permanent holes
- Add safety features – Always use rod leashes as backup, regardless of how secure your holders seem
Remember that even experienced kayak anglers often use a combination of DIY and commercial holders, placing homemade versions in secondary positions while investing in quality commercial holders for their primary fishing rods. The money saved on DIY holders can fund other essential kayak gear upgrades like better paddles, fish finders, or safety equipment.
With basic tools, a few dollars in materials, and an hour of time, you can transform your kayak into a functional fishing platform that rivals factory-equipped models costing hundreds more. The satisfaction of catching fish using gear you built yourself adds an extra dimension to the kayak fishing experience.





