
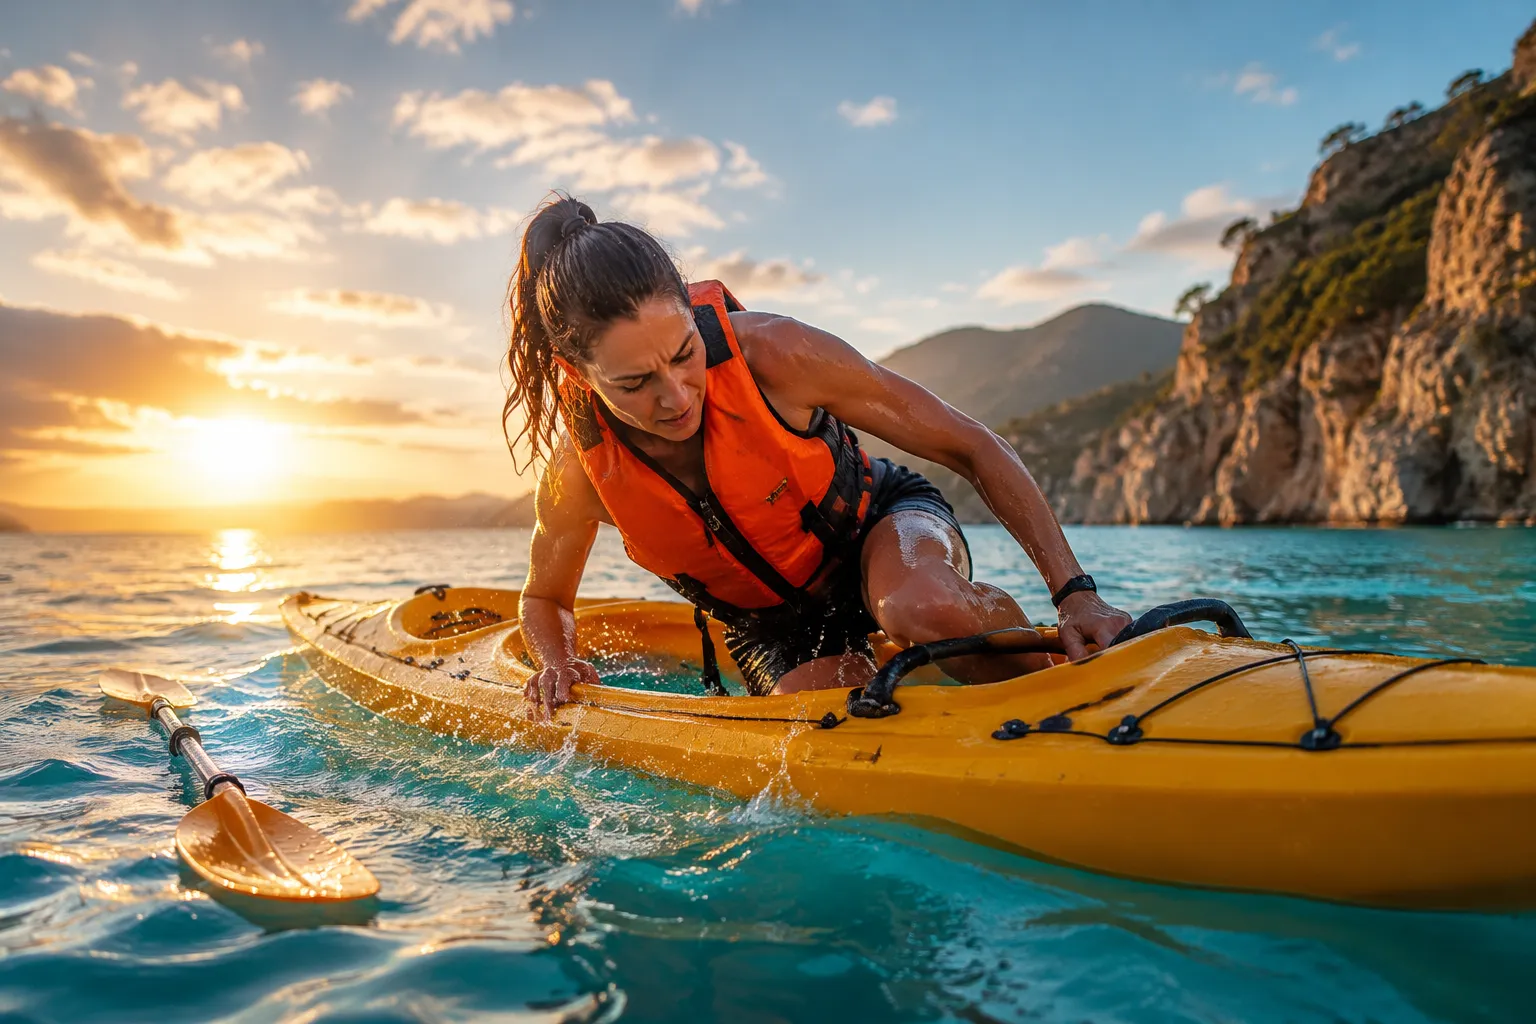
Quick Answer: Getting back on a kayak after falling off requires positioning yourself at the center of the kayak (not the ends), keeping your body horizontal in the water, and using a strong kick combined with arm leverage to pull yourself up and over in one smooth motion. Sit-on-top kayaks are significantly easier to re-enter than sit-inside models, and practicing the technique in shallow, calm water before heading out alone is essential for building the muscle memory and confidence needed in a real capsize situation.
Key Takeaways
- Position matters most: Always re-enter from the side at the kayak’s center point where it’s most stable, never from the bow or stern
- Sit-on-top kayaks are dramatically easier to re-enter than sit-inside models because you don’t need to climb into a cockpit
- The scissor-kick technique provides the momentum needed to get your torso onto the deck in one motion
- Paddle floats create outriggers that stabilize your kayak during solo re-entry attempts
- Practice in controlled conditions (shallow water, warm weather, with a buddy) before you actually need the skill
- Body weight and height affect difficulty but proper technique and equipment adaptations make re-entry possible for everyone
- Deep water is actually easier than shallow water for most re-entry techniques because you can position your body horizontally
- A water-filled kayak can still float and support your weight, though you’ll need a bilge pump
- Common mistakes include approaching from the wrong angle, trying to climb straight up, and not securing your paddle first
- If you can’t re-enter, stay with your kayak, signal for help, and conserve energy
What Is the Easiest Way to Get Back Into a Kayak From the Water?
The easiest re-entry method for most kayakers is the side-mount technique performed at the kayak’s center point. Position yourself perpendicular to the kayak at its widest, most stable section, place both hands flat on the deck or gunwales, let your body float horizontal behind you, then execute a powerful scissor kick while simultaneously pulling down and sliding your belly onto the deck.
This technique works because it uses your body’s buoyancy and leg strength rather than relying solely on upper body power. Here’s the step-by-step process:
- Secure your paddle first by sliding it across the deck or using a paddle leash
- Position yourself at the kayak’s center, facing the side
- Place both palms flat on the deck, shoulder-width apart
- Let your legs float up behind you until your body is horizontal
- Execute a strong scissor kick while pulling down on the deck
- Slide your belly onto the kayak in one smooth motion
- Rotate your body to get your legs back in position
- Sit up slowly to maintain balance
The key is momentum. Trying to slowly pull yourself up rarely works because you’re fighting gravity and water resistance. One explosive motion is far more effective than multiple weak attempts.
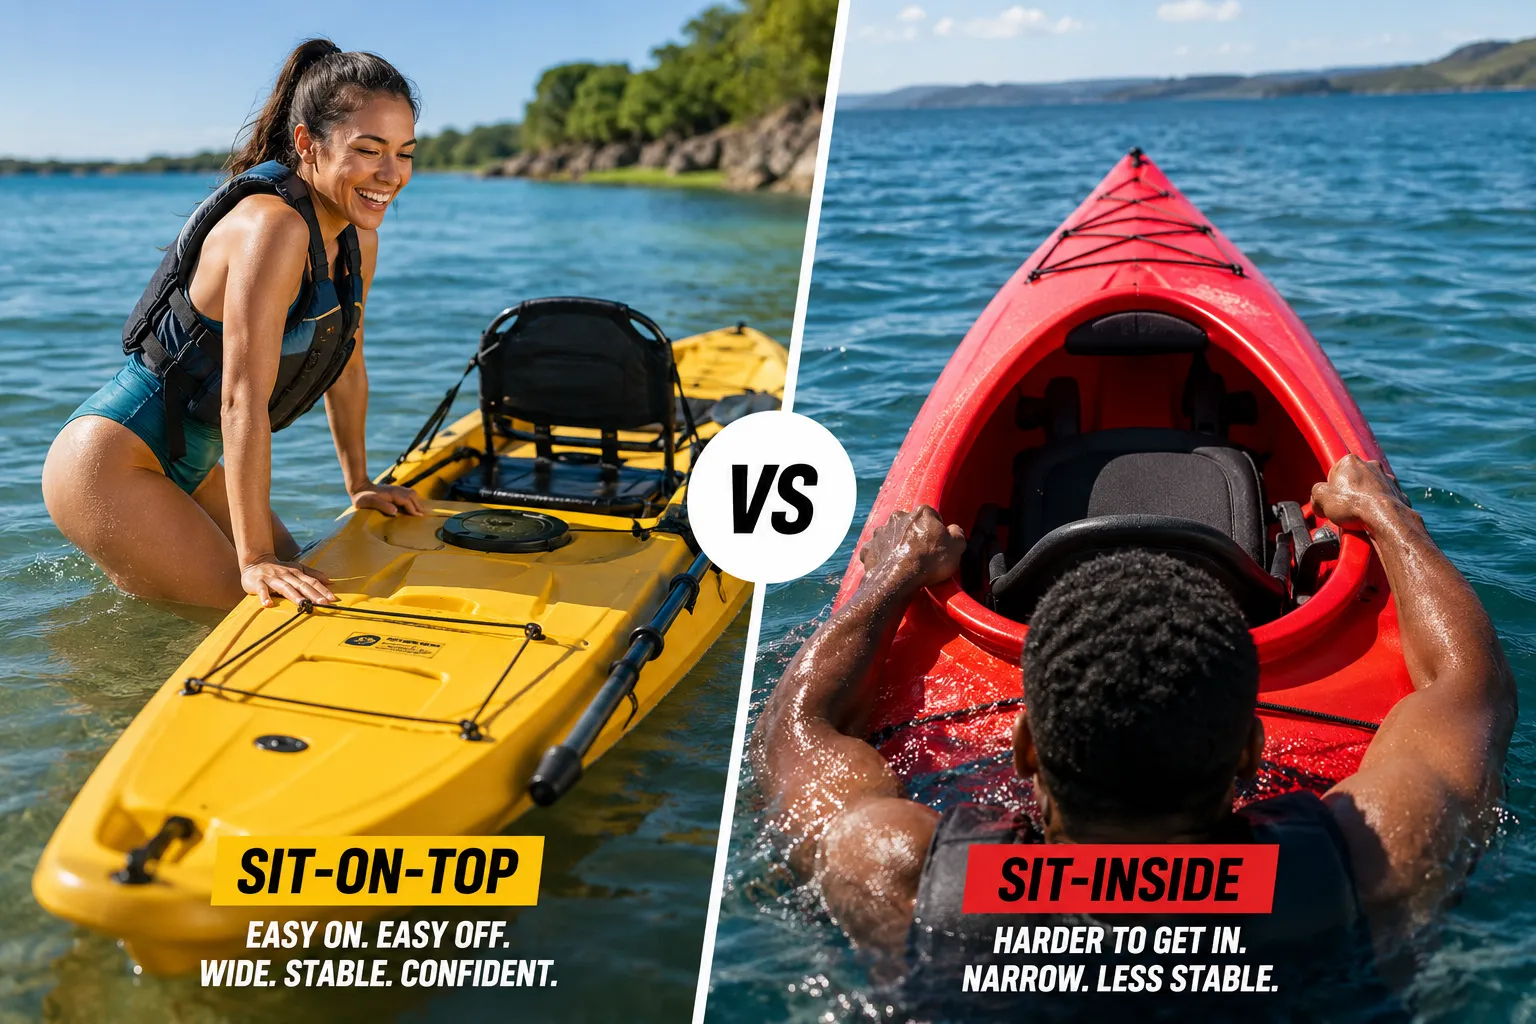
Sit-On-Top vs Sit-Inside Kayak: Which Is Easier to Re-Enter After Falling?
Sit-on-top kayaks are substantially easier to re-enter from the water compared to sit-inside models. With a sit-on-top, you only need to get your body onto the deck and rotate into a seated position, while sit-inside kayaks require you to maneuver your legs into a confined cockpit opening while the kayak remains stable.
Sit-on-top advantages for re-entry:
- No cockpit rim to navigate
- Self-draining scupper holes eliminate water accumulation
- Wider, more stable platforms
- You can re-enter from any angle
- Easier to practice and build confidence
Sit-inside challenges:
- Must align your body with the cockpit opening
- Water-filled cockpit adds weight and instability
- Requires more precise technique
- Often needs a paddle float for stability
- Spray skirt adds another complication
For fishing kayaks specifically, most models use sit-on-top designs partly because of this re-entry advantage. If you’re concerned about capsizing and self-rescue, a sit-on-top kayak significantly improves your odds of a successful recovery.
That said, experienced paddlers can re-enter sit-inside kayaks using techniques like the paddle float rescue or cowboy scramble, but these require practice and upper body strength.

Universal adjustable kayak seat for most sit on top Kayak or Stand Up Paddle Board (SUP)

UV-Protected HDPE Construction for Durability: Built with high-density polyethylene (HDPE) plastic, this kayak is both lightweight and highly durable, offering long-lasting protection against UV rays for years of use in various conditions. Paddle included.
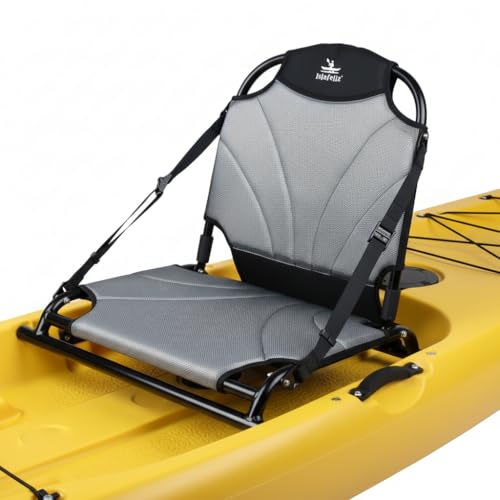
[CRITICAL FITMENT] MEASURE DECK WIDTH FIRST: STOP AND MEASURE: The base dimensions are 22.83'' (W) × 17.5'' (L). It is specifically engineered for wide Sit-On-Top kayaks and fishing boats with flat mounting decks or molded seat wells. Please verify your vessel has enough clearance before purchasing to ensure a perfect, hassle-free upgrade
How Do You Flip a Capsized Kayak Back Over While in the Water?
To flip a capsized kayak while treading water, position yourself at the side near the center, reach across to grab the far edge or gunwale, then pull it toward you while pushing down on the near edge. The kayak will rotate over the top of you, and you should duck slightly as the hull passes overhead.
Detailed flipping technique:
For sit-on-top kayaks, flipping is straightforward because water drains automatically through scupper holes. For sit-inside kayaks, the process is similar but you’ll end up with a cockpit full of water.
Step-by-step flip:
- Swim to the side of the overturned kayak
- Position yourself at the center (widest point)
- Reach across to the far edge
- Pull the far edge toward you while pushing the near edge down
- Duck your head as the kayak rotates over you
- The kayak should right itself with you positioned at its side
Important considerations:
- Some kayaks trap air pockets when inverted, making them harder to flip
- Breaking the seal by lifting one end slightly can help release trapped air
- In waves or current, position yourself upwind/upcurrent before flipping
- Your paddle may float away during this process, so secure it first if possible
After flipping a sit-inside kayak, you’ll need to either pump out the water before re-entering or use an advanced technique to re-enter and roll, which requires significant skill.

GET WATER OUT FAST WHEN IT COUNTS: Pumps 20 gallons per minute with 115 cubic inches per stroke. Two to three pumps removes a full gallon. Use it in boats, kayaks, flooded basements, window wells, pool covers, hot tubs, or anywhere water collects.
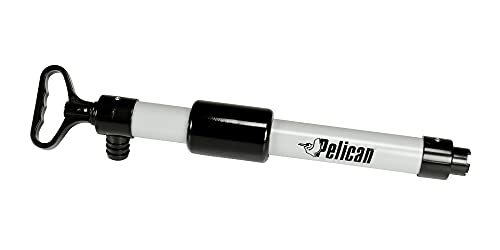
Compact & powerful pump to easily and quickly evacuate water out of kayak, canoe, boat, etc.

COMPACT KAYAK AND CANOE BILGE PUMP: At 15.75 inches, this pump is sized for kayaks, canoes, and small dinghies. Clears water at 5 gallons per minute without batteries or power. Stows in a hatch, cockpit bag, or under a seat.
Why Do I Keep Tipping Over When Trying to Climb Back in My Kayak?
You keep tipping over because you’re likely trying to pull yourself straight up rather than sliding horizontally onto the deck, or you’re attempting re-entry from an unstable position like the bow, stern, or too far to one side. Kayaks tip when your weight creates leverage on one side without counterbalance.
Common balance-breaking mistakes:
Pulling straight up: This creates maximum leverage and almost guarantees a flip. Your body needs to stay horizontal and slide onto the deck, not climb vertically.
Wrong entry point: The bow and stern are narrow and unstable. Always enter at the kayak’s widest point, typically just behind the seat area.
Weak kick: Without momentum from a strong leg kick, you’re relying entirely on arm strength and creating slow, unstable movement.
Not centering your weight: If you pull yourself up on one side and don’t immediately shift your weight to the center, the kayak will roll.
Trying multiple weak attempts: Each failed attempt drains energy and makes the next try harder.
Solutions that work:
- Use a paddle float to create an outrigger for stability
- Practice the explosive scissor-kick technique
- Enter at the exact center point of the kayak
- Keep your body horizontal until your belly is fully on the deck
- Consider a kayak with better initial stability (wider beam)
For heavier paddlers or those with limited upper body strength, a paddle float or stirrup system can provide the extra stability and leverage needed for successful re-entry.
Paddle Float Rescue Technique for Solo Kayakers
The paddle float rescue uses an inflatable device attached to your paddle blade to create a temporary outrigger that stabilizes your kayak during re-entry. This technique is essential for solo kayakers in sit-inside kayaks and helpful for anyone who struggles with standard re-entry methods.
Equipment needed:
- Paddle float (inflatable bag that fits over paddle blade)
- Your kayak paddle
- Optional: paddle leash to prevent losing your paddle
Step-by-step paddle float rescue:
- Flip your kayak upright if it’s capsized
- Retrieve your paddle float from your PFD pocket or deck rigging
- Inflate the paddle float and secure it over one paddle blade
- Position the paddle perpendicular across the kayak behind the cockpit
- Secure the paddle under deck rigging or bungees on the opposite side
- Use the paddle as an outrigger by keeping weight on the float side
- Position yourself at the cockpit, facing the paddle float side
- Pull yourself up using the paddle shaft and cockpit rim
- Slide your legs into the cockpit while keeping weight on the outrigger
- Rotate into seated position carefully
- Pump out water before removing the paddle float
Critical tips:
- The paddle float only provides stability while you maintain downward pressure on it
- Practice inflating your paddle float while treading water before you need it in an emergency
- Some paddle floats are foam rather than inflatable and don’t require inflation
- This technique works best in calm water; waves complicate the process significantly
The paddle float rescue is considered an essential skill for anyone paddling a sit-inside kayak beyond swimming distance from shore.

Quick-release buckles:The kayak floating bag has quick-release buckles for easy attachment to kayak paddles. Auto-valve makes single-handed inflation possible

Dual air chambers

paddle float is an essential piece of safety gear for any kayaker embarking on open water.
Can an Overweight Person Get Back Into a Kayak After Falling Out?
Yes, overweight paddlers can successfully re-enter kayaks after capsizing by using proper technique, appropriate equipment, and kayaks designed with adequate weight capacity and stability. Body weight affects the difficulty level but doesn’t make re-entry impossible when you use the right approach.
Adaptations that help:
Choose the right kayak: Wider fishing kayaks with high weight capacities (400+ pounds) provide more initial stability and a larger platform for re-entry. Sit-on-top designs are significantly easier than sit-inside models.
Use a paddle float: The outrigger stability is even more valuable for heavier paddlers because it counterbalances the additional weight during re-entry.
Try the stirrup method: A webbing loop attached to the kayak creates a step that helps you get your body weight higher before pulling yourself onto the deck.
Enter from the stern: Some heavier paddlers find success with the cowboy scramble technique, mounting from the stern and scooting forward into position.
Build upper body strength: While technique matters more than raw strength, some upper body conditioning makes re-entry significantly easier.
Practice in controlled conditions: Shallow water with a sandy bottom lets you practice the motion with the option to stand if needed.
Real-world considerations:
- Buoyancy from body fat actually helps keep you floating during the re-entry attempt
- A proper PFD is essential and must be rated for your weight
- Tandem kayaks or wider fishing kayaks offer more stability
- Having a paddling partner provides assistance options if self-rescue fails
The kayaking community includes successful paddlers of all body types. The key is matching your equipment and technique to your specific needs rather than assuming re-entry is impossible.
Is It Harder to Re-Enter a Kayak in Deep Water or Shallow Water?
Deep water is actually easier for most re-entry techniques because you can position your body horizontally and use proper form, while shallow water tempts you to try standing or using the bottom for leverage, which often leads to poor technique and additional capsizes.
Why deep water works better:
In water over your head, you’re forced to use correct horizontal body positioning and swimming mechanics. Your legs can float freely behind you, allowing the powerful scissor kick that generates momentum for re-entry. There’s no temptation to try standing, which usually results in unstable footing and awkward angles.
Shallow water challenges:
- Temptation to stand leads to poor body position
- Muddy or rocky bottoms provide unstable footing
- Trying to push off the bottom often tips the kayak further
- You can’t get your body fully horizontal
- Waves or current in shallow water create more instability
When shallow water helps:
- Initial practice sessions where you can stand if you panic
- Very shallow water (knee-deep) where you can stabilize the kayak while mounting
- Emergency situations where you’re injured or exhausted
Best practice approach:
Learn and practice re-entry techniques in shallow water where you can stand if needed, but use proper deep-water technique even in shallow conditions. This builds the muscle memory you’ll need when you capsize in deep water where standing isn’t an option.
Most experienced kayakers prefer practicing in chest-deep water, which provides psychological comfort while still requiring proper technique.
What to Do If You Can’t Get Back in Your Kayak After Capsizing
If you cannot re-enter your kayak after multiple attempts, stop trying, conserve your energy, stay with your kayak, and signal for help using a whistle, mirror, or bright-colored flag. Your kayak provides flotation and visibility even when capsized or swamped.
Immediate priorities:
- Stop exhausting yourself: Failed re-entry attempts drain energy and body heat rapidly
- Stay with your kayak: It’s more visible than a swimmer and provides flotation support
- Signal for help: Use your whistle (three blasts is universal distress), signal mirror, or bright flag
- Conserve body heat: Get as much of your body out of the water as possible by draping over the hull
- Assess your situation: Distance to shore, water temperature, weather conditions, and traffic patterns
Survival strategies:
In warm water near shore: You may choose to swim your kayak to shore if it’s close (under 100 yards) and you’re a strong swimmer. Stay with the kayak and push it ahead of you rather than towing it.
In cold water: Hypothermia is your primary threat. Minimize movement to conserve heat, get onto the overturned hull if possible, and focus on signaling for help.
In boat traffic areas: Stay with your kayak for visibility. A kayaker in the water is nearly invisible to boat operators, but a kayak hull is much more visible.
With proper safety gear: A PFD with pockets should contain a whistle, signal mirror, and ideally a personal locator beacon (PLB) for offshore paddling.
Prevention is key: Always file a float plan with someone on shore, paddle with a buddy when possible, and carry appropriate safety gear for your paddling environment. Most kayaking fatalities involve paddlers who weren’t wearing PFDs or were paddling alone in challenging conditions.
Common Mistakes People Make When Trying to Remount a Kayak
The most common re-entry mistakes include approaching from the bow or stern instead of the center, trying to pull straight up instead of sliding horizontally, not securing the paddle first, and making multiple weak attempts instead of one strong effort.
Detailed mistake breakdown:
Mistake 1: Wrong approach angle
Trying to climb in from the ends or at a 45-degree angle creates instability. Always approach perpendicular to the kayak at its widest point.
Mistake 2: Vertical climbing motion
Pulling yourself straight up creates maximum leverage and tips the kayak. Your body should stay horizontal and slide onto the deck.
Mistake 3: Losing your paddle
A loose paddle floats away quickly, leaving you without a critical tool. Secure it first or use a paddle leash.
Mistake 4: Weak, tentative attempts
Multiple half-hearted tries drain your energy. One explosive motion with a strong kick is far more effective.
Mistake 5: Not using available equipment
Ignoring your paddle float, stirrup, or other re-entry aids makes the process unnecessarily difficult.
Mistake 6: Panicking and rushing
Frantic movements waste energy and create instability. Take a breath, assess, then execute with purpose.
Mistake 7: Wrong hand placement
Grabbing the far side of the kayak or placing hands too close together reduces leverage and stability.
Mistake 8: Not practicing beforehand
Attempting re-entry for the first time during an actual capsize, when you’re stressed and possibly cold, dramatically reduces success rates.
The fix: Practice re-entry in controlled conditions (warm water, shallow area, with a buddy) until the motion becomes automatic. Muscle memory developed in practice carries over to real emergencies.
Do I Need Special Equipment to Get Back on a Kayak After Falling Off?
You don’t need special equipment for basic re-entry on a sit-on-top kayak, but a paddle float, bilge pump, and paddle leash significantly improve your success rate, especially for sit-inside kayaks or challenging conditions. A properly fitted PFD is the only truly essential piece of safety equipment.
Essential equipment:
Personal Flotation Device (PFD): Non-negotiable for any kayaking. Keeps you afloat while attempting re-entry and provides pockets for safety gear.
Helpful equipment:
Paddle float: Creates an outrigger for stability during re-entry. Essential for sit-inside kayaks, helpful for everyone else. Cost: $15-40.
Bilge pump or sponge: Removes water from a swamped kayak. Hand pumps work faster than sponges. Cost: $10-30.
Paddle leash: Prevents losing your paddle during a capsize. Cost: $8-20.
Whistle: Signals for help. Should be attached to your PFD. Cost: $3-10.
Re-entry stirrup: Webbing loop that creates a step for getting your body higher during re-entry. Cost: $15-25.
Cowboy scramble strap: Deck rigging that provides handholds for stern re-entry. Often included on fishing kayaks.
Nice to have:
- Dry bag with spare clothes
- Signal mirror
- Personal locator beacon (PLB) for offshore paddling
- Wetsuit or drysuit for cold water
What you probably don’t need:
- Expensive specialized rescue equipment unless you’re doing expedition paddling
- Complex rope systems
- Inflatable sponsons (unless you have specific mobility limitations)
Most recreational and fishing kayakers can handle re-entry successfully with just a paddle float and bilge pump added to their basic setup.
How to Practice Kayak Re-Entry Safely Before Going Out Alone
Practice kayak re-entry in a controlled environment with warm water, a sandy or muddy bottom in chest-deep water, a buddy present, and warm weather conditions. Start by deliberately capsizing and working through the re-entry process until it becomes automatic.
Ideal practice setup:
Location: Calm lake, pond, or pool with chest-deep water and easy exit options. Avoid current, waves, or cold water for initial practice.
Conditions: Water temperature above 70°F, air temperature comfortable, sunny day. You’ll be wet for extended periods.
Safety: Practice with a buddy who can assist if needed and provide feedback on your technique.
Equipment: Wear your normal paddling gear including PFD, bring your paddle float and any other re-entry aids you plan to use.
Practice progression:
Session 1: Controlled capsize and flip
- Deliberately tip your kayak in chest-deep water
- Practice flipping it back upright
- Get comfortable being in the water with your kayak
- Repeat 3-5 times until it feels routine
Session 2: Basic re-entry
- Flip kayak upright
- Practice the side-mount technique
- Focus on body position and the scissor kick
- Attempt 5-10 re-entries until you succeed consistently
Session 3: Paddle float rescue
- Practice inflating your paddle float while treading water
- Set up the outrigger system
- Complete the full paddle float rescue sequence
- Time yourself to build efficiency
Session 4: Challenging conditions
- Practice in slightly deeper water
- Add mild waves or wake from passing boats
- Practice with gear on your kayak
- Simulate fatigue by doing multiple attempts in succession
Session 5: Full scenario
- Paddle out, capsize unexpectedly (have your buddy tip you)
- Complete the full rescue sequence including gear retrieval
- Pump out water and resume paddling
Key learning points:
- Your first few attempts will likely fail; this is normal
- The technique feels awkward initially but becomes natural with repetition
- Discovering what works for your body type and kayak model requires experimentation
- Building confidence in controlled conditions prevents panic during real capsizes
Most kayakers need 3-5 practice sessions before re-entry becomes reliable.
Is Getting Back Into a Kayak Harder for Beginners or Short People?
Getting back into a kayak is harder for beginners due to lack of technique and confidence rather than physical limitations, while shorter paddlers face specific challenges with leverage and reach but can overcome them with proper technique adaptations and equipment choices.
Beginner challenges:
Beginners struggle primarily because they don’t know the correct technique and often panic when they capsize. The physical skill of re-entry isn’t particularly difficult once you understand body positioning, but first-time attempts without instruction usually fail. This creates a psychological barrier that makes subsequent attempts harder.
Solutions for beginners:
- Take a kayaking safety course that includes capsize recovery
- Practice in controlled conditions before paddling alone
- Start with stable sit-on-top kayaks
- Paddle with experienced friends who can demonstrate technique
- Watch instructional videos and visualize the process
Short paddler challenges:
Shorter paddlers (typically under 5’4″) face specific difficulties:
- Less reach across the kayak deck
- Reduced leverage for pulling body weight up
- Proportionally more body weight to lift relative to arm length
- Difficulty getting legs into sit-inside cockpits
Solutions for shorter paddlers:
- Choose kayaks with narrower beams (easier to reach across)
- Use a re-entry stirrup for additional leverage
- Master the scissor-kick technique to generate momentum
- Consider sit-on-top kayaks that don’t require cockpit entry
- Use a paddle float for added stability
- Practice the cowboy scramble (stern entry) technique
Real-world perspective: Kayaking communities include successful paddlers of all heights and experience levels. Physical size matters less than technique, practice, and appropriate equipment choices. Many shorter paddlers become highly skilled at re-entry once they develop techniques that work for their body proportions.
The biggest predictor of re-entry success isn’t height or strength but rather practice and confidence built through controlled training.
What If My Kayak Fills With Water After I Flip, Can I Still Get Back In?
Yes, you can still re-enter a water-filled kayak because kayaks are designed with enough buoyancy to float even when swamped, though the kayak will sit lower in the water and feel less stable until you pump out the water. Sit-on-top kayaks drain automatically through scupper holes, while sit-inside kayaks require manual pumping.
Water-filled kayak physics:
Kayaks contain foam flotation in the bow and stern (or sealed bulkheads) that keep them floating even when the cockpit or deck is completely swamped. A water-filled kayak won’t sink, but it will:
- Sit several inches lower in the water
- Feel less stable and more sluggish
- Be harder to paddle efficiently
- Respond poorly to waves or wake
Re-entry process for swamped kayaks:
Sit-on-top kayaks:
- Re-enter using standard technique
- Water drains through scupper holes as you paddle
- May take 5-10 minutes for complete drainage
- Rock side-to-side to speed drainage
Sit-inside kayaks:
- Re-enter using paddle float technique
- Immediately begin pumping water out
- A hand bilge pump can remove most water in 3-5 minutes
- Use a sponge for remaining water
- Resume paddling once cockpit is mostly clear
When to pump before re-entry:
In some situations, experienced paddlers pump water out while still in the water by stabilizing the kayak and reaching in with the pump. This works in calm conditions but is difficult in waves.
Prevention tips:
- Install a spray skirt on sit-inside kayaks to prevent water entry
- Keep your bilge pump accessible (deck rigging or PFD pocket)
- Practice pumping while seated in your kayak so you know how long it takes
- Consider a sit-on-top kayak if you paddle in conditions where capsizing is likely
The key point: a water-filled kayak is still a functional flotation device and can be re-entered, pumped out, and paddled to safety. Don’t abandon your kayak just because it’s swamped.
Frequently Asked Questions
How long does it take to learn kayak re-entry?
Most paddlers can learn basic re-entry technique in 2-3 practice sessions over a few hours, but building reliable muscle memory and confidence typically requires 5-10 successful re-entries in controlled conditions before attempting solo paddling in open water.
Should I practice re-entry every season?
Yes, practicing re-entry at the start of each paddling season refreshes your muscle memory and ensures your technique remains sharp. Many experienced kayakers practice annually even after years of paddling.
Can you re-enter a kayak while wearing a fishing PFD with lots of pockets?
Yes, though bulky fishing PFDs with multiple tackle boxes can make re-entry slightly more difficult by adding bulk and reducing flexibility. The safety benefit of wearing the PFD far outweighs the minor inconvenience during re-entry.
What’s the cowboy scramble technique?
The cowboy scramble involves mounting your kayak from the stern (back end) by pulling yourself onto the rear deck, then scooting forward into the seat. This technique works well for some paddlers but requires good core strength and balance.
Do I need to be a strong swimmer to kayak?
You don’t need to be an Olympic swimmer, but you should be comfortable in the water and able to tread water for several minutes while wearing a PFD. Basic swimming competency is essential for safe kayaking.
How do you re-enter a tandem kayak alone?
Re-entering a tandem kayak solo is more challenging because the kayak is less stable without a partner’s weight for balance. Use a paddle float on both sides if possible, or enter from the stern and scoot forward to the rear seat position first.
Will my kayak sink if it flips?
No, properly designed kayaks have built-in flotation (foam or sealed compartments) that keeps them floating even when completely swamped. Kayaks are designed not to sink.
Can you re-enter a kayak in waves?
Yes, but it’s significantly more difficult than in calm water. Timing your re-entry attempt between wave sets and using a paddle float for stability improves success rates. Rough water re-entry requires advanced skills and practice.
What if I lose my paddle during a capsize?
Use a paddle leash to prevent losing your paddle, but if you do lose it, stay with your kayak and use your hands to paddle to shore or signal for help. Your kayak provides flotation and visibility even without a paddle.
How cold does water need to be before I need a wetsuit?
The 120 Rule suggests that if air temperature plus water temperature equals less than 120°F, you should wear thermal protection like a wetsuit or drysuit. Cold water (below 60°F) can cause hypothermia in minutes.
Is it easier to re-enter a fishing kayak than a touring kayak?
Generally yes, because fishing kayaks are typically wider and more stable, often sit-on-top designs, and have more deck rigging to grab during re-entry. Narrow touring kayaks require more precise technique.
Should beginners avoid kayaking alone?
Yes, beginners should paddle with experienced partners until they’ve practiced capsize recovery, built water confidence, and understand safety protocols. Solo paddling requires self-rescue skills that take time to develop.
Conclusion
Learning how to get back on a kayak after falling off is a fundamental safety skill that every kayaker should master before paddling beyond easy swimming distance from shore. The core technique involves positioning yourself at the kayak’s center, maintaining horizontal body position, and using a powerful scissor kick combined with arm leverage to slide onto the deck in one explosive motion.
Sit-on-top kayaks offer significantly easier re-entry than sit-inside models, making them the better choice for beginners or anyone concerned about capsize recovery. Equipment like paddle floats, bilge pumps, and re-entry stirrups can dramatically improve your success rate, especially in challenging conditions or for paddlers with physical limitations.
The single most important step you can take is practicing re-entry in controlled conditions before you actually need the skill in an emergency. Dedicate a few hours to deliberate capsize and re-entry practice in warm, shallow water with a buddy present. This builds the muscle memory, confidence, and problem-solving ability that will serve you if you ever capsize unexpectedly.
Your next steps:
- Schedule a practice session in safe conditions this week
- Invest in a paddle float if you paddle a sit-inside kayak
- Verify your PFD fits properly and contains a whistle
- Practice re-entry 5-10 times until it becomes automatic
- Consider taking a kayaking safety course that includes rescue techniques
Remember that staying with your kayak and signaling for help is always a valid option if re-entry attempts fail. Your kayak provides flotation and visibility even when capsized. With proper preparation, practice, and equipment, you can handle a capsize confidently and get back to enjoying your time on the water.





