
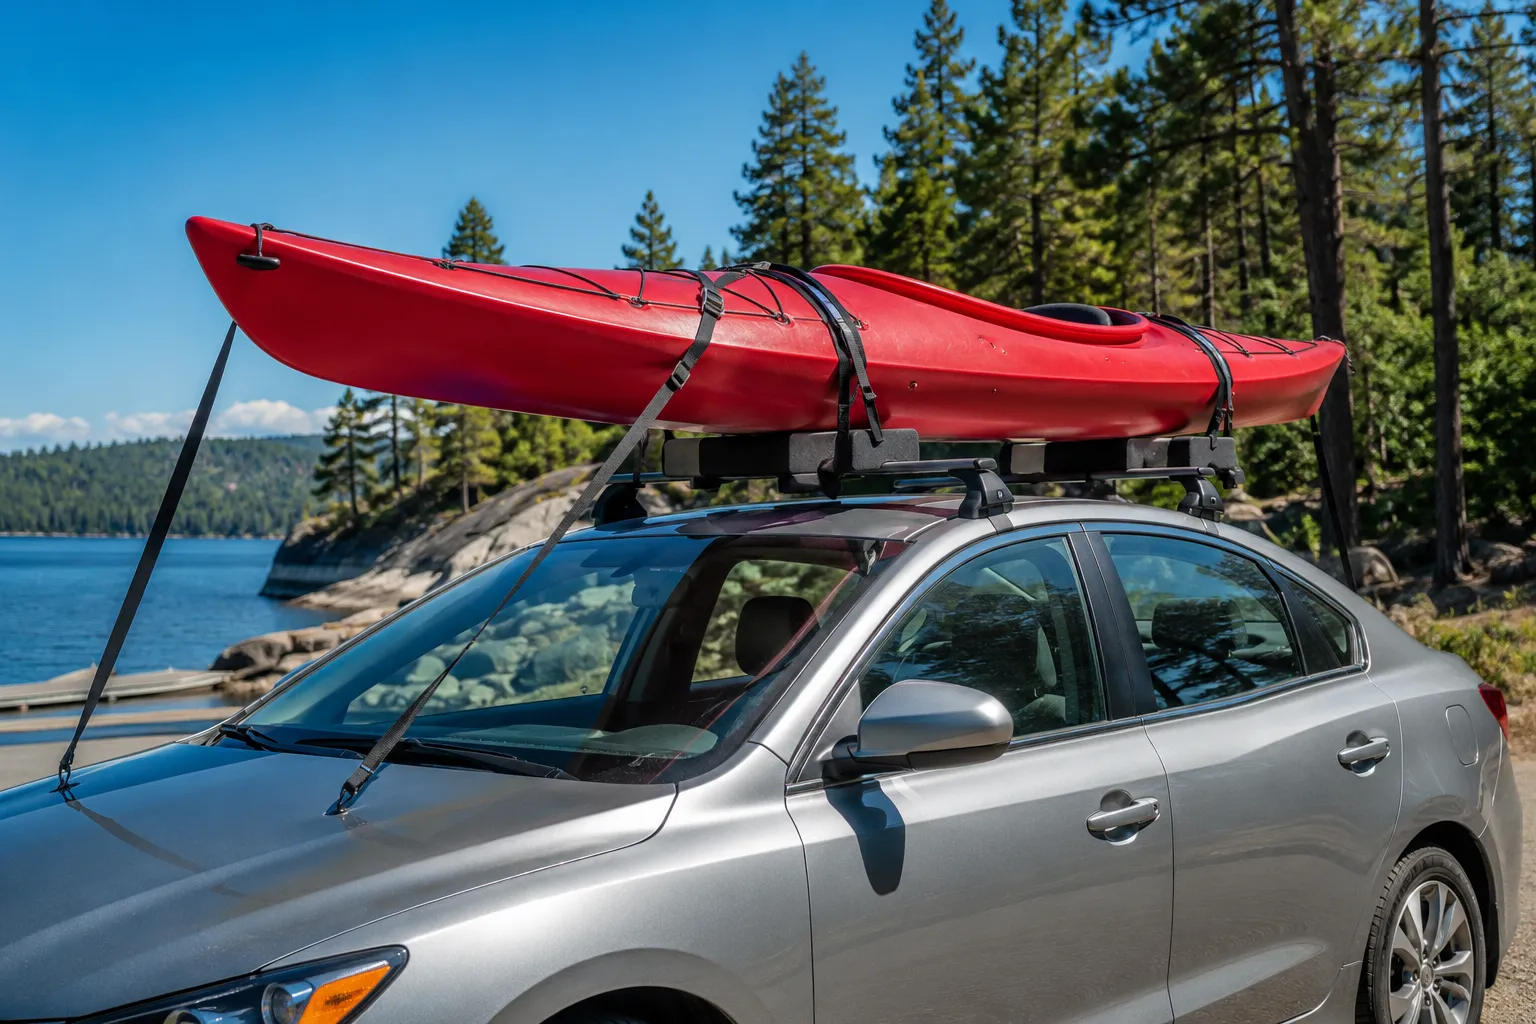
Quick Answer
You can safely transport a kayak without a roof rack by using foam blocks or pool noodles as padding between the kayak hull and your car roof, then securing it with cam buckle straps that run through the vehicle’s interior. This method works for most sedans, SUVs, and hatchbacks, provided you add bow and stern tie-down lines and drive carefully. The setup costs $30-60 and takes about 15 minutes once you know the process.
Key Takeaways
- Foam blocks or pool noodles create a protective cushion between your kayak and car roof, preventing scratches and dents to both surfaces
- Cam buckle straps (not bungee cords) running through the car’s interior provide secure attachment without a roof rack
- Bow and stern lines are essential safety backups that prevent the kayak from sliding forward or backward during sudden stops
- Most sedans and SUVs can carry a kayak this way, though the kayak will overhang the front and rear of shorter vehicles
- Legal requirements vary by state, but most allow roof-mounted kayaks if properly secured and marked with flags when overhanging more than 3-4 feet
- Pool noodles cost $3-5 and work well for occasional trips, while dedicated foam blocks ($20-40) offer better stability for frequent transport
- Hitch-mounted carriers ($150-400) are a rack-free alternative that holds kayaks vertically or at an angle behind your vehicle
- Inflatable kayaks eliminate most transport challenges since they pack into a bag that fits in any trunk or back seat
Can You Transport a Kayak on a Car Without a Roof Rack?
Yes, you can safely transport a kayak on a car without a roof rack using foam padding and proper straps. This method has been used by kayakers for decades and works reliably when done correctly. The key is creating adequate padding to protect both your vehicle and kayak, then securing the load with straps strong enough to handle highway speeds and sudden stops.
The bare-roof method works best for:
- Occasional paddlers who don’t want to invest $200-500 in a roof rack system
- Rental cars or borrowed vehicles where installing a rack isn’t practical
- Short trips (under 100 miles) at moderate speeds
- Lighter kayaks (under 60 pounds) that are easier to lift and position
This approach does have limitations. You’ll need to lift the kayak higher than with a rack, the setup takes longer each time, and you must check strap tension more frequently during long drives. But for weekend warriors and casual anglers, it’s a proven solution that saves money and works with almost any vehicle.
Common mistake: Skipping the padding and placing the kayak directly on the roof. Even a short drive will scratch your car’s paint and can dent the kayak hull. Always use foam blocks, pool noodles, or thick towels as a barrier.
How to Tie Down a Kayak With Pool Noodles
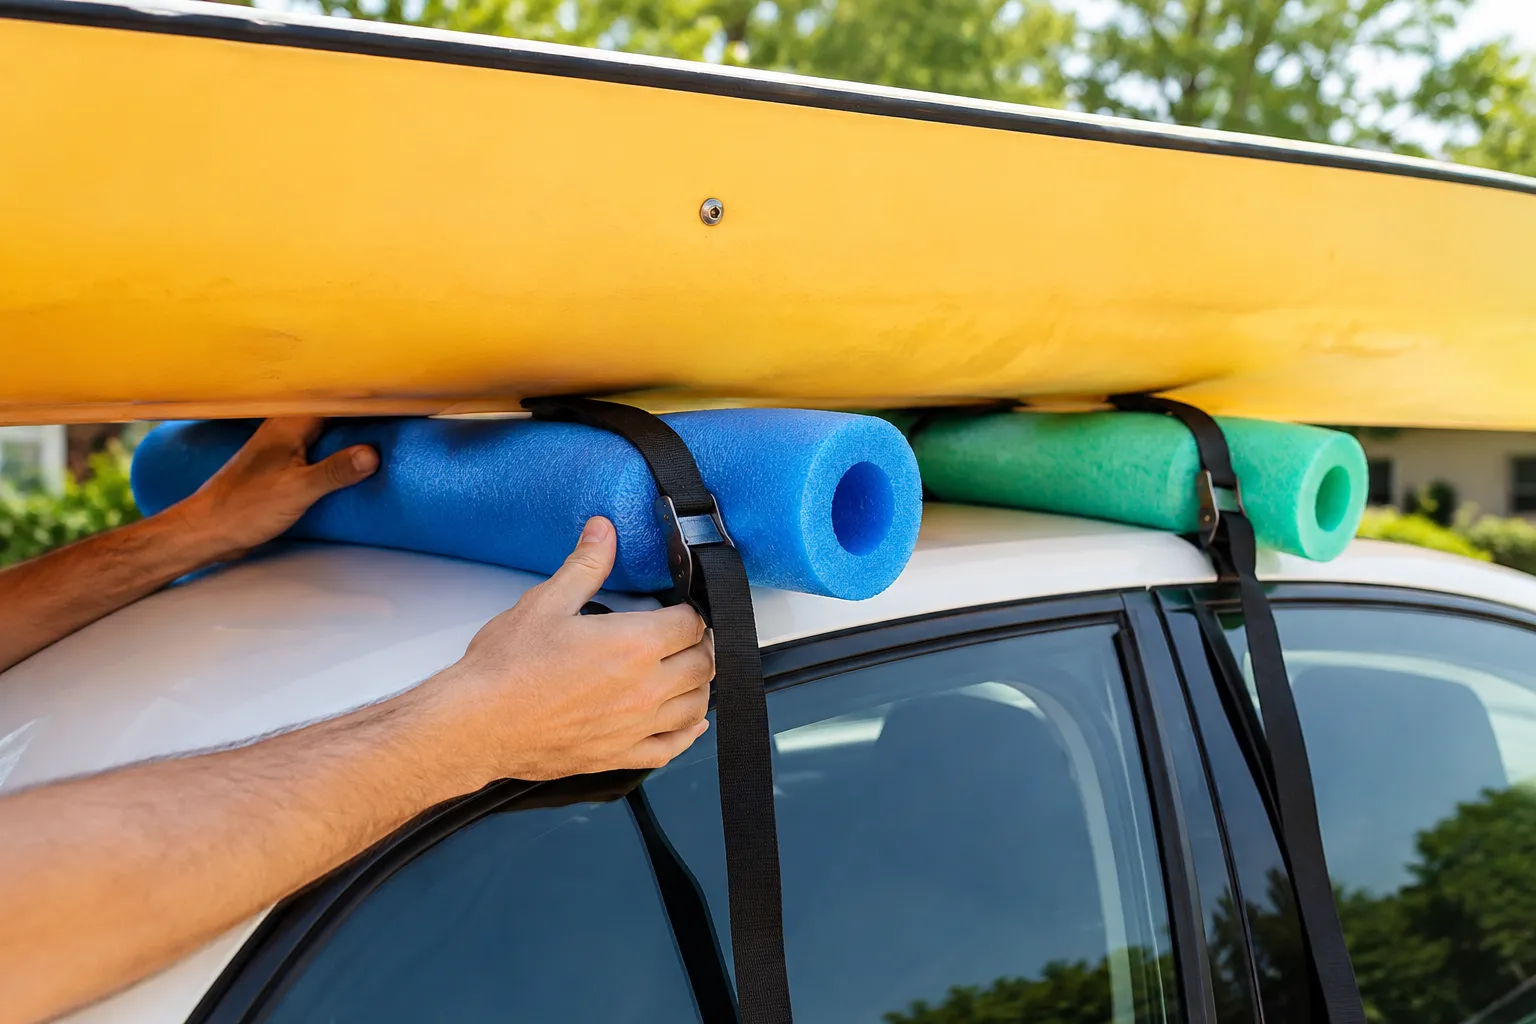
Pool noodles provide an inexpensive padding solution for kayak transport. Cut two pool noodles in half lengthwise, creating four semi-circular pieces. Place these cut-side-down on your car roof in two parallel lines, spaced to match the width of your kayak’s hull. The kayak then rests in the curved channels, creating a stable, cushioned platform.
Step-by-step setup:
- Cut the noodles: Use a serrated knife to slice two standard pool noodles lengthwise down the middle
- Position on roof: Place the four halves cut-side-down, creating two parallel tracks about 24-30 inches apart (adjust for your kayak width)
- Secure with straps: Run cam buckle straps over the kayak and through your car’s interior (through front doors and rear doors or hatch)
- Tighten evenly: Pull straps snug but not overly tight, the noodles will compress slightly
- Add safety lines: Attach bow and stern lines from the kayak’s grab handles to your vehicle’s tow hooks or bumper tie-points
Pool noodles compress more than foam blocks, so check your straps after the first 10-15 minutes of driving and retighten if needed. For trips longer than 50 miles, consider upgrading to dedicated foam blocks, which maintain their shape better under sustained pressure.
Choose pool noodles if: You’re making a one-time trip, transporting a lightweight kayak, or testing whether you enjoy kayaking before investing in better gear.

Extra Dense & Durable: Made with high-quality dense closed-cell structure foam that resists bending, tearing & water absorption — lasts longer.

Size Details: This is a single foam tube with an inner diameter of 0.79 inches, The inner diameter perimeter is 2.48 inch, outer diameter of 1.96 inch a total length of 15.7 inches. Important: Please measure the diameter of the object you need to wrap before purchasing to ensure this product fits your intended use. Avoid buying based on assumptions to prevent issues with sizing.
Is It Legal to Strap a Kayak Directly to Car Roof?
Strapping a kayak directly to your car roof is legal in all 50 states, provided the load is properly secured and doesn’t obstruct your view or extend beyond legal overhang limits. Most states allow rear overhang up to 3-4 feet without requiring a flag or marker, though this varies by jurisdiction. Front overhang is typically limited to 3 feet.
Key legal requirements:
- Secure attachment: The load must not shift, bounce, or create a hazard to other drivers
- Visibility: Your mirrors, windshield, and rear window must remain unobstructed
- Overhang markers: Red or orange flags are required when cargo extends more than 3-4 feet beyond the rear bumper (check your state’s specific limit)
- Width limits: The kayak cannot extend more than 6 inches beyond each side of your vehicle in most states
Before your first trip, verify your state’s Department of Transportation regulations. Some states require additional lighting for loads that extend beyond certain distances, especially for night driving. A quick call to your local DMV or a search for “[your state] vehicle cargo regulations” will clarify specific requirements.
Edge case: If you’re crossing state lines, follow the most restrictive state’s rules for the entire trip. What’s legal in your home state might not be in the state you’re driving through.
Foam Blocks vs Pool Noodles for Kayak Transport
Foam blocks are purpose-built for kayak transport and offer better stability, durability, and load distribution than pool noodles. They cost $20-40 for a set of four and feature contoured surfaces that cradle the kayak hull, plus straps or channels to keep them positioned correctly. Pool noodles cost $3-5 and work adequately for occasional use but compress unevenly and can shift during transport.
Comparison:
| Feature | Foam Blocks | Pool Noodles |
|---|---|---|
| Cost | $20-40 | $3-10 |
| Durability | 3-5 years regular use | 5-10 trips before degrading |
| Stability | Excellent, stays in place | Good, can shift if not secured |
| Load distribution | Wide, contoured surface | Narrow contact points |
| Setup time | 5 minutes | 8-10 minutes (cutting required) |
| Best for | Regular paddlers | One-time or occasional trips |
Foam blocks maintain their shape under the weight of the kayak and the compression from straps, providing consistent support throughout your drive. Pool noodles flatten over time and with repeated use, creating uneven pressure points that can dent softer kayak hulls.
Choose foam blocks if: You paddle more than once a month, own a heavier kayak (over 50 pounds), or regularly drive highway speeds for more than 30 minutes.
Choose pool noodles if: You’re transporting a kayak once or twice, testing the sport before committing to gear, or carrying a very lightweight kayak on a short trip.
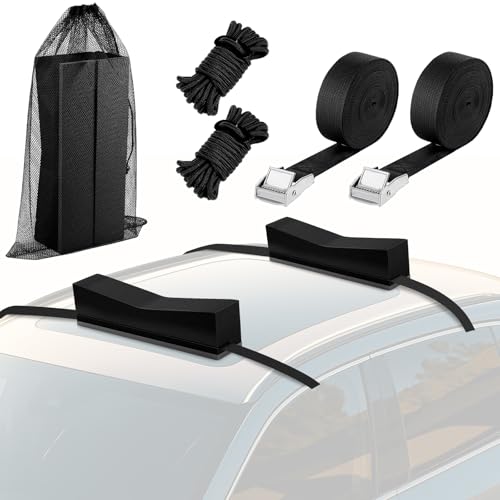
Universal Roof Rack Pad: the package includes 2 soft foam pads, 2 tie-downs with adjustable buckles(15Ft), 2 nylon load straps (13.12Ft)and 1storage bag; All these elements work together to provide good stability, leading to a smoother transportation experience

Universal Roof Rack Pad: the package includes 4 soft foam pads, 2 tie-downs with adjustable buckles, 2 nylon load straps, 2 S hooks and 1 bag; All these elements work together to provide good stability, leading to a smoother transportation experience
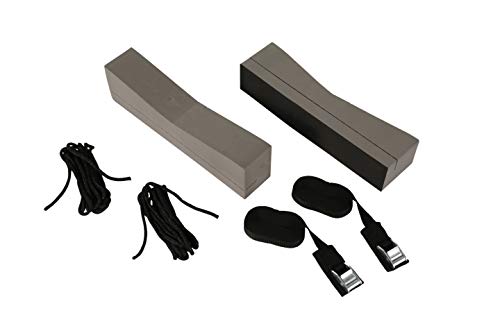
Everything you need for kayak transportation on your car roof
Best Straps for Securing Kayak Without Roof Rack
Cam buckle straps rated for at least 500 pounds are the best choice for securing a kayak without a roof rack. These straps feature a spring-loaded cam mechanism that grips the webbing, allowing you to tighten them easily without the risk of over-tightening that comes with ratchet straps. Use two straps running perpendicular to the kayak (across its width) plus separate bow and stern lines.
Recommended strap specifications:
- Width: 1 to 1.5 inches (wider distributes pressure better)
- Length: 12-15 feet (long enough to pass through your vehicle’s interior)
- Breaking strength: 500-800 pounds minimum
- Buckle type: Cam buckle (easier to use, less likely to over-tighten)
- Material: Polypropylene or polyester webbing with UV resistance
Why not ratchet straps? Ratchet straps can generate excessive force (1,000+ pounds of tension), which can crush kayak hulls, especially on sit-on-top models with hollow sections. Cam buckles provide plenty of holding power (300-400 pounds of working tension) without the risk of damage.
Why not bungee cords? Bungee cords stretch and bounce, allowing the kayak to shift. They’re also prone to sudden failure if one hook detaches. Never use bungees as primary kayak tie-downs.
Strap routing: Run each strap over the kayak, through your car’s interior (front doors to rear doors, or front doors to rear hatch), and back over the kayak to the buckle. This creates a complete loop that can’t slip off the roof. Pad the straps where they contact door frames with towels or foam to prevent scratching.

【Durable and Sturdy】Premium heavy duty tie down straps is 6.5ft long, 1 inch wide, include 4 pcs to meet your needs.black metal cam buckle straps with delicate gear and sturdy thick 600D strap, they grip well and break strength 500lbs.
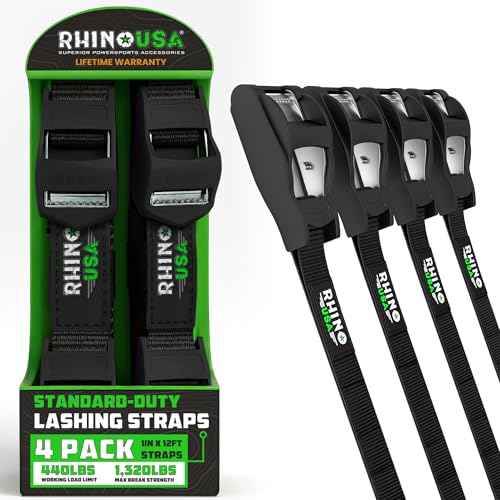
SILICONE-COVERED CAM BUCKLE STRAPS – Protective silicone housing helps prevent scratches on vehicle paint and gear while securing loads. Cam buckle design allows quick tightening and release without ratchet tools.

SILICONE-COVERED CAM BUCKLE LASHING STRAPS - Protective Silicone Housing Guards Vehicle Paint and Gear From Scratches. Cam Buckle Cinch Straps Tighten and Release Quickly Without Ratchet Tools.
Can I Use a Hitch Mount for a Kayak Instead of Roof Rack?
Yes, hitch-mounted kayak carriers are an excellent roof rack alternative that holds one or two kayaks vertically or at an angle behind your vehicle. These carriers slide into a standard 2-inch hitch receiver and cost $150-400, depending on capacity and features. They’re easier to load than roof-mounted options since you’re lifting the kayak to waist height rather than over your head.
Hitch mount advantages:
- Easier loading: Lift kayaks to 3-4 feet high instead of 5-6 feet
- No roof contact: Eliminates risk of scratching your vehicle’s roof or kayak hull
- Better fuel economy: Less wind resistance than roof-mounted kayaks
- Quick installation: Slides into hitch receiver in seconds, no tools required
- Rear access: Some models fold or swing away for trunk/hatch access
Limitations:
- Requires hitch receiver: You’ll need a 2-inch hitch installed ($150-300 if you don’t have one)
- Blocks rear visibility: Kayaks extend behind the vehicle, obscuring rear view
- Weight limit: Most hitch mounts handle 2 kayaks maximum (100-150 pounds total)
- Ground clearance: Can reduce departure angle on steep driveways or trails
Choose a hitch mount if: You have a hitch receiver or plan to install one, struggle with overhead lifting, or want a semi-permanent solution that’s faster than foam blocks and straps.
Skip it if: You don’t have a hitch and don’t want to install one, need to carry more than two kayaks, or frequently drive steep terrain where ground clearance matters.
How to Transport a Kayak in a Truck Bed
Transporting a kayak in a truck bed is straightforward and secure. Place the kayak in the bed with the stern (rear) toward the cab and the bow (front) extending over the tailgate. Secure it with ratchet straps or cam straps attached to the bed’s tie-down anchors, running straps over the kayak in an X-pattern to prevent shifting.
Truck bed transport steps:
- Lower the tailgate (or remove it if the kayak extends far beyond the bed)
- Add padding: Place foam blocks, pool noodles, or moving blankets under the kayak to protect both the kayak and truck bed
- Position the kayak: Center it in the bed with the bow extending over the tailgate
- Secure with straps: Run at least two straps in an X-pattern from bed anchors, over the kayak, to opposite anchors
- Add a flag: If the kayak extends more than 3-4 feet beyond the tailgate, attach a red or orange flag to the bow
For kayaks longer than your bed: Most fishing kayaks (10-14 feet) will extend beyond a standard truck bed (5.5-6.5 feet). This is legal and safe as long as the kayak is properly secured and flagged. The kayak should rest on the bed floor with the bow angled upward over the tailgate.
Common mistake: Leaving the kayak loose in the bed, assuming the bed walls will keep it in place. Even a short stop can send an unsecured kayak sliding forward into the cab window. Always strap it down.
Bed extenders: If your kayak extends far beyond the tailgate, consider a bed extender ($50-150) that creates a support point at the tailgate, reducing the unsupported overhang.
What Happens If Kayak Straps Come Loose While Driving?
If kayak straps come loose while driving, the kayak can shift, slide, or even fly off your vehicle, creating a serious hazard for you and other drivers. A loose kayak can damage your car’s roof, shatter windows, or cause a multi-vehicle accident if it falls into traffic. This is why redundant safety lines (bow and stern tie-downs) are essential, not optional.
Warning signs your straps are loosening:
- Whistling or humming sounds from the roof (indicates the kayak is vibrating)
- Visible movement of the kayak in your mirrors
- Strap flutter visible at the edges of your windshield or side windows
- Changed wind noise compared to the start of your trip
Immediate actions if you suspect loose straps:
- Pull over safely at the first opportunity (parking lot, rest area, wide shoulder)
- Check all straps for tension, they should be snug with no slack
- Inspect the padding to ensure foam blocks or noodles haven’t shifted
- Verify bow and stern lines are still attached and tight
- Retighten everything before continuing
Prevention: Check your straps after the first 10-15 minutes of driving, especially if using pool noodles, which compress more than foam blocks. On trips longer than an hour, stop and recheck at least once. Cam buckle straps rarely loosen on their own, but vibration and wind can gradually work them loose if they weren’t tight enough initially.
Why bow and stern lines matter: These safety lines run from the kayak’s front and rear grab handles to your vehicle’s bumper or tow hooks. If the main straps fail, these lines prevent the kayak from flying off. They’re your backup system and should always be used, even on short trips.
Can a Sedan Carry a Kayak Without Roof Rack?
Yes, most sedans can carry a kayak without a roof rack using foam blocks and straps, though the kayak will overhang the front and rear of the vehicle. A typical sedan roof is 14-16 feet long, while fishing kayaks range from 10-14 feet, so expect 2-4 feet of overhang at each end. This is legal and safe when properly secured with straps and bow/stern lines.
Sedan-specific considerations:
- Roof strength: Modern sedan roofs can support 100-150 pounds when the weight is distributed across foam blocks or padding
- Door access: You’ll need to route straps through the front and rear doors, which means opening and closing doors with straps in place (pad the straps to prevent scratching)
- Aerodynamics: Sedans have less wind resistance than SUVs, but a kayak on the roof will reduce fuel economy by 10-25%
- Lift height: Sedan roofs are lower than SUVs (4-5 feet vs. 5-6 feet), making loading easier
Best practices for sedans:
- Use four foam blocks instead of two to distribute weight more evenly across the roof
- Position the kayak’s cockpit (heaviest part) over the roof’s center, not overhanging the windshield
- Drive more conservatively, sedans have a higher center of gravity with a roof load than SUVs
- Avoid sudden lane changes or hard braking, which can shift the load
Choose a different method if: Your sedan has a sunroof (the glass panel reduces roof strength), the kayak weighs more than 70 pounds, or you’re uncomfortable with the overhang.
Kayak Trailer vs Roof Rack: Which Is Cheaper?
A basic kayak trailer costs $300-800, while a quality roof rack system costs $200-500, making roof racks the cheaper option for most paddlers. However, trailers can carry more kayaks (4-8 vs. 2-4 on a roof rack) and eliminate the need to lift kayaks overhead, which may justify the higher upfront cost if you paddle with a group or have physical limitations.
Cost breakdown:
Roof rack system:
- Crossbars: $150-300
- Kayak carriers (J-cradles or saddles): $50-200
- Installation: DIY (free) or $50-100 professional
- Total: $200-500
Kayak trailer:
- Basic single-axle trailer: $300-600
- Multi-kayak trailer (4-6 boats): $600-1,200
- Registration and tags: $20-100 annually
- Storage space: Requires garage or yard space
- Total: $320-1,300+ (plus annual fees)
Ongoing costs:
- Roof rack: Minimal, occasional strap replacement ($20-30)
- Trailer: Annual registration, tire maintenance, bearing grease, potential storage fees
Choose a roof rack if: You paddle solo or with one partner, have limited storage space, and want the lowest upfront cost.
Choose a trailer if: You regularly transport 3+ kayaks, have back or shoulder issues that make overhead lifting difficult, or paddle with a club or family group.
Choose neither (foam blocks) if: You paddle occasionally (less than once a month) and want to spend less than $50 total.
Common Mistakes When Strapping Kayak to Bare Roof
The most common mistake when strapping a kayak to a bare roof is using insufficient padding, which leads to scratches, dents, and hull damage. Other frequent errors include over-tightening straps (crushing the kayak), skipping bow and stern lines (allowing the kayak to slide), and routing straps incorrectly (creating pressure points that damage the vehicle).
Top mistakes and fixes:
1. No padding or inadequate padding
- Problem: Direct contact between kayak and roof scratches both surfaces
- Fix: Always use foam blocks, pool noodles, or thick towels as a barrier
2. Over-tightening straps
- Problem: Excessive tension crushes kayak hulls, especially on sit-on-top models
- Fix: Use cam buckle straps instead of ratchet straps; tighten until snug but not deforming the hull
3. Skipping bow and stern lines
- Problem: Kayak can slide forward or backward during sudden stops or acceleration
- Fix: Always attach safety lines from kayak ends to vehicle bumper or tow hooks
4. Straps positioned too close together
- Problem: Narrow strap spacing allows the kayak to pivot or twist
- Fix: Space straps at least 3-4 feet apart, positioned near the kayak’s widest points
5. Not checking straps during the trip
- Problem: Straps can loosen as padding compresses or from vibration
- Fix: Stop after 10-15 minutes and recheck tension; repeat every hour on long trips
6. Using bungee cords as primary tie-downs
- Problem: Bungees stretch and can fail suddenly
- Fix: Use only cam buckle or ratchet straps rated for 500+ pounds
7. Blocking door access
- Problem: Straps routed incorrectly prevent doors from opening
- Fix: Route straps through the vehicle interior (front to back doors) so you can still access the car
How Far Can You Drive With Kayak on Car Roof Without Rack?
You can safely drive any distance with a kayak on your car roof without a rack, provided the kayak is properly secured with foam padding, cam straps, and bow/stern lines. Paddlers regularly make 100+ mile trips using this method. The limiting factor isn’t distance but rather your willingness to stop and check strap tension every 50-75 miles and drive at moderate speeds (55-65 mph) to reduce wind stress.
Distance considerations:
Short trips (under 25 miles):
- Check straps once before departure
- City speeds (35-45 mph) create minimal wind stress
- Foam blocks or pool noodles work equally well
Medium trips (25-100 miles):
- Check straps after 10-15 minutes, then at the halfway point
- Highway speeds (55-65 mph) are safe with proper setup
- Foam blocks recommended over pool noodles for better stability
Long trips (100+ miles):
- Check straps every 50-75 miles or every hour
- Consider upgrading to a roof rack for convenience and peace of mind
- Foam blocks essential, pool noodles will compress unevenly
- Expect 15-25% reduction in fuel economy due to wind resistance
Speed limits: Stay at or below 65 mph. Higher speeds create exponentially more wind force, increasing the risk of strap loosening or kayak shifting. Some paddlers report successful trips at 70-75 mph, but this adds unnecessary risk.
Weather factors: Strong crosswinds (20+ mph) make roof-mounted kayaks harder to control, especially on lighter vehicles. If possible, delay your trip or choose a different transport method during high-wind conditions.
Do I Need Bow and Stern Lines Without a Roof Rack?
Yes, bow and stern lines are essential safety equipment when transporting a kayak without a roof rack. These lines run from the kayak’s front and rear grab handles to your vehicle’s bumper, tow hooks, or frame attachment points, creating a backup system that prevents the kayak from sliding forward or backward if the main straps fail or loosen.
Why they’re critical without a rack:
Roof racks provide multiple attachment points and metal framework that physically blocks the kayak from sliding. Without a rack, your cam straps are the only thing holding the kayak in place. Bow and stern lines add redundancy, if straps loosen or fail, the lines keep the kayak on your vehicle.
How to attach bow and stern lines:
- Front (bow) line: Tie a rope or strap to the kayak’s front grab handle, run it down to your vehicle’s front tow hook or bumper tie-point, and secure it with a trucker’s hitch or bowline knot
- Rear (stern) line: Repeat the process at the kayak’s rear, attaching to a rear tow hook or bumper anchor
- Tension: Pull the lines snug but not overly tight, they should have slight slack when the kayak is properly positioned, becoming taut only if the kayak tries to shift
Attachment points on your vehicle:
- Tow hooks: Best option, metal hooks designed for pulling loads
- Bumper tie-points: Some vehicles have built-in loops or anchors under the bumper
- Frame loops: Look under the front and rear bumpers for metal loops attached to the frame
- Hood/trunk latches: Last resort, wrap rope around the latch mechanism (not the hood itself)
Rope specifications: Use 1/4-inch or thicker nylon or polypropylene rope, or dedicated cam straps. The lines should be rated for at least 200 pounds breaking strength.
Common mistake: Attaching bow and stern lines to plastic bumper covers or decorative trim. These aren’t structural and can tear off. Always attach to metal frame components.
Inflatable Kayak vs Hard Shell for Transport Without Rack
Inflatable kayaks eliminate the need for roof racks, foam blocks, and straps entirely since they pack into a bag that fits in any trunk, back seat, or even a large backpack. For paddlers who don’t want to deal with roof transport, inflatables offer unmatched convenience. However, hard-shell kayaks provide better performance, durability, and fishing features, making them the preferred choice for serious anglers despite the transport challenges.
Transport comparison:
| Factor | Inflatable Kayak | Hard-Shell Kayak |
|---|---|---|
| Transport method | Bag in trunk/back seat | Roof, bed, or trailer |
| Setup required | 10-15 min inflation | None (ready to paddle) |
| Storage space | Closet or garage corner | Garage, yard, or rack |
| Vehicle requirements | Any car with trunk | Roof rack or truck bed |
| Fuel economy impact | None | 10-25% reduction |
| Convenience | High (no lifting) | Medium (lifting required) |
Fishing performance differences:
Hard-shell advantages:
- Better tracking and speed (rigid hull cuts through water efficiently)
- More stable platform for standing and casting
- Greater weight capacity for gear and fish
- Easier to add accessories (fish finders, rod holders, anchor trolleys)
- More durable against rocks, oyster beds, and sharp objects
Inflatable advantages:
- Lighter weight (25-40 pounds vs. 50-80 pounds)
- No transport equipment needed
- Fits in small apartments or condos
- Can be checked as luggage for fly-in fishing trips
- Softer surface is more comfortable for long sits
Choose an inflatable if: Transport and storage are your primary concerns, you paddle calm waters (lakes, slow rivers), and you’re willing to sacrifice some performance for convenience.
Choose a hard-shell if: You prioritize fishing performance, paddle frequently (don’t want to inflate/deflate every trip), fish rough water or saltwater, or need maximum gear capacity.
Hybrid option: Own both. Use the inflatable for spontaneous trips or when traveling, and the hard-shell for serious fishing outings. Many anglers find this combination gives them the best of both worlds.
Frequently Asked Questions
Can I transport a kayak on a car with a sunroof?
Yes, but use extra caution and distribute weight away from the sunroof glass. Position foam blocks over the solid roof sections (front and rear of the sunroof panel) rather than directly over the glass. The metal roof frame can support the load, but the glass panel cannot.
How tight should kayak straps be?
Straps should be snug enough that the kayak doesn’t shift when you push on it, but not so tight that they deform the hull. You should be able to slip two fingers under the strap with moderate resistance. Check for hull deformation (visible dents or flex) and loosen slightly if present.
Do I need a red flag on my kayak?
Most states require a red or orange flag when cargo extends more than 3-4 feet beyond the rear bumper. Check your state’s specific regulations, but it’s good practice to add a flag anytime your kayak overhangs the rear by more than 2 feet, even if not legally required.
Can I use ratchet straps instead of cam straps?
You can, but cam straps are safer for kayaks. Ratchet straps can generate excessive force (1,000+ pounds) that crushes kayak hulls. If you use ratchet straps, tighten them gently, just enough to secure the kayak without over-compressing the hull.
Will transporting a kayak on my roof damage my car’s paint?
Not if you use proper padding. Foam blocks or pool noodles create a barrier between the kayak and your roof. The straps can scratch door frames where they pass through, so wrap those contact points with towels or foam padding.
How much does a foam block kayak carrier cost?
Basic foam block sets cost $20-40 for four blocks. Premium versions with contoured surfaces and strap channels run $40-60. This is significantly cheaper than a full roof rack system ($200-500).
Can I transport two kayaks without a roof rack?
Yes, but it’s challenging. You’ll need to stack the kayaks (one upside down, one right-side up) with padding between them, then use longer straps to secure both. This method works best for shorter trips and lighter kayaks. For regular two-kayak transport, a roof rack or trailer is more practical.
What’s the best knot for bow and stern lines?
The trucker’s hitch is ideal because it creates mechanical advantage for tightening and locks securely. Alternatively, use a bowline knot at the kayak end and a taut-line hitch at the vehicle end for adjustable tension.
How do I protect my kayak from UV damage during transport?
UV damage occurs over months and years of sun exposure, not during a few hours of transport. If you’re concerned, use a kayak cover or tarp during transport, but this is more important for long-term storage than short trips.
Can I transport a kayak in the rain?
Yes, rain doesn’t affect transport safety. However, wet straps can slip more easily, so check tension more frequently. Also, a wet kayak is heavier and more slippery to handle during loading and unloading.
Do I need insurance for transporting a kayak?
Your auto insurance typically covers damage to your vehicle and liability if the kayak falls and causes an accident. However, damage to the kayak itself may not be covered. Check with your insurer, and consider adding a rider if you own expensive kayaks.
How do I load a heavy kayak onto my car roof alone?
Use the “slide method”: rest the kayak’s bow on your rear bumper or open hatch, lift the stern, and slide the kayak forward onto the roof. Alternatively, invest in kayak loading assists like suction-cup rollers ($30-60) that make solo loading easier.
Conclusion
Transporting a kayak without a roof rack is a practical, budget-friendly solution that works reliably for occasional and regular paddlers alike. By using foam blocks or pool noodles for padding, cam buckle straps for securing, and bow and stern lines for safety backup, you can safely transport your kayak on almost any vehicle for under $60 in equipment.
The key to success is proper setup: position padding to protect both your vehicle and kayak, route straps through the vehicle’s interior to prevent slipping, and always add redundant safety lines. Check strap tension after the first 15 minutes of driving and periodically on longer trips. Drive at moderate speeds (55-65 mph) and avoid sudden maneuvers.
Your next steps:
- Gather equipment: Purchase foam blocks ($20-40) or pool noodles ($3-10), cam buckle straps ($15-25), and rope for bow/stern lines ($5-10)
- Practice at home: Do a trial setup in your driveway before your first trip to familiarize yourself with strap routing and tensioning
- Start with short trips: Build confidence with local paddles (under 25 miles) before attempting longer drives
- Evaluate your needs: After 5-10 trips, decide whether this method meets your needs or if you should upgrade to a roof rack, hitch mount, or trailer
For paddlers who fish once or twice a month, the foam-block method offers years of reliable service. If you find yourself paddling weekly or transporting multiple kayaks regularly, consider investing in a permanent roof rack system for added convenience and faster setup times.
The water is waiting, don’t let the lack of a roof rack keep you off it.





