
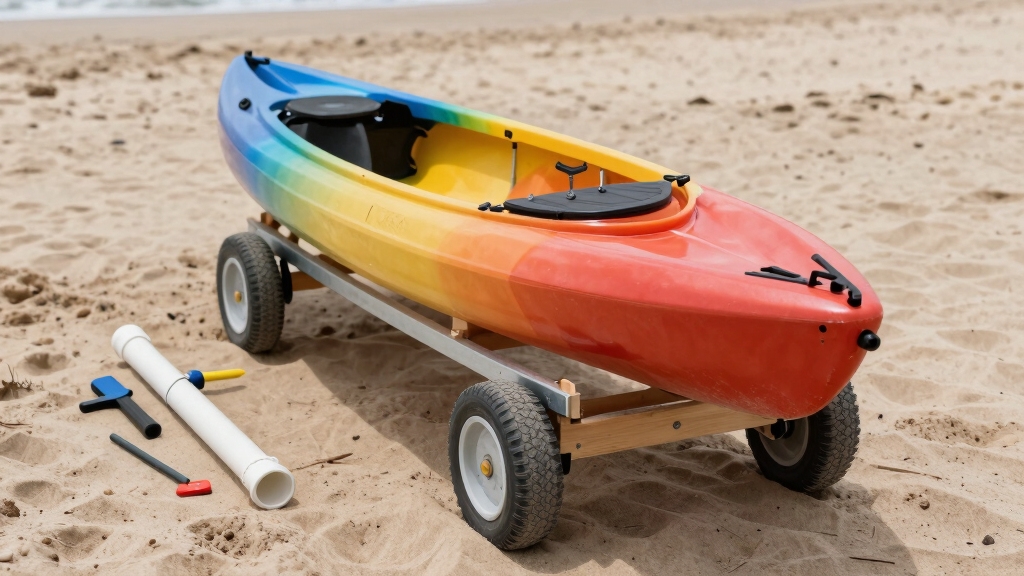
Dragging a 60-pound fishing kayak across sand, gravel, or a boat ramp parking lot wears you out before you even hit the water. A DIY kayak cart solves this problem for $30-50 in materials and about two hours of work, giving you a wheeled transport system that rolls your kayak from vehicle to launch with minimal effort.
Key Takeaways
- Build cost: A homemade kayak cart costs $30-50 using PVC or $60-80 with aluminum, compared to $80-200 for commercial models
- Material choice: PVC works well for kayaks under 80 pounds and smooth terrain; aluminum handles heavier loads and rough ground
- Wheel selection: Balloon wheels (10-12 inches) perform best on sand; solid rubber wheels suit pavement and gravel
- Width matters: Cart frames should be 24-30 inches wide for stability; wider kayaks need wider carts to prevent tipping
- Foam padding: Pool noodles or pipe insulation protect your kayak hull from scratches and distribute weight evenly
- Build time: Most anglers complete a basic PVC cart in 1-2 hours; aluminum versions take 2-3 hours
- Weight capacity: Properly built PVC carts handle 80-100 pounds; aluminum frames support 150+ pounds including tandem fishing kayaks
What Materials Do I Need to Build a Kayak Cart
Building a functional kayak cart requires PVC or aluminum tubing for the frame, two wheels with axle hardware, foam padding for hull protection, and basic fasteners. For a standard PVC cart, you’ll need two 10-foot sections of 1.5-inch Schedule 40 PVC pipe, four PVC T-joints, two PVC elbow joints, one 3/4-inch threaded rod for the axle, two 10-12 inch wheels, washers, nuts, and pool noodles or pipe insulation for padding.
Essential materials list for PVC cart:
- 2× 10-foot sections of 1.5″ Schedule 40 PVC pipe
- 4× 1.5″ PVC T-joints
- 2× 1.5″ PVC elbow joints (90-degree)
- 1× 3/4″ threaded steel rod (36″ length for axle)
- 2× wheels (10-12″ diameter with 3/4″ bore)
- 4× washers and 4× nuts (3/4″ size)
- 2× pool noodles or 6 feet of foam pipe insulation
- PVC primer and cement
- Zip ties or hose clamps
For aluminum frame carts, substitute:
- 2× 10-foot sections of 1″ square aluminum tubing
- Aluminum corner brackets and flat plates
- Bolts, nuts, and washers (1/4″ or 5/16″)
- Metal cutting saw or pipe cutter
- Drill with metal bits
Most hardware stores stock these materials in the plumbing and hardware aisles. The total shopping time takes about 30 minutes if you bring a materials list. Choose PVC for lighter fishing kayaks under 80 pounds, and aluminum for heavier models or if you frequently navigate rocky terrain.
How Much Does It Cost to Make a DIY Kayak Cart vs Buying One
A DIY kayak cart costs $30-50 for PVC construction or $60-80 for aluminum, while commercial carts range from $80-200 depending on features and weight capacity. The cost difference means building your own saves $30-150, with the biggest savings on heavy-duty models designed for larger fishing kayaks.
Cost breakdown for DIY PVC cart:
- PVC pipes and fittings: $15-20
- Wheels and axle hardware: $12-25
- Foam padding: $3-5
- PVC cement and primer: $8-10
- Total: $38-60
Commercial cart comparison:
- Basic folding cart: $80-120
- Heavy-duty cart with balloon tires: $120-180
- Premium cart with adjustable width: $150-250
The math favors DIY if you own basic tools and plan to use the cart regularly. Commercial carts offer convenience and often include features like quick-release mechanisms, adjustable widths, and corrosion-resistant coatings. However, a homemade cart built with quality materials performs just as well for kayak transport needs.
Choose DIY if: you have 2-3 hours available, own or can borrow a saw and drill, want to customize dimensions for your specific kayak, or fish frequently enough to justify the time investment.
Buy commercial if: you need a cart immediately, lack tools or workspace, want a collapsible design for vehicle storage, or only kayak occasionally (less than 10 times per year).

This vinyl repair kit from Pool Above includes eight (8) round heavy duty patches, each measuring 2 inches across. Constructed of 1100 denier polyester canvas fabric - extrusion-coated on both sides with waterproof, air proof flexible colored plastic for color-match and superior adhesion.

☀【DURABLE】 Our kayak dolly can carry up to 100 lbs,and includes cam buckle tie down strap to secure your kayak, canoe, or another small boat once it’s been placed on top of the trolley.

H2o Anchor Trolley Kit Marine Grade Fixings
Best Wheels for Homemade Kayak Cart
Balloon wheels (10-12 inches diameter with 3-4 inches width) work best for sand and soft terrain, while solid rubber wheels (8-10 inches) perform better on pavement, gravel, and boat ramps. The wheel choice directly affects how easily your cart rolls across different surfaces and whether it sinks into soft ground.
Wheel selection guide:
- Balloon/pneumatic wheels: Inflatable tires that distribute weight over a larger surface area, preventing sinking in sand; ideal for beach launches and soft ground; require occasional air pressure checks
- Solid rubber wheels: No-flat design that rolls smoothly on hard surfaces; better for paved ramps, gravel parking lots, and rocky shorelines; more durable but less forgiving on sand
- Plastic wheels: Lightweight and inexpensive but prone to cracking under heavy loads; suitable only for occasional use on smooth surfaces
For fishing kayak owners who launch from varied locations, balloon wheels offer the most versatility. A 10-12 inch diameter provides enough ground clearance to roll over small obstacles like rocks and driftwood. The wider the tire (3-4 inches), the better it floats on sand without digging in.
Bore size matters: Match your wheel bore to your axle diameter. Most DIY carts use 3/4-inch threaded rod, so choose wheels with a 3/4-inch center hole. Some wheels come with bushings to adapt different bore sizes.
Common mistake: Buying wheels that are too small (under 8 inches) for the kayak weight. Small wheels require more effort to push and get stuck more easily. For a 12 foot kayak weighing 60-80 pounds, 10-inch minimum diameter wheels prevent excessive rolling resistance.
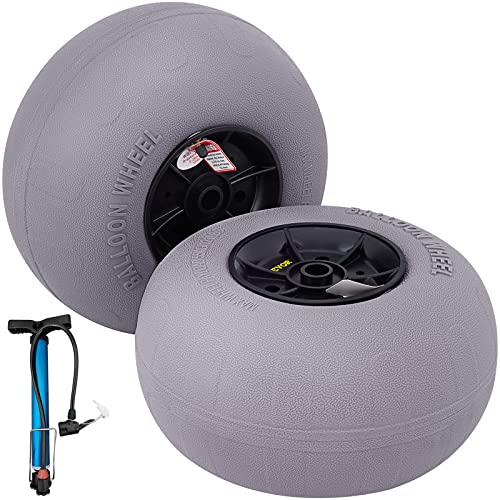
2PCS x 13" Beach Balloon Wheels: The 2PCS x 13" beach wheels make it easier than ever to transport your beach umbrellas, folding chairs, and kayaks to the beach. Its large and inflatable wheel design allows your cart to glide on the sand effortlessly. This wheel is suitable for axles with a 0.9-inch diameter. Please measure your cart's axle before purchase, then select the proper size you need.
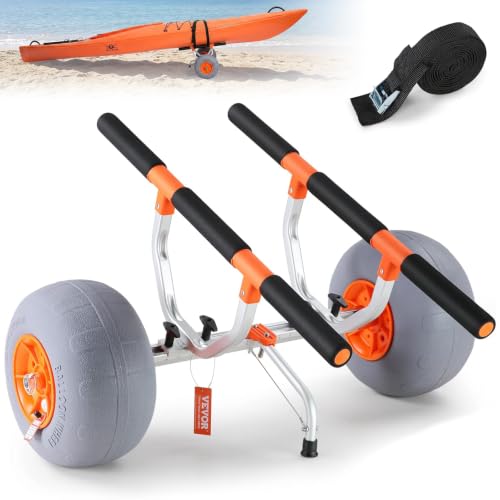
【Strong Weight Capacity】This compact kayak trailer is specially designed for transporting various kinds of kayaks. It adopts a 2mm thickened aluminum alloy frame for a larger load capacity. It can carry 350 lbs / 160 kg kayaks without breaking or deforming.

Beach Wheels: Effortlessly pull carts over soft sand with our beach wheels. Roll your kayak dolly, beach cart, wheelchair, cooler, sand wagon, rolling walker, fish cart, and garden cart with ease
PVC vs Aluminum for Kayak Cart Frame
PVC pipe creates a lightweight, corrosion-proof frame suitable for kayaks under 80 pounds and costs less, while aluminum tubing provides superior strength for heavier kayaks, better durability on rough terrain, and handles loads over 100 pounds without flexing. The material choice depends on your kayak weight, launch conditions, and how often you navigate uneven ground.
PVC advantages:
- Costs $15-20 for materials vs $40-60 for aluminum
- Weighs 5-8 pounds when assembled (easy to lift and store)
- Never rusts or corrodes in saltwater
- Cuts easily with a hand saw
- Joints glue together with PVC cement (no drilling required)
- Sufficient strength for most sit-on-top fishing kayaks
PVC limitations:
- Flexes under loads over 80 pounds
- Can crack if dropped on concrete
- Less stable on rocky terrain where frame might hit obstacles
- UV exposure weakens PVC over years (though Schedule 40 resists this better)
Aluminum advantages:
- Supports 150+ pounds without bending
- More rigid frame prevents wobbling with heavy pedal kayaks
- Withstands impacts from rocks and rough handling
- Longer lifespan (10+ years with proper care)
- Professional appearance
Aluminum limitations:
- Costs 2-3× more than PVC
- Requires metal-cutting tools and drilling
- Weighs 10-15 pounds (heavier to carry)
- Can corrode in saltwater without protective coating
Choose PVC if: your kayak weighs under 75 pounds, you launch from sandy beaches or smooth ramps, you want the lightest possible cart, or you’re building your first cart and want to minimize cost.
Choose aluminum if: you own a heavy fishing kayak (80+ pounds), you frequently cross rocky shorelines, you want maximum durability, or you’re building a cart for a tandem kayak.
Most anglers start with PVC because it’s forgiving for first-time builders. If the PVC cart proves insufficient after testing, the skills learned transfer directly to building an aluminum version.

【Enhanced Load Capacity】 Built with 2mm thickened aluminum alloy, it supports up to 280lbs / 127kg, offering stable, deformation-resistant performance. Easily transports heavy kayaks, with enhanced durability for long-term use

【Application: 】: Kayak pad eyes and rivet kit are suitable for kayak equipment
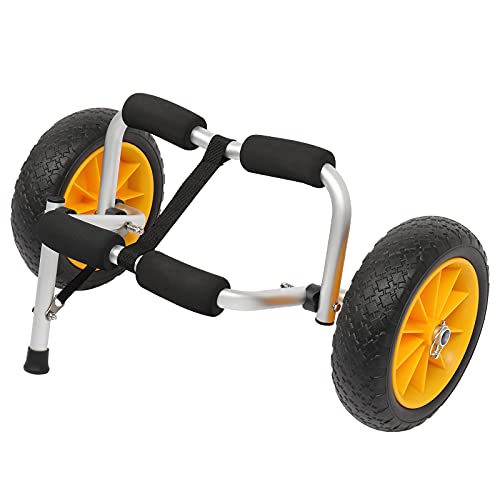
CAPACITY: This kayak cart is made of aluminum alloy tubes (20x1.75mm) and can hold up to 200 lbs. It helps you move your kayak or canoe from parking areas to beaches, lakes, or rivers easily
How Do I Attach a Kayak Cart Without Scratching My Kayak
Wrap all contact points with foam padding (pool noodles or pipe insulation) and secure the kayak with padded straps or bungee cords that distribute pressure evenly across the hull. The padding creates a cushion between hard frame materials and your kayak’s plastic or fiberglass surface, preventing scratches, dents, and stress cracks.
Step-by-step padding installation:
- Cut foam to length: Measure the two crossbars that will contact your kayak hull (typically 24-30 inches each); cut pool noodles or pipe insulation 2 inches longer than each bar
- Slit the foam: Use a utility knife to cut a lengthwise slit through one side of the foam so it opens like a clamshell
- Slide onto frame: Open the slit and press the foam onto the PVC or aluminum crossbars; the foam should fit snugly without sliding
- Secure the foam: Wrap zip ties or hose clamps every 6-8 inches along the foam to prevent it from rotating or sliding off during use
- Add extra padding: For kayaks with pronounced hull ridges or keel lines, add a second layer of foam at contact points
Strap placement tips:
- Position straps across the widest part of the kayak hull for maximum stability
- Use cam buckle straps (not ratchet straps) to avoid over-tightening, which can dent plastic hulls
- Run straps through scupper holes if your sit-on-top kayak has them positioned near the cart
- Tighten straps just enough to prevent the kayak from shifting; you should be able to slide two fingers under the strap
Common mistake: Placing the cart too far forward or back on the kayak, creating an unbalanced load. The cart should sit slightly behind the kayak’s center of gravity (usually near the seat area) so the bow naturally tilts up slightly when you pull the cart. This prevents the nose from dragging on the ground.
For kayak stability during transport, the kayak should rest in the cart’s cradle with at least 12 inches of hull contact on each crossbar. Narrow contact points concentrate weight and increase scratch risk.
DIY Kayak Cart Plans for Heavy Kayaks
Heavy kayaks (80-120 pounds) require reinforced aluminum frames, wider stance (28-32 inches), larger diameter wheels (12 inches minimum), and dual crossbar support to distribute weight without flexing. Standard PVC carts lack the structural integrity for kayaks in this weight range, especially when loaded with fishing gear.
Reinforced cart specifications:
- Frame material: 1-inch square aluminum tubing with 1/8-inch wall thickness
- Cart width: 28-32 inches between wheels (wider base prevents tipping)
- Crossbar spacing: Two padded crossbars spaced 18-24 inches apart (distributes weight across more hull surface)
- Wheel size: 12-inch diameter balloon wheels rated for 150+ pounds each
- Axle: 3/4-inch or 1-inch steel rod with grade 8 bolts and lock washers
- Bracing: Diagonal support bars connecting corners to prevent frame racking
Build modifications for heavy kayaks:
- Double-wall construction: Use two layers of aluminum tubing at stress points (where crossbars meet the main frame)
- Gusseted corners: Add triangular aluminum plates at T-joints and corners, secured with bolts through pre-drilled holes
- Reinforced axle mounts: Create axle mounting blocks from 2-inch aluminum angle iron rather than drilling directly through frame tubes
- Weight distribution: Position crossbars to support the kayak at its two widest points, typically 18-24 inches apart
Testing weight capacity: Before loading your expensive fishing kayak, test the cart with sandbags or water jugs totaling 120-150 pounds. Roll the loaded cart 50-100 feet over the terrain you’ll actually use. Watch for frame flexing, wheel wobble, or foam padding compression that indicates weak points.
For tandem fishing kayaks or kayaks with heavy trolling motor setups, consider building a cart with four wheels instead of two. A four-wheel design (two axles) distributes weight more evenly and provides better stability but requires more complex construction.
Why Does My Homemade Kayak Cart Tip Over on Sand
Kayak carts tip on sand when wheels are too narrow and sink, the cart width is insufficient for the kayak’s beam, or the load sits too high above the axle. Sand creates an unstable surface that amplifies any balance issues in cart design, especially when one wheel encounters softer sand than the other.
Primary tipping causes and fixes:
Narrow wheels sinking: Standard 8-inch wheels with 2-inch width dig into soft sand, creating uneven support. Solution: Upgrade to 10-12 inch balloon wheels with 3-4 inch width that “float” on sand surface rather than sinking.
Insufficient cart width: A cart that’s narrower than your kayak’s widest point creates a top-heavy configuration. Solution: Build or modify the cart so the wheel track (distance between wheels) is at least 24 inches, preferably 28-30 inches for wider fishing kayaks.
High center of gravity: Crossbars positioned too high on the frame raise the kayak’s center of gravity. Solution: Mount crossbars as low as possible while maintaining 3-4 inches of ground clearance for the kayak hull.
Uneven weight distribution: Kayak positioned too far forward or back on the cart. Solution: Adjust cart placement so the kayak’s center of gravity sits directly over the axle; the bow should tilt up slightly (5-10 degrees) when pulling the cart.
Single-side loading: Gear stored in only one side of the kayak. Solution: Distribute fishing gear, coolers, and equipment evenly between port and starboard sides, or remove heavy items before transport.
Testing stability: Load your kayak on the cart and pull it across level ground first. If it feels stable, try sand. Start on firm, damp sand near the waterline before attempting soft, dry sand higher on the beach. If the cart tips during testing, widen the wheel base before using it with your expensive kayak.
For anglers who primarily launch from sandy beaches, building a wider cart from the start (30-inch wheel track) prevents tipping issues entirely. The extra width adds minimal weight but dramatically improves kayak balance during transport.
Can I Use a Kayak Cart on Rocky Terrain
A well-built kayak cart works on rocky terrain if it has solid rubber wheels (not pneumatic), adequate ground clearance (4-5 inches minimum), and a reinforced aluminum frame that won’t bend when wheels drop into gaps between rocks. PVC carts risk cracking if the frame strikes rocks, making aluminum the better choice for rough launches.
Rocky terrain requirements:
- Wheel type: Solid rubber or semi-pneumatic wheels that won’t puncture on sharp rocks; 10-12 inch diameter to roll over obstacles
- Frame material: Aluminum tubing that absorbs impacts without cracking
- Ground clearance: Minimum 4 inches between the lowest frame point and ground to prevent frame-rock contact
- Wheel mounting: Reinforced axle mounts that won’t bend when wheels drop into rock gaps
- Padding: Extra-thick foam (double-layer pool noodles) to absorb vibration and prevent hull damage
Technique for rocky launches:
- Scout the path before loading your kayak to identify the smoothest route
- Pull the cart slowly (1-2 mph walking speed) to maintain control
- Lift the cart slightly when approaching large rocks rather than forcing wheels over them
- Keep weight centered over the axle to prevent tipping when one wheel drops
- Consider using a second person to stabilize the kayak on very rough terrain
Limitations: Even the best DIY cart struggles with boulder fields or extremely uneven surfaces where rocks are larger than your wheel diameter. In these conditions, carrying the kayak or using a two-person carry with handles works better than any wheeled cart.
Alternative approach: Some anglers build a hybrid cart with removable wheels. For the rocky section, remove the wheels and use the frame as a sled or carrying handles. Once past the rocks, reattach wheels for easier rolling on smoother ground.
Rocky terrain accelerates wear on both wheels and frame. Inspect your cart after each use, checking for cracks in PVC, bent aluminum, loose bolts, and worn wheel treads. Solid rubber wheels last longer than pneumatic on rocks but eventually develop flat spots that create a bumpy ride.
Is a DIY Kayak Cart Worth It for Occasional Use
A DIY kayak cart is worth building for occasional use (5-10 trips per year) because the $30-50 cost and 2-hour build time pay off after just a few launches compared to dragging a kayak or buying a $100+ commercial cart. Even infrequent anglers benefit from reduced physical strain and faster launch times.
Value calculation for occasional users:
- Time saved per launch: 5-10 minutes compared to dragging or carrying
- Physical effort: Reduces strain on back and shoulders, especially important for anglers over 50 or those with mobility limitations
- Kayak protection: Prevents hull scratches and wear from dragging across pavement or gravel
- Break-even point: After 3-5 uses, the time and effort saved justifies the build investment
Occasional use considerations:
Storage: DIY carts store easily in garages, sheds, or vehicle cargo areas. PVC carts weigh 5-8 pounds and fit in most truck bed kayak setups alongside your kayak.
Durability: A properly built cart lasts 5-10 years with minimal maintenance, even with occasional use. PVC doesn’t degrade from sitting unused, and wheels don’t require maintenance between trips.
Versatility: Once you own a cart, you’ll likely use it more often than planned. Many anglers report fishing more frequently because the cart eliminates the physical barrier of kayak transport.
Resale value: If you decide kayak fishing isn’t for you, a well-built DIY cart sells easily on local marketplaces for $30-50, recovering most of your material costs.
When to skip building: If you kayak less than 3-4 times per year and always launch from locations with direct vehicle-to-water access (no carry distance), the cart may sit unused. In this case, consider borrowing a cart from a fishing buddy or renting one at the launch site if available.
For beginner kayak fishing enthusiasts testing whether the sport suits them, building a basic PVC cart makes sense. The low cost and simple construction don’t require a major commitment, but the cart significantly improves the launch experience.
Common Mistakes When Building a Kayak Cart
The most frequent DIY kayak cart mistakes include making the frame too narrow (under 24 inches), using wheels that are too small (under 8 inches), positioning crossbars too far apart, forgetting to add foam padding, and over-tightening PVC joints that crack under stress. These errors create carts that tip easily, roll poorly, or damage kayak hulls.
Critical mistakes and corrections:
Mistake 1: Insufficient width
Building a cart narrower than 24 inches creates instability, especially on uneven ground. Fix: Measure your kayak’s beam (width) and build the cart at least 24 inches wide, preferably 28-30 inches for wider fishing kayaks.
Mistake 2: Wrong wheel size
Using 6-8 inch wheels saves money but creates excessive rolling resistance and poor obstacle clearance. Fix: Invest in 10-12 inch wheels; the $5-10 extra cost dramatically improves performance.
Mistake 3: Crossbar spacing
Placing crossbars more than 24 inches apart concentrates weight on two narrow points, increasing hull stress. Fix: Space crossbars 18-24 inches apart to distribute weight across more hull surface.
Mistake 4: Skipping padding
Direct PVC or aluminum contact scratches hulls and creates pressure points. Fix: Always wrap crossbars with pool noodles or foam pipe insulation before first use.
Mistake 5: Over-tightening joints
Forcing PVC joints together or over-tightening bolts on aluminum frames creates stress cracks. Fix: For PVC, apply cement and press joints together firmly but don’t force; for aluminum, tighten bolts snug but not torqued.
Mistake 6: Poor axle mounting
Drilling axle holes off-center or using undersized hardware causes wheel wobble. Fix: Measure carefully and drill axle holes at exactly the same height on both sides; use washers on both sides of each wheel.
Mistake 7: Ignoring balance point
Mounting the cart at the kayak’s midpoint rather than center of gravity. Fix: Test balance by lifting your kayak at different points; mount the cart where the kayak balances naturally with slight bow-up tilt.
Mistake 8: Weak joints
Using PVC T-joints without proper cement or aluminum connections without gussets. Fix: Apply PVC primer and cement to all joints; add corner gussets or diagonal bracing to aluminum frames.
Testing before use: After building your cart, load it with weight (sandbags, water jugs) equal to your kayak plus gear. Roll it 100 feet over the terrain you’ll actually use. This test reveals design flaws before you risk your kayak.
How Wide Should a Kayak Cart Be for Stability
A kayak cart should be 24-30 inches wide (measured between wheel centers) for optimal stability, with wider carts (28-30 inches) recommended for fishing kayaks over 30 inches beam or for use on soft sand and uneven terrain. The cart width directly affects tipping resistance and how well the cart tracks when pulled.
Width guidelines by kayak type:
- Narrow kayaks (under 28″ beam): 24-26 inch cart width provides adequate stability
- Standard fishing kayaks (28-32″ beam): 26-28 inch cart width balances stability and maneuverability
- Wide fishing kayaks (32-36″ beam): 28-30 inch cart width prevents tipping
- Tandem kayaks (34-38″ beam): 30-32 inch cart width required for safe transport
Physics of cart stability: A wider wheel base lowers the center of gravity relative to the track width, increasing the angle required to tip the cart. A 24-inch cart tips at approximately 25-30 degrees of side slope, while a 30-inch cart remains stable up to 35-40 degrees.
Trade-offs of extra width:
Advantages:
- Greater resistance to tipping on uneven ground
- Better stability when one wheel encounters soft sand or a depression
- More confidence when pulling cart across slopes
- Reduced need to carefully balance gear inside kayak
Disadvantages:
- Slightly heavier frame (2-3 extra pounds)
- Requires more material ($5-10 additional cost)
- Less maneuverable in tight spaces (narrow dock ramps, crowded parking areas)
- May not fit through some gates or narrow paths
Measuring your kayak: Before cutting materials, measure your kayak’s beam at its widest point (usually near the seat). Add 2-4 inches to this measurement for minimum cart width. For example, a 30-inch wide kayak needs a minimum 32-inch cart, but 34 inches provides better stability.
Adjustable width option: Some DIY builders create carts with telescoping crossbars that adjust from 24-30 inches. This requires more complex construction (sliding tubes with locking pins) but accommodates multiple kayaks or different terrain conditions.
For most fishing kayak owners launching from varied locations, building a 28-inch wide cart provides the best balance of stability, maneuverability, and universal fit for different kayak sizes.
Do I Need Foam Padding on My DIY Kayak Cart
Foam padding is essential on any DIY kayak cart because it prevents scratches, distributes weight evenly across the hull, reduces vibration during transport, and protects against stress cracks at contact points. Without padding, hard PVC or aluminum creates concentrated pressure points that damage kayak hulls over time.
Why padding matters:
Scratch prevention: Even smooth PVC or aluminum develops rough edges and burrs that scratch polyethylene or fiberglass hulls. Foam creates a protective barrier that prevents surface damage.
Weight distribution: Bare pipes create narrow contact lines (less than 1 inch wide) that concentrate the kayak’s entire weight. Foam padding spreads this load across 2-3 inches of hull surface, reducing stress.
Vibration dampening: Rolling over rough ground transmits vibration through the cart frame. Foam absorbs these shocks, preventing micro-cracks in the hull and reducing wear on cart joints.
Grip: Foam provides friction that prevents the kayak from sliding or rotating on the cart during transport, especially on slopes or when making turns.
Padding options ranked by performance:
- Pool noodles (best value): $3-5 for two noodles; 2.5-3 inch diameter provides excellent cushioning; easy to slit and install; lasts 2-3 seasons
- Foam pipe insulation (most durable): $8-12 for 6 feet; pre-slit for easy installation; denser foam lasts 3-5 seasons; available in various diameters
- Pipe wrap foam (professional option): $15-20; self-adhesive foam designed for pipe protection; longest lifespan but costs more
- Carpet or towel (temporary): Works in a pinch but absorbs water, adds weight, and wears quickly; not recommended for regular use
Installation tips:
- Cut foam 2 inches longer than the crossbar to ensure complete coverage
- Secure foam every 6-8 inches with zip ties or hose clamps to prevent rotation
- Replace foam when it shows compression marks, tears, or loses cushioning (typically every 2-3 years)
- Use contrasting foam colors (bright yellow or orange) to make the cart more visible in parking areas
Common question: “Can I skip padding if I’m careful?” No. Even gentle contact between hard surfaces and kayak hulls creates wear over time. The $5 investment in foam padding prevents hundreds of dollars in hull repair or replacement.
For maximum hull protection, some anglers add a second layer of foam at the two primary contact points where the kayak’s weight concentrates. This double-padding approach works especially well for heavier kayaks or carts used on rough terrain.
Alternatives to Building Your Own Kayak Cart
Commercial folding carts ($80-150), kayak wheels that strap directly to the hull ($40-80), inflatable roller systems ($60-100), and cart rental programs at popular launch sites offer alternatives to building a DIY cart. Each option suits different use cases, budgets, and storage constraints.
Commercial folding carts: Pre-built carts with collapsible frames that fold flat for vehicle storage. Most feature adjustable width, quick-release straps, and corrosion-resistant materials. Best for: anglers who want immediate use without building, those with limited tool access, or anyone who values compact storage over cost savings.
Strap-on kayak wheels: Two-wheel systems that attach directly to the kayak hull with straps, eliminating the separate cart frame. The wheels stay attached while fishing (submerged) or remove quickly. Best for: minimalist anglers, those with limited storage space, or kayakers who launch from locations with short carry distances (under 100 feet).
Inflatable roller systems: Cylindrical inflatable rollers that sit under the kayak, allowing you to roll it like a log. Best for: short distances on smooth surfaces, anglers who want the lightest possible transport option, or as a backup system that stores in a dry bag.
Cart rental programs: Some popular fishing destinations and kayak outfitters offer cart rentals for $5-15 per day. Best for: traveling anglers who fly to fishing destinations, occasional users (1-3 trips per year), or those testing different cart styles before buying or building.
Kayak dolly services: At high-traffic launches, commercial services transport kayaks from parking to water for $10-20. Best for: anglers with mobility limitations, those fishing in unfamiliar locations, or when launching during peak times with long carry distances.
Comparison table:
| Option | Cost | Setup Time | Storage Space | Best Use Case |
|---|---|---|---|---|
| DIY PVC cart | $30-50 | 2 hours build | Medium (garage) | Regular use, customization |
| DIY aluminum cart | $60-80 | 3 hours build | Medium (garage) | Heavy kayaks, rough terrain |
| Commercial cart | $80-200 | 0 (ready to use) | Small (folds flat) | Immediate need, convenience |
| Strap-on wheels | $40-80 | 5 minutes | Very small | Short distances, minimalist |
| Inflatable roller | $60-100 | 2 minutes | Very small (deflates) | Smooth surfaces, backup |
| Rental | $5-15/day | 0 | None | Occasional use, travel |
Decision framework: Build a DIY cart if you fish 10+ times per year and have basic tools. Buy a commercial cart if you need a solution today and value convenience over cost. Choose strap-on wheels if you prioritize minimal storage space. Rent if you kayak fewer than 5 times annually.
For anglers who want to explore DIY kayak transport options beyond carts, consider building a truck bed slide system or roof rack with rollers that complement your cart for complete transport coverage from home to water.
Kayak Cart for Tandem Kayak DIY Instructions
Building a cart for a tandem kayak requires a reinforced aluminum frame 32-36 inches wide, dual crossbars spaced 24-30 inches apart, 12-inch balloon wheels rated for 200+ pounds, and a 1-inch steel axle with grade 8 hardware. Tandem kayaks weigh 80-120 pounds empty and require stronger construction than standard single-kayak carts.
Tandem cart specifications:
- Frame: 1-inch square aluminum tubing with 1/8-inch wall thickness
- Width: 32-36 inches between wheels (matches tandem kayak beam of 34-38 inches)
- Length: 36-40 inches from front to back (accommodates two crossbars with proper spacing)
- Crossbars: Two padded bars spaced 24-30 inches apart to distribute 100+ pound load
- Wheels: 12-inch diameter balloon wheels with 4-inch width, rated for 150 pounds each
- Axle: 1-inch diameter steel rod or heavy-duty bolt-through axle
- Bracing: Diagonal support bars connecting all four corners for rigidity
Build steps for tandem cart:
- Cut frame pieces: Four pieces of aluminum tubing (two at 36 inches for sides, two at 32 inches for crossbars)
- Create corner joints: Use aluminum corner brackets and 1/4-inch bolts to connect frame pieces at right angles
- Add diagonal bracing: Cut two 40-inch pieces and bolt diagonally from front corners to rear corners for rigidity
- Mount axle: Install axle mounts (aluminum angle iron) 4 inches from the bottom of the frame on each side
- Install wheels: Thread 1-inch steel rod through axle mounts and wheels; secure with washers and lock nuts
- Add crossbar padding: Wrap both crossbars with double-layer foam padding secured with hose clamps
- Install handles: Add a T-handle or loop at the front for pulling
Weight distribution for tandem kayaks: Position the cart so the two crossbars contact the kayak at points roughly 1/3 and 2/3 along the hull length. This distributes weight evenly and prevents excessive bow or stern droop. For a 14-foot tandem kayak, crossbars should be approximately 4.5 feet and 9.5 feet from the bow.
Testing procedure: Before loading your tandem kayak, test the cart with 150 pounds of weight (sandbags, water jugs, or a single kayak plus gear). Roll the loaded cart 100 feet over your typical launch terrain. Check for frame flex, wheel wobble, or loose joints. Tandem kayaks create significantly more stress than singles, so thorough testing prevents failures with your expensive kayak loaded.
Reinforcement options: If the basic frame shows any flex during testing, add:
- Gusset plates at all corner joints
- A third crossbar in the center for additional support
- Upgraded wheels (pneumatic tires with sealed bearings)
- Wider aluminum tubing (1.25-inch square instead of 1-inch)
For anglers who frequently transport tandem fishing kayaks, investing in quality materials and reinforced construction pays off in durability and peace of mind. A well-built tandem cart lasts 10+ years with proper maintenance.
Frequently Asked Questions
How long does it take to build a DIY kayak cart?
A basic PVC kayak cart takes 1-2 hours to build, including cutting pipes, gluing joints, and installing wheels. Aluminum carts require 2-3 hours because of metal cutting, drilling, and bolting. First-time builders should allow an extra hour for measuring and adjusting.
Can I use a kayak cart for a sit-inside kayak?
Yes, kayak carts work for both sit-on-top and sit-inside kayaks. Position the cart under the cockpit area where the hull is widest and strongest. Sit-inside kayaks may need narrower cart spacing (22-26 inches) compared to wider sit-on-top fishing kayaks.
How do I store a DIY kayak cart when not in use?
Store PVC or aluminum carts in a garage, shed, or vehicle cargo area. Hang the cart on wall hooks to save floor space, or store it vertically in a corner. Remove any straps or bungee cords to prevent elastic degradation. Carts stored outdoors should be covered to protect foam padding from UV damage.
Will a kayak cart work on boat ramps?
Kayak carts work well on concrete boat ramps with solid rubber or pneumatic wheels. Avoid using carts on steep ramps (over 20-degree slope) where the kayak might slide off. For steep ramps, use a second person to stabilize the kayak or carry it instead.
How much weight can a PVC kayak cart hold?
A properly built PVC cart using 1.5-inch Schedule 40 pipe handles 80-100 pounds safely. This accommodates most single fishing kayaks plus light gear. For kayaks over 80 pounds or heavy gear loads, build an aluminum cart instead.
Do I need to remove the cart before launching my kayak?
Yes, remove the cart before launching. Most carts detach in 10-15 seconds by releasing straps and lifting the kayak off. Some anglers wade into shallow water with the cart, then remove it once the kayak floats. Never leave the cart attached while paddling.
Can I build a cart that folds for storage?
Yes, but folding mechanisms add complexity. Use hinged joints with locking pins at the corners, allowing the frame to collapse flat. Folding carts require more precise construction and cost $10-20 extra for hardware, but they store in smaller spaces like vehicle trunks.
What’s the best way to pull a kayak cart?
Attach a rope or strap to the front of the cart frame and pull from the side of the kayak (not directly in front). This gives you better visibility and control. Pull at a steady walking pace (2-3 mph) to maintain stability. On slopes, walk beside the cart rather than in front to prevent it from rolling into you if it gets away.
How often should I replace the foam padding?
Replace foam padding every 2-3 years or when it shows permanent compression marks, tears, or loses cushioning. Pool noodles typically last 2-3 seasons; denser pipe insulation lasts 3-5 years. Inspect padding before each season and replace if damaged.
Can I use a kayak cart on grass?
Kayak carts work on short, firm grass but struggle on tall grass or soft, muddy ground. Balloon wheels perform better on grass than solid rubber wheels. For long distances across grass, consider using a two-person carry or dragging the kayak on a tarp instead.
Do I need a permit to use a kayak cart at public launches?
Most public launches allow kayak carts without permits. Some crowded launches prohibit leaving carts unattended in parking areas or on ramps. Check local regulations at your specific launch site. Private marinas may have their own cart policies.
How do I prevent my cart from being stolen?
Use a cable lock to secure the cart to your vehicle or a fixed object when not in use. Engrave your name or phone number on the frame. At busy launches, take the cart with you or lock it to a dock post. Most thieves avoid marked equipment that’s easily identifiable.
Conclusion
Building a DIY kayak cart transforms your fishing experience by eliminating the physical strain of dragging heavy kayaks across parking lots, beaches, and boat ramps. For $30-80 in materials and 2-3 hours of work, you’ll create a custom transport solution that matches your specific kayak, launch conditions, and budget.
The key decisions center on frame material (PVC for lighter kayaks under 80 pounds, aluminum for heavier loads), wheel selection (balloon tires for sand, solid rubber for pavement), and proper width (24-30 inches for stability). Don’t skip the foam padding, it’s the difference between a cart that protects your investment and one that causes expensive hull damage.
Your next steps:
- Measure your kayak’s weight, beam width, and typical launch terrain
- Choose PVC or aluminum based on your kayak weight and conditions
- Purchase materials from the shopping list provided (budget $30-80)
- Set aside 2-3 hours for construction in a garage or driveway
- Test the cart with weight before loading your kayak
- Adjust crossbar position and padding as needed for your specific kayak
Start with a basic PVC design if you’re new to DIY projects. The skills and experience transfer directly to building an upgraded aluminum cart later if needed. Most anglers find that even a simple homemade cart dramatically improves their launch routine and encourages more frequent fishing trips.
For more kayak transport solutions, explore our guides on kayak transport and DIY kayak transport options that complement your new cart.





