
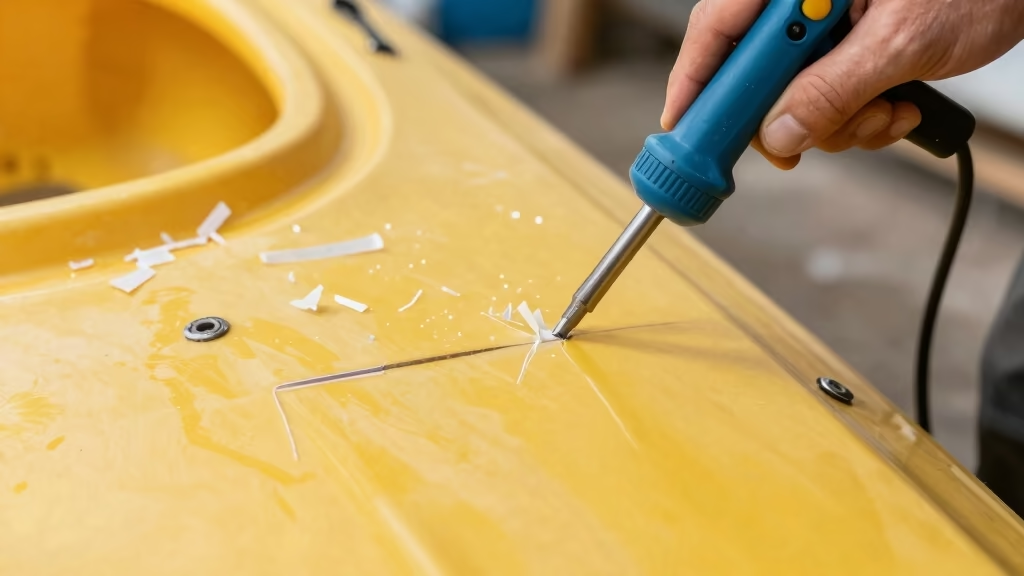
Dragging your fishing kayak over rocky shorelines or scraping against submerged logs leaves more than cosmetic damage—deep scratches and gouges compromise hull integrity and can lead to cracks or leaks. Learning how to repair kayak scratches using plastic welding basics gives you a permanent, waterproof fix that restores structural strength without expensive professional help. This guide walks you through identifying damage that needs welding, choosing the right equipment, and executing repairs that last for years of hard fishing use.
Key Takeaways
- Plastic welding permanently fuses polyethylene kayak material by melting a plastic rod into scratches and gouges, creating a molecular bond stronger than epoxy
- Most fishing kayaks are made from rotomolded polyethylene, which responds well to plastic welding but requires temperatures between 400-600°F
- Deep scratches (more than 1/8 inch) and structural cracks need plastic welding, while shallow surface scratches can be buffed or left alone
- Professional kayak scratch repair costs $75-$200 depending on damage severity, but DIY plastic welding kits run $40-$80 for unlimited repairs
- Common mistakes include overheating the base material, using incompatible plastic rods, and failing to properly clean and prepare the damaged area
- Plastic welding only works on thermoplastic kayaks (polyethylene, ABS) and will not repair fiberglass, composite, or thermoset plastic hulls
- A proper weld creates a watertight, permanent repair that maintains hull flexibility and can withstand years of fishing pressure
What Is Plastic Welding for Kayaks?
Plastic welding for kayaks is a repair technique that uses heat to melt and fuse plastic material directly into cracks, gouges, or holes in the hull. Unlike adhesives that sit on top of the surface, plastic welding creates a molecular bond by melting a compatible plastic rod (filler material) into the damaged area, essentially making the repair part of the original structure. This method works specifically on thermoplastic kayaks—plastics that soften when heated and re-harden when cooled.
The process involves three key elements: a heat source (typically a specialized plastic welding gun), a plastic welding rod that matches your kayak’s material composition, and proper surface preparation. When done correctly, the melted rod flows into the scratch or crack and bonds at the molecular level with the surrounding kayak plastic, creating a repair that’s often stronger than the original material.
Why plastic welding beats other repair methods:
- Creates permanent, waterproof seals that won’t delaminate over time
- Maintains the hull’s flexibility and impact resistance
- Allows repairs in high-stress areas like the keel and hull bottom
- Works on damage ranging from hairline cracks to large gouges
- Doesn’t add rigid patches that can crack under flex
For fishing kayak enthusiasts who regularly launch from rocky beaches or navigate shallow rivers, plastic welding is the gold standard for structural repairs. The technique requires practice but delivers professional-grade results once you understand the basics of heat control and material flow.
What Type of Plastic Are Kayaks Made Of?
Most fishing kayaks are constructed from high-density polyethylene (HDPE) or linear low-density polyethylene (LLDPE) using a rotomolding process. These thermoplastic materials make up roughly 85-90% of recreational and fishing kayaks on the market because they’re durable, impact-resistant, UV-stable, and affordable. Polyethylene kayaks can flex under stress without cracking and return to their original shape, making them ideal for rough fishing conditions.
A smaller percentage of kayaks use ABS plastic (acrylonitrile butadiene styrene), which is also a thermoplastic that can be plastic welded. ABS kayaks tend to be lighter and more rigid than polyethylene models but are less common in the fishing kayak market.
Kayaks that CANNOT be plastic welded:
- Fiberglass kayaks – These use resin-based composite construction requiring fiberglass cloth and epoxy repairs
- Carbon fiber or Kevlar composites – Need specialized composite repair techniques
- Thermoset plastics – Once cured, these materials cannot be re-melted
- Inflatable kayaks – Made from PVC or other fabrics requiring patch adhesives
To identify your kayak’s material, check the manufacturer’s specifications or look for a recycling symbol on the hull (HDPE is marked with #2, LLDPE with #4). If you’re unsure, test a small inconspicuous area with a heat gun on low setting—polyethylene will soften and become glossy when heated, while fiberglass will not change. Understanding your kayak’s material is critical before attempting any repair, as using the wrong technique or incompatible welding rod will result in a failed repair.
How to Tell If Kayak Scratch Needs Plastic Welding or Just Buffing
Surface scratches less than 1/16 inch deep that don’t penetrate through the outer colored layer of plastic typically don’t need plastic welding and can be buffed out or simply left alone. These cosmetic scratches don’t compromise hull integrity and won’t lead to leaks. Run your fingernail across the scratch—if it doesn’t catch or you can’t feel a significant groove, buffing with fine-grit sandpaper (400-600 grit) followed by a heat gun pass to re-gloss the surface is sufficient.
Deep gouges, cracks, or scratches that expose white plastic beneath the colored surface layer require plastic welding for proper repair. These penetrate into the structural layer of the hull and can propagate into larger cracks under stress, especially in high-flex areas like the keel or near scupper holes. If you can see daylight through the damage, feel sharp edges, or notice the scratch flexes when you press on either side, plastic welding is necessary.
Decision criteria for repair method:
| Damage Type | Depth | Repair Method | Urgency |
|---|---|---|---|
| Light surface scratch | Less than 1/16″ | Buff or ignore | Low |
| Moderate scratch | 1/16″ to 1/8″ | Heat buffing or light weld | Medium |
| Deep gouge | More than 1/8″ | Full plastic weld | High |
| Crack (any length) | Through hull | Plastic weld immediately | Critical |
| Hole or puncture | Any size | Plastic weld with backing | Critical |
Common mistake: Many kayak anglers over-repair minor scratches that don’t affect performance. Every fishing kayak will accumulate surface scratches over time—these are normal wear and don’t require intervention unless they’re deep enough to compromise the hull structure. Focus your repair efforts on damage that actually threatens the kayak’s integrity or waterproofness, and you’ll save time and avoid unnecessary modifications to your hull.
For guidance on maintaining your kayak’s overall condition and kayak stability during repairs, proper assessment of damage severity is your first step toward effective maintenance.
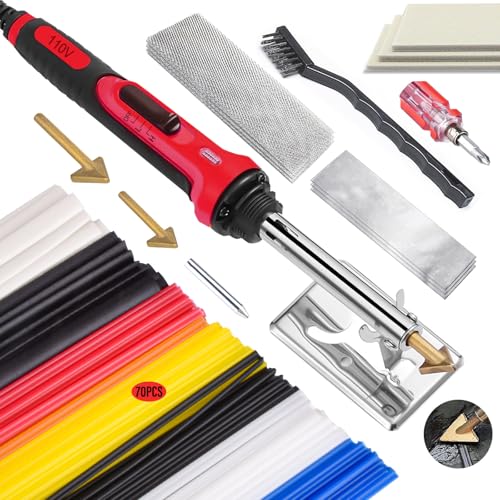
UPGRADED 150W RAPID HEATING - This 150W plastic weld adopts advanced ceramic heating chip, It can be heated to 1112 ℉ in 15-20 seconds. By quickly heating, melting, and repairing, the plastic welding gun reassembles broken plastic to extend the lifespan of items, saving a significant amount of time and money. Compared with the traditional tungsten wire chips, it not only heats up faster, but also lasts 10 times longer than the traditional tungsten chip. And this plastic welding with 6 ventilation holes, it helps to dissipate heat quickly. The design of plastic handle insulation is not easy to deform and don't worry about burning your hands.

UPGRADED 150W RAPID HEATING - This 150W plastic weld adopts advanced ceramic heating chip, It can be heated to 1112 ℉ in 15-20 seconds. By quickly heating, melting, and repairing, the plastic welding gun reassembles broken plastic to extend the lifespan of items, saving a significant amount of time and money. Compared with the traditional tungsten wire chips, it not only heats up faster, but also lasts 10 times longer than the traditional tungsten chip. And this plastic welding with 6 ventilation holes, it helps to dissipate heat quickly. The design of plastic handle insulation is not easy to deform and don't worry about burning your hands.

220W Rapid Heating:The plastic welding machine has a power of 220 watts and a 110V-US plug, which has higher output current and faster heating speed. Using heat to embed nails or plastic rods into plastic will not cause damage to the car or plastic surface, and is very sturdy. Not only are there two repair methods to choose from: welding rods and hot nails, but there is also an overheat protection device to ensure your safety
Can You Plastic Weld a Polyethylene Kayak at Home?
Yes, you can successfully plastic weld a polyethylene kayak at home with the right equipment and technique. The process requires a plastic welding gun (or high-temperature heat gun), compatible polyethylene welding rods, basic safety equipment, and a clean workspace. Home repairs using plastic welding basics can achieve professional-quality results that last for years, provided you follow proper temperature control and preparation steps.
Essential equipment for home kayak plastic welding:
- Plastic welding gun – Dedicated welding tools ($40-$150) offer better temperature control than general heat guns
- Polyethylene welding rods – Must match your kayak’s plastic type (HDPE or LLDPE); typically sold in 1/8″ or 3/16″ diameter
- Safety gear – Heat-resistant gloves, safety glasses, and adequate ventilation
- Surface prep tools – Wire brush, sandpaper (80-120 grit), degreaser or isopropyl alcohol
- Finishing tools – Utility knife or scraper for trimming excess material, additional sandpaper for smoothing
The learning curve is moderate—your first repair may look rough, but the technique becomes intuitive after practicing on scrap plastic or in inconspicuous areas. Start with small scratches before tackling major structural damage. The key advantage of home repair is cost savings: professional repairs run $75-$200 per incident, while a complete welding kit costs $40-$80 and handles unlimited repairs over your kayak’s lifetime.
Choose home plastic welding if:
- You have multiple scratches or anticipate future damage from your fishing style
- You’re comfortable working with power tools and heat equipment
- You want immediate repairs without waiting for shop appointments
- You fish remote locations where professional repair access is limited
Consider professional repair if:
- The damage is in a critical structural area (hull seams, bulkheads)
- You’re dealing with a crack longer than 6 inches
- Your kayak is under warranty (DIY repairs may void coverage)
- You lack a safe workspace with proper ventilation
Most fishing kayak enthusiasts find that learning basic plastic welding pays for itself after 2-3 repairs and provides peace of mind when fishing rocky shorelines or shallow waters where hull damage is common.
Plastic Welding Gun Temperature for Kayak Repair
Polyethylene kayak repairs require welding temperatures between 400-600°F (204-316°C), with the optimal range being 450-500°F for most HDPE and LLDPE hulls. This temperature range is hot enough to melt the welding rod and soften the base kayak material for proper fusion, but not so hot that it burns, bubbles, or degrades the plastic structure. Temperature control is the single most critical factor in achieving a strong, lasting repair.
Most dedicated plastic welding guns feature adjustable temperature dials or multiple heat settings. If using a general-purpose heat gun, look for models with variable temperature control rather than simple high/low settings. The welding rod should melt smoothly and flow into the damaged area without smoking or producing a burnt smell—both signs that your temperature is too high.
Temperature guidelines by plastic type:
- HDPE (high-density polyethylene) – 500-550°F optimal; can handle higher temps without degradation
- LLDPE (linear low-density polyethylene) – 450-500°F optimal; more sensitive to overheating
- ABS plastic – 400-450°F optimal; lower melting point than polyethylene
Signs your temperature is correct:
- Welding rod melts smoothly and flows like honey
- Base material becomes slightly glossy and tacky but doesn’t bubble
- No smoke, burning smell, or discoloration
- Weld bead adheres immediately without gaps
Signs your temperature is too high:
- Plastic smokes or produces acrid odor
- Base material bubbles, chars, or turns brown/black
- Welding rod drips rapidly or burns away
- Surrounding area becomes overly soft or distorted
Signs your temperature is too low:
- Welding rod doesn’t melt or melts very slowly
- Poor adhesion—weld bead can be peeled off easily
- Weld appears dull and grainy rather than smooth
- Rod sits on surface rather than fusing into the scratch
Start at the lower end of the temperature range and increase gradually until you achieve smooth flow and good adhesion. Practice on scrap polyethylene or an inconspicuous area of your kayak before tackling visible repairs. Remember that ambient temperature affects welding—cold workshop conditions may require slightly higher settings, while hot summer repairs may need lower temperatures.

150W RAPID HEATING: The upgraded 150W plastic welder adopts advanced ceramic heating core, which can be heated to the desired temperature within 15 seconds. The body of the plastic welding gun is designed with upgraded tube, which is sturdy and durable. And with 6 ventilation holes, it helps to dissipate heat quickly, which can reduce the temperature conducted from the soldering iron tip to the handle, which greatly improves your working efficiency compared to the old plastic welding kit.

Multipurpose Fit: Repairs at least 98% of the plastics on the market. Suitable for repairing: bumper, dashboard, lamp holder, plastic ring, radiator, spoiler, handles, headlights, plastic wings, car and motorcycle plastic device, etc

【1600W Hot Air Plastic Welder】 This 1600W plastic hot air welding gun produces a jet of hot air for shaping, bending and welding thermoplastic materials. Professional hot air roofing welder, built-in fan and integrated design, compact and handheld for use, easy-carrying and must-have tool for both beginner and professionals.
Do I Need to Plastic Weld Small Scratches or Just Deep Gouges?
You only need to plastic weld scratches that penetrate deeper than 1/8 inch or expose the white structural layer of your kayak hull. Small surface scratches that only affect the colored outer layer don’t compromise hull integrity and can be left as-is or simply buffed for cosmetic improvement. Deep gouges, cracks, and any damage that goes through the hull wall require plastic welding to prevent crack propagation and maintain waterproof integrity.
The colored outer layer of most rotomolded kayaks is approximately 1/16 to 1/8 inch thick, serving primarily as UV protection and aesthetics. Scratches that stay within this layer won’t lead to structural failure. However, once damage reaches the white or natural-colored polyethylene beneath, you’ve compromised the load-bearing structure of the hull, and the scratch can develop into a crack under flex stress—especially in high-impact areas like the bow, stern, or keel line.
Repair decision framework:
Skip plastic welding for:
- Hairline surface scratches you can barely feel
- Cosmetic scuffs that don’t catch your fingernail
- Scratches in low-stress areas (deck, sides above waterline) that don’t expose white plastic
- Battle scars that don’t affect performance (many anglers wear these as badges)
Plastic weld immediately for:
- Any crack, regardless of length—cracks propagate under stress
- Gouges deeper than 1/8 inch, especially on the hull bottom
- Scratches near stress points (scupper holes, rod holder mounts, seat tracks)
- Damage in the keel or chine areas that flex during paddling
- Any puncture or hole, no matter how small
Consider plastic welding for:
- Moderate scratches (1/16″ to 1/8″ deep) in high-stress areas
- Multiple parallel scratches that could weaken a hull section
- Damage that’s starting to show stress whitening around the edges
A common mistake is over-repairing cosmetic damage. Every fishing kayak will accumulate scratches—it’s part of the sport. Focus your repair efforts on structural damage that actually threatens hull integrity. That said, if you’re learning plastic welding, practicing on minor scratches in inconspicuous areas builds skill before you tackle critical repairs.
For anglers who frequently fish shallow waters or rocky areas, understanding when repairs are necessary helps maintain your kayak’s longevity. Check out our guide on kayak safety for more tips on preventing and addressing damage during your fishing trips.
How to Repair Kayak Scratches Using Plastic Welding Basics (Step-by-Step)
Plastic welding a kayak scratch involves five key steps: surface preparation, temperature setup, welding rod application, cooling, and finishing. The entire process takes 15-30 minutes per repair depending on damage size, with most of that time spent on proper preparation and cooling. Rushing any step—especially surface prep—will result in weak adhesion and repair failure.
Step 1: Clean and Prepare the Damaged Area
Remove all dirt, oil, fish slime, and oxidation from the scratch and surrounding area. Use a wire brush or 80-grit sandpaper to roughen the scratch interior and create a 1-inch border of abraded surface around the damage. Clean thoroughly with isopropyl alcohol or degreaser and let dry completely. For deep gouges, use a utility knife to create a V-groove profile—this gives the welding rod more surface area to bond with and creates a stronger repair.
Preparation checklist:
- Wire brush or sand the scratch interior until shiny and rough
- Abrade 1-inch border around damage for better adhesion
- V-groove deep scratches (wider at top, narrower at bottom)
- Clean with alcohol and allow to dry fully
- Position kayak so repair area is horizontal and accessible
Step 2: Set Up Your Welding Equipment
Set your plastic welding gun to 450-500°F and allow it to preheat for 3-5 minutes. Select a polyethylene welding rod that matches your kayak’s material (HDPE or LLDPE—check manufacturer specs or test on scrap). Cut the rod at a 45-degree angle to create a pointed tip for easier starting. Put on heat-resistant gloves and safety glasses, and ensure adequate ventilation in your workspace.
Step 3: Apply the Welding Rod
Hold the welding gun at a 45-degree angle about 1/2 inch above the scratch. Touch the pointed welding rod tip to the start of the scratch while directing heat at both the rod and the base material. As the rod begins to melt, apply gentle downward pressure and move slowly along the scratch, allowing the melted plastic to flow into the groove. The rod should melt smoothly and fuse with the base material—you’re not just filling the scratch, you’re creating a molecular bond.
Welding technique tips:
- Move at a steady pace—about 1 inch every 3-5 seconds
- Keep consistent pressure; don’t force the rod or it will bend
- Slightly overfill the scratch; you’ll trim excess later
- For long scratches, work in 6-8 inch sections to maintain control
- If the rod doesn’t stick, increase temperature slightly
- If base material bubbles, reduce temperature immediately
Step 4: Allow Proper Cooling
Let the repair cool naturally for at least 15-20 minutes before touching or stressing the area. Polyethylene continues to bond and strengthen as it cools, and disturbing the weld during this phase can create weak spots or separation. Don’t use water or compressed air to speed cooling—rapid temperature changes can cause cracking or poor adhesion.
Step 5: Trim and Finish the Repair
Once fully cooled, use a sharp utility knife or scraper to trim excess welding rod material flush with the hull surface. Sand the repair area with progressively finer grits (120, 220, then 400) until smooth and level with the surrounding hull. For a more finished appearance, briefly pass the heat gun over the sanded area at low temperature to re-gloss the surface, but this is optional and purely cosmetic.
Common mistakes to avoid:
- Skipping surface preparation (causes 80% of repair failures)
- Moving too fast—the rod needs time to fuse, not just fill
- Using incompatible plastic rod types (HDPE rod on LLDPE kayak or vice versa)
- Overheating and burning the base material
- Disturbing the repair before it’s fully cooled
- Not V-grooving deep scratches, resulting in shallow, weak repairs
For your first repair, practice on scrap polyethylene or an inconspicuous area of your kayak’s hull. The technique feels awkward initially but becomes intuitive after 2-3 attempts. Once mastered, you’ll be able to repair damage in the field with a portable heat gun and spare welding rods.
Difference Between Plastic Welding and Using Epoxy on Kayak Scratches
Plastic welding creates a molecular bond by melting and fusing plastic material, while epoxy creates a mechanical bond by adhering to the surface. Plastic welding becomes part of the kayak’s structure and maintains flexibility, whereas epoxy forms a rigid patch that can crack or delaminate under the hull’s natural flex. For polyethylene fishing kayaks that bend and twist during use, plastic welding provides superior long-term durability.
Key differences:
| Factor | Plastic Welding | Epoxy Repair |
|---|---|---|
| Bond type | Molecular fusion | Surface adhesion |
| Flexibility | Matches hull flex | Rigid, can crack |
| Longevity | Permanent (10+ years) | 1-3 years typical |
| Waterproofing | Completely waterproof | Can develop leaks |
| Strength | Often stronger than original | Depends on adhesion |
| Application | Requires heat gun, practice | Simple mixing and application |
| Best for | Polyethylene kayaks | Fiberglass, composite kayaks |
When to choose plastic welding:
- Repairing polyethylene or ABS plastic kayaks
- Deep structural damage or cracks
- High-stress areas (keel, hull bottom, flex zones)
- Permanent repairs that will last the kayak’s lifetime
- When you want the repair to flex naturally with the hull
When to choose epoxy:
- Repairing fiberglass or composite kayaks (plastic welding won’t work)
- Quick temporary fixes until proper welding is possible
- Very small surface cracks in low-stress areas
- When you lack plastic welding equipment
The fundamental issue with epoxy on polyethylene is poor adhesion—polyethylene is chemically inert and doesn’t bond well with adhesives. Even specialized plastic epoxies create weaker bonds than plastic welding and tend to fail under repeated flex stress. Many kayak anglers who’ve tried epoxy repairs find themselves re-repairing the same damage within a season or two, while properly executed plastic welds last indefinitely.
For fishing kayaks that see regular use in challenging conditions, plastic welding is the professional-grade solution. Epoxy has its place for fiberglass boats or emergency temporary repairs, but it’s not the right tool for polyethylene hull damage.
Is Plastic Welding Permanent for Kayak Cracks?
Yes, properly executed plastic welding creates a permanent repair that often exceeds the strength of the original kayak material. The molecular fusion achieved during plastic welding means the repair becomes an integral part of the hull structure rather than a separate patch or adhesive layer. When done correctly with compatible materials and proper technique, plastic-welded repairs can last the entire remaining life of the kayak—often 10-20+ years depending on use conditions.
The permanence comes from the welding process itself: heating both the welding rod and base material to their melting point allows the polymer chains to intermingle and bond at the molecular level. As the plastic cools, these chains lock together, creating a unified structure. This is fundamentally different from adhesive repairs, which rely on surface bonding that can fail under stress, temperature changes, or UV exposure.
Factors that ensure permanent repairs:
- Material compatibility – Using the correct polyethylene rod type (HDPE or LLDPE) that matches your kayak
- Proper surface preparation – Thoroughly cleaning and abrading the repair area for maximum fusion
- Correct temperature – Achieving full melt and fusion without burning or degrading the plastic
- Adequate cooling time – Allowing the repair to cool naturally without stress or disturbance
- Appropriate technique – V-grooving deep damage and ensuring full penetration of melted material
What can compromise permanence:
- Using incompatible plastic rod types (wrong polymer or additives)
- Insufficient surface preparation leaving contaminants that prevent bonding
- Temperature too low (incomplete fusion) or too high (material degradation)
- Disturbing the repair before it fully cools and bonds
- Attempting to weld thermoset plastics or fiberglass (won’t work at all)
Real-world durability: Many commercial kayak manufacturers use plastic welding for production repairs and warranty work because it’s the most reliable method for polyethylene hulls. Fishing guides and rental operations that put thousands of hours on kayaks annually rely on plastic welding for fleet maintenance, with repairs routinely lasting 5-10 years of heavy commercial use.
The only scenario where a plastic weld might fail is if the surrounding material develops new damage—but in these cases, the weld itself typically remains intact while new cracks form in adjacent areas. This actually demonstrates the repair’s strength: the welded section becomes stronger than the original hull material.
Can You Repair Rotomolded Kayak Scratches Without Welding?
Yes, shallow surface scratches on rotomolded kayaks can be repaired or minimized without plastic welding using heat buffing, sanding, or simply leaving them alone. However, deep gouges, cracks, or structural damage in rotomolded polyethylene kayaks cannot be permanently repaired without plastic welding—alternative methods like epoxy, patches, or sealants provide only temporary fixes that will eventually fail under flex stress.
Non-welding repair options for minor damage:
Heat buffing – For shallow scratches less than 1/16 inch deep, carefully pass a heat gun on low setting (300-350°F) over the scratch while moving continuously. The surface plastic will soften and reflow slightly, reducing the scratch’s visibility. This works best on HDPE kayaks and requires practice to avoid creating shiny spots or over-softening the material.
Sanding and polishing – Use progressively finer sandpaper (400, 600, 800 grit) to level shallow scratches with the surrounding surface. Follow with plastic polish or a brief heat gun pass to restore gloss. This removes material rather than repairing it, so it only works for very shallow cosmetic damage.
Marine sealants – Products like Lexel or 3M 5200 can fill small scratches and provide temporary waterproofing, but they don’t bond well to polyethylene and will eventually peel or wash out. These are emergency fixes, not permanent solutions.
Leaving scratches as-is – Many experienced kayak anglers don’t repair minor surface scratches at all. Rotomolded polyethylene is extremely durable, and shallow scratches don’t affect performance, waterproofness, or structural integrity. Battle scars are normal for fishing kayaks.
What you CANNOT effectively repair without welding:
- Cracks of any length (will propagate under stress)
- Gouges deeper than 1/8 inch (compromise hull structure)
- Holes or punctures (temporary patches will leak eventually)
- Damage in high-stress areas (keel, chines, flex zones)
- Scratches showing stress whitening or crack formation
The rotomolding process creates a uniform, single-piece hull with no seams or joints, which is why these kayaks are so durable. But this same characteristic means that when damage penetrates the structural layer, only a repair method that fuses with the base material—plastic welding—can restore the hull’s integrity. Adhesives and patches sit on top of the slippery polyethylene surface and can’t create the molecular bond needed for permanent repair.
For fishing kayak owners who regularly encounter rocky launches or shallow water obstacles, learning basic plastic welding is a better long-term investment than repeatedly applying temporary fixes. The initial equipment cost pays for itself after 2-3 repairs, and you’ll have the confidence to tackle damage immediately rather than worrying about patch failures mid-trip.
What Happens If I Plastic Weld My Kayak Wrong?
Improper plastic welding typically results in weak repairs that crack, peel, or separate under stress, but it rarely causes additional damage beyond the original scratch if you avoid extreme overheating. The most common failure mode is poor adhesion—the welding rod fills the scratch but doesn’t actually fuse with the base material, creating a repair that looks acceptable but pops out or cracks when the hull flexes. These failed repairs can simply be removed and redone using proper technique.
Common plastic welding mistakes and their consequences:
Overheating the base material – Causes bubbling, charring, or warping of the hull around the repair area. Severe overheating can thin the hull wall or create weak spots more problematic than the original scratch. This is the most serious error and the main reason to practice temperature control before tackling visible repairs.
Using incompatible welding rod – Creates a repair that looks fine initially but separates or cracks within weeks or months because the different plastic types don’t bond properly at the molecular level. Always verify your kayak’s plastic type (HDPE vs. LLDPE) and use matching rod material.
Insufficient surface preparation – Results in poor adhesion where the welding rod sits on top of the scratch rather than fusing into it. These repairs can often be peeled off by hand and provide no structural benefit. Contamination from oils, dirt, or oxidation prevents proper bonding.
Moving too fast – Creates a shallow, weak repair where the rod doesn’t penetrate deeply into the scratch. The repair may look acceptable but will crack or separate under flex stress because it lacks sufficient bonding surface area.
Disturbing the repair before cooling – Can create internal stress fractures or incomplete bonding that leads to premature failure. The repair may appear solid but crack or separate days or weeks later.
Can you fix a bad plastic weld?
Yes, failed plastic welds can be removed and redone. Use a sharp utility knife or scraper to remove the poorly bonded welding rod material, re-prepare the surface (clean and abrade), and attempt the repair again with corrected technique. The base kayak material isn’t permanently damaged unless you severely overheated it.
Signs you need to redo a repair:
- Welding rod can be peeled or picked off easily
- Visible gaps between the rod and base material
- Repair cracks or separates within days of completion
- Discoloration, bubbling, or warping around the repair area
- Repair feels rigid and doesn’t flex with the surrounding hull
The good news is that plastic welding is forgiving—most mistakes result in cosmetic issues or weak repairs rather than catastrophic damage. Start with practice repairs on scrap polyethylene or inconspicuous areas of your kayak to develop feel for proper temperature, speed, and pressure before tackling visible or critical repairs.
Best Plastic Welding Kit for Kayak Repairs
A quality plastic welding kit for kayak repairs should include a variable-temperature heat gun (400-600°F range), assorted polyethylene welding rods, and basic safety equipment, with complete kits available in the $40-$120 range. The most important feature is precise temperature control—cheap heat guns with only high/low settings make it difficult to achieve the 450-500°F sweet spot needed for polyethylene fusion without burning.
Essential components of a kayak repair welding kit:
Heat source options:
- Dedicated plastic welding gun ($60-$150) – Purpose-built tools with precise temperature control, welding tips, and ergonomic design for extended use
- Variable-temperature heat gun ($40-$80) – General-purpose tools that work well for kayak repairs if they offer temperature adjustment in the 400-600°F range
- Avoid: Basic two-setting heat guns or tools without temperature readouts—too imprecise for consistent results
Welding rods:
- Polyethylene rods in 1/8″ or 3/16″ diameter (most versatile sizes)
- Both HDPE and LLDPE rod varieties if you repair multiple kayaks
- Natural (unpigmented) color works for all kayaks; colored rods for cosmetic matching
- Triangular or round profile (triangular provides more surface contact)
Recommended complete kits:
Budget option ($40-$60): Variable-temperature heat gun + assorted polyethylene rod pack + basic safety glasses. Sufficient for occasional repairs and learning the technique.
Mid-range option ($80-$120): Dedicated plastic welding gun with multiple tips + comprehensive rod assortment + heat-resistant gloves + carrying case. Best value for regular kayak maintenance.
Professional option ($150-$250): High-end welding gun with digital temperature display + speed welding tips + extensive rod selection + specialized tools. Overkill for most kayak owners but ideal if you repair multiple boats or run a guide service.
Additional useful tools (not always included):
- Wire brush or abrasive pad for surface prep
- Utility knife or scraper for trimming excess material
- Sandpaper assortment (80, 120, 220, 400 grit)
- Isopropyl alcohol or degreaser for cleaning
- Heat-resistant work gloves
- Safety glasses
What to look for when buying:
- Temperature range covering 400-600°F minimum
- Digital or analog temperature display (not just high/low settings)
- Comfortable grip for extended use
- Welding rod compatibility (standard sizes, not proprietary)
- Warranty or return policy for testing
Many fishing kayak enthusiasts find that a mid-range kit ($80-$120) provides the best balance of capability and value. These kits handle everything from minor scratches to major structural repairs and typically pay for themselves after 2-3 repairs compared to professional service costs of $75-$200 per incident.
For anglers who transport their kayaks frequently, check out our guide on kayak transport to prevent damage in the first place, reducing the need for repairs.

UL CERTIFIED: Our Plastic Welder, the factory, and the process have been tested, approved, and Certified by Underwriters Laboratories (UL). Safety is our number one priority
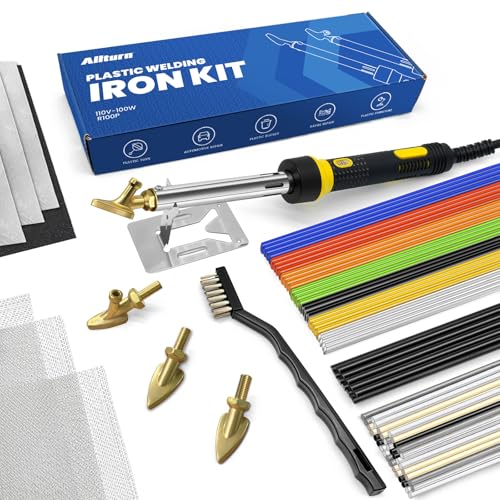
Time Saving and Efficient:Plastic welder iron (110V,100W) heats to 800°F (426°C) and repairs TPO,TEO and PP materials in just minutes
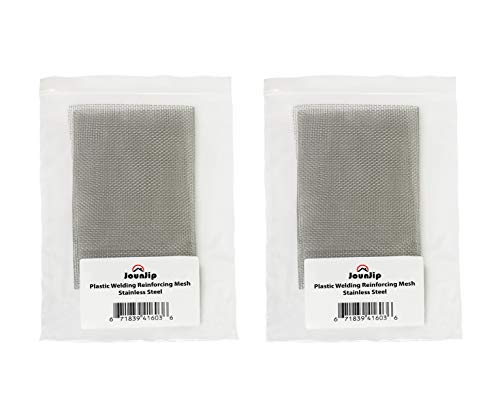
Stainless Steel Reinforcing Wire Mesh: 5" x 8 3/4" dimensions, conveniently packaged in a 2 pack
How Much Does Kayak Scratch Repair Cost Professionally?
Professional kayak scratch repair using plastic welding typically costs $75-$200 per repair, depending on damage severity, location, and shop rates. Simple shallow scratches on the low end, while extensive crack repairs, multiple gouges, or structural damage requiring reinforcement can reach $200-$300. Mobile repair services that come to your location often charge 20-30% more than shop-based repairs.
Professional repair cost breakdown:
| Damage Type | Typical Cost Range | Repair Time |
|---|---|---|
| Single shallow scratch (cosmetic) | $50-$75 | 30-45 minutes |
| Deep gouge or scratch (structural) | $75-$125 | 1-2 hours |
| Crack repair (under 6 inches) | $100-$150 | 1.5-2 hours |
| Crack repair (over 6 inches) | $150-$250 | 2-3 hours |
| Multiple repairs or extensive damage | $200-$400+ | 3-5 hours |
| Hole or puncture repair | $125-$200 | 2-3 hours |
Factors affecting professional repair costs:
- Geographic location – Urban areas and coastal regions typically charge more than rural shops
- Shop specialization – Dedicated kayak/marine repair shops may charge premium rates but deliver better results than general plastic welding services
- Damage location – Hard-to-access areas (inside hull, near bulkheads) increase labor time
- Cosmetic matching – Color-matched welding rods and finishing work add cost
- Turnaround time – Rush repairs often carry 25-50% surcharges
DIY vs. professional cost comparison:
A complete home plastic welding kit costs $40-$120 and handles unlimited repairs over your kayak’s lifetime. After 2-3 repairs, you’ve broken even compared to professional service. However, professional repairs make sense for:
- Critical structural damage where mistakes could compromise safety
- Warranty repairs (some manufacturers require professional service)
- Complex repairs requiring specialized equipment or techniques
- First-time kayak owners who aren’t comfortable with DIY repairs
- Damage discovered mid-trip when you need immediate professional help
Many fishing kayak enthusiasts adopt a hybrid approach: learning basic plastic welding for common scratches and gouges while relying on professionals for major structural repairs or cracks in critical areas. This maximizes cost savings while ensuring safety-critical repairs receive expert attention.
For those who fish frequently in rocky or shallow areas, the DIY investment pays dividends quickly. A $100 welding kit that handles 10-15 repairs over several years saves $750-$2,000 compared to professional service for the same damage.
Common Mistakes When Plastic Welding Kayak Hull Damage
The most common plastic welding mistakes are inadequate surface preparation, incorrect temperature settings, and rushing the cooling process, accounting for roughly 80% of repair failures. These errors result in weak bonds that separate under stress, cosmetic issues like discoloration or warping, or repairs that crack within weeks of completion. Understanding these pitfalls before your first repair dramatically improves success rates.
Critical mistakes and how to avoid them:
Skipping or rushing surface preparation – Failing to thoroughly clean, degrease, and abrade the repair area prevents proper molecular bonding. Even invisible contamination from fish slime, sunscreen, or oxidation creates a barrier between the welding rod and base material.
Solution: Spend 5-10 minutes on prep for every repair. Wire brush or sand until the surface is visibly rough and shiny, then clean with isopropyl alcohol. The prep time is never wasted—it’s the foundation of a lasting repair.
Using the wrong plastic rod type – Mixing HDPE rods with LLDPE kayaks (or vice versa) creates incompatible repairs that separate because the different polymer types don’t fuse properly at the molecular level.
Solution: Verify your kayak’s plastic type from manufacturer specs or the recycling symbol on the hull. When in doubt, buy assorted rod packs that include both types and test on scrap material.
Overheating the base material – Setting temperature too high or holding the heat gun too close causes bubbling, charring, or thinning of the hull wall. This creates weak spots more problematic than the original scratch.
Solution: Start at 450°F and increase gradually. Keep the heat gun moving and maintain 1/2 inch distance from the surface. If you see smoke or smell burning plastic, immediately reduce temperature.
Moving too fast along the scratch – Rushing the welding process doesn’t allow sufficient time for the rod to melt and penetrate deeply into the scratch, resulting in shallow repairs that crack under flex.
Solution: Move at approximately 1 inch every 3-5 seconds. The welding rod should flow smoothly into the scratch, not just sit on top. If the rod isn’t sticking, slow down or increase temperature slightly.
Not V-grooving deep scratches – Attempting to fill deep gouges without creating a V-shaped profile limits bonding surface area and creates weak repairs.
Solution: Use a utility knife to widen the top of deep scratches, creating a V-groove that’s wider at the surface and narrower at the bottom. This gives the welding rod more surface area to bond with.
Disturbing the repair before full cooling – Touching, flexing, or stressing the repair area before it fully cools (15-20 minutes) can create internal fractures or incomplete bonding.
Solution: Set a timer and resist the urge to test the repair early. Polyethylene continues to bond and strengthen as it cools, and patience during this phase ensures maximum strength.
Attempting to weld incompatible materials – Trying to plastic weld fiberglass, composite, or thermoset plastic kayaks results in complete failure because these materials don’t melt and re-fuse.
Solution: Verify your kayak is polyethylene or ABS before attempting plastic welding. Fiberglass and composite kayaks require completely different repair techniques using resin and cloth.
Using inadequate ventilation – Melting plastic releases fumes that can cause headaches, dizziness, or respiratory irritation in enclosed spaces.
Solution: Always work outdoors or in a well-ventilated garage with doors open and fans running. Take breaks if you feel lightheaded.
Expecting perfect cosmetic results on first attempt – Plastic welding is a skill that improves with practice. First-time repairs often look rough even when structurally sound.
Solution: Practice on scrap polyethylene or inconspicuous areas before tackling visible repairs. Focus on structural integrity first; cosmetic refinement comes with experience.
Most of these mistakes are recoverable—failed welds can be removed and redone with proper technique. The key is recognizing when a repair hasn’t bonded correctly (rod peels off easily, visible gaps, cracks within days) and addressing it immediately rather than hoping it will hold.
Will Plastic Welding Work on Fiberglass Kayaks?
No, plastic welding will not work on fiberglass kayaks because fiberglass is a thermoset composite material that cannot be melted and re-fused. Fiberglass kayaks are constructed from woven glass cloth saturated with epoxy or polyester resin that chemically cures into a rigid structure. Once cured, these resins cannot be softened with heat—attempting to plastic weld fiberglass will simply burn and damage the material without creating any bond.
Fiberglass kayaks require completely different repair techniques using fiberglass cloth, resin, and layup methods. The repair process involves sanding the damaged area, applying layers of resin-saturated fiberglass cloth, allowing it to cure, and then sanding and finishing the repair to match the surrounding hull.
Material identification guide:
Polyethylene kayaks (can be plastic welded):
- Slightly flexible, returns to shape after pressing
- Typically heavier than fiberglass
- Matte or semi-gloss finish
- Recycling symbol #2 (HDPE) or #4 (LLDPE) on hull
- Scratches reveal white or natural-colored plastic beneath colored surface
Fiberglass kayaks (cannot be plastic welded):
- Rigid with minimal flex
- Lighter weight than polyethylene
- Glossy gel-coat finish
- Scratches reveal woven glass fiber texture beneath surface
- May show spider-web cracking patterns when damaged
Other materials that cannot be plastic welded:
- Carbon fiber or Kevlar composites (require specialized composite repair)
- Thermoset plastics (once cured, cannot be re-melted)
- Wood kayaks (require woodworking and marine sealant techniques)
- Inflatable kayaks (require patch adhesives specific to PVC or Hypalon)
If you’re unsure of your kayak’s material, check the manufacturer’s specifications or perform a simple test: press firmly on the hull—polyethylene will flex noticeably and return to shape, while fiberglass remains rigid. You can also test an inconspicuous area with a heat gun on low setting: polyethylene will soften and become glossy, while fiberglass will not change (but don’t overheat or you’ll damage gel-coat).
For fishing kayak enthusiasts with fiberglass boats, learning basic fiberglass repair techniques is the equivalent skill to plastic welding for polyethylene kayaks. Many marine supply stores offer fiberglass repair kits with instructions, or you can consult professional marine repair shops for complex damage.
The good news is that most fishing kayaks on the market in 2026 are polyethylene construction specifically because of their durability and ease of repair. If you’re shopping for a new fishing kayak and want the option of DIY plastic welding repairs, confirm the hull material is HDPE or LLDPE polyethylene before purchasing.
FAQ
How long does a plastic welded kayak repair last?
A properly executed plastic weld repair lasts indefinitely—often 10-20+ years or the remaining life of the kayak. The molecular fusion creates a bond as strong as or stronger than the original hull material, making the repair permanent unless new damage occurs in adjacent areas.
Can I plastic weld my kayak in cold weather?
Yes, but cold ambient temperatures (below 50°F) may require slightly higher welding gun settings to compensate for faster heat loss. Work in a heated garage if possible, or allow extra time for the welding gun to maintain temperature. Cold plastic also takes longer to reach proper fusion temperature.
Do I need to sand the repair after plastic welding?
Sanding is optional and primarily cosmetic. Trimming excess welding rod flush with the hull and sanding smooth (120-400 grit progression) improves appearance but doesn’t affect structural integrity. Many anglers skip finishing on hull-bottom repairs that aren’t visible during use.
Can plastic welding repair a cracked kayak seat or accessory mount?
Yes, plastic welding works on any polyethylene component including seats, rod holders, and accessory mounts, provided you can access the damaged area with your heat gun. Use the same technique as hull repairs, ensuring proper surface preparation and temperature control.
Will plastic welding change the color of my kayak?
Natural (unpigmented) welding rod creates a light gray or white repair that contrasts with colored kayaks. Color-matched rods are available for popular kayak colors, or you can paint the repair area with marine-grade plastic paint after welding. Most anglers accept the color difference on hull-bottom repairs.
How do I know if my welding rod is compatible with my kayak?
Check your kayak manufacturer’s specifications for plastic type (HDPE or LLDPE) and purchase matching welding rod. If specifications aren’t available, look for the recycling symbol on your hull (#2 for HDPE, #4 for LLDPE). When in doubt, buy assorted rod packs and test on scrap material or an inconspicuous area.
Can I use a regular heat gun instead of a plastic welding gun?
Yes, a variable-temperature heat gun that reaches 400-600°F works fine for kayak repairs. Dedicated plastic welding guns offer better temperature control and specialized tips but aren’t essential. Avoid basic two-setting heat guns that lack precise temperature adjustment.
What should I do if my plastic weld repair cracks or separates?
Remove the failed repair material with a utility knife, re-prepare the surface (clean and abrade thoroughly), and redo the repair using proper technique. Failed welds usually indicate inadequate surface prep, incorrect temperature, or incompatible materials—address the root cause before re-welding.
Is plastic welding safe to do at home?
Yes, with proper safety precautions: work in well-ventilated areas, wear heat-resistant gloves and safety glasses, keep flammable materials away from the heat gun, and never touch hot plastic or welding equipment. The process is no more dangerous than other common DIY tasks involving heat tools.
Can I plastic weld a kayak that’s been repaired with epoxy before?
Yes, but you must completely remove all epoxy residue from the repair area first. Sand or scrape away the old epoxy, then clean thoroughly with isopropyl alcohol. Any remaining epoxy will prevent proper bonding of the plastic weld.
How much welding rod do I need for a typical scratch repair?
Most scratches require 6-12 inches of welding rod depending on length and depth. A standard 1-pound pack of welding rod (approximately 10-15 feet) handles 15-25 typical repairs. Buy rod in bulk if you anticipate multiple repairs or fish in rocky areas frequently.
Will plastic welding void my kayak warranty?
Warranty terms vary by manufacturer—some allow owner repairs while others require professional service for warranty coverage. Check your warranty documentation before attempting repairs on a kayak still under warranty. After the warranty period expires, DIY repairs have no impact.
Conclusion
Learning how to repair kayak scratches using plastic welding basics empowers fishing kayak enthusiasts to maintain their boats confidently and cost-effectively. The technique creates permanent, waterproof repairs that restore structural integrity and often exceed the strength of the original hull material. While the initial learning curve requires practice with temperature control and technique, most anglers achieve solid results after 2-3 repairs.
The investment in a quality plastic welding kit ($40-$120) pays for itself quickly compared to professional repair costs of $75-$200 per incident, and provides the peace of mind to fish rocky shorelines, shallow rivers, and challenging environments without worrying about damage. Focus on proper surface preparation, temperature control in the 450-500°F range, and patient cooling time—these three factors determine repair success more than any other variables.
Your next steps:
- Identify your kayak’s plastic type (HDPE or LLDPE) from manufacturer specs or hull markings
- Assess current damage using the depth and location criteria outlined in this guide
- Purchase a mid-range welding kit with variable temperature control and compatible welding rods
- Practice on scrap polyethylene or inconspicuous areas before tackling visible repairs
- Start with minor scratches to build confidence before addressing structural damage
- Document your repairs with photos to track technique improvement over time
For fishing kayak owners who regularly encounter hull-damaging conditions, plastic welding is an essential skill that extends your kayak’s lifespan and maintains its resale value. The technique works equally well for emergency field repairs and comprehensive workshop restoration, making it one of the most valuable maintenance skills any serious kayak angler can develop.
Remember that not every scratch requires repair—focus your efforts on structural damage deeper than 1/8 inch, cracks of any length, and damage in high-stress areas. Surface scratches are battle scars that tell the story of your fishing adventures and rarely affect performance. With proper technique and the right equipment, you’ll handle everything from minor gouges to major cracks with confidence, keeping your fishing kayak in top condition for years of productive time on the water.
For more guidance on maintaining your fishing kayak and preventing damage, explore our resources on kayak gear and fishing kayak buying guide.





