
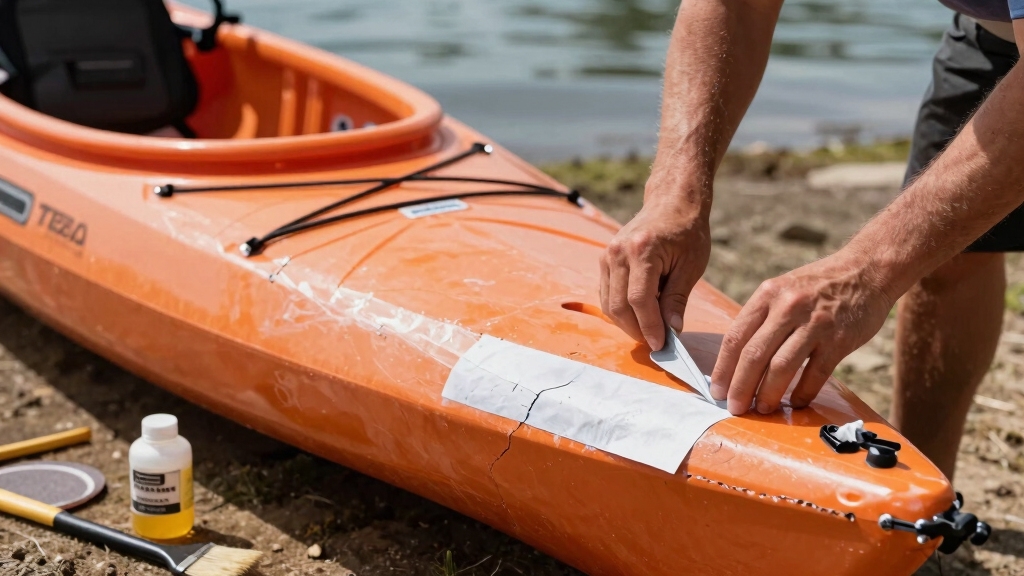
Quick Answer
How to fix a cracked kayak hull depends on your kayak’s material: polyethylene plastic kayaks require plastic welding or specialized adhesives, while fiberglass kayaks need marine epoxy and fiberglass cloth. Small hairline cracks under 2 inches can be DIY repaired in 1-2 hours using the right materials, but cracks longer than 6 inches or those compromising structural integrity often need professional repair or replacement consideration.
Key Takeaways
- Polyethylene kayaks need plastic welding kits or specialized polyethylene adhesives, not standard epoxy
- Fiberglass kayaks repair well with marine epoxy and fiberglass cloth for permanent fixes
- Hairline cracks under 2 inches are safe to repair yourself and won’t significantly weaken the hull
- Professional repairs cost $100-$300 depending on crack size and kayak material
- Flex Seal works as a temporary waterproof patch but isn’t a permanent structural repair
- Cracks longer than 6 inches or near stress points may indicate it’s time to replace the kayak
- Interior repairs are stronger than exterior-only patches for through-hull cracks
- Common mistakes include using wrong adhesives, skipping surface prep, and not reinforcing the repair area
What Causes Cracks in Kayak Hulls
Kayak hull cracks typically result from impact damage, UV degradation, improper storage, or stress from overloading. Dragging your fishing kayak across rocks, dropping it during kayak transport, or leaving it in direct sunlight for years weakens the hull material and creates failure points.
Most common causes include:
- Impact damage from collisions with rocks, docks, or hard surfaces during launch and retrieval
- UV exposure breaking down plastic polymers over 3-5 years of outdoor storage
- Stress cracks from excessive weight beyond the kayak’s capacity rating
- Temperature extremes causing expansion and contraction, especially in polyethylene hulls
- Improper storage such as hanging by the ends or storing on uneven surfaces
- Age-related brittleness in kayaks older than 10 years, particularly budget models
Prevention tip: Store your kayak on padded racks that support the hull’s entire length, use a UV-protectant spray annually, and always check weight limits before loading gear. Polyethylene kayaks are especially vulnerable to stress cracks near scupper holes and seat mounting points where the material is thinner.
Can You Repair a Cracked Plastic Kayak Yourself
Yes, you can repair most cracked plastic kayaks yourself if the crack is under 6 inches and doesn’t compromise major structural areas like the keel or cockpit rim. DIY repairs using plastic welding kits or marine-grade adhesives cost $20-$60 and take 1-3 hours, compared to $150-$300 for professional repair.
When DIY repair makes sense:
- Cracks shorter than 6 inches in non-structural areas
- Hairline surface cracks that haven’t penetrated through the hull
- You have basic hand tools and can follow detailed instructions
- The kayak is worth more than $200 (repair cost vs. replacement value)
- You’re comfortable working with heat tools or chemical adhesives
When to seek professional help:
- Cracks longer than 6 inches or multiple cracks in the same area
- Damage near the keel, cockpit rim, or other load-bearing structures
- Through-hull cracks that leak water actively
- Kayaks made from composite materials you’re unfamiliar with
- High-value pedal kayaks or specialized fishing models
The success rate for DIY polyethylene kayak repairs is high when you use the correct materials and follow proper surface preparation steps. Most fishing kayak enthusiasts can handle basic crack repairs with a weekend afternoon and the right supplies.
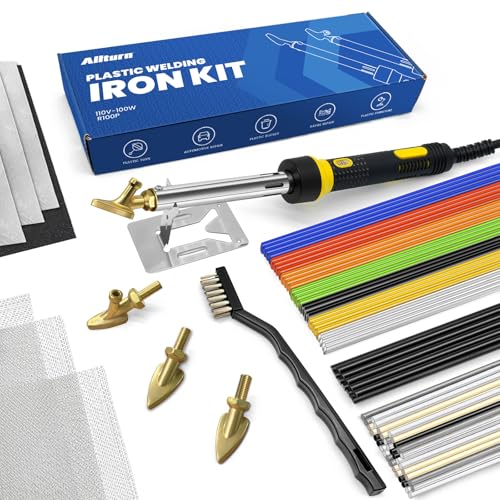
Time Saving and Efficient:Plastic welder iron (110V,100W) heats to 800°F (426°C) and repairs TPO,TEO and PP materials in just minutes

J-B Weld Plasticweld: A Hand Mixable Two Part Epoxy Putty Stick That Is Formulated To Repair And Rebuild Various Plastic Compounds And Surfaces. J-B Weld Plasticweld Is Designed For Diy Plastic Repairs On Abs, Pvc & Cpvc Pipes And Plastics, Auto Bumpers And More! Plasticweld Is Certified By The Nsf And Is Safe For Contact With Potable Water

SUPERIOR RELIABILITY AND STRENGTH: The Gator Patch protects and repairs kayaks, canoes, stand up paddleboards and small boats. Bonding to fiberglass, aluminum, wood or plastic surfaces, it shields your marine investment from everyday boating hazards.
Difference Between Repairing Polyethylene vs Fiberglass Kayak Cracks
Polyethylene kayaks require plastic welding or specialized PE adhesives because standard epoxy won’t bond to the slick, low-surface-energy plastic, while fiberglass kayaks accept marine epoxy readily and create stronger, more permanent repairs. The repair approach, materials, and difficulty level differ significantly between these two common kayak hull materials.
Polyethylene (plastic) kayak repairs:
- Materials needed: Plastic welding kit with heat gun and PE welding rods, or G/flex epoxy specifically formulated for polyethylene
- Process: Clean and roughen the surface, heat-weld plastic filler into the crack, or apply flexible PE-compatible adhesive
- Difficulty: Moderate to difficult; plastic welding requires practice and temperature control
- Strength: 70-85% of original hull strength when done correctly
- Cost: $25-$50 for materials
- Drying time: 24-48 hours for adhesives; immediate for welding (after cooling)
Fiberglass kayak repairs:
- Materials needed: Marine epoxy resin, fiberglass cloth or mat, acetone, sandpaper
- Process: Sand the damaged area, apply epoxy layers with fiberglass reinforcement, sand smooth when cured
- Difficulty: Easy to moderate; more forgiving than plastic welding
- Strength: 90-100% of original hull strength with proper layering
- Cost: $15-$35 for materials
- Drying time: 24-72 hours depending on temperature and epoxy type
Key difference: Fiberglass repairs are generally easier for beginners because epoxy bonds chemically to the hull material, while polyethylene’s chemical resistance makes it harder to create lasting bonds. If you own a sit on top kayak (usually polyethylene), expect a more challenging repair process than with fiberglass models.
Best Epoxy or Glue for Kayak Hull Repair
For polyethylene kayaks, G/flex 650 Epoxy by West System is the best adhesive because it’s specifically formulated to bond to low-surface-energy plastics, while fiberglass kayaks work best with marine-grade epoxies like System Three or West System 105/206. Standard hardware store epoxies and super glues will fail on polyethylene within weeks.
Top adhesives by kayak material:
For polyethylene plastic kayaks:
- G/flex 650 Epoxy (best overall) – flexible, bonds to PE, $30-$40 per kit
- 3M Marine Adhesive Sealant 5200 (good for small cracks) – flexible, waterproof, $15-$20
- Plastic welding (strongest option) – requires heat gun and PE welding rods, $40-$60 for kit
For fiberglass kayaks:
- West System 105 Epoxy Resin with 206 Hardener – industry standard, $50-$70
- System Three SculpWood Epoxy Paste – easy to work with, gap-filling, $25-$35
- MAS FLAG Epoxy – excellent for marine applications, $40-$60
For composite/hybrid kayaks:
- Check manufacturer recommendations first
- G/flex 650 works on most composite materials
- May require specialized carbon fiber or Kevlar repair kits
What NOT to use:
- Standard 5-minute epoxy from hardware stores (too brittle)
- Super glue or cyanoacrylate (won’t flex with hull movement)
- Silicone sealants (won’t create structural bond)
- Gorilla Glue or similar polyurethane adhesives (poor water resistance on kayaks)
Choose your adhesive based on your specific kayak material. When in doubt, contact the kayak manufacturer for their recommended repair products. Using the wrong adhesive is the number one reason DIY kayak repairs fail within the first season.

All-in-One Marine Fiberglass Repair Kit: This marine fiberglass repair kit is designed to quickly fix common fiberglass damage, including deep scratches, cracks, chips, holes, and surface damage. Ideal for boats, jet skis, yachts, surfboards, and other watercraft, it is also suitable for RVs, bathtubs, showers, and household fiberglass repairs, helping restore a smooth, clean surface and a renewed appearance

EFFECTIVE MARINE FIBERGLASS REPAIR KIT — Cracks, chips, scratches and holes on boat or fiberglass surfaces can worsen over time due to sun, water, and vibration. The Nanoxa gelcoat repair kit for boats helps repair damage effectively and prevent minor issues from spreading. This fiberglass repair kit works on boats, yachts, jet skis, kayaks, surfboards, decks and other watercraft

Marine Fiberglass Repair Kit: This all-in-one epoxy filler can fix fiberglass boat damage efficiently, repairing deep scratches, cracks, chips, and holes in the boat, jet ski, yacht, surfboards, and other water vehicles. Our fiberglass repair kit has super strong adhesion and perfectly achieves seamless repair of marine gel coat, giving the boat finish a new life.rine Fiberglass Repair Kit
How Much Does Professional Kayak Hull Repair Cost
Professional kayak hull repair typically costs $100-$300 for most cracks, with prices varying based on crack length, hull material, and geographic location. Simple polyethylene crack repairs start around $75-$125, while complex fiberglass layup work or structural repairs can reach $300-$500.
Price breakdown by repair type:
- Small crack (under 3 inches): $75-$150
- Medium crack (3-6 inches): $150-$250
- Large crack (6-12 inches): $250-$400
- Multiple cracks or structural damage: $400-$600+
- Plastic welding (polyethylene): $100-$200 per crack
- Fiberglass layup and refinishing: $150-$350
Factors affecting cost:
- Hull material – Fiberglass repairs cost 20-30% more than polyethylene due to material costs
- Crack location – Hard-to-reach interior areas add $50-$100 to labor
- Repair shop type – Marine shops charge more than general repair services
- Geographic location – Coastal areas with more kayakers have competitive pricing
- Turnaround time – Rush repairs (under 1 week) may cost 25-50% more
When professional repair is worth it:
- Your kayak is worth more than $500 and the repair costs under 30% of replacement value
- The crack is in a critical structural area you’re not confident repairing
- You lack the tools or workspace for DIY repair
- The kayak has sentimental value or is a discontinued model
- You need a warranty-backed repair for insurance or resale purposes
For fishing kayaks under $400, professional repair often costs close to replacement value, making DIY repair or replacement more economical. Calculate the repair cost as a percentage of your kayak’s current market value to make the best decision.
Can You Use Flex Seal on a Cracked Kayak
Flex Seal can temporarily waterproof a cracked kayak for emergency use, but it’s not a permanent structural repair and will likely peel or leak within 2-6 months of regular use. It works best as a quick fix to get you off the water safely or as a temporary patch until you can perform a proper repair.
Flex Seal limitations for kayak repair:
- Not structural – Adds no strength to the cracked area
- Poor adhesion to polyethylene without extensive surface prep
- Peels under stress from hull flexing during paddling
- UV degradation causes failure after 3-6 months of sun exposure
- Cosmetically obvious – Leaves a thick, textured coating
- Expensive for the temporary results ($15-$25 per can)
When Flex Seal makes sense:
- Emergency waterproofing during a multi-day fishing trip
- Temporary fix on a low-value kayak you plan to replace soon
- Sealing very small hairline cracks (under 1 inch) as a stopgap
- Waterproofing the repair area after proper structural repair
Better alternatives:
- Marine Goop – Better adhesion and flexibility than Flex Seal, $8-$12
- Aquaseal – Designed for watercraft repairs, more durable, $10-$15
- Proper epoxy or welding – Permanent solution for similar or less cost
If you’re considering Flex Seal because you’re unsure about proper repair methods, invest that money in G/flex epoxy or a plastic welding kit instead. The time spent applying Flex Seal is better used doing a real repair that will last for years. Think of Flex Seal as duct tape for kayaks – useful in emergencies but not a long-term solution for your fishing kayak gear.
How to Tell If a Kayak Crack Is Too Big to Repair
A kayak crack is generally too big to repair if it exceeds 12 inches in length, compromises the keel or major structural ribs, or if the hull shows multiple stress cracks indicating overall material failure. Cracks that flex open more than 1/4 inch when you apply hand pressure also suggest the hull integrity is too compromised for safe repair.
Signs a crack is repairable:
- Length under 6 inches in non-structural areas
- Clean break with edges that align when pressed together
- Located in flat hull sections away from stress points
- Single isolated crack, not part of a crack network
- Hull material still feels rigid and not brittle around the damage
- Kayak is less than 10 years old with otherwise sound construction
Red flags that suggest replacement:
- Multiple cracks radiating from one point (spider-web pattern)
- Cracks longer than 12 inches or spanning multiple hull sections
- Keel damage affecting the entire length of the bottom centerline
- Brittle material that crumbles or flakes when you sand it
- Cockpit rim cracks that affect structural integrity
- Previous failed repairs indicating ongoing material degradation
- Age over 15 years combined with UV damage and brittleness
The cost-benefit test:
Calculate repair cost (materials + time or professional service) against replacement cost. If repair exceeds 40% of a comparable used kayak’s price, replacement usually makes more financial sense. A $150 repair on a $300 used kayak is questionable economics, especially if the hull shows other signs of aging.
Safety consideration: Even if technically repairable, cracks in high-stress areas like the keel or near scupper holes on sit on top kayaks can fail catastrophically during use. When in doubt about structural safety, consult a professional or replace the kayak rather than risk a failure during offshore kayak fishing.
Do I Need to Repair Small Hairline Cracks in My Kayak
Small hairline cracks under 1 inch that haven’t penetrated through the hull don’t require immediate repair for safety, but sealing them prevents water intrusion and stops them from growing into larger structural problems. Surface cracks in polyethylene kayaks often indicate UV damage and may spread over time if left untreated.
When to repair hairline cracks:
- The crack shows signs of growing (compare photos over 2-3 months)
- Water seeps through during use, even slowly
- The crack is located near stress points like scupper holes or seat mounts
- You notice the crack flexing or moving during paddling
- The kayak will be used in rough conditions or ocean kayak fishing
When you can safely monitor without immediate repair:
- Purely cosmetic surface scratches that don’t penetrate the outer layer
- Stable cracks that haven’t changed in 6+ months
- Cracks in low-stress areas of the hull far from mounting points
- The kayak is used only in calm water conditions
- You inspect the crack regularly for changes
Quick seal options for hairline cracks:
- Marine Goop or Aquaseal – Flexible sealants that prevent water intrusion, $10-$15
- G/flex epoxy – Thin application fills and seals small cracks permanently, $30-$40
- UV-protectant coating – Prevents further UV damage that causes crack growth, $15-$25
The prevention approach: Even if a hairline crack doesn’t need immediate structural repair, applying a thin coat of flexible marine sealant takes 10 minutes and prevents future problems. Think of it like sealing a small chip in your car windshield before it spreads across the glass. Small cracks in fishing kayaks are easier and cheaper to address early than after they’ve grown into major repairs.
Document hairline cracks with dated photos so you can track whether they’re stable or growing. If you notice growth, move up your repair timeline.
Kayak Welding Kit vs Epoxy: Which Is Better
Plastic welding creates stronger, more permanent repairs for polyethylene kayaks (85-95% of original strength) but requires skill and specialized equipment, while epoxy repairs are easier for beginners and work on multiple materials but may only achieve 70-80% strength on polyethylene. Choose welding for large structural cracks and epoxy for small repairs or fiberglass hulls.
Plastic welding advantages:
- Strongest bond – Melts and fuses the plastic at molecular level
- Permanent repair – Won’t degrade or separate over time
- No cure time – Ready to use once cooled (30-60 minutes)
- Best for large cracks – Can fill gaps and rebuild missing material
- Professional results – Looks cleaner when done properly
Plastic welding disadvantages:
- Steep learning curve – Easy to overheat and damage hull further
- Equipment cost – Quality heat gun and welding kit runs $60-$150
- Skill required – Practice needed on scrap plastic first
- Risk of warping – Excessive heat can distort hull shape
- Polyethylene only – Doesn’t work on fiberglass or composite kayaks
Epoxy (G/flex) advantages:
- Easy application – Mix and apply like any two-part adhesive
- Beginner-friendly – Hard to mess up if you follow instructions
- Works on multiple materials – Fiberglass, some plastics, composites
- Lower equipment cost – $30-$40 for complete repair kit
- Flexible when cured – Moves with hull flex better than rigid epoxies
Epoxy disadvantages:
- Weaker on polyethylene – 70-80% strength vs. 90%+ for welding
- Long cure time – 24-48 hours before water use
- Surface prep critical – Requires thorough cleaning and roughening
- May fail on large cracks – Best for cracks under 4 inches
- Temperature sensitive – Won’t cure properly below 50°F
Decision guide:
- Choose welding if: You have a polyethylene kayak, crack is over 4 inches, you’re willing to practice the technique, and you want maximum strength
- Choose epoxy if: You’re a beginner, crack is under 4 inches, you have a fiberglass kayak, or you want a simpler process with less risk
Many experienced kayak owners keep both options available – epoxy for quick small repairs and welding equipment for major structural work. For your first repair on a recreational kayak, start with G/flex epoxy to build confidence before investing in welding equipment.

UL CERTIFIED: Our Plastic Welder, the factory, and the process have been tested, approved, and Certified by Underwriters Laboratories (UL). Safety is our number one priority

220W Rapid Heating:The plastic welding machine has a power of 220 watts and a 110V-US plug, which has higher output current and faster heating speed. Using heat to embed nails or plastic rods into plastic will not cause damage to the car or plastic surface, and is very sturdy. Not only are there two repair methods to choose from: welding rods and hot nails, but there is also an overheat protection device to ensure your safety

UPGRADED 150W RAPID HEATING - This 150W plastic weld adopts advanced ceramic heating chip, It can be heated to 1112 ℉ in 15-20 seconds. By quickly heating, melting, and repairing, the plastic welding gun reassembles broken plastic to extend the lifespan of items, saving a significant amount of time and money. Compared with the traditional tungsten wire chips, it not only heats up faster, but also lasts 10 times longer than the traditional tungsten chip. And this plastic welding with 6 ventilation holes, it helps to dissipate heat quickly. The design of plastic handle insulation is not easy to deform and don't worry about burning your hands.
Common Mistakes When Fixing a Cracked Kayak Hull
The most common mistake when fixing a cracked kayak hull is inadequate surface preparation – failing to clean, dry, and roughen the repair area causes 60-70% of repair failures within the first year. Using the wrong adhesive for your hull material and rushing the cure time are close seconds that lead to leaks and re-cracking.
Top mistakes that cause repair failure:
- Skipping surface prep – Not cleaning oils, dirt, and oxidation from the crack area
- Using wrong adhesive – Applying standard epoxy to polyethylene kayaks
- Insufficient drying time – Applying repair materials to damp surfaces
- Not roughening the surface – Smooth plastic won’t bond well to adhesives
- Rushing cure time – Using the kayak before adhesive fully hardens
- Exterior-only repairs – Not reinforcing through-hull cracks from inside
- Overfilling cracks – Creating thick, inflexible repair areas that crack again
- Ignoring temperature – Applying epoxy in cold weather (below 50°F)
- Poor crack alignment – Not holding crack edges together during cure
- No reinforcement – Failing to add backing material for large cracks
Proper repair sequence to avoid mistakes:
- Clean thoroughly – Acetone or denatured alcohol, let dry completely (2+ hours)
- Roughen surface – 80-grit sandpaper in 2-inch radius around crack
- Align crack edges – Use clamps or tape to hold proper hull shape
- Apply from both sides – Interior and exterior for through-hull cracks
- Add reinforcement – Fiberglass tape or plastic backing for cracks over 2 inches
- Follow cure times – Wait full 48-72 hours before water testing
- Sand and seal – Smooth the repair and apply UV protectant
The patience principle: More repair failures come from impatience than from lack of skill. Waiting an extra day for full cure is the difference between a repair that lasts five years and one that fails in five months. If you’re repairing your kayak mid-season, resist the temptation to rush back on the water.
Testing your repair: Before taking your repaired kayak on a fishing trip, fill it with water and let it sit for 2-3 hours to check for leaks. Better to discover a failed repair in your driveway than two miles offshore during kayak fishing.
Will a Repaired Kayak Crack Leak Again
A properly repaired kayak crack using the correct materials and technique should not leak again, with well-executed repairs lasting 5-10+ years or the remaining life of the kayak. However, repairs can fail and leak if the underlying cause (UV damage, stress points, material fatigue) isn’t addressed or if the repair was done incorrectly.
Factors that determine repair longevity:
Repairs that last:
- Correct adhesive for hull material (G/flex for polyethylene, marine epoxy for fiberglass)
- Thorough surface preparation with cleaning and roughening
- Full cure time before water exposure (48-72 hours minimum)
- Reinforcement on both sides of through-hull cracks
- UV protectant applied after repair
- Addressing the root cause (impact point, stress concentration)
Repairs likely to fail:
- Wrong adhesive type (standard epoxy on polyethylene)
- Rushed application or insufficient cure time
- Exterior-only patch on through-hull crack
- No surface prep or cleaning
- Repair in cold weather (below 50°F)
- Continued stress on the repaired area
Preventing re-cracking:
- Add reinforcement – Fiberglass tape or plastic backing distributes stress
- Reduce stress – Adjust gear placement to avoid overloading repaired areas
- UV protection – Apply 303 Protectant or similar UV coating annually
- Proper storage – Support hull evenly to prevent new stress cracks
- Regular inspection – Check repair area before each season
- Address root causes – Fix the problem that caused the original crack
Realistic expectations: A repair will never be quite as strong as the original undamaged hull, typically achieving 70-95% of original strength depending on method and materials. For fishing kayaks used in demanding conditions, inspect repaired areas at the start of each season and be prepared to reinforce them if you notice any changes.
When to worry: If a repair starts leaking within the first 6 months, it indicates a problem with the repair process or materials. Re-do the repair properly rather than applying patch over patch. If a repair lasts 2+ years and then fails, it’s more likely due to continued hull degradation than repair failure – at that point, evaluate whether the kayak is worth another repair or if replacement makes more sense.
How to Fix a Crack on the Inside vs Outside of Kayak Hull
Through-hull cracks should be repaired from both the inside and outside for maximum strength, with the interior repair providing structural support and the exterior repair creating a waterproof seal. Interior-only repairs are stronger but harder to waterproof, while exterior-only repairs are easier but may fail under stress because they don’t address the structural damage.
Interior repair approach:
Advantages:
- Stronger structural repair because you can add backing material
- Better access to clean and prepare the crack edges
- Can add reinforcement strips or patches
- Less visible cosmetically from outside
Process:
- Access the interior (easier on sit-on-top kayaks)
- Clean and roughen both sides of the crack
- Apply adhesive and press crack edges together
- Add fiberglass tape or plastic backing strip across the crack
- Clamp or weight until fully cured
- Sand smooth any sharp edges that could snag gear
Challenges:
- Limited access in sit-inside kayaks
- Difficult to reach cracks near the bow or stern
- May require removing seats or hatches
- Harder to achieve smooth waterproof finish
Exterior repair approach:
Advantages:
- Easy access to the damaged area
- Simpler to create waterproof seal
- Can sand smooth for cosmetic finish
- No need to disassemble kayak components
Process:
- Clean and roughen the exterior surface
- Fill crack with appropriate adhesive
- Apply fiberglass tape or reinforcement over crack
- Sand smooth when cured
- Apply UV protectant or paint to match hull
Challenges:
- Less structural strength without interior backing
- Repair material may peel under hull flex
- More visible cosmetically
- Won’t address interior damage or sharp edges
Best practice – both sides:
For any crack that penetrates through the hull, repair from both sides:
- Interior first – Provides structural backing and alignment
- Let cure partially – 12-24 hours before exterior work
- Exterior second – Seals and waterproofs the repair
- Full cure – Wait another 48 hours before water use
This two-sided approach creates a repair that’s both structurally sound and waterproof, achieving 85-95% of original hull strength. For sit on top kayaks, interior access is straightforward through the hull openings. For sit-inside models, you may need to reach through the cockpit with long tools or flexible materials.
Surface cracks only: If the crack hasn’t penetrated through the hull (you can’t see light through it), an exterior-only repair is sufficient. Clean, fill, and seal from the outside, then monitor for any signs the crack is deepening.
Is It Worth Repairing an Old Cracked Kayak or Buy New
Repair an old cracked kayak if the repair cost is under 30% of a comparable replacement kayak’s price and the hull shows no other signs of major degradation, but replace it if the kayak is over 12 years old with multiple cracks, severe UV damage, or if repair costs approach 50% of replacement value. Factor in safety, especially for offshore kayak fishing where hull failure could be dangerous.
Repair makes sense when:
- Kayak is less than 8 years old with isolated damage
- Current market value is $400+ and repair costs under $120
- Single crack in non-structural area
- Hull material is still flexible and not brittle
- You have emotional attachment or it’s a discontinued model you love
- DIY repair costs $30-$60 in materials
- The kayak has features or modifications you can’t easily replace
Replacement makes sense when:
- Kayak is over 12 years old with multiple issues
- Repair costs exceed 40% of comparable used kayak price
- Multiple cracks or spider-web cracking patterns
- Hull feels brittle or shows extensive UV damage
- You’ve already repaired this kayak multiple times
- Professional repair quotes are $200+ for a $400 kayak
- Safety concerns for your typical fishing conditions
- You’ve outgrown the kayak’s features or capacity
The calculation:
| Kayak Value | Max Repair Cost | Decision Point |
|---|---|---|
| Under $200 | $60 (DIY only) | Replace unless sentimental value |
| $200-$400 | $120 | Repair if single crack, replace if multiple issues |
| $400-$800 | $240 | Repair makes sense for most damage |
| $800-$1,500 | $450 | Repair almost always worth it |
| Over $1,500 | $600+ | Definitely repair, consider professional service |
Hidden costs of old kayaks: Even if you repair the crack, an aging kayak may need other work soon – new seat, hatch covers, bungee cords, or scupper plugs. Add these anticipated costs to your repair budget when making the decision.
The upgrade opportunity: Sometimes a cracked kayak is the universe telling you it’s time to upgrade to that pedal kayak or stable fishing platform you’ve been eyeing. If you’ve been wanting better features, use the crack as justification for an upgrade rather than sinking money into an old hull.
Safety first: For kayaks used in challenging conditions – ocean fishing, fast rivers, or far from shore – err on the side of replacement if you have any doubts about structural integrity. A $200 repair that fails during a trip could cost you far more in lost gear, rescue costs, or injury.
Step-by-Step: How to Fix a Cracked Kayak Hull
Fixing a cracked kayak hull requires identifying your hull material, gathering the right repair supplies, thoroughly preparing the surface, applying adhesive from both sides if possible, and allowing full cure time before water use. The entire process takes 2-4 hours of active work plus 48-72 hours of cure time.
Materials needed:
For polyethylene kayaks:
- G/flex 650 Epoxy or plastic welding kit
- Acetone or denatured alcohol
- 80-grit sandpaper
- Clean rags
- Disposable gloves
- Mixing sticks and cups (for epoxy)
- Clamps or heavy weights
- Fiberglass tape or plastic backing strip
For fiberglass kayaks:
- Marine epoxy (West System 105/206 or similar)
- Fiberglass cloth or mat
- Acetone
- 80-grit and 220-grit sandpaper
- Mixing supplies
- Disposable brushes
- Plastic spreader
Step-by-step repair process:
1. Assess the damage (15 minutes)
- Identify crack length and location
- Check if crack goes through hull (shine light from inside)
- Determine hull material (polyethylene, fiberglass, or composite)
- Take photos for documentation
2. Clean the area (30 minutes)
- Wash with soap and water, rinse thoroughly
- Wipe with acetone or denatured alcohol
- Let dry completely (2+ hours in warm weather)
- Clean both interior and exterior if through-hull crack
3. Prepare the surface (20 minutes)
- Sand 2-3 inches around crack with 80-grit sandpaper
- Create rough texture for adhesive bonding
- Wipe away dust with clean rag
- Final wipe with acetone
4. Align the crack (10 minutes)
- Press crack edges together to restore hull shape
- Use clamps, tape, or weights to hold alignment
- Check from both sides that edges meet properly
- For large cracks, may need helper to hold position
5. Apply interior repair (30-45 minutes)
- Mix epoxy according to package directions
- Apply thin layer along crack from inside
- Press fiberglass tape or backing strip into wet adhesive
- Apply second coat over reinforcement
- Smooth with spreader, remove excess
- Let cure 12-24 hours before exterior work
6. Apply exterior repair (30-45 minutes)
- Repeat surface prep on exterior
- Apply adhesive to fill crack
- Add fiberglass tape for cracks over 2 inches
- Build up layers if needed for strength
- Smooth and feather edges
- Remove clamps after adhesive sets (per product instructions)
7. Finish and cure (48-72 hours)
- Let cure fully per adhesive instructions
- Sand smooth with 220-grit sandpaper
- Apply UV protectant or paint to match hull
- Wait full cure time before water testing
8. Test the repair (2-3 hours)
- Fill kayak with water and inspect for leaks
- Let sit 2-3 hours, check repair area
- If dry, test in calm water close to shore
- Gradually return to normal use over 2-3 trips
Pro tips:
- Work in temperatures above 60°F for best adhesive performance
- Use more adhesive than you think you need – excess can be sanded off
- For large cracks, build up repair in multiple thin layers rather than one thick application
- Mark the repair area with tape to avoid accidentally sanding through fresh adhesive
- Keep mixing sticks and cups for future repairs
Time investment: Plan for a weekend project – a few hours of active work on Saturday, then let it cure until Monday or Tuesday before water testing. Rushing the cure time is the most common reason repairs fail.
FAQ
How long does kayak hull repair take?
Active repair work takes 2-4 hours depending on crack size and whether you repair from both sides, but full cure time requires 48-72 hours before the kayak can be used in water. Plan for a 3-4 day total timeline from start to water-ready.
Can you repair a kayak with duct tape?
Duct tape can serve as an emergency temporary patch to get you off the water safely, but it will fail within hours to days of water exposure and provides no structural repair. Use proper marine adhesives for any repair meant to last more than a single trip.
What is the strongest way to repair a polyethylene kayak?
Plastic welding with a heat gun and polyethylene welding rods creates the strongest repair (85-95% of original strength) for polyethylene kayaks, followed by G/flex 650 epoxy with interior reinforcement (70-85% strength). Standard epoxies won’t bond properly to polyethylene.
How do you fix a crack in a kayak without a kit?
For emergency repairs without a kit, thoroughly clean and dry the area, then use marine-grade silicone sealant or 3M 5200 adhesive available at hardware stores. This won’t provide structural strength but can waterproof small cracks temporarily until you can do a proper repair.
Can you repair a kayak with a hole?
Yes, holes up to 2-3 inches can be repaired using the same techniques as cracks, but you’ll need to add a backing patch from the interior to bridge the gap before applying adhesive and reinforcement. Larger holes may require professional repair or indicate the kayak should be replaced.
Do I need to sand before repairing a kayak crack?
Yes, sanding is critical for repair success – rough surfaces create mechanical bonding that helps adhesives grip the hull material. Sand 2-3 inches around the crack with 80-grit sandpaper and wipe clean before applying any repair materials.
How much does G/flex epoxy cost?
G/flex 650 epoxy typically costs $30-$45 for a kit that includes enough resin and hardener for 2-4 typical kayak crack repairs. It’s more expensive than standard epoxy but essential for bonding to polyethylene kayaks.
Can you repair a kayak in cold weather?
Most marine adhesives and epoxies require temperatures above 50-60°F to cure properly, so cold weather repairs often fail. If you must repair in cold weather, work in a heated garage and use a space heater to maintain proper temperature during the cure period.
Will a repaired kayak be as strong as new?
A properly executed repair typically achieves 70-95% of original hull strength depending on materials and technique, which is sufficient for normal recreational and fishing use. The repair area may be slightly more prone to re-cracking under extreme stress than undamaged hull.
How do you prevent kayak cracks?
Prevent cracks by storing your kayak on padded racks that support the entire hull length, applying UV protectant spray annually, avoiding dragging across rocks or concrete, staying within weight capacity limits, and keeping the kayak out of direct sunlight when not in use.
Can you use JB Weld on a kayak?
JB Weld can work on fiberglass kayaks for small cracks but is too rigid for polyethylene hulls that flex during use – the repair will crack again quickly. Use flexible marine adhesives like G/flex or 3M 5200 instead for better results on plastic kayaks.
What causes stress cracks in kayaks?
Stress cracks develop from repeated flexing at weak points, overloading beyond weight capacity, improper storage that creates pressure points, UV degradation weakening the plastic, and temperature cycling causing expansion and contraction. They often appear near scupper holes, seat mounts, and rod holder installations.
Conclusion
Knowing how to fix a cracked kayak hull saves money and extends the life of your fishing kayak, whether you’re dealing with a small hairline crack or a more significant structural issue. The key to successful repair lies in matching the right materials to your hull type – G/flex epoxy or plastic welding for polyethylene kayaks, marine epoxy with fiberglass reinforcement for fiberglass hulls – and never rushing the surface preparation or cure time.
For most fishing kayak enthusiasts, DIY crack repair is achievable with basic tools and $30-$60 in materials, making it far more economical than professional repair ($100-$300) or replacement. Start by thoroughly cleaning and roughening the damaged area, apply your chosen adhesive from both sides when possible, add reinforcement for cracks over 2 inches, and wait the full 48-72 hours before water testing.
Your next steps:
- Assess your damage – Measure the crack length and identify your hull material
- Gather materials – Purchase G/flex epoxy for polyethylene or marine epoxy for fiberglass
- Set aside time – Plan a weekend when you can work without rushing cure times
- Follow the process – Clean, prep, repair, reinforce, and cure properly
- Test thoroughly – Fill with water and inspect before returning to fishing trips
- Prevent future damage – Apply UV protectant and improve storage practices
Remember that repair makes the most sense when your kayak is under 10 years old, the crack is isolated and under 6 inches, and repair costs stay below 30-40% of replacement value. For older kayaks with multiple cracks or severe UV damage, replacement may be the safer and more economical choice, especially if you fish in challenging conditions where hull failure could be dangerous.
Take your time, use the right materials for your hull type, and don’t skip the surface preparation steps. A properly repaired crack can last for years and keep your fishing kayak on the water for many more successful trips. For more guidance on maintaining and transporting your kayak safely, explore our other resources on kayak safety and kayak transport.





