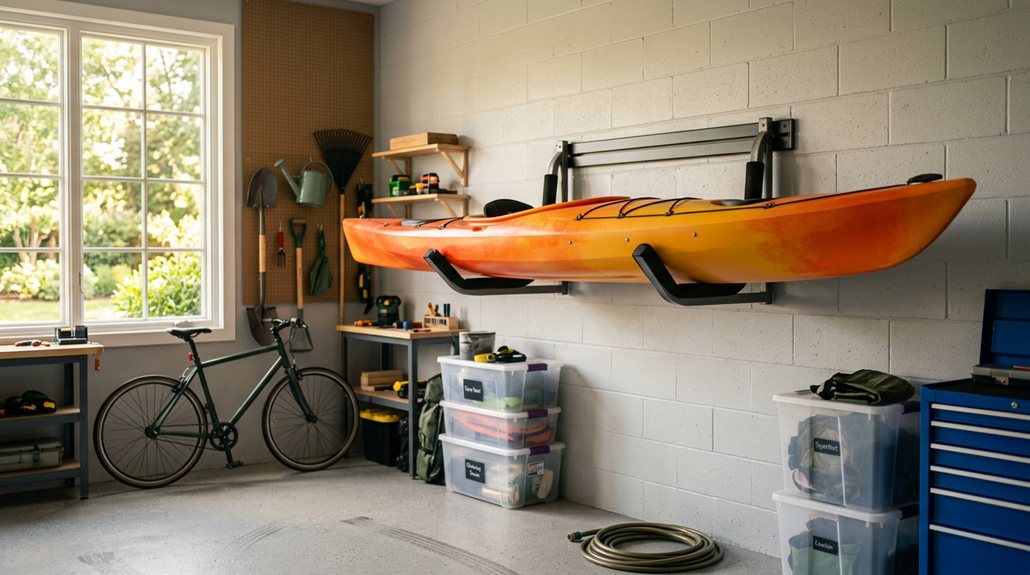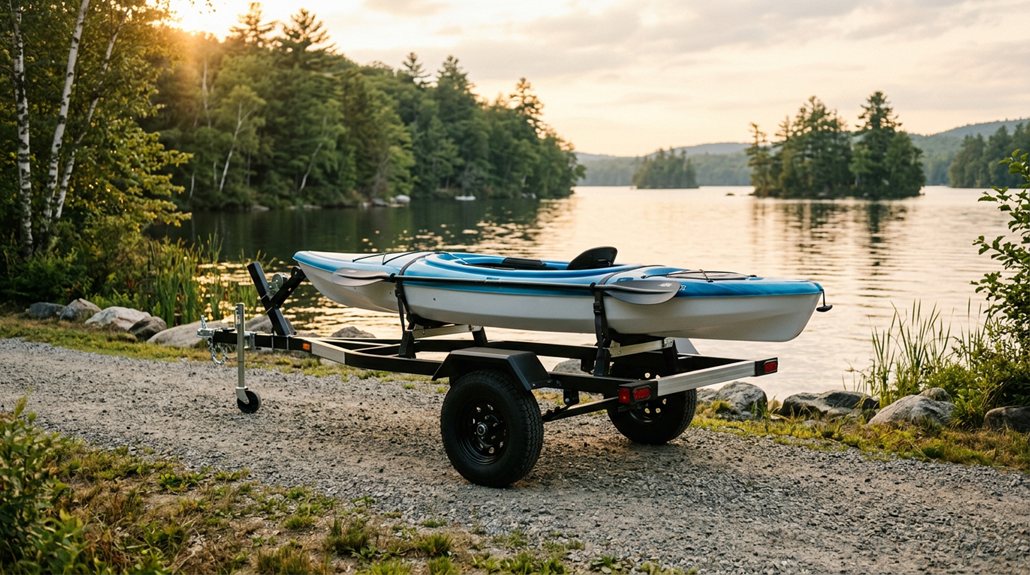
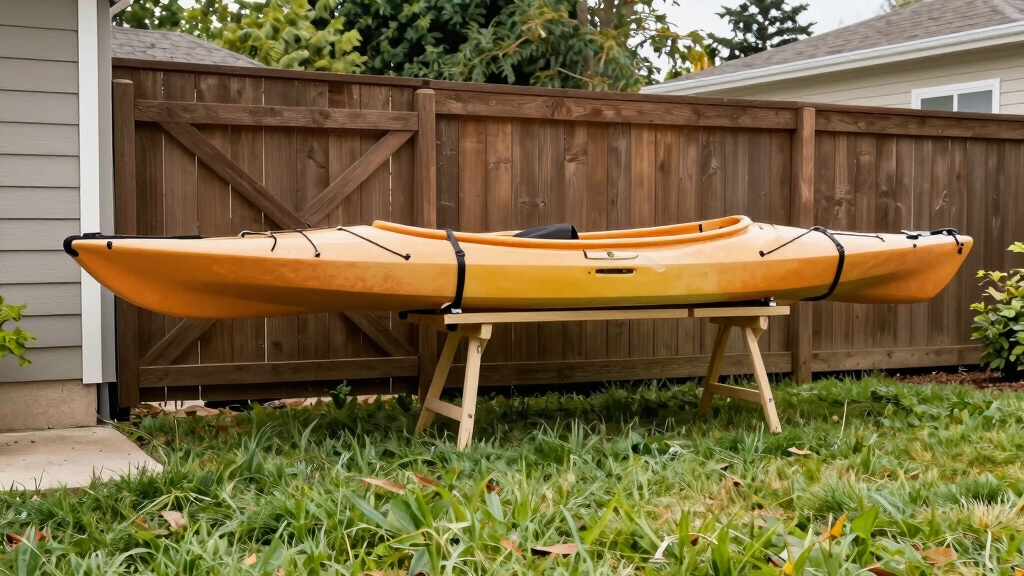
Most fishing kayaks spend their lives outdoors, and when stored correctly, they’ll last 10-15 years or more without significant damage. How to Store a Kayak Outside requires protecting the hull from UV rays, supporting it properly to prevent warping, and keeping water from pooling inside—three simple principles that separate kayaks that age gracefully from those that crack and fade within a few seasons.
Key Takeaways
- Store kayaks off the ground on racks, sawhorses, or wall mounts to prevent hull deformation and moisture damage
- UV protection is critical—use covers, store in shade, or apply UV protectant spray to prevent plastic degradation and fading
- Hull-side-down or on-edge storage distributes weight evenly and prevents warping better than storing right-side-up
- Winter outdoor storage is safe for most kayaks if properly covered and supported, though extreme cold can make plastic brittle
- Cheap solutions work well—sawhorses with padding, DIY PVC racks, and basic tarps provide adequate protection for under $100
- Warranty coverage varies—check your manufacturer’s policy, as some void warranties for outdoor storage without covers
- Inspect monthly for UV damage, cracks, and water accumulation to catch problems before they become expensive
- Apartment dwellers can use vertical wall mounts, balcony racks, or portable storage stands that minimize footprint
What Happens If You Leave a Kayak Outside in the Sun
Direct sunlight degrades polyethylene and other plastics through UV radiation, causing your kayak’s hull to fade, become brittle, and eventually crack. Most fishing kayaks are made from rotomolded polyethylene, which oxidizes when exposed to UV rays—the material’s molecular chains break down, leading to chalky surfaces, color loss, and structural weakness within 2-3 years of unprotected sun exposure.
The damage accelerates in hot climates where surface temperatures exceed 140°F. You’ll first notice fading on the deck and hull, particularly on darker colors that absorb more heat. Within 12-18 months of constant sun exposure, the plastic becomes noticeably more brittle. Small stress cracks appear around scupper holes, seat mounts, and other high-stress areas.
Signs of UV damage to watch for:
- Chalky white residue on the hull surface
- Faded colors, especially reds and blues
- Brittle plastic that flexes less than when new
- Small spider-web cracks near mounting points
- Warping or oil-canning in flat sections
The good news? UV damage is almost entirely preventable with proper covering or shade. Even a basic tarp reduces UV exposure by 90% or more, extending your kayak’s lifespan significantly.
Best Way to Cover a Kayak Stored Outside
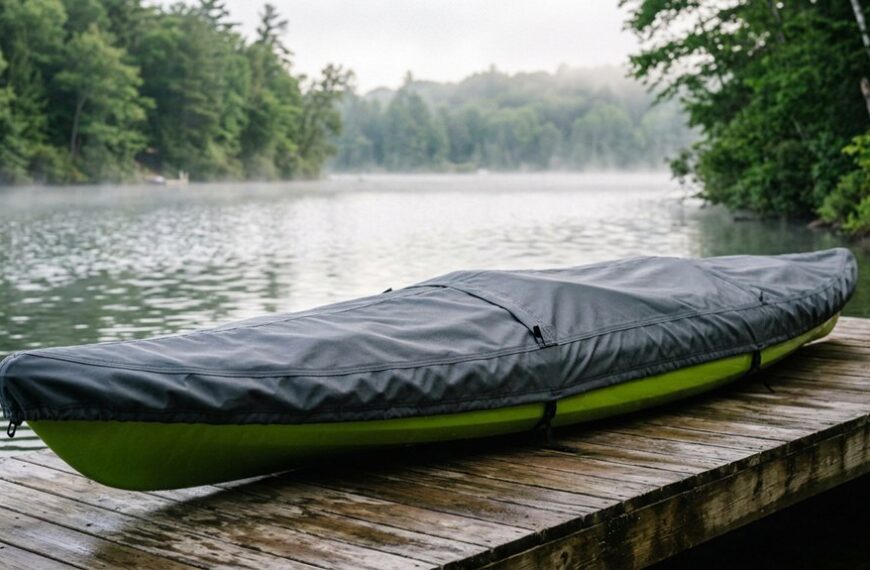
A breathable, UV-resistant cover specifically designed for kayaks provides the best protection, though heavy-duty tarps work nearly as well at a fraction of the cost. The key is ensuring the cover doesn’t trap moisture against the hull while blocking at least 95% of UV rays—waterproof covers without ventilation create condensation that promotes mold and mildew growth.
Covering options ranked by effectiveness:
- Custom kayak covers ($50-150): Fitted designs with ventilation panels, tie-down straps, and reinforced UV-blocking fabric
- Heavy-duty silver tarps ($20-40): Reflective surface deflects heat, widely available, requires proper securing to prevent wind damage
- Breathable boat covers ($60-120): Marine-grade fabric allows moisture escape while blocking UV
- Canvas tarps ($30-80): Natural material breathes well but degrades faster than synthetic options
Common covering mistakes:
- Using thin blue tarps that deteriorate within one season
- Wrapping covers too tightly, trapping moisture inside
- Failing to secure covers properly—wind damage ruins both cover and kayak
- Covering a wet kayak without allowing it to dry first
For fishing kayaks with lots of kayak gear mounted on deck, remove electronics, rod holders, and other accessories before covering. These create pressure points that can tear covers and trap water pockets.
Secure your cover with bungee cords or ratchet straps, but avoid over-tightening. The cover should sit loosely enough to allow air circulation but snugly enough that wind can’t get underneath. Check and retighten straps monthly, especially after storms.

【Durable & Protective Material】– Made with heavy-duty 420D Oxford fabric, this kayak covers for outdoor storage resists UV rays, water, and dust. It shields your kayak from sun, rain, snow, and scratches during transport, making it perfect for both off-season storage and in-season use to extend your kayak’s lifespan.

Fit for 10.1-11.4 FT Kayaks: Designed specifically for kayaks ranging from 10.1 to 11.4 feet in length, It also accommodates most universal boats, including canoes, fishing boats, stand-up paddle boards (SUP), It’s perfect for outdoor storage, whether you're at home or on the go, and protects your boat from wear and tear during long-term storage. (Ensure your kayak size is within the 10.1-11.4FT (3.1-3.5M) range for optimal fit.)
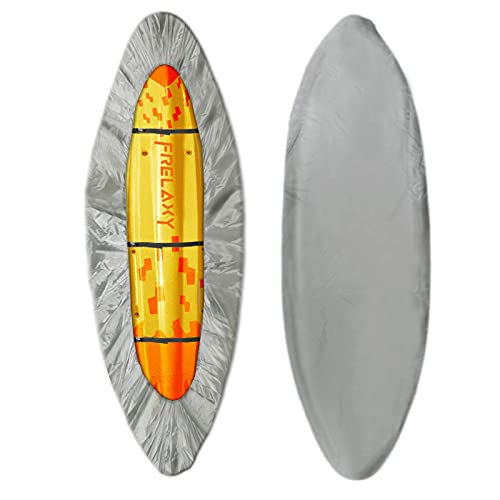
✔THICKER AND LAST LONGER: NEW VERSION Frelaxy Kayak Cover Upgrade the material from 300D oxford to Superior Tear-Resistant 420D OXFORD, Extends Double The Lifespan, BUILT TO WITHSTAND STRONG WIND, HEAVY RAIN, AND SUNBURN.
Can You Store a Kayak Outside in Winter
Yes, most fishing kayaks handle winter outdoor storage without damage if properly supported and covered, though extreme cold below 0°F can make polyethylene plastic temporarily brittle. The bigger winter threats are snow load, ice accumulation, and freeze-thaw cycles that can warp unsupported hulls or crack kayaks stored with water trapped inside.
Winter storage preparation steps:
- Clean thoroughly and remove all water from hull, scupper holes, and storage compartments
- Inspect for damage and repair any cracks before freezing temperatures arrive
- Remove accessories like fish finders, rod holders, and seats that could trap moisture
- Apply UV protectant spray to exposed surfaces
- Position hull-down or on-edge to prevent snow accumulation inside
- Use a sloped cover so snow and ice slide off rather than accumulating
Snow load is a real concern—wet snow weighs roughly 20 pounds per cubic foot, and a kayak filled with snow can experience hundreds of pounds of pressure on the hull. Store your kayak upside-down or use a cover that sheds snow to avoid this problem.
Choose winter outdoor storage if:
- You have a covered area like a carport or overhang
- You can check on the kayak monthly to remove snow/ice
- Temperatures in your area rarely drop below -10°F
- You have proper support (rack or sawhorses) to prevent ground contact
Consider indoor storage if:
- You live in areas with extreme cold (below -20°F regularly)
- Heavy snow and ice storms are common
- You can’t check on the kayak for months at a time
- Your kayak is high-end composite material rather than polyethylene
Most fishing kayaks are built tough enough for winter outdoor storage. The manufacturers design them for year-round outdoor use, though they won’t advertise it to avoid warranty claims.
Kayak Storage Rack vs Wall Mount for Outdoor Use
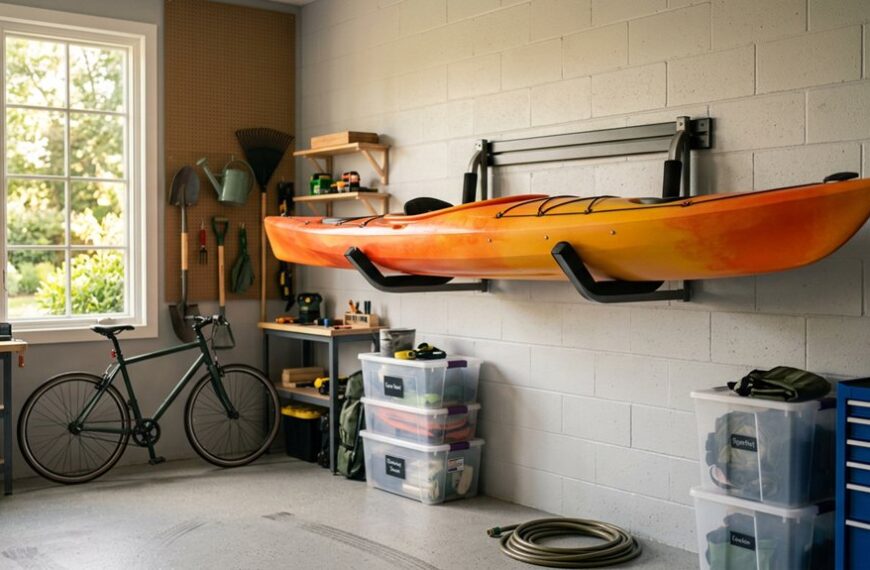
Freestanding racks offer more flexibility and capacity for multiple kayaks, while wall mounts save space and work better for single-kayak storage in tight areas like apartment patios or narrow side yards. Both protect your kayak equally well when installed correctly—the choice depends on your available space, number of kayaks, and whether you own or rent your property.
Freestanding rack advantages:
- No drilling or permanent installation required
- Easy to relocate or take when moving
- Can hold 2-4 kayaks on most models
- Works on any surface (grass, concrete, gravel)
- Typically costs $100-300 for quality models
Wall mount advantages:
- Saves floor space—kayak stores vertically or horizontally against wall
- More secure in high-wind areas
- Cheaper ($30-80 for basic models)
- Keeps kayak higher off ground, away from pests and flooding
- Cleaner look in residential settings
Installation considerations:
For wall mounts, you’ll need to anchor into studs or use heavy-duty masonry anchors for brick/concrete. A 12-foot fishing kayak weighs 60-80 pounds, and mounts must support at least 150 pounds to account for dynamic loading when placing or removing the kayak. Poor installation leads to torn-out anchors and damaged kayaks.
Freestanding racks need level ground and should be staked or weighted if you live in windy areas. Many anglers add sandbags or concrete blocks to the base for stability.
For apartment or condo storage, wall mounts are usually the only option, but check your lease before drilling. Some properties allow outdoor storage on balconies or patios with removable solutions. Vertical wall mounts work well for sit on top kayaks common in fishing applications.

Heavy-Duty Steel: Crafted from high-strength steel, the kayak storage rack is extremely sturdy, supporting 110 lbs per tier, with a total capacity of 660 lbs. Its heavy-duty structural design ensures lasting stability and prevents collapse

RECLAIM YOUR FLOOR SPACE — Stand 2 kayaks upright in a compact footprint and free up valuable floor space in tight areas; this kayak rack for garage keeps both boats upright and out of the way.
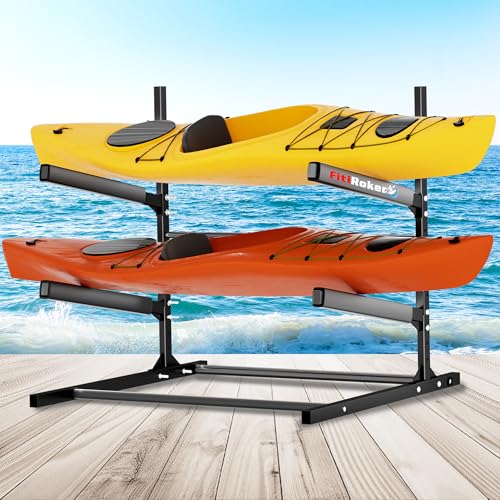
2-Tier Storage, 200 lbs Total: Store up to three kayaks or a mix of canoes, SUPs, paddleboards and surfboards in one organized rack. Each level supports up to 100 lbs for garages, sheds, boathouses and covered docks
How to Protect Kayak from UV Damage Outside
Apply marine-grade UV protectant spray every 3-4 months and store your kayak in shade or under a cover to block direct sunlight—these two actions prevent 95% of UV degradation. UV protectants work by creating a sacrificial barrier that absorbs UV radiation before it reaches the plastic, while physical barriers like covers and shade structures eliminate exposure entirely.
Effective UV protection methods:
- UV protectant sprays ($15-30): 303 Aerospace Protectant and similar marine products create a protective coating; reapply quarterly
- Covered storage: Even a basic tarp blocks most UV when properly secured
- Shade structures: Carports, pergolas, or trees reduce direct sun exposure by 70-90%
- Reflective covers: Silver or white covers reflect heat and UV better than dark colors
- Strategic positioning: Store kayak on north side of buildings (northern hemisphere) for maximum shade
Application tips for UV protectant:
- Clean and dry the kayak completely before applying
- Spray in thin, even coats rather than heavy application
- Wipe with a microfiber cloth to spread evenly and remove excess
- Focus on high-exposure areas: deck, hull sides, and any flat surfaces
- Avoid getting protectant on non-slip pads or seat cushions (makes them slippery)
UV damage is cumulative and irreversible. A kayak that sits in full Arizona sun for three years without protection will be significantly more brittle than the same model stored in Seattle with occasional UV spray application. The investment in protection is minimal compared to replacing a damaged kayak.
For fishing kayaks, pay special attention to mounting points for rod holders, fish finders, and other accessories. These areas experience both UV exposure and mechanical stress, making them prone to cracking if the plastic becomes brittle.
Is It Better to Store a Kayak Upside Down or Right Side Up
Store your kayak hull-side-down (upside down) or on its edge to distribute weight evenly across the strongest part of the hull and prevent warping—never store a kayak right-side-up on flat ground or sawhorses. The hull is designed to handle water pressure from below and distributes weight better when inverted, while right-side-up storage concentrates pressure on the keel and can cause oil-canning (flat spots) in the bottom.
Storage position rankings:
- On edge (sideways): Best option—minimal contact points, excellent weight distribution, water drains naturally
- Hull-down (upside down): Second best—spreads weight across gunwales, prevents water accumulation inside
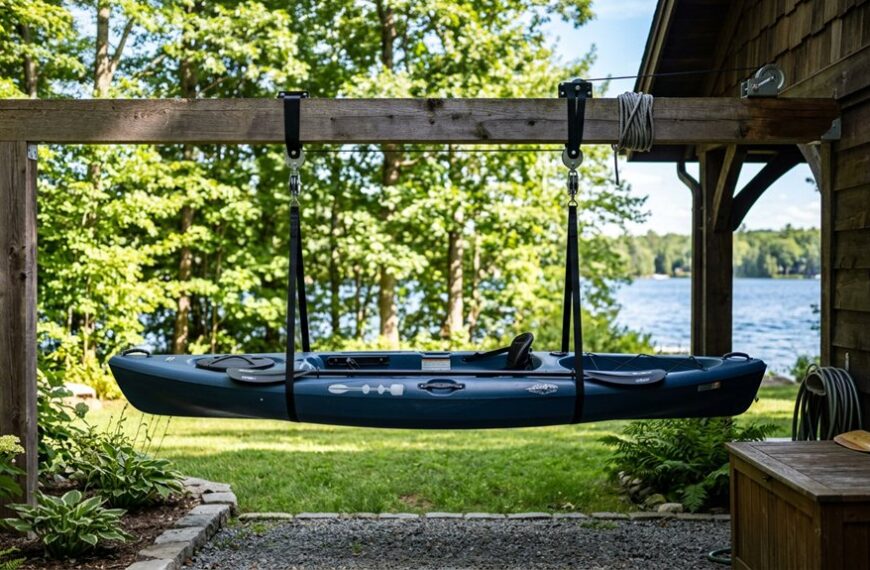
- Suspended by straps: Excellent but requires proper strap placement and strong support structure
- Right-side-up: Worst option—causes warping, allows water/debris accumulation, concentrates weight on keel
Proper support points:
When storing hull-down or on-edge, support the kayak at points roughly one-quarter of the length from each end. For a 12 foot kayak, that means supports at approximately 3 feet and 9 feet from the bow. This distributes weight along the strongest structural sections.
Use padded supports—foam blocks, pool noodles, or carpet scraps—to prevent pressure points. Hard contact points create indentations over time, especially in warm weather when plastic is more pliable.
Common storage position mistakes:
- Supporting only at the center point (causes severe sagging)
- Using narrow supports that create pressure points
- Storing right-side-up, which allows water, leaves, and debris to collect inside
- Hanging by bow and stern handles (not designed for long-term weight bearing)
For tandem fishing kayaks or longer models (14+ feet), proper support becomes even more critical due to increased weight and length. These kayaks are more prone to warping if stored incorrectly.
Cheap Outdoor Kayak Storage Solutions
Sawhorses with foam padding cost $30-50 and provide excellent support for outdoor kayak storage, while DIY PVC pipe racks run $40-70 in materials and work just as well as commercial options costing $200+. The key to budget storage is proper support spacing and padding—expensive racks don’t protect your kayak any better than well-designed cheap solutions.
Budget storage options:
Sawhorses with padding ($30-50):
- Buy two adjustable sawhorses from any hardware store
- Add foam pipe insulation or pool noodles to the top bars
- Position at quarter-points along kayak length
- Stable, portable, and works for any kayak size
DIY PVC rack ($40-70):
- Build a freestanding rack using 3-inch PVC pipe and fittings
- Dozens of free plans available online
- Customize height and width for your space
- Can hold multiple kayaks with proper design
Concrete blocks and 2x4s ($25-40):
- Stack concrete blocks to desired height
- Lay padded 2x4s across blocks
- Simple, stable, infinitely adjustable
- Works well for temporary or seasonal storage
Wall-mounted 2×4 brackets ($15-30):
- Cut 2x4s to 18-24 inches length
- Mount to wall studs at 45-degree angle
- Add foam padding to contact points
- Holds kayak vertically or horizontally
Rope and pulley system ($20-40):
- Suspend kayak from overhead structure (carport, pergola)
- Use wide straps (not rope) to prevent hull damage
- Requires strong overhead support
- Keeps kayak completely off ground
What makes cheap storage work:
The expensive commercial racks use the same principles as DIY solutions—proper support spacing, padded contact points, and stable construction. You’re paying for convenience and aesthetics, not better kayak protection. A $40 sawhorse setup protects your kayak just as well as a $300 commercial rack if you position and pad it correctly.
Avoid these “cheap” solutions:
- Storing directly on ground (causes warping and moisture damage)
- Leaning against a wall without support (creates pressure points)
- Hanging from bow/stern handles (not designed for long-term weight)
- Using rope or wire without padding (cuts into hull)
For beginner kayak fishing enthusiasts on a budget, sawhorses are the best starting point. They’re versatile, portable, and work for kayak maintenance and repairs too.
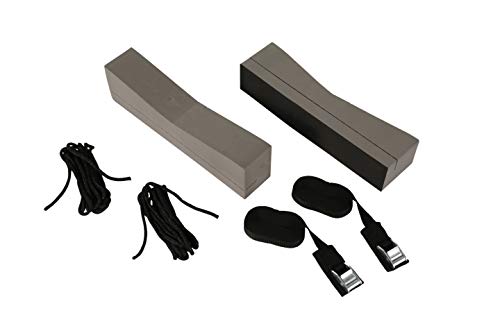
Everything you need for kayak transportation on your car roof

Universal Fitment: No longer do you need an expensive fixed roof rack system! HEYTRIP soft roof racks are ideally suited for carrying your kayak/surfboard/SUP/canoe to your favorite paddling spot and have a maximum weight load of 80kg. It works on almost any type of vehicle, no matter whether your car with/without side rails or gutters.

Ultimate Versatility for All Your Gear : This universal car roof rack is the perfect solution for transporting kayaks, surfboards, SUPs, canoes, snowboards, and more; Designed to fit SUVs, sedans, hatchbacks, and 2-door or 4-door cars;with or without side rails;it’s your go-to for beach trips, mountain adventures, or lake outings; Convenience and reliability guaranteed
Will Storing My Kayak Outside Void the Warranty
Most kayak manufacturers allow outdoor storage but require UV protection (covers or shade) and proper support to maintain warranty coverage—check your specific warranty terms, as policies vary significantly between brands. Some manufacturers explicitly void warranties for outdoor storage without covers, while others have no restrictions as long as damage isn’t from obvious neglect.
Common warranty provisions:
- Lifetime hull warranties typically cover manufacturing defects but exclude UV damage, warping from improper storage, and impact damage
- Outdoor storage clauses often require “reasonable protection from elements” without defining specifics
- UV damage is almost never covered, as manufacturers consider it preventable
- Warping from improper support voids most warranties
Manufacturer-specific examples:
Premium brands often have stricter warranty terms requiring indoor storage or covered outdoor storage. Budget brands typically have shorter warranties (1-3 years) with fewer restrictions. Always read your warranty card or registration documents for exact terms.
Documenting proper storage:
If you plan to make a warranty claim, photos of your storage setup help prove you stored the kayak properly. Take pictures showing:
- Covered storage or shade structure
- Proper support points (not on ground)
- Hull-down or on-edge positioning
- Regular maintenance and cleaning
What voids warranties:
- Storing on flat ground without support
- Leaving uncovered in direct sun for extended periods
- Dragging kayak across rough surfaces
- Modifying hull structure (drilling holes without proper reinforcement)
- Using kayak beyond rated capacity
For fishing kayak enthusiasts, warranty coverage matters more for expensive features like pedal drives, rudder systems, and integrated electronics. Hull warranties are less critical since proper storage prevents most damage anyway.
Contact your manufacturer directly if warranty terms are unclear. Most have customer service lines that can clarify storage requirements specific to your model.
How to Store a Kayak Outside Without a Rack
Lay your kayak hull-down on padded sawhorses, concrete blocks with 2x4s, or even stacked firewood with foam padding—any stable, elevated surface with proper support spacing works without a dedicated rack. The goal is keeping the kayak off the ground with weight distributed across two support points positioned at the quarter-lengths, regardless of what materials you use.
No-rack storage methods:
Padded sawhorses (best option):
- Adjustable height for different kayak sizes
- Portable and easy to reposition
- Costs $30-50 for a pair
- Add foam pipe insulation for padding
Concrete blocks and lumber:
- Stack blocks to 12-18 inches height
- Lay padded 2x4s or 4x4s across blocks
- Extremely stable and weather-resistant
- Total cost under $40
Tree supports:
- Strap padded 2x4s between two trees
- Adjust height with rope or chain
- Free if you have suitable trees
- Ensure trees are stable and properly spaced
Pallet storage:
- Stack two pallets for height
- Add padding on top
- Secure pallets so they don’t shift
- Free from many businesses
Ground storage (last resort):
- Only if you must store on ground temporarily
- Use multiple foam blocks or pool noodles underneath
- Position blocks at quarter-points
- Cover completely to prevent water accumulation
- Check weekly for warping
Support spacing formula:
For any storage method, position supports at approximately 25% and 75% of the kayak’s length. For a 10-foot kayak, that’s 2.5 feet and 7.5 feet from the bow. This distributes weight along the strongest structural sections and prevents sagging.
Padding materials:
- Pool noodles (cheap, effective, widely available)
- Foam pipe insulation from hardware stores
- Old carpet scraps
- Foam camping pads cut to size
- Yoga mats wrapped around support points
The padding prevents pressure points that create indentations in the hull. Even a few millimeters of foam makes a significant difference over months of storage.
For apartment dwellers without yard space, vertical wall storage using simple brackets works well. Mount two padded 2x4s to an exterior wall at a 45-degree angle, spaced to support the kayak at quarter-points. This keeps the kayak off the ground and minimizes footprint.
Do Plastic Kayaks Crack from Being Stored Outside
Plastic kayaks rarely crack from outdoor storage alone—cracks result from UV damage weakening the plastic combined with stress from impacts, improper support, or extreme temperature swings. A properly stored and protected polyethylene kayak can last 15+ years outdoors without cracking, while an unprotected kayak in harsh sun may develop cracks within 2-3 years.
Crack causes ranked by frequency:
- UV degradation + impact: Brittle plastic from sun damage cracks when bumped or dropped
- Improper support: Pressure points from narrow supports create stress cracks
- Freeze-thaw cycles: Water trapped in cracks expands when frozen, widening damage
- Manufacturing defects: Thin spots or air bubbles in rotomolding process
- Overloading: Exceeding weight capacity stresses hull structure
Crack-prone areas:
- Scupper holes and drain plugs
- Seat mounting points
- Rod holder installations
- Hull-deck seams
- Any area with drilled holes or modifications
Prevention strategies:
- Apply UV protectant spray quarterly
- Store under cover or in shade
- Use proper support spacing with padding
- Inspect monthly for early signs of damage
- Repair small cracks immediately before they spread
- Remove water before freezing temperatures
Crack repair:
Small cracks (under 2 inches) can be repaired with plastic welding or marine epoxy. Larger cracks may require professional repair or indicate the kayak is reaching end of life. Catch cracks early—a 1-inch crack is a $20 DIY fix, while a 12-inch crack may total the kayak.
Material differences:
- Rotomolded polyethylene (most fishing kayaks): Durable, flexible, crack-resistant when protected from UV
- Thermoformed plastic: Stiffer, lighter, more prone to cracking than rotomolded
- Composite materials: Fiberglass and carbon fiber don’t crack from UV but can delaminate from moisture
For inflatable fishing kayaks, outdoor storage concerns are different—UV damages the fabric and seams rather than causing cracks. These should always be stored deflated and covered.
Outdoor Kayak Storage for Apartments with No Garage
Vertical wall mounts on balconies or patios provide the most space-efficient outdoor storage for apartment dwellers, holding a kayak in just 2-3 feet of floor space while keeping it protected and accessible. Many apartments allow outdoor storage on private balconies or patios, though you should check your lease and HOA rules before installing permanent mounts.
Apartment-friendly storage solutions:
Vertical wall mounts ($30-80):
- Mounts to exterior wall or balcony railing
- Holds kayak nose-up or tail-up
- Minimal footprint (2-3 feet of floor space)
- Requires permission to drill into walls
Freestanding vertical racks ($80-150):
- No installation required
- Portable if you move
- Holds kayak vertically without wall attachment
- Needs 3-4 feet of floor space
Balcony rail mounts ($40-100):
- Clamps to balcony railing without drilling
- Works for lighter kayaks (under 60 pounds)
- Easy to remove when moving
- Check weight limits and railing strength
Portable storage stands ($60-120):
- Folds flat when not in use
- No installation required
- Can be moved indoors during extreme weather
- Works in shared storage areas
Lease and HOA considerations:
- Get written permission before drilling or installing permanent fixtures
- Some properties prohibit outdoor storage entirely
- HOAs may have rules about visible kayaks or covers
- Shared storage areas may allow kayak racks with permission
For renters, prioritize removable solutions that don’t require drilling. Freestanding racks and rail-mounted options leave no permanent marks and can move with you.
Security concerns:
Apartment storage increases theft risk. Use kayak straps with locks, cable locks through scupper holes, or store in less visible areas. Remove expensive accessories like fish finders and rod holders when not in use.
Alternative options:
- Kayak storage facilities: Some marinas and outdoor shops offer monthly kayak storage ($20-50/month)
- Shared storage with neighbors: Split the cost of a storage unit or shed
- Seasonal storage: Store at a friend’s house during off-season
- Kayak clubs: Some clubs offer member storage
For recreational kayaking enthusiasts in apartments, vertical storage is often the only viable option. It works well for shorter kayaks (10-12 feet) but becomes challenging with longer fishing kayaks (14+ feet).
Common Mistakes When Storing Kayaks Outdoors
Storing kayaks right-side-up on the ground is the most common mistake, causing warping, water accumulation, and pest problems—yet many anglers do it because it seems easier than proper setup. Other frequent errors include using covers that trap moisture, supporting kayaks at only one point, and neglecting regular inspections that catch small problems before they become expensive.
Top storage mistakes:
Storing right-side-up:
- Allows water, leaves, and debris to collect inside
- Concentrates weight on keel, causing warping
- Creates breeding ground for mosquitoes and pests
- Solution: Always store hull-down or on edge
Ground contact:
- Causes flat spots and warping
- Exposes hull to moisture and ground-dwelling pests
- Increases UV exposure on bottom of kayak
- Solution: Elevate at least 6-12 inches off ground
Single support point:
- Creates severe sagging in middle of kayak
- Stresses hull structure
- Leads to permanent deformation
- Solution: Use two supports at quarter-points
Non-breathable covers:
- Traps moisture against hull
- Promotes mold and mildew growth
- Creates condensation that damages accessories
- Solution: Use breathable covers or leave ventilation gaps
Ignoring UV protection:
- Plastic becomes brittle within 2-3 years
- Fading and chalking indicate damage
- Cracks develop at stress points
- Solution: Apply UV protectant spray quarterly and use covers
Improper strap tension:
- Over-tightening deforms hull
- Under-tightening allows wind to lift covers
- Straps across unsupported sections cause indentations
- Solution: Snug but not tight, avoid crossing hull spans
Neglecting inspections:
- Small cracks become large failures
- Water accumulation goes unnoticed
- Pest damage spreads
- Solution: Monthly visual inspections, quarterly detailed checks
Storing with accessories attached:
- Electronics damaged by moisture and temperature swings
- Rod holders create pressure points under covers
- Seats trap moisture and mildew
- Solution: Remove all accessories for storage
For fishing kayak owners, the mistake of leaving expensive electronics and fish finders mounted during storage is particularly costly. Temperature swings and moisture damage these components even when the kayak itself is fine.
Quick storage checklist:
- ✓ Kayak elevated off ground
- ✓ Hull-down or on-edge position
- ✓ Two support points at quarter-lengths
- ✓ Padded contact points
- ✓ Breathable cover or shade
- ✓ All water drained from hull
- ✓ Accessories removed
- ✓ Monthly inspection scheduled
How Long Can a Kayak Stay Outside Before Damage Occurs
A properly stored and covered kayak can remain outside indefinitely without damage, while an unprotected kayak in direct sun shows visible UV damage within 6-12 months and develops structural problems within 2-3 years. The timeline depends entirely on protection measures—covered storage in shade can preserve a kayak for 15+ years, while full sun exposure without protection causes noticeable degradation in a single season.
Damage timeline for unprotected outdoor storage:
3-6 months: Visible color fading, especially on deck and top surfaces; slight chalking on hull
6-12 months: Significant fading, chalky residue, plastic feels slightly more brittle; no structural damage yet
12-18 months: Noticeable brittleness, small stress cracks may appear at mounting points; warping if improperly supported
2-3 years: Severe UV damage, multiple cracks, significant warping; kayak may still be usable but lifespan shortened
3-5 years: Major structural problems, large cracks, severe warping; kayak approaching end of useful life
Damage timeline for properly protected storage:
1-5 years: No visible damage with proper UV protection and support
5-10 years: Minor fading and wear, but structurally sound
10-15 years: Noticeable aging but still fully functional with proper care
15+ years: Possible replacement needed due to accumulated wear, but many kayaks last this long outdoors
Factors that accelerate damage:
- Climate: Desert sun and high heat cause faster degradation than temperate climates
- Altitude: Higher UV exposure at elevation
- Humidity: Moisture accelerates mold and mildew but doesn’t affect plastic directly
- Temperature swings: Extreme freeze-thaw cycles stress plastic
- Kayak color: Darker colors absorb more heat and show fading faster
Factors that extend lifespan:
- Consistent UV protectant application
- Quality covers or shade structures
- Proper support preventing warping
- Regular cleaning and maintenance
- Moderate climate without temperature extremes
For fishing kayaks with lots of accessories and modifications, the timeline may be shorter because drilled holes and mounting points create stress concentration areas where cracks start. Inspect these areas carefully during regular maintenance.
When to replace:
Replace your kayak when you notice multiple large cracks (over 6 inches), severe warping that affects performance, or when the plastic becomes so brittle that it flexes noticeably less than when new. Small cosmetic damage doesn’t affect function—many fishing kayaks look rough but perform perfectly for decades.
Should I Store My Kayak on Sawhorses Outside
Yes, sawhorses provide excellent outdoor kayak storage when positioned at the quarter-points of the kayak’s length and padded to prevent pressure points—they’re stable, adjustable, and cost-effective at $30-50 for a pair. Sawhorses are one of the most popular storage solutions among experienced kayak anglers because they work for any kayak size, require no installation, and double as maintenance stands for cleaning and repairs.
Why sawhorses work well:
- Adjustable height: Most sawhorses adjust from 24-36 inches, accommodating different kayak sizes
- Stable platform: Wide base prevents tipping in wind
- Portable: Easy to move for yard work or relocating kayak
- Multi-purpose: Use for kayak maintenance, repairs, and cleaning
- Affordable: Quality sawhorses cost $15-25 each
- No installation: Set up in minutes without tools
Proper sawhorse setup:
- Position sawhorses at approximately 25% and 75% of kayak length
- Add padding using foam pipe insulation, pool noodles, or carpet
- Level the sawhorses on flat ground to prevent kayak from sliding
- Store hull-down with the kayak inverted on the padded sawhorses
- Add cover to protect from UV and weather
- Secure cover with bungee cords to prevent wind damage
Sawhorse selection tips:
- Choose metal or heavy-duty plastic sawhorses rated for at least 1,000 pounds per pair
- Adjustable models offer more versatility for different kayak sizes
- Wider sawhorses (24+ inches) provide better stability
- Look for rubber feet to prevent sliding on concrete or decking
Padding options:
- Pool noodles: Cut lengthwise and slip over sawhorse top bar; cheap and effective
- Foam pipe insulation: Similar to pool noodles but more durable
- Carpet scraps: Wrap and secure with zip ties or duct tape
- Foam camping pads: Cut to size and attach with adhesive
Common sawhorse mistakes:
- Positioning too close together (causes sagging)
- Using sawhorses without padding (creates pressure points)
- Placing on uneven ground (kayak slides off)
- Supporting kayak at center only (severe warping)
For longer kayaks (14+ feet), consider using three sawhorses for additional support, positioned at 25%, 50%, and 75% of the length. This prevents sagging in longer, heavier models.
Sawhorses work particularly well for kayak transport preparation—you can load and secure your kayak on sawhorses before lifting it onto your vehicle, making the process safer and easier.
Conclusion
Storing a kayak outside successfully comes down to three core principles: protect it from UV damage with covers or shade, support it properly to prevent warping, and keep water from accumulating inside. Whether you invest in a commercial rack system or build a simple sawhorse setup, these fundamentals remain the same.
Most fishing kayaks are built to withstand outdoor storage—manufacturers design them for exactly this purpose. The difference between a kayak that lasts 5 years and one that lasts 15 years isn’t the kayak itself, but how you store it. A $40 investment in sawhorses and a tarp provides the same protection as a $300 commercial rack when set up correctly.
Take action today:
- Assess your current storage: Is your kayak elevated, supported at quarter-points, and protected from UV?
- Fix immediate problems: Add padding to support points, elevate off ground, or add a cover
- Set a maintenance schedule: Monthly visual inspections, quarterly UV protectant application
- Document your setup: Take photos for warranty purposes and to track any changes over time
The kayak you have now can serve you for decades with proper outdoor storage. Don’t let poor storage practices shorten the life of your investment—implement these strategies and spend more time fishing, less time worrying about equipment damage.
For more guidance on maintaining your fishing kayak and maximizing your time on the water, explore our fishing kayak resources and kayak gear guides.
FAQ
How much does outdoor kayak storage cost?
Basic outdoor storage using sawhorses and a tarp costs $50-80 total. Commercial rack systems range from $100-300, while wall mounts run $30-150. DIY solutions using PVC pipe or lumber cost $40-70 in materials.
Can I store a kayak vertically outside?
Yes, vertical storage works well outdoors and saves space. Use wall mounts or freestanding vertical racks, ensure proper support at two points, and cover the kayak to protect from UV. Vertical storage is ideal for apartments and small yards.
Do I need to drain my kayak before outdoor storage?
Yes, always drain all water from the hull, scupper holes, and storage compartments before storing. Trapped water promotes mold growth, attracts mosquitoes, and can freeze in winter causing cracks and damage.
How often should I inspect my outdoor-stored kayak?
Inspect monthly for visible damage, water accumulation, and cover condition. Perform detailed inspections quarterly, checking for cracks, warping, UV damage, and pest problems. Reapply UV protectant every 3-4 months.
Will rain damage my kayak stored outside?
No, rain doesn’t damage kayaks—they’re designed to be in water. However, store hull-down or on-edge so rain doesn’t accumulate inside. Use breathable covers that allow moisture to escape while blocking UV rays.
Can I store my kayak on grass outside?
Avoid storing directly on grass—it causes warping, moisture damage, and pest problems. Always elevate your kayak at least 6-12 inches off the ground using sawhorses, racks, or blocks with proper padding.
What temperature is too cold for outdoor kayak storage?
Most polyethylene kayaks handle temperatures down to -20°F without damage when properly stored. Below 0°F, plastic becomes brittle temporarily but won’t crack unless impacted. Remove all water before freezing temperatures.
Should I remove my kayak seat for outdoor storage?
Yes, remove seats, electronics, and accessories for outdoor storage. These components trap moisture, create pressure points under covers, and can be damaged by temperature swings and UV exposure.
How do I prevent my kayak cover from blowing off?
Secure covers with bungee cords or ratchet straps at multiple points around the kayak. Don’t over-tighten—covers should be snug but allow some air circulation. Check and retighten monthly, especially after storms.
Can I stack kayaks for outdoor storage?
Avoid stacking kayaks directly on top of each other—the weight causes warping in the bottom kayak. If you must stack, use a rack system designed for multiple kayaks with individual support points for each boat.
Does kayak color affect outdoor storage damage?
Yes, darker colors absorb more heat and show UV fading faster than light colors. However, all kayak colors need UV protection regardless of shade. Darker kayaks may need more frequent UV protectant application.
How do I store a pedal drive kayak outside?
Remove the pedal drive system and store it indoors—these mechanisms have seals, bearings, and moving parts that degrade faster outdoors. Store the kayak hull using standard outdoor storage methods with proper support and covering.