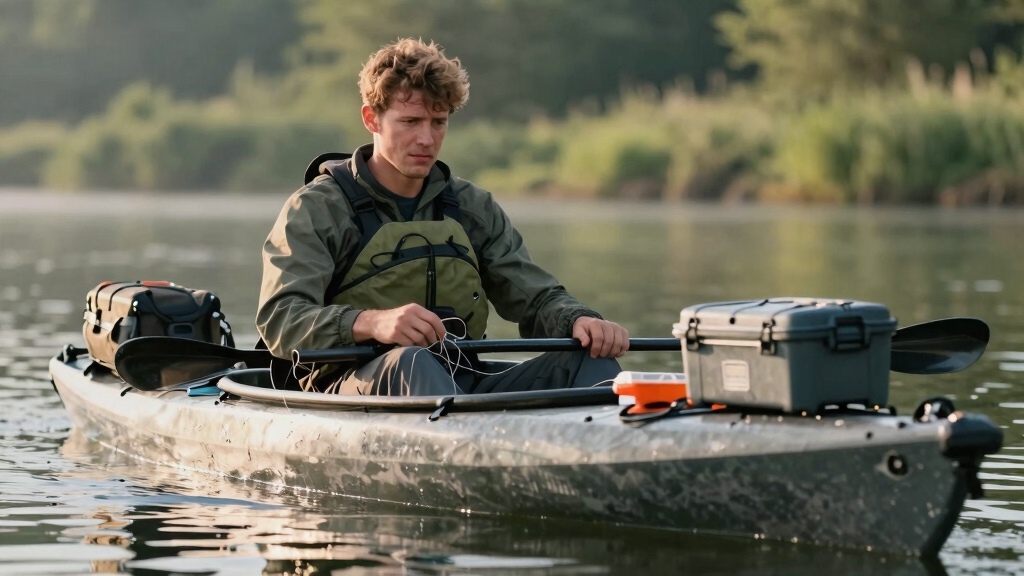
More than 60% of first-time kayak anglers capsize or lose gear during their initial outings, not because the sport is inherently dangerous, but because they skip fundamental preparation steps that experienced paddlers take for granted. Understanding the common kayak fishing mistakes beginners make can transform your first trip from a frustrating disaster into the start of a lifelong passion.
Key Takeaways
- Choose the right vessel: Regular recreational kayaks lack the stability, rod holders, and storage that fishing-specific models provide
- Prioritize stability over speed: Wider kayaks (30+ inches) prevent the most common beginner mistake—tipping over while casting or landing fish
- Secure everything: Rods, tackle, and gear will end up in the water unless properly leashed or stored in closed compartments
- Master anchoring basics: Improper anchor setup causes kayaks to spin uncontrollably or capsize in current and wind
- Wear appropriate safety gear: A properly fitted PFD (personal flotation device) is non-negotiable, regardless of swimming ability
- Start in protected waters: Avoid open ocean, strong currents, and boat traffic until you’ve mastered basic kayak control
- Budget realistically: Quality entry-level fishing kayaks start around $600-800; cheaper options often create more problems than they solve
- Learn to handle big fish: Having a plan before hooking a large fish prevents equipment loss and dangerous situations
What Are the Most Common Kayak Fishing Mistakes for Beginners?
The most common kayak fishing mistakes beginners make fall into three categories: equipment selection, safety preparation, and on-water technique. New anglers typically choose the wrong kayak type, skip essential safety gear, fail to secure their equipment, and underestimate the importance of proper anchoring and weight distribution.
Equipment mistakes include using recreational kayaks instead of fishing-specific models, buying kayaks that are too narrow for stability, and neglecting rod holders or leashes. Many beginners also overload their first kayak with unnecessary gear, creating dangerous weight distribution issues.
Safety oversights are equally problematic. First-timers often:
- Wear improperly fitted or Coast Guard non-approved PFDs
- Skip communication devices like waterproof phones or VHF radios
- Ignore weather forecasts and water temperature considerations
- Venture into waters beyond their skill level
Technique errors compound these problems. Beginners frequently stand up too quickly, reach too far while casting, and panic when the kayak rocks. They also tend to anchor from the side rather than the bow or stern, causing dangerous spinning in current.
For a comprehensive overview of getting started, check out our beginner kayak fishing resources.
Do I Need a Special Kayak for Fishing or Can I Use a Regular One?
You need a fishing-specific kayak for consistent success and safety. Regular recreational kayaks lack the stability, storage, and mounting points that make fishing practical and enjoyable. While you can fish from a recreational kayak, you’ll struggle with rod management, gear organization, and stability every time you cast or fight a fish.
Key differences between fishing and recreational kayaks:
| Feature | Fishing Kayak | Recreational Kayak |
|---|---|---|
| Width | 30-36 inches | 24-28 inches |
| Stability | High (designed for standing) | Moderate (designed for paddling) |
| Rod holders | 2-4 built-in mounts | None |
| Storage | Open deck with bungees, sealed hatches | Limited deck space |
| Weight capacity | 350-550 lbs | 250-350 lbs |
| Anchor system | Trolley or cleat system | None |
Fishing kayaks feature wider hulls that provide a stable platform for casting, fighting fish, and even standing. They include flush-mount rod holders, gear tracks for accessories, and dedicated storage for tackle boxes. Most importantly, they’re designed with the assumption that you’ll be shifting your weight frequently—something that causes recreational kayaks to feel tippy and unstable.
Choose a fishing kayak if: You plan to fish regularly, want to stand while casting, need multiple rod setups, or fish in areas requiring anchoring. Stick with a recreational kayak only if: You’re testing the sport once or twice, fishing exclusively from a seated position in calm ponds, and don’t mind holding your rod constantly.
For help selecting the right model, explore our fishing kayak buying guide.

HIGH QUALITY - The kayak fishing rod holder Made of High Quality Material PC+ABC, strong and durable, corrosion resistant, hard to damage.
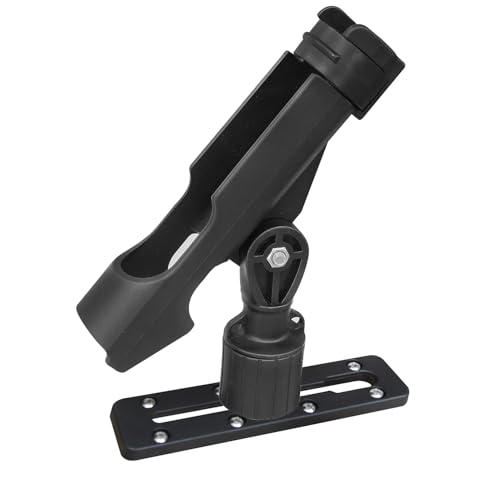
Made of UV stabilized fiberglass reinforced nylon.
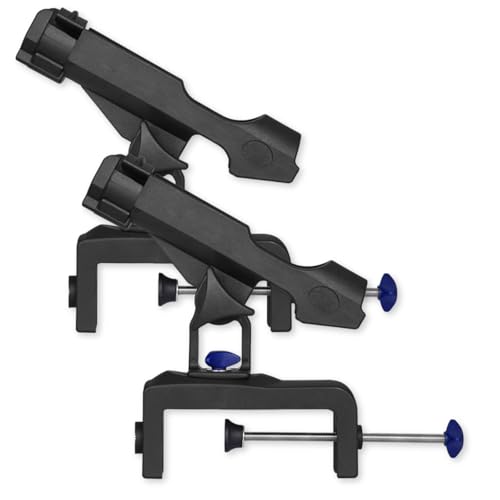
ZENFUN set of 2 adjustable boat rod holders for fishing with large clamp opening, including stainless steel screws hardware. Clamp max opening is 4.7in. Fishing rod holder gives you versatility and convenience while fishing.
How to Avoid Tipping Over While Kayak Fishing
Avoiding capsizing requires understanding the three-point contact rule and maintaining your center of gravity over the kayak’s centerline. Keep your hips centered in the seat, move slowly and deliberately, and always maintain contact with the kayak through your feet, seat, and hands when shifting position.
Stability fundamentals:
- Choose a wide, stable platform: Kayaks 32 inches or wider provide significantly better initial stability for beginners
- Keep weight low and centered: Store heavy items like batteries and tackle in the hull, not on elevated surfaces
- Use the paddle as an outrigger: When reaching for something, extend your paddle perpendicular to the kayak and press down for support
- Avoid sudden movements: Shift weight gradually, especially when standing or reaching over the side
- Practice the wet exit: Before fishing, deliberately capsize in shallow water while wearing your PFD to build confidence
Common tipping triggers to avoid:
- Standing up without first stabilizing with your paddle
- Reaching far over the side to land a fish or retrieve dropped gear
- Turning your upper body quickly while casting
- Leaning back too far when fighting a fish
- Anchoring from the side in current (causes the kayak to roll)
The most critical mistake beginners make is tensing up when the kayak rocks. Kayaks are designed to rock—that’s normal. Fighting the movement with rigid muscles actually increases instability. Instead, relax your core and let your hips move with the kayak while keeping your upper body relatively still.
For more on maintaining balance, visit our kayak balance guide.

Float don't Sink: Get ready to set sail! Our kayak outrigger stabilizer provides more stability and makes you feel safe. Whether you're kayaking, canoeing, boating, or fishing, it is here to let you enjoy more stability and freedom during all water sports. Only for kayaks or boats with holes.
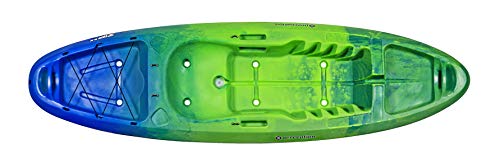
Made in the USA, the Perception Zip 9.5 is a uniquely simple and stable "sit on top kayak" perfect for all-around fun. Designed for use on lakes, ponds, slow-moving rivers, and calm coastal environments, it handles a maximum capacity of 325 lbs, catering to a wide range of paddlers.
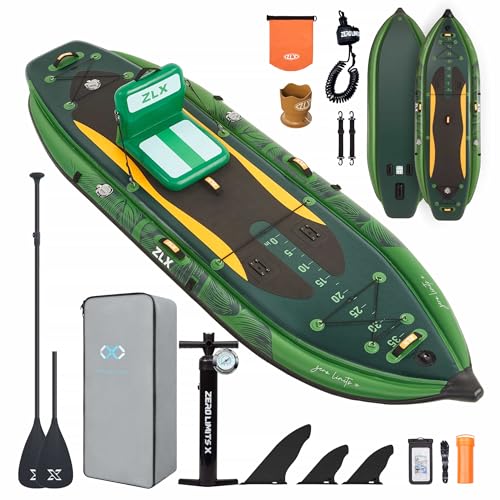
Pro Fishing Paddle Board Setup: Designed for anglers, featuring specialized rod mount, measurement markings for precision, adjustable bungees to secure coolers/gear, plus a detachable inflatable seat – transforming your SUP into a stable fishing boat alternative.
What Safety Gear Do I Actually Need for Kayak Fishing?
You absolutely need a Coast Guard-approved Type III PFD that fits properly, a whistle or sound-producing device, and a waterproof communication method. Beyond these legal requirements, a paddle leash, knife or cutting tool, and first aid kit are essential for safe kayak fishing in 2026.
Mandatory safety equipment:
- PFD (Personal Flotation Device): Must be Coast Guard-approved, properly sized, and worn at all times—not just stored on the kayak
- Sound-producing device: Whistle attached to your PFD for signaling distress
- Navigation lights: Required if fishing before sunrise or after sunset
- Communication device: Waterproof phone in a sealed case or VHF radio
Highly recommended additions:
- Paddle leash: Prevents losing your paddle if you capsize or drop it while fighting a fish
- Rod leashes: Attach expensive rods to the kayak to prevent loss
- Knife or cutting tool: Essential for cutting tangled anchor lines or fishing line in emergencies
- Bilge pump or sponge: For removing water from sit-inside kayaks
- Dry bag: Protects phone, keys, and wallet from water damage
- Sun protection: Hat, sunglasses, sunscreen, and UV-protective clothing
- Hydration: Water bottle or hydration pack for trips over an hour
Weather-dependent gear:
Cold water (below 60°F) requires a wetsuit or drysuit, not just warm air temperature clothing. The “120 rule” applies: if air temperature plus water temperature is less than 120°F, wear thermal protection. Hypothermia can occur in minutes if you capsize in cold water.
Many beginners make the mistake of buying a cheap, bulky PFD that’s uncomfortable to wear all day. Invest in a fishing-specific PFD with high-back design (won’t interfere with your kayak seat), multiple pockets for gear, and proper ventilation. You’ll actually wear it if it’s comfortable.
Learn more about essential equipment in our kayak safety section.

U.S. COAST GUARD APPROVED: This USCG-approved inflatable belt pack inflates manually by pulling the inflation handle. Approved for users 16 years or older, and over 80 lbs. The universal size fits up to a 52” waist

US COAST GUARD APPROVED PFD: US Coast Guard Approved Type V Personal Flotation Device with Type III performance designed for stand-up paddlers, anglers, and boaters.
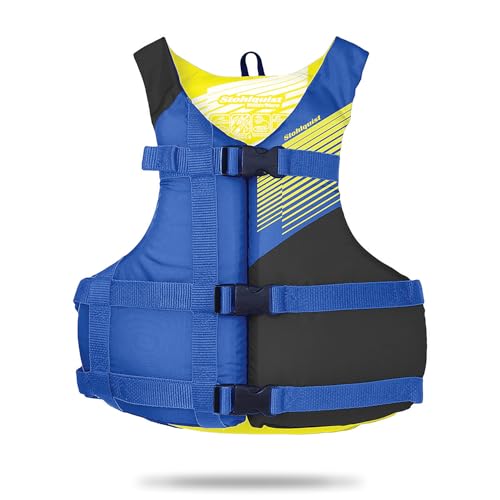
TRUSTED SAFETY SINCE 1977: Stohlquist has led innovation in life jackets for over 40 years, delivering reliable performance trusted by paddlers, kayakers, and boaters worldwide.
How Much Should I Spend on My First Fishing Kayak?
Plan to spend $600-1,200 for a quality entry-level fishing kayak that will last and keep you safe. Kayaks under $400 typically lack the stability, durability, and features needed for fishing, while models over $1,500 offer advanced features that beginners won’t fully utilize until they’ve gained experience.
Budget breakdown by kayak type:
- $300-500: Basic recreational kayaks (not ideal for fishing but usable in calm water)
- $600-900: Entry-level fishing kayaks with basic rod holders and decent stability
- $900-1,200: Mid-range fishing kayaks with better materials, more features, and improved stability
- $1,200-2,000: Advanced fishing kayaks with standing capability, premium seats, and accessory systems
- $2,000+: High-end pedal-drive or motorized fishing kayaks
What you get at each price point:
The $600-900 range typically includes sit-on-top designs with 2-3 rod holders, basic bungee storage, and adequate stability for seated fishing. These kayaks use rotomolded polyethylene construction that’s durable but heavier (60-80 lbs).
The $900-1,200 range adds better seats, more storage options, gear track systems for mounting accessories, and wider hulls for standing. Weight capacity increases, and build quality improves noticeably.
Don’t forget additional costs:
- Paddle: $50-150 (don’t use the cheap paddle that comes with budget kayaks)
- PFD: $50-120
- Rod holders and accessories: $50-200
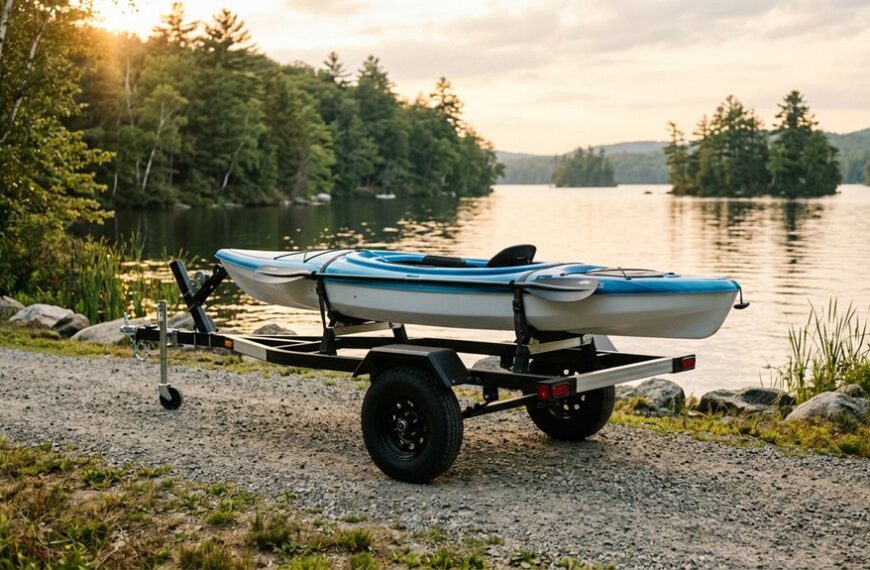
- Transportation: Roof rack, kayak cart, or trailer ($100-500)
- Total first-year investment: $850-2,000+
Choose the lower end if: You’re testing the sport, fishing only a few times per season, or have strict budget constraints. Invest more if: You plan to fish regularly, want to stand while fishing, or fish in varied water conditions.
For detailed comparisons, see our fishing kayak comparison resources.
Why Does My Kayak Keep Spinning When I Try to Fish?
Your kayak spins because of wind, current, or improper anchoring technique. Without an anchor or drift sock, kayaks naturally weathervane (turn to face the wind) and drift with current, making it nearly impossible to maintain position for effective fishing.
The three causes of kayak spinning:
- Wind: Even light breezes push the high-profile hull and angler, causing constant rotation
- Current: Moving water pushes the kayak downstream while you’re focused on fishing
- Improper anchor placement: Anchoring from the side rather than bow or stern causes the kayak to swing wildly
Solutions for maintaining position:
Anchor systems are essential for fishing specific spots. Install an anchor trolley system that allows you to adjust the anchor point from bow to stern while seated. This lets you position the kayak to face into wind or current, preventing spinning. Always anchor from the bow or stern, never from the side—side anchoring can cause dangerous capsizing if current or wind catches the kayak broadside.
Drift socks (also called sea anchors) slow your drift in wind or current without fully stopping. They’re ideal for covering water while maintaining control, especially when fishing large areas or trolling.
Stake-out poles work in shallow water (under 6 feet) and allow quick, silent positioning without the noise of dropping an anchor. They’re perfect for flats fishing or stealthy approaches to spooky fish.
Common anchoring mistakes beginners make:
- Using too light an anchor for the conditions (minimum 3-5 lbs for most situations)
- Not using enough anchor line (need 2-3 times the water depth)
- Anchoring in strong current without considering the kayak’s swing radius
- Failing to secure the anchor line properly, causing it to slip when tension increases
For more details, check out resources on kayak anchor setup.
Is Kayak Fishing Harder Than Regular Kayaking?
Kayak fishing is more challenging than recreational kayaking because it requires managing fishing gear, maintaining position, and handling fish while staying stable on the water. However, the paddling itself is often easier since fishing kayaks are wider and more stable, and you spend less time actively paddling.
Skills required for kayak fishing but not recreational kayaking:
- Multitasking: Simultaneously managing paddle, rod, and kayak position
- One-handed paddling: Keeping the kayak positioned while holding a rod
- Weight management: Shifting position to cast, land fish, and access gear without tipping
- Anchor deployment: Setting and retrieving anchors from a seated position
- Fish handling: Landing, unhooking, and releasing fish in a confined space
What’s actually easier:
Fishing kayaks are more stable and forgiving than narrow recreational or touring kayaks. The wider beam means you can shift weight more freely without feeling tippy. You also paddle shorter distances since you’re focused on fishing spots rather than covering miles.
The learning curve:
Most beginners become comfortable with basic kayak fishing within 3-5 outings. The first trip focuses on simply staying stable and managing gear. By the third trip, most anglers can cast accurately, paddle one-handed, and handle small to medium fish confidently.
Choose kayak fishing over shore fishing if: You want access to areas unreachable from shore, enjoy the mobility to cover water, and don’t mind the learning curve. Stick with shore fishing if: You prefer simplicity, want to bring more gear, or have physical limitations that make kayak entry/exit difficult.
What to Do If I Hook a Fish Too Big for My Kayak
If you hook a fish that’s too large or powerful, keep your rod tip up, let your drag do the work, and be prepared to cut the line if the fish threatens to capsize you or drag you into dangerous water. Never wrap line around your hand or tie off to the kayak—you must be able to release the fish instantly if needed.
Immediate response steps:
- Stay seated and centered: Don’t stand up or lean over the side
- Let the drag work: Set your drag to 25-30% of your line’s breaking strength before fishing
- Keep the rod tip high: Absorbs shock and prevents the fish from diving under the kayak
- Point the kayak toward the fish: Use one-handed paddle strokes to keep the bow facing the fish’s direction
- Be patient: Let the fish tire itself out rather than forcing the fight
When to cut the line:
Cut immediately if the fish is:
- Dragging you toward dangerous water (rapids, boat traffic, ocean swells)
- Pulling you faster than you can safely paddle
- Causing the kayak to lean dangerously to one side
- Tangling your line around the kayak or paddle
- Clearly a species too large to safely land (shark, large catfish, etc.)
Safe landing techniques for large fish:
For fish you can safely land, use a net with a long handle that you can operate one-handed. Bring the fish alongside the kayak (never across the bow or stern where it can thrash and destabilize you). If keeping the fish, use a fish grip tool or lip gripper rather than trying to grab it with your hands.
The most important rule: Your safety is more valuable than any fish. Experienced kayak anglers lose fish regularly by choice—it’s part of the sport. The fish that “got away” makes a better story than the one that put you in the hospital.
How Do People Not Lose Their Rods When Kayak Fishing?
Anglers prevent rod loss by using rod leashes, installing multiple rod holders, and developing the habit of securing rods immediately after use. A quality rod leash costs $10-20 and can save a $200+ rod setup from sinking to the bottom.
Rod retention systems:
Rod leashes attach to the rod handle and clip to the kayak via a coiled or straight tether. Use leashes rated for the weight of your rod and reel combo. Coiled leashes stay out of the way better but can tangle; straight leashes are simpler but may drag in the water.
Rod holders keep rods secure when not actively fishing. Install at least three: two for actively fishing (one for casting, one for trolling or backup) and one for storage while paddling. Flush-mount holders are permanent and secure; adjustable holders offer more positioning options.
Best practices to prevent rod loss:
- Clip the leash before making the first cast, not after you’ve already hooked a fish
- Place rods in holders immediately after landing a fish, not on your lap
- Use rod holders with positive retention (locking mechanisms or deep cups)
- Never lay rods across your lap while paddling—one wave or sudden movement sends them overboard
- Install rod holders within easy reach so you’re not tempted to set rods down loosely
What to do if you drop a rod:
If a rod goes overboard, note the exact location immediately (use your phone’s GPS or mark visible landmarks). Rods often float for 30-60 seconds before sinking, giving you time to retrieve them if you react quickly. If the rod sinks, mark the spot and return with a weighted treble hook or grappling hook to drag the bottom.
Many beginners resist using leashes because they seem unnecessary—until they lose their first rod. The most common loss scenario isn’t dropping the rod while fighting a fish; it’s setting it down loosely while reaching for something else and having it slide off when the kayak rocks.
Can You Kayak Fish Alone or Do You Need a Partner?
You can safely kayak fish alone if you take proper precautions, tell someone your plans, bring communication devices, and stay within your skill level. Solo kayak fishing is common and offers advantages like flexibility and access to smaller waters, but it requires more careful planning than fishing with a partner.
Safety requirements for solo fishing:
- File a float plan: Tell someone where you’re going, when you’ll return, and what to do if you don’t check in
- Bring communication: Waterproof phone or VHF radio in a sealed, floating case
- Stay in range: Fish within swimming distance of shore until you’re experienced
- Check weather: Avoid solo trips when storms, high winds, or rough water are forecast
- Know your limits: Don’t push into challenging conditions alone
Advantages of solo kayak fishing:
- Fish at your own pace without coordinating with others
- Access narrow creeks and small ponds that don’t accommodate multiple kayaks
- Maintain stealth more easily (less noise and disturbance)
- Make spontaneous decisions about where and when to fish
When to bring a partner:
Fish with a buddy when exploring new waters, fishing in remote areas, paddling in cold water (hypothermia risk), or learning new techniques. Partners provide immediate assistance if you capsize, get injured, or experience equipment failure.
Solo fishing mistakes to avoid:
- Overestimating your abilities in unfamiliar water
- Fishing too far from shore or civilization
- Not bringing backup paddle or communication device
- Ignoring weather changes because you’re “almost done”
- Failing to check in with your emergency contact
The kayak fishing community is generally welcoming, so if you prefer company but don’t have fishing partners, join local kayak fishing clubs or online groups. Many areas have regular group outings that welcome beginners.
What Mistakes Do Beginners Make with Kayak Anchoring?
Beginners commonly anchor from the side of the kayak instead of the bow or stern, use insufficient anchor line, and fail to install an anchor trolley system. These mistakes cause the kayak to spin uncontrollably, capsize in current, or drift away from the fishing spot.
The most dangerous mistake: side anchoring
Anchoring from the side (beam) of the kayak is extremely dangerous in current or wind. The water pushes against the broad side of the kayak, creating a lever arm that can flip you over. Always anchor from the bow or stern so the kayak faces into the current or wind, presenting the smallest profile.
Critical anchoring errors:
- Too little anchor line: Use 2-3 times the water depth (fishing in 10 feet? Use 20-30 feet of line)
- Wrong anchor type: Grapnel anchors work for most bottoms; mushroom anchors for mud; stake-out poles for sand/grass flats
- No anchor trolley: Without a trolley system, you can’t adjust anchor position from bow to stern while seated
- Improper line storage: Loose anchor line tangles around feet, paddle, or rod—use a line bag or reel
- Anchoring in too much current: Strong current can pull the kayak underwater at the bow; use a drift sock instead
Proper anchoring technique:
- Position the kayak where you want to fish
- Use the anchor trolley to move the attachment point to the bow (if facing into current) or stern (if current is behind you)
- Lower the anchor slowly—don’t throw it (creates noise and tangles)
- Let out 2-3 times the water depth in line
- Secure the line to the cleat or trolley
- Adjust the trolley position to fine-tune your angle to wind/current
When not to anchor:
Skip anchoring in strong current (over 2 mph), deep water (over 30 feet), areas with heavy boat traffic, or when fish are actively moving. Use drift fishing or a drift sock instead.
For more guidance, see our kayak anchor setup resources.
Where Should I Not Go Kayak Fishing as a Beginner?
Beginners should avoid ocean surf zones, rivers with rapids or strong current, areas with heavy boat traffic, and any water with hazards like dams, weirs, or low-head dams. Start in protected lakes, ponds, or slow-moving rivers where you can easily return to shore if conditions change.
High-risk locations for beginners:
Ocean and coastal waters present multiple challenges: waves, tides, currents, wind, and distance from shore. Even experienced paddlers avoid ocean kayak fishing in conditions that beginners might consider “calm.” If you want to try ocean kayak fishing, start in protected bays or estuaries, not open ocean.
Fast-moving rivers require advanced paddling skills and quick decision-making. Current speeds over 2 mph make it difficult to maintain position, and obstacles like strainers (fallen trees) and undercut banks create serious hazards.
Areas with boat traffic are dangerous because powerboats often don’t see kayaks until they’re very close. Avoid busy boat launches, main navigation channels, and popular water-skiing areas. If you must fish near boats, wear bright colors and attach a visibility flag to your kayak.
Low-head dams and weirs create deadly hydraulics that can trap and drown kayakers. These structures look innocent but create powerful recirculating currents. Never fish near dams or paddle over them.
Ideal beginner locations:
- Small to medium lakes with easy shore access
- Protected coves and bays
- Slow-moving rivers with minimal current
- Ponds with boat ramps or easy entry points
- Areas with other kayakers present (safety in numbers)
Environmental considerations:
Check local regulations before fishing any water. Some areas require permits, have restricted seasons, or prohibit kayaks entirely. Respect private property, stay off marked swimming beaches during peak hours, and avoid wildlife nesting areas during breeding seasons.
Start close to shore and gradually work your way into deeper water as your skills improve. Most kayak fishing accidents happen when beginners venture into conditions beyond their ability level.
Kayak Fishing vs Shore Fishing: Which Is Better for Beginners?
Shore fishing is easier for absolute beginners because it requires less equipment, no paddling skills, and allows you to bring more gear without weight restrictions. However, kayak fishing provides access to more productive water and fish that rarely see lures, making it worth the learning curve for anglers who want to catch more and larger fish.
Shore fishing advantages:
- No kayak purchase required (save $600-2,000)
- Simpler gear management (no need to secure everything)
- Can bring unlimited tackle, chairs, coolers, and equipment
- No risk of capsizing or getting stranded
- Easier for families with young children
- Better for anglers with mobility limitations
Kayak fishing advantages:
- Access to structure and cover unreachable from shore (submerged trees, offshore humps, weed edges)
- Mobility to follow fish and adjust to conditions
- Stealth approach that doesn’t spook fish
- Ability to fish both banks of rivers and lakes
- More exciting and engaging experience
- Lower cost than a boat (but higher than shore fishing)
The hybrid approach:
Many successful anglers do both. Shore fish while learning the water, then use a kayak to access the spots you identified from shore. This approach minimizes the kayak learning curve because you already know where the fish are.
Choose shore fishing if: You’re testing whether you enjoy fishing, have a limited budget, prefer simplicity, or have physical limitations. Choose kayak fishing if: You’re committed to fishing regularly, want access to better fishing spots, and enjoy the challenge of learning new skills.
For those starting out, our kayak for beginners section offers helpful guidance.
Best Kayak Fishing Setup for Someone Who Has Never Done It
The best beginner kayak fishing setup includes a stable sit-on-top kayak (32+ inches wide), a comfortable high-back seat, 2-3 rod holders, basic safety gear (PFD, whistle, paddle leash), and a simple anchor system. Keep your first setup minimal—you can add accessories after you understand what you actually need.
Essential gear checklist:
Kayak specifications:
- Sit-on-top design (easier to enter/exit, self-draining)
- 32-36 inch width (stable enough for beginners)
- 350+ lb weight capacity (accommodates you plus gear)
- Built-in rod holders (minimum 2)
- Paddle included (upgrade later if needed)
Safety equipment:
- Coast Guard-approved Type III PFD (properly fitted)
- Whistle attached to PFD
- Waterproof phone case or VHF radio
- Paddle leash
- First aid kit
Fishing gear:
- 1-2 medium-action spinning rods (7 feet)
- Spinning reels with 10-15 lb test line
- Basic tackle box with versatile lures (soft plastics, crankbaits, topwater)
- Rod leashes
- Fishing pliers and lip gripper
- Measuring tape and camera (for catch documentation)
Accessories to add later:
- Anchor trolley system ($30-50)
- Fish finder ($100-400)
- Gear tracks and mounting systems ($50-150)
- Upgraded paddle ($80-150)
- Milk crate or tackle storage system ($20-60)
Setup mistakes to avoid:
Don’t buy every accessory before your first trip. Many beginners spend hundreds on gear they never use. Fish 3-4 times with a basic setup, then add accessories based on actual needs. The most common mistake is over-accessorizing a kayak to the point where it’s cluttered, heavy, and difficult to manage.
Budget-friendly alternative:
If buying new isn’t feasible, look for used fishing kayaks on local marketplaces. Many anglers upgrade after a season or two, selling well-maintained kayaks for 40-60% of retail price. Just inspect carefully for cracks, warping, or damage before buying.
For more detailed guidance, visit our fishing kayak buying guide.
Frequently Asked Questions
How stable do fishing kayaks need to be for beginners?
Beginners need kayaks with at least 32 inches of width for adequate primary stability. Wider kayaks (34-36 inches) provide even more confidence and allow standing, though they paddle slightly slower. Prioritize stability over speed for your first kayak.
Can I fish from an inflatable kayak?
Yes, modern inflatable fishing kayaks are viable for beginners fishing in protected waters. They offer excellent stability, easy storage and transport, and lower cost than hard-shell kayaks. However, they’re more vulnerable to punctures from hooks and sharp objects, and they perform poorly in wind.
What’s the best time of day for beginner kayak fishing?
Early morning (dawn to 9 AM) and late afternoon (4 PM to dusk) offer the best combination of active fish and calm water conditions. Avoid midday when wind typically picks up and fish are less active. Start with morning trips when water is usually calmest.
How do I get back in a kayak after falling out?
For sit-on-top kayaks, approach from the side, place both hands on the center of the seat area, kick your legs to the surface, and pull yourself up while sliding one leg over. Practice this in shallow water before fishing. Sit-inside kayaks are much harder to re-enter and typically require assisted rescue or swimming to shore.
Do I need a fishing license to kayak fish?
Yes, you need a valid fishing license for the state where you’re fishing, regardless of whether you’re on shore, in a kayak, or in a boat. Kayak fishing follows the same regulations as any other fishing method. Some states also require kayak registration depending on length and propulsion type.
What should I wear kayak fishing?
Wear quick-drying synthetic or wool clothing (never cotton), a wide-brim hat, polarized sunglasses, and sun-protective clothing. In cold water (below 60°F), wear a wetsuit or drysuit regardless of air temperature. Always wear your PFD over your clothing, and bring a waterproof jacket for changing weather.
How far from shore should beginners kayak fish?
Stay within 100-200 yards of shore until you’re comfortable with kayak control, self-rescue, and reading weather conditions. Many productive fishing spots are within this range anyway. Gradually increase distance as your skills and confidence grow.
Can I use a kayak in saltwater and freshwater?
Yes, most fishing kayaks work in both environments. However, saltwater requires more rigorous rinsing after each use to prevent corrosion of metal components. If you’ll fish primarily in saltwater, choose stainless steel or aluminum hardware rather than standard steel.
What’s the weight limit on fishing kayaks?
Most fishing kayaks have weight capacities between 300-550 lbs. This includes your body weight plus all gear, water, fish, and equipment. For comfort and safety, stay at least 50-75 lbs below the maximum capacity. Overloading reduces stability and increases capsize risk.
How long does it take to learn kayak fishing?
Most beginners feel comfortable with basic kayak fishing within 3-5 trips. Expect to spend the first outing learning kayak control and stability, the second trip improving casting and gear management, and the third trip actually fishing effectively. Mastery of advanced techniques like standing and fishing in current takes a full season.
Should I get a sit-in or sit-on-top kayak for fishing?
Choose sit-on-top kayaks for fishing. They’re more stable, easier to enter and exit, self-draining, and provide better access to gear. Sit-inside kayaks are faster and drier but much harder to fish from and nearly impossible to re-enter if you capsize.
What’s the best paddle length for kayak fishing?
For fishing kayaks (which are wider than recreational kayaks), choose a paddle between 240-260 cm. Taller paddlers and wider kayaks need longer paddles. Since you’ll often paddle one-handed while fishing, a lighter paddle (under 30 oz) reduces fatigue significantly.
Conclusion
The common kayak fishing mistakes beginners make are predictable and entirely avoidable with proper preparation. Success starts with choosing the right equipment—a stable, fishing-specific kayak with adequate width, proper safety gear including a well-fitted PFD, and essential accessories like rod holders and leashes. Master the fundamentals of stability and weight distribution before advancing to standing or fishing in challenging conditions.
Start your kayak fishing journey in protected waters close to shore, where you can build skills without serious risk. Practice basic paddling, anchoring, and self-rescue techniques before your first fishing trip. Remember that every experienced kayak angler started exactly where you are now, making the same mistakes and learning the same lessons.
Your next steps:
- Research and select a fishing kayak that fits your budget and local water conditions using our fishing kayak comparison resources
- Invest in proper safety gear, especially a quality PFD that you’ll actually wear
- Practice paddling and stability exercises in calm water before adding fishing to the mix
- Plan your first trip to a protected lake or pond with easy shore access
- Join local kayak fishing groups or forums to learn from experienced anglers in your area
The learning curve is real, but the rewards—access to pristine fishing spots, the thrill of fighting fish from a kayak, and the peace of being on the water—make every challenge worthwhile. Start simple, stay safe, and gradually expand your skills and range as confidence grows. The fish are waiting, and your kayak fishing adventure begins with that first paddle stroke.