
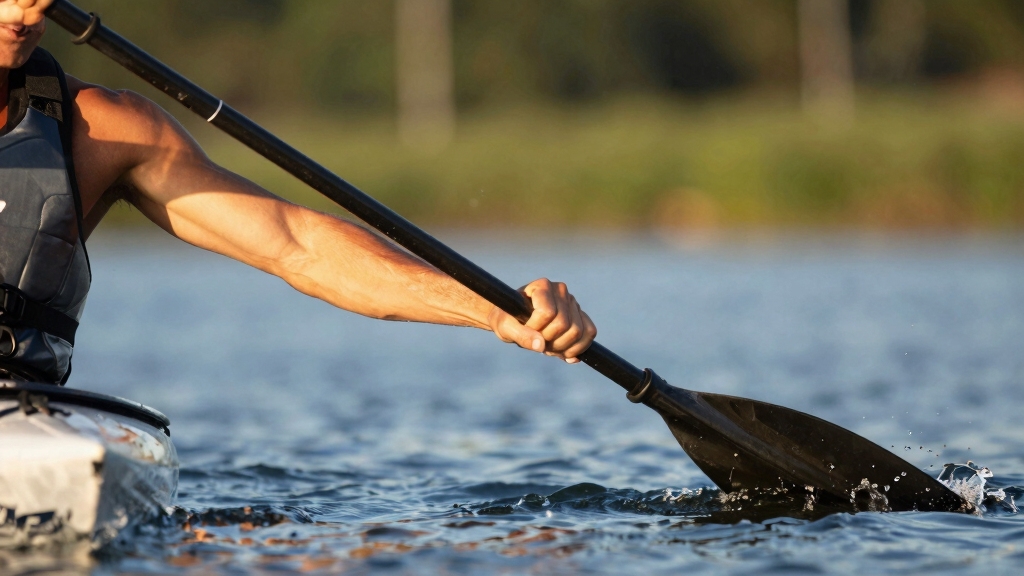
Shoulder pain affects up to 40% of recreational kayakers, but most of that discomfort stems from preventable technique errors rather than the activity itself. Paddling Technique Basics That Save Your Shoulders centers on using torso rotation instead of arm strength, maintaining proper paddle angles, and choosing equipment that matches your body dimensions. When you paddle correctly, your core muscles do the work while your shoulders simply transfer power, dramatically reducing strain and injury risk during long days on the water.
Key Takeaways
- Torso rotation generates 70-80% of paddling power while keeping shoulders in a safe, neutral position throughout the stroke
- Proper paddle length should allow a 90-degree elbow bend when the top hand reaches eye level during the stroke
- The “paddler’s box” keeps hands in front of your chest and prevents shoulder overextension that causes rotator cuff strain
- Low-angle paddling (blade enters at 30-45 degrees) is gentler on shoulders than high-angle technique for recreational and fishing applications
- Bent-shaft paddles reduce wrist strain by 15-20% but don’t significantly change shoulder loading compared to straight shafts
- Pre-paddle stretches targeting shoulders, chest, and lats reduce injury risk and improve range of motion on the water
- Existing shoulder injuries don’t automatically disqualify you from kayaking, but require modified technique and medical clearance
What Is Proper Paddle Technique to Avoid Shoulder Injury?
Proper shoulder-safe paddling technique relies on torso rotation to generate power while keeping your arms relatively stationary within an imaginary box in front of your chest. Your shoulders act as pivot points rather than primary movers, which prevents the repetitive overhead reaching and pulling motions that damage rotator cuff tendons over time.
The foundation of injury-free paddling includes three core principles:
- Maintain the paddler’s box: Keep both hands visible in your peripheral vision throughout the entire stroke, never reaching behind your hip or above your head
- Rotate from your core: Twist your torso 45-60 degrees with each stroke, using oblique and back muscles to drive the paddle rather than pulling with your arms
- Push and pull equally: The top hand pushes forward with as much force as the bottom hand pulls back, distributing load across both shoulders
Common mistake: Many fishing kayak anglers treat paddling like rowing, pulling hard with their arms while their torso stays rigid. This concentrates all the force in the shoulder joint and leads to inflammation after just a few hours on the water.
When you engage your core properly, you’ll feel your obliques and lower back working harder than your deltoids. If your shoulders burn before your abs do, you’re relying too much on arm strength. For more guidance on developing solid fundamentals, check out our resources on kayaking techniques.
How to Hold a Kayak Paddle Correctly
Correct paddle grip starts with hand placement at shoulder-width plus one fist-width on each side, creating approximately 24-30 inches between your hands depending on your build. Your knuckles should align with the top edge of the paddle blade, and you should grip firmly but not tightly—imagine holding a small bird that you don’t want to escape or crush.
Step-by-step grip setup:
- Find your control hand: Most paddles have one blade fixed at a specific angle (the control grip side) and one that rotates. Right-hand control is most common.
- Position the control hand: Place your control hand so the blade on that side faces the correct direction when your wrist is straight and relaxed
- Set the opposite hand: Place your other hand at the proper width and allow that blade to rotate freely in your loose grip
- Check blade alignment: Both blades should be aligned in the same plane (not offset) for fishing kayaks; whitewater kayaks use feathered blades but that’s unnecessary for flatwater
Grip pressure matters: White knuckles mean you’re gripping too hard, which creates forearm fatigue and transfers tension up through your wrists into your shoulders. Your grip should tighten only during the power phase of each stroke, then relax during recovery.
Choose this grip if: You’re paddling a fishing kayak on calm to moderate water where blade feathering provides no real advantage and simpler technique reduces cognitive load while you focus on fishing.

CONFORMS TO THE CURVE OF YOUR HAND: This high-quality, patented design cushioned paddle grip makes paddling more enjoyable because it conforms to the curves of your hands. The padding reduces pressure on your palms and tendons, allowing you to get a better grip for more efficient paddling. The soft, durable material also reduces blisters and calluses as you enjoy water activities.
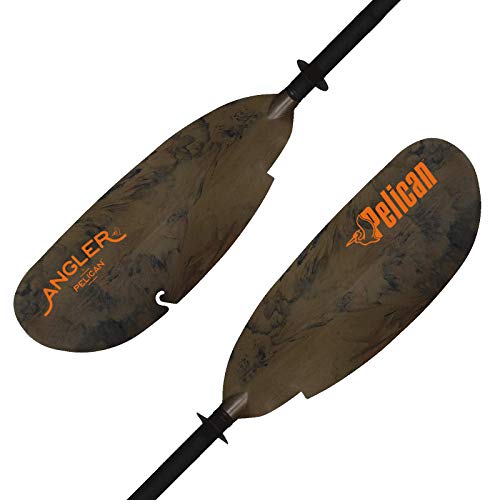
Longer reach:This high-quality paddle is extra long and sized to fit modern fishing kayaks over 34" wide.

NOTES: NOT for one-piece paddles. Only suitable for paddles with a diameter of 30mm/1.18 inches. Please take a while to measure the diameter of your paddle shaft before order
Torso Rotation vs Arm Paddling: Which Is Better for Shoulders?
Torso rotation is objectively superior for shoulder health because it recruits your body’s largest muscle groups—the obliques, lats, and erector spinae—while keeping shoulder joints in their strongest, most stable position. Arm paddling isolates smaller shoulder muscles and forces them into weak, extended positions where tendons are vulnerable to impingement and tears.
Biomechanical comparison:
| Technique | Primary Muscles | Shoulder Position | Injury Risk | Endurance |
|---|---|---|---|---|
| Torso rotation | Core, obliques, lats | Neutral, stable | Low | High (large muscles fatigue slowly) |
| Arm paddling | Deltoids, rotator cuff | Extended, vulnerable | High | Low (small muscles fatigue quickly) |
When you rotate your torso, your shoulder simply acts as a connection point between your core and the paddle. The joint moves through a small, safe range of motion while your trunk does the heavy lifting. Arm paddling, by contrast, requires your shoulder to move through its full range while simultaneously generating force—a recipe for overuse injuries.
Real-world test: Paddle 100 strokes using only your arms while keeping your torso completely still. Then paddle 100 strokes rotating your torso fully while keeping your arms relatively fixed. The second set will feel easier and your shoulders will experience less fatigue, demonstrating why torso rotation is the foundation of sustainable paddling technique.
For fishing kayak enthusiasts who spend 4-8 hours on the water, torso rotation isn’t just better—it’s essential for avoiding chronic shoulder problems that can end your season. Learn more about building effective paddling skills that keep you on the water longer.
Common Paddling Mistakes That Cause Shoulder Pain
The most damaging paddling errors involve breaking the paddler’s box, using excessive reach, and maintaining poor posture throughout the stroke cycle. These mistakes place shoulder joints in mechanically disadvantaged positions where small muscles must generate large forces, leading to inflammation, impingement, and eventual tendon damage.
Top shoulder-damaging mistakes:
- Reaching behind your hip: Extending the stroke past your body’s midline forces your shoulder into internal rotation under load, pinching rotator cuff tendons against bone
- Lifting the paddle too high: Raising your top hand above shoulder height during the stroke creates impingement as the humeral head compresses the supraspinatus tendon
- Death-gripping the paddle: Excessive grip tension travels up the kinetic chain, creating shoulder and neck stiffness that restricts natural movement
- Slouching or hunching: Poor posture rounds your shoulders forward, narrowing the subacromial space and increasing impingement risk with every stroke
- Paddling with straight arms: Locked elbows prevent your body from absorbing shock and force your shoulders to handle impact loads from choppy water
The “weekend warrior” pattern: Paddling aggressively after weeks of inactivity is particularly dangerous. Cold, unstretched tissues combined with enthusiastic but sloppy technique creates the perfect storm for acute shoulder injuries. If you’re returning to the water after a break, spend your first 15 minutes paddling at 50% intensity while focusing on form.
Edge case: Anglers who paddle primarily on one side (to keep their fishing side free) develop asymmetric shoulder problems. If you favor one side, make a conscious effort to switch sides every 10-15 minutes, even if it feels awkward at first.
Should I Use a Bent Shaft or Straight Shaft Paddle for Shoulder Health?
Bent-shaft paddles reduce wrist strain by maintaining a more neutral wrist angle throughout the stroke, but they provide minimal shoulder benefit compared to straight shafts when proper technique is used. The primary advantage of bent shafts is ergonomic comfort during long sessions rather than injury prevention, and they cost $30-80 more than comparable straight-shaft models.
Bent shaft advantages:
- Keeps wrists in neutral alignment, reducing tendonitis risk in the forearm and wrist
- May feel more comfortable for paddlers with existing wrist problems or arthritis
- Some users report 10-15% less perceived exertion over multi-hour sessions
Straight shaft advantages:
- Lower cost ($80-150 vs $110-230 for comparable quality)
- Easier hand repositioning for varied stroke types and corrections
- Simpler to share among multiple paddlers with different preferences
- No learning curve if you’re already comfortable with straight shafts
Choose bent shaft if: You have a history of wrist problems, paddle more than 3 hours per session regularly, and don’t share your paddle with others. The wrist comfort translates to less overall upper-body tension, which indirectly benefits shoulders.
Choose straight shaft if: You’re on a budget, new to kayaking, or prioritize versatility. A quality straight-shaft paddle with proper technique protects your shoulders just as effectively as a bent shaft. For more insights on selecting the right gear, explore our fishing kayak buying guide.

Length Adjustement: Easy length adjustment with a telescoping ferrule system. It's ideal for recreational paddlers over 5'5" in kayaks over 30" wide. The length can be adjusted from 240 cm to 250 cm (94.5 in. to 98.4 in.)

Length: Measuring 240 (94.5"), this quality paddle is ideal for angler paddlers over 152 cm (5'5") in kayaks over 86 cm (34") wide.

【Durability Meets Efficiency】This kayak paddle features an anodized, high-quality aluminum shaft for saltwater resistance and durability. Total length 218cm/86 inches,It is an ideal option for both starters and intermediate kayakers.
How to Tell If My Paddle Is Too Long for Me
Your paddle is too long if your top hand rises above eye level during a normal forward stroke or if you must reach uncomfortably wide to maintain proper hand spacing. An oversized paddle forces excessive shoulder elevation and wider arm positioning, both of which increase rotator cuff strain and reduce paddling efficiency.
Quick sizing test (on water):
- Sit in your kayak with normal posture
- Hold the paddle horizontally above your head with proper hand spacing
- Your elbows should bend to approximately 90 degrees
- If your arms are straighter than 90 degrees, your paddle is too long
- If your elbows bend much more than 90 degrees, your paddle is too short
Sizing by kayak width and paddling style:
- Narrow kayaks (under 28 inches): 210-220 cm paddle for low-angle technique
- Medium fishing kayaks (28-33 inches): 220-230 cm for low-angle, 210-220 cm for high-angle
- Wide fishing kayaks (over 33 inches): 230-240 cm for low-angle technique
Height-based starting point: Add your height in inches to your kayak width in inches, then use this formula: (Height + Width) × 2.5 = paddle length in cm. This provides a baseline that you can adjust up or down based on personal preference and paddling style.
Warning signs your paddle is wrong: Shoulder fatigue within 30 minutes, difficulty maintaining the paddler’s box, or needing to lean side-to-side excessively to get the blade fully in the water all indicate sizing problems. Most fishing kayak paddlers do better with slightly longer paddles (230-240 cm) because the wider, more stable hulls sit higher off the water.
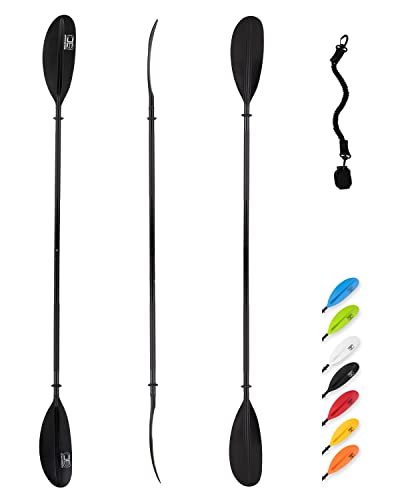
MADE TO LAST: This kayak paddle is with high-quality aluminum alloy shaft (1.1mm shell thickness) and fiberglass reinforced PP blade. The material combination ensures a stiff and made to last kayak paddle at a better price. It’s a perfect choice for starters and intermediate kayakers.

24” (61cm) Extension for Crooked Creek Kayak Paddles

Paddling Technique for Beginners With Bad Shoulders
Beginners with shoulder problems should adopt ultra-low-angle paddling technique, take frequent breaks, and limit initial sessions to 30-45 minutes while gradually building tolerance. Modified technique emphasizes smaller torso rotation (30-40 degrees instead of 60), shorter stroke length, and higher cadence with less force per stroke to distribute load over more repetitions.
Modified technique checklist:
- Reduce stroke length: End each stroke when the blade reaches your hip, never extending behind your body
- Increase stroke rate: Aim for 50-60 strokes per minute rather than 40-45, using less force per stroke
- Exaggerate the paddler’s box: Keep your hands even closer to your centerline than normal technique requires
- Use a lighter paddle: Carbon fiber paddles (14-18 oz) reduce cumulative shoulder load compared to plastic or fiberglass (28-32 oz)
- Paddle in calm conditions: Wind and waves force corrective strokes that break good form and stress shoulders
Pre-existing condition considerations: If you have diagnosed rotator cuff problems, shoulder impingement, or recent shoulder surgery, get medical clearance before paddling. Physical therapists can assess your specific limitations and may recommend additional modifications like using a shorter paddle or paddling with a partner who can take over if you fatigue.
Progressive loading approach: Start with three 30-minute sessions per week for two weeks, then gradually increase duration by 15 minutes per week. This allows connective tissues to adapt to the new stress without triggering inflammatory responses. If you experience sharp pain (not just muscle fatigue), stop immediately and rest for several days before trying again.
Building foundational skills properly from the start prevents bad habits that are difficult to unlearn later. Consider reviewing resources on paddling safety to ensure you’re protecting yourself in multiple ways.
Is Kayaking Bad for Rotator Cuff Injuries?
Kayaking is not inherently bad for rotator cuff injuries, but improper technique or paddling before adequate healing can worsen existing damage and delay recovery. With medical clearance, modified technique, and gradual progression, many people with rotator cuff issues successfully return to kayaking without re-injury.
Risk factors that increase problems:
- Paddling during the acute inflammatory phase (first 2-6 weeks after injury)
- Using high-angle technique that requires overhead reaching
- Paddling in rough water that demands aggressive corrective strokes
- Ignoring pain signals and pushing through discomfort
- Inadequate warm-up and stretching before paddling
Protective strategies:
- Wait until you have full pain-free range of motion before returning to paddling
- Start with a physical therapist-approved strengthening program before getting back on the water
- Use only low-angle technique with strict adherence to the paddler’s box
- Consider a bent-shaft paddle to reduce overall upper-body strain
- Paddle with a partner who can assist if you experience problems
Medical perspective: Rotator cuff tendons heal slowly because they have limited blood supply. Returning to repetitive overhead activities too soon creates a cycle of re-injury and chronic tendinosis. Most orthopedic specialists recommend waiting 8-12 weeks after a significant rotator cuff strain before resuming kayaking, and 4-6 months after surgical repair.
Choose kayaking if: Your doctor has cleared you for the activity, you can demonstrate proper technique, and you’re willing to stop immediately if symptoms return. Avoid kayaking if you still have pain with daily activities like reaching overhead or lifting objects.
How to Strengthen Shoulders for Kayaking
Effective shoulder strengthening for kayaking targets the rotator cuff muscles, scapular stabilizers, and posterior chain while maintaining balanced development between internal and external rotators. A well-designed program performed 2-3 times per week for 6-8 weeks before the paddling season significantly reduces injury risk.
Essential exercises:
Rotator cuff strengthening:
- External rotation with resistance band (3 sets of 15 reps)
- Internal rotation with resistance band (3 sets of 15 reps)
- Empty can exercise for supraspinatus (3 sets of 12 reps)
Scapular stability:
- Scapular push-ups (3 sets of 10 reps)
- Prone Y-T-W raises (2 sets of 10 each position)
- Face pulls with band or cable (3 sets of 15 reps)
Functional strength:
- Pallof press for anti-rotation core strength (3 sets of 12 per side)
- Single-arm rows (3 sets of 12 per side)
- Band pull-aparts (3 sets of 20 reps)
Programming guidelines: Perform these exercises with light resistance that allows perfect form for all prescribed reps. The rotator cuff muscles are small and fatigue quickly, so heavy weights are counterproductive and increase injury risk. Focus on controlled movement and feeling the target muscles work rather than moving maximum weight.
Timing: Begin your strengthening program 6-8 weeks before you plan to start serious paddling. This gives connective tissues time to adapt to increased loads. Continue the program year-round at reduced frequency (once per week) to maintain gains.
Red flag: If any exercise causes sharp pain or clicking in your shoulder, stop immediately and consult a physical therapist. Some discomfort is normal when starting a new program, but pain indicates you’re either using too much weight or have an underlying issue that needs professional evaluation.
Why Does My Shoulder Hurt After Paddling?
Post-paddling shoulder pain typically results from muscle fatigue, poor technique causing tendon irritation, or inadequate conditioning for the duration and intensity of your session. Delayed-onset muscle soreness (DOMS) in the deltoids and upper back is normal after long paddles, but sharp pain, clicking, or pain that persists beyond 48 hours suggests technique problems or overuse injury.
Diagnostic questions:
- When does it hurt? Pain during paddling suggests acute strain or impingement; pain 12-24 hours later is usually DOMS
- Where exactly? Front shoulder pain indicates biceps or anterior deltoid strain; top of shoulder suggests impingement; back of shoulder points to posterior cuff or scapular issues
- What movements trigger it? Pain reaching overhead suggests impingement; pain with rotation indicates rotator cuff involvement
- How long does it last? DOMS resolves in 48-72 hours; persistent pain suggests tissue damage
Common causes by pain location:
| Pain Location | Likely Cause | Technique Error |
|---|---|---|
| Front of shoulder | Biceps tendonitis | Pulling too hard with arms, not using torso |
| Top of shoulder | Subacromial impingement | Top hand rising too high during stroke |
| Back of shoulder | Posterior cuff strain | Reaching behind hip, over-rotating |
| Shoulder blade area | Scapular muscle fatigue | Poor posture, rounded shoulders |
Immediate treatment: Apply ice for 15 minutes every 2-3 hours for the first 48 hours, take anti-inflammatory medication if appropriate, and rest from paddling. Gentle range-of-motion exercises (arm circles, pendulum swings) help maintain mobility without stressing injured tissues.
When to see a doctor: Seek medical evaluation if pain persists beyond one week, you experience significant weakness, you hear or feel clicking/popping, or pain wakes you at night. These symptoms suggest structural damage that won’t heal with rest alone.
Proper Paddle Entry Angle to Reduce Shoulder Strain
The optimal paddle entry angle for shoulder health is 30-45 degrees from vertical (low-angle technique), which keeps your top hand below shoulder height and maintains the paddler’s box throughout the stroke. High-angle technique (60-75 degrees from vertical) generates more power but requires greater shoulder elevation and is appropriate only for racing or challenging conditions, not recreational fishing kayaking.
Low-angle entry technique:
- Blade enters the water 12-18 inches forward of your hip
- Top hand stays between chest and eye level, never rising above your head
- Paddle shaft crosses your body at a shallow angle
- Less strain on shoulders, better for all-day paddling
- Ideal for fishing kayaks, touring, and recreational use
High-angle entry technique:
- Blade enters closer to the bow, 24-30 inches forward
- Top hand rises to forehead or above, requiring greater shoulder elevation
- Paddle shaft is more vertical during the power phase
- More power per stroke but higher shoulder stress
- Appropriate for racing, surfing, or short intense efforts
Practical application: For fishing kayak use, low-angle technique is almost always the better choice. You’re prioritizing endurance and comfort over maximum speed, and you need to preserve shoulder health for casting, fighting fish, and other fishing activities beyond just paddling.
Adjustment for wind: When paddling into strong headwinds, you may temporarily adopt a slightly higher angle (45-50 degrees) to generate more power, but return to low-angle technique once conditions moderate. The key is matching your technique to conditions rather than using high-angle as your default.
Understanding proper technique helps you make the most of your time on the water. For more tips on maximizing your fishing kayak experience, check out our guide to kayak fishing techniques.
Can You Kayak With a Previous Shoulder Injury?
You can kayak with a previous shoulder injury if you have full pain-free range of motion, medical clearance from your healthcare provider, and commit to using modified technique that protects the injured area. Many paddlers successfully return to kayaking after shoulder injuries by adopting low-angle technique, using lighter equipment, and maintaining a shoulder-strengthening program.
Prerequisites for return:
- Complete healing of acute injury (typically 8-12 weeks minimum)
- Full active range of motion without pain
- Strength at least 80% of your uninjured side
- Completion of physical therapy if prescribed
- Written clearance from your doctor or physical therapist
Modifications for previously injured shoulders:
- Use exclusively low-angle paddling technique
- Invest in a lightweight carbon paddle (under 20 oz)
- Limit initial sessions to 30 minutes and progress slowly
- Avoid paddling in rough water or strong winds
- Perform shoulder warm-up exercises before every session
- Stop immediately if you experience any sharp pain
Long-term management: Previous shoulder injuries increase your risk of re-injury, so ongoing prevention is essential. Continue shoulder strengthening exercises year-round, maintain excellent paddling technique, and don’t ignore early warning signs like mild soreness or stiffness. Address small problems before they become major setbacks.
Alternative consideration: If traditional paddling proves too stressful for your shoulders, consider a pedal kayak that eliminates paddling entirely. Pedal-drive systems allow you to propel your kayak using leg power, completely removing shoulder stress while keeping your hands free for fishing.
Difference Between High Angle and Low Angle Paddling Technique
High-angle paddling uses a more vertical paddle shaft (60-75 degrees from horizontal) with the blade entering close to the bow, generating maximum power per stroke but requiring greater shoulder elevation and strength. Low-angle paddling uses a more horizontal shaft (30-45 degrees) with the blade entering near your hip, producing less power per stroke but allowing sustainable all-day paddling with minimal shoulder stress.
Detailed comparison:
High-angle technique:
- Paddle length: 210-220 cm (shorter)
- Blade shape: Wider, more surface area
- Stroke rate: 40-50 strokes per minute
- Top hand position: Eye level to overhead
- Best for: Racing, whitewater, short intense efforts
- Shoulder demand: High
- Learning curve: Moderate to difficult
Low-angle technique:
- Paddle length: 220-240 cm (longer)
- Blade shape: Narrower, elongated
- Stroke rate: 50-60 strokes per minute
- Top hand position: Chest to shoulder level
- Best for: Touring, fishing, recreational paddling
- Shoulder demand: Low
- Learning curve: Easy
Efficiency considerations: High-angle technique is more efficient for short distances or when you need maximum acceleration, but low-angle technique is more efficient for distances over one mile because it’s sustainable for hours without fatigue. For fishing kayak applications where you might paddle 3-5 miles in a day with frequent stops, low-angle is the clear winner.
Hybrid approach: Some experienced paddlers use low-angle as their default but switch to high-angle for brief periods when they need extra power—crossing a channel with current, punching through surf, or making a quick sprint to a fishing spot. This requires owning a mid-length paddle (220-230 cm) that works reasonably well for both styles.
Choose low-angle if: You’re fishing from your kayak, paddling more than 90 minutes per session, have any shoulder concerns, or prioritize comfort over speed. This describes 90% of fishing kayak enthusiasts.
Stretches to Do Before Kayaking to Prevent Shoulder Pain
Pre-paddling stretches should target the shoulders, chest, lats, and thoracic spine to ensure full range of motion and reduce injury risk during the first strokes when muscles are still cold. A proper warm-up takes 5-10 minutes and includes both dynamic stretches (movement-based) and static holds, performed in that order.
Dynamic warm-up sequence (perform first):
- Arm circles: 10 forward, 10 backward, gradually increasing diameter
- Torso rotations: 15 reps, hands on hips, rotating through full range
- Shoulder rolls: 10 forward, 10 backward, exaggerating the movement
- Cross-body arm swings: 15 reps, swinging arms across chest and back
- Paddle simulation: 20 air strokes with your paddle, focusing on form
Static stretches (hold each 20-30 seconds):
- Doorway chest stretch: Place forearm on door frame, rotate body away to stretch pecs
- Overhead triceps stretch: Reach one arm overhead, bend elbow, gently pull with opposite hand
- Cross-body shoulder stretch: Pull one arm across chest with opposite hand
- Lat stretch: Reach both arms overhead, lean to one side, hold, repeat other side
- Posterior shoulder stretch: Reach arm across body at shoulder height, pull with opposite hand
On-water warm-up: Even after stretching, paddle at 50% intensity for the first 10 minutes to allow muscles to fully warm up under load. This gradual progression reduces the shock to cold tissues and gives you time to dial in your technique before you start working hard.
Cold weather considerations: When paddling in water temperatures below 60°F or air temperatures below 50°F, double your warm-up time. Cold muscles are less elastic and more prone to strains, so extra preparation is essential for injury prevention.
Proper preparation extends beyond just stretching—it includes having the right safety gear and knowledge. Learn more about comprehensive kayaking safety practices to protect yourself on every outing.
Frequently Asked Questions
How long does it take to learn proper paddling technique?
Most people can learn basic shoulder-safe paddling technique in 2-3 hours of focused practice, but developing muscle memory and consistent form takes 10-15 hours on the water. Working with an instructor or experienced paddler for your first few sessions accelerates learning and prevents bad habits from forming.
Can a paddle that’s too short also cause shoulder problems?
Yes, a paddle that’s too short forces you to lean excessively side-to-side and reach down toward the water, which strains your lower back and can cause shoulder instability. Proper paddle length keeps your torso more upright and your shoulders in a stronger, more stable position.
Should I paddle on both sides equally to prevent imbalanced shoulder development?
Ideally yes, though most paddlers naturally favor one side. Switching sides every 10-15 minutes helps prevent asymmetric muscle development and reduces overuse risk on your dominant side. This is especially important for fishing kayak anglers who tend to keep one side clear for casting.
Is it normal for my shoulders to be sore after my first few kayaking trips?
Mild muscle soreness (DOMS) in your shoulders and upper back is normal when you’re new to kayaking, typically lasting 24-48 hours. However, sharp pain, pain that persists beyond 72 hours, or pain during paddling (not just after) indicates technique problems or overuse that needs correction.
Do I need a different paddle for a wide fishing kayak versus a narrow touring kayak?
Yes, wider kayaks require longer paddles (typically 230-240 cm) to comfortably reach the water without excessive leaning, while narrow kayaks work better with shorter paddles (210-220 cm). Using the wrong length for your kayak width forces poor technique and increases shoulder strain.
Can I use a kayak paddle if I have arthritis in my shoulders?
Many people with shoulder arthritis successfully kayak using bent-shaft paddles, low-angle technique, and anti-inflammatory medication as needed. Consult your rheumatologist or orthopedist before starting, and consider a lightweight carbon paddle to minimize joint stress. Stop if you experience increased pain or swelling.
How do I know if I’m rotating my torso enough during the stroke?
Place your hand on your opposite hip while paddling—you should feel your hip moving forward with each stroke on that side. If your hips stay stationary, you’re paddling with your arms instead of rotating your torso. Another test: your belly button should point toward your paddle blade during the power phase of each stroke.
What’s the best way to carry a kayak paddle to avoid shoulder strain?
Carry your paddle balanced on one shoulder with the shaft resting across your trapezius muscle, not gripped in your hand at your side. For longer carries, switch shoulders every few minutes. Never carry your paddle by gripping it at one end and letting it hang, as this creates uneven shoulder loading.
Should I use a paddle leash, and does it affect shoulder safety?
Paddle leashes are recommended for fishing kayaks because they prevent losing your paddle while fighting fish or taking photos. They don’t significantly affect shoulder safety as long as the leash is long enough (6-8 feet) to allow full range of motion during normal paddling strokes.
How often should I replace my kayak paddle?
Replace your paddle when you notice cracks in the shaft or blades, significant wear on blade edges, or looseness in the ferrule joint. A damaged paddle can fail during use, potentially causing shoulder injury if it breaks mid-stroke. Quality paddles typically last 5-10 years with proper care.
Can poor paddling technique cause neck pain in addition to shoulder pain?
Yes, poor technique often causes both shoulder and neck pain because these areas are biomechanically connected. Hunched posture, excessive grip tension, and lack of torso rotation all create neck strain. Addressing technique errors usually resolves both shoulder and neck symptoms simultaneously.
Is it worth investing in a carbon fiber paddle for shoulder health?
If you paddle frequently (more than twice per month) or have existing shoulder concerns, a carbon fiber paddle is worth the investment. The 10-15 ounce weight difference compared to plastic or fiberglass paddles significantly reduces cumulative shoulder load over a full day on the water, though carbon paddles cost $200-400 versus $80-150 for heavier alternatives.
Conclusion
Protecting your shoulders while kayaking comes down to three fundamental principles: use torso rotation instead of arm strength, maintain the paddler’s box throughout every stroke, and choose equipment that matches your body dimensions and paddling style. Low-angle paddling technique with proper form allows fishing kayak enthusiasts to spend full days on the water without pain or injury risk.
Take these steps to implement shoulder-safe paddling:
- Assess your current paddle length using the on-water test described above and replace it if necessary
- Practice torso rotation on land until the movement feels natural before applying it on the water
- Start your next season with a 6-week shoulder strengthening program to build resilience
- Film yourself paddling or ask an experienced friend to watch your technique and identify errors
- Commit to proper warm-up stretches before every paddling session, no exceptions
Remember that developing good technique takes time and conscious effort, but the investment pays dividends in pain-free paddling for years to come. If you experience persistent shoulder pain despite correcting your technique, consult a physical therapist who specializes in sports injuries—they can identify specific weaknesses or movement patterns that need individual attention.
The water is waiting, and with proper paddling technique basics that save your shoulders, you’ll be able to enjoy it for decades without the chronic pain that sidelines so many kayakers. Start with one technique improvement per session rather than trying to fix everything at once, and you’ll build sustainable habits that protect your shoulders for the long haul.
For more ways to enhance your time on the water, explore our resources on fishing techniques and beginner kayak fishing to round out your skills.





