
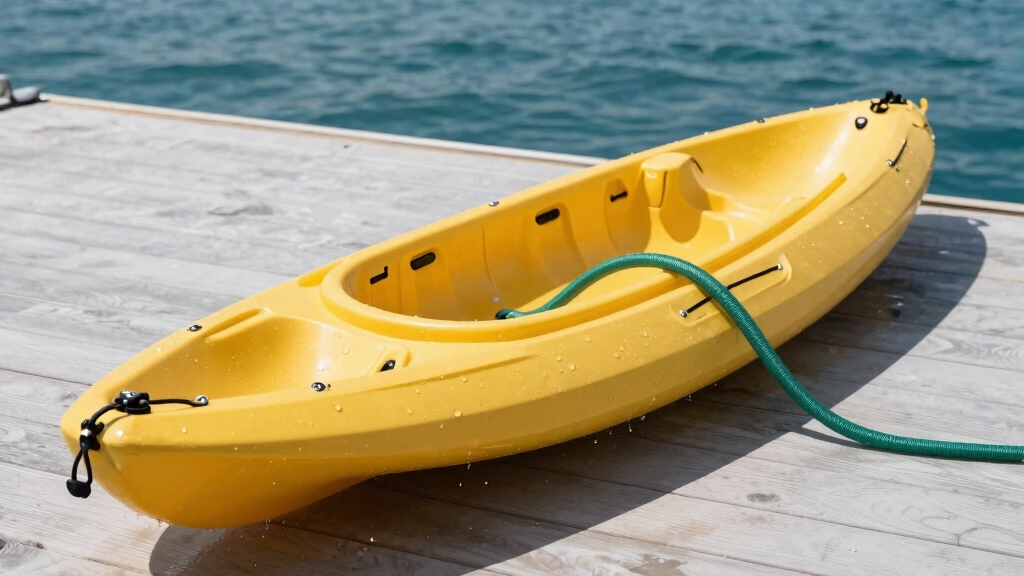
Saltwater leaves behind microscopic salt crystals that bond to your kayak’s surface within hours, accelerating UV damage and corroding metal hardware up to three times faster than freshwater exposure. Learning how to clean a kayak after saltwater isn’t just about aesthetics—it’s about protecting your investment from permanent damage that can shorten your kayak’s lifespan by years.
Key Takeaways
- Rinse immediately with fresh water after every saltwater trip to prevent salt crystal bonding and corrosion
- Use mild soap (dish soap or marine-specific cleaner) for monthly deep cleans, but plain water works for routine rinses
- Focus on hardware including scupper holes, rod holders, tracks, and bungee cords where salt accumulates fastest
- Plastic kayaks resist corrosion better than fiberglass, but both materials suffer UV damage when salt residue remains
- Never use pressure washers above 1,500 PSI directly on kayak surfaces to avoid micro-cracks in the hull
- Salt buildup removal requires vinegar solution (1:1 ratio) or dedicated marine cleaner for stubborn deposits
- Clean within 24 hours for best results; waiting longer allows salt to bond more permanently to surfaces
- Protect long-term with UV protectant spray applied after cleaning to create a barrier against future salt damage
What Happens If You Don’t Rinse Your Kayak After Saltwater
Skipping the rinse after ocean kayak fishing allows salt crystals to form on your kayak’s surface as the water evaporates. These crystals act like tiny magnifying glasses, intensifying UV rays and causing the plastic or gel coat to oxidize, fade, and become brittle much faster than normal wear.
The damage compounds over time:
- Week 1-2: White salt residue appears, especially in crevices and around hardware
- Month 1-3: Metal components (cleats, screws, tracks) show early corrosion signs with surface rust or green oxidation
- Month 3-6: Hull develops chalky texture as UV damage accelerates; bungee cords stiffen and fray
- Year 1+: Permanent discoloration, weakened hull integrity, seized hardware requiring replacement
Salt also attracts moisture from the air, keeping metal parts in constant contact with corrosive elements even when the kayak is stored. For fishing kayaks with multiple accessories and mounting systems, this accelerated corrosion can make tracks unusable and cause expensive rod holders to fail.
How to Clean a Kayak After Saltwater: Step-by-Step Process
Cleaning your kayak after saltwater exposure takes 10-15 minutes for a basic rinse or 30-45 minutes for a thorough deep clean. The process differs slightly based on how soon you clean after your trip and how much salt buildup exists.
Immediate Post-Trip Rinse (Within 2 Hours)
- Position the kayak on a flat surface or sawhorses with the hull facing up
- Rinse the entire hull with fresh water from a garden hose, starting at the bow and working toward the stern
- Flip the kayak and rinse the deck, paying extra attention to recessed areas
- Spray inside scupper holes for 5-10 seconds each to flush salt from internal channels
- Rinse all hardware including rod holders, tracks, cleats, and anchor trolley systems
- Spray bungee cords and elastic straps thoroughly
- Wipe down the seat and any fabric components with fresh water
- Let air dry completely before storing to prevent mildew
Deep Clean (Monthly or After Heavy Salt Exposure)
For kayaks used weekly in saltwater kayaking conditions, a monthly deep clean prevents long-term damage:
- Pre-rinse with fresh water to remove loose salt and debris
- Mix cleaning solution: 2-3 drops of mild dish soap per gallon of water (or use marine-specific kayak cleaner)
- Apply with soft sponge or microfiber cloth in circular motions, working in sections
- Scrub hardware with a soft-bristle brush to remove salt deposits from threads and crevices
- Clean scupper holes with a bottle brush or pipe cleaner dipped in soapy water
- Rinse thoroughly with fresh water until no soap residue remains
- Dry with microfiber towels or let air dry completely
- Apply UV protectant (303 Aerospace Protectant or similar) to hull and deck surfaces
Common mistake: Using too much soap creates residue that attracts dirt. A little goes a long way—you should barely see suds.
Can I Just Hose Down My Kayak After Saltwater or Do I Need Soap
A simple freshwater hose-down is sufficient for routine cleaning after each saltwater trip. Soap becomes necessary only when you notice visible salt buildup, stubborn stains, or during monthly deep-clean maintenance sessions.
Plain water effectively removes 90-95% of salt residue if applied within 24 hours of exposure. The key is thorough coverage and adequate water volume—a quick 30-second spray won’t cut it. Spend at least 5-10 minutes rinsing every surface, crevice, and piece of hardware.
When soap is required:
- Visible white salt crust has formed on surfaces
- You’ve skipped several rinses and buildup has accumulated
- Organic matter (fish slime, algae, bait residue) is present
- Monthly maintenance schedule regardless of visible dirt
- Preparing the kayak for long-term storage
When water alone works:
- Cleaning within 24 hours of saltwater exposure
- No visible salt deposits or staining
- Regular weekly maintenance routine
- Quick rinses between multi-day fishing trips
For fishing kayak owners who launch frequently, establishing a “rinse every time, soap once monthly” routine provides the best balance between protection and convenience.

CONCENTRATED SAFE FORMULA Our highly concentrated formula goes a long way! A small dime size amount is all you need to get a nice lather. It is safe for your hands, hair, body, pots and pans, and more. Formulated by aestheticians with sensitive skin in mind and gentle enough to be used every day.

𝐄𝐅𝐅𝐎𝐑𝐓𝐋𝐄𝐒𝐒 𝐂𝐋𝐄𝐀𝐍𝐈𝐍𝐆 𝐅𝐎𝐑 𝐀𝐋𝐋 𝐘𝐎𝐔𝐑 𝐌𝐀𝐑𝐈𝐍𝐄 𝐄𝐐𝐔𝐈𝐏𝐌𝐄𝐍𝐓 - Perfect for washing boats, pontoons, kayaks, paddleboards, and more, this versatile cleaning kit makes it easy to remove salt, grime, and debris in minutes, leaving your equipment sparkling clean and protected.

THE BEST WAY TO CLEAN YOUR BOAT: Remove dirt, grime, grease, fish guts, and bird droppings from your boat safely and effectively with this phosphate-free boat vinyl cleaner. The premium boat wash soap can be used in hot, cold, fresh, and salt water.
How to Remove Salt Buildup From Kayak Hull
Stubborn salt deposits that have bonded to your kayak’s hull require more than plain water. White crusty patches or chalky residue indicate salt has crystallized and needs chemical help to dissolve.
Vinegar solution method (most effective for heavy buildup):
- Mix equal parts white vinegar and fresh water in a spray bottle
- Spray affected areas generously and let sit for 5-10 minutes
- Scrub with a soft sponge or microfiber cloth
- Rinse thoroughly with fresh water
- Repeat if necessary for thick deposits
Baking soda paste method (for textured buildup):
- Mix 3 parts baking soda with 1 part water to form a paste
- Apply to salt deposits and let sit for 10 minutes
- Scrub gently with a soft-bristle brush
- Rinse completely with fresh water
Marine cleaner method (for severe cases):
Products like Star brite Salt Off or similar marine-specific cleaners contain chelating agents designed to break down salt bonds. Follow manufacturer instructions, but typically:
- Apply cleaner to dry surface
- Let dwell for recommended time (usually 5-15 minutes)
- Agitate with soft brush if needed
- Rinse thoroughly with fresh water
Never use: Abrasive cleaners, steel wool, or harsh chemicals like bleach, which can damage the kayak’s surface and void warranties. Stick to pH-neutral or mildly acidic solutions.

VERSATILE USE: Ideal for flushing outboard motors, rods and reels, lures, and any metal equipment exposed to salt water. Also works great for removing road salt in winter conditions

2X More Effective - Ultra-concentrated salt remover with twice the active ingredients of competitors, delivering effortless and reliable salt-dissolving results. Easily wash salt off of boats, engines, trailers, vehicles, homes, and more

POWERFUL SALT & SALTWATER RESIDUE REMOVAL: Salty Dog pods dissolve stubborn salt buildup, grime, and mineral deposits left by ocean spray and winter road salt — helping protect boats, cars, trailers, and gear from long-term salt damage.
Best Soap for Cleaning Kayak After Ocean Use
The best soap for cleaning a kayak after ocean use is mild dish soap (like Dawn or Seventh Generation) diluted heavily with water, or purpose-made marine cleaners designed for fiberglass and plastic watercraft. Both options effectively remove salt, organic matter, and grime without damaging kayak materials.
Top soap choices for kayak cleaning:
| Soap Type | Best For | Dilution Ratio | Pros | Cons |
|---|---|---|---|---|
| Mild dish soap | Routine cleaning, budget option | 2-3 drops per gallon | Readily available, effective, inexpensive | Requires thorough rinsing |
| Marine kayak cleaner | Deep cleaning, UV protection | Follow label | pH-balanced, often includes protectants | More expensive |
| Boat soap (Star brite, 3M) | Heavy buildup, multi-kayak cleaning | Per label | Concentrated, salt-specific formulas | Overkill for light cleaning |
| Biodegradable camp soap | Eco-conscious cleaning | 1-2 tablespoons per gallon | Environmentally safe | Less effective on heavy salt |
What to avoid:
- Automotive car wash soap: Contains waxes and additives that leave residue
- Laundry detergent: Too harsh, can degrade plastic over time
- Bleach or ammonia: Damages kayak materials and voids warranties
- Abrasive cleaners: Scratches gel coat and plastic surfaces
For fishing kayak gear maintenance, choose soaps that rinse clean easily and won’t leave slippery residue on deck surfaces where you need secure footing.
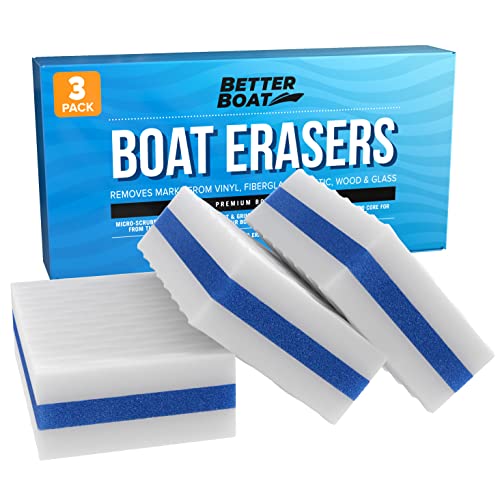
THE ORIGINAL BOAT ERASER: This is the one that started it all. Dozens of copycats have appeared since, but the original has a reinforced core, textured surface, and premium density that cheap knockoffs simply cannot match. Accept no imitations.

Heavy Duty Cleaning: Professional-grade marine soap formulated to tackle tough scum, grime, and dirt buildup on all boat surfaces, delivering powerful cleaning performance for vessels of any size

THE ORIGINAL BOAT ERASER: This is the one that started it all. Dozens of copycats have appeared since, but the original has a reinforced core, textured surface, and premium density that cheap knockoffs simply cannot match. Accept no imitations.
How to Clean Kayak Scupper Holes After Saltwater
Scupper holes are self-draining ports in sit-on-top kayaks that allow water to escape, but they also trap salt, sand, and organic debris. Cleaning scupper holes after saltwater use prevents clogs, corrosion of scupper plugs, and buildup that can restrict drainage.
Scupper hole cleaning process:
- Remove scupper plugs if installed
- Flush with high-pressure water from a garden hose nozzle, inserting the nozzle into each hole for 10-15 seconds
- Use a bottle brush or pipe cleaner to scrub the interior walls of accessible scupper holes
- Spray from both sides (top deck and hull bottom) to dislodge trapped debris
- Inspect scupper plugs for salt buildup or corrosion; soak in vinegar solution if crusty
- Rinse plugs thoroughly and let dry before reinstalling
For stubborn blockages:
- Run a flexible drain snake or long bottle brush through the scupper channel
- Soak the entire kayak section in fresh water if possible (fill a kiddie pool or use a bathtub)
- Use compressed air to blow out debris after initial water flush
Maintenance schedule:
- After every saltwater trip: Quick water flush (30 seconds per hole)
- Weekly for frequent users: Brush cleaning with soapy water
- Monthly: Remove and inspect plugs, deep clean channels
Neglected scupper holes can develop permanent salt deposits that restrict water flow, affecting your kayak’s self-bailing performance and potentially creating standing water that attracts mold.
Should I Clean My Kayak Immediately After Saltwater or Can It Wait
Clean your kayak within 24 hours of saltwater exposure for optimal protection, but immediate cleaning (within 2 hours) prevents 95% of potential salt damage. Waiting longer than 24 hours allows salt crystals to bond more permanently to surfaces, requiring more aggressive cleaning methods.
Timing impact on cleaning effectiveness:
- 0-2 hours: Salt still wet or barely crystallized; rinses away easily with plain water
- 2-12 hours: Salt crystals forming but not fully bonded; water rinse still highly effective
- 12-24 hours: Crystals hardening; may need light scrubbing in crevices
- 24-48 hours: Salt bonded to surface; soap or vinegar solution recommended
- 48+ hours: Significant bonding; requires dedicated cleaning products and more effort
Real-world considerations:
If you can’t clean immediately, at least rinse the most vulnerable components—metal hardware, tracks, and scupper holes—within a few hours. These areas corrode fastest and benefit most from quick attention. The hull can wait slightly longer without catastrophic damage, though sooner is always better.
For multi-day inshore saltwater kayak fishing trips, bring a collapsible water jug or find a freshwater source to do quick rinses between days. This prevents cumulative salt buildup that becomes harder to remove at trip’s end.
Choose immediate cleaning if:
- You live in a humid climate (salt attracts moisture, accelerating corrosion)
- Your kayak has extensive metal hardware or electronics
- You fish in particularly salty waters (higher salinity = faster damage)
- You want to maximize your kayak’s lifespan
Does Saltwater Damage Plastic Kayaks or Fiberglass Kayaks More
Saltwater causes more visible and structural damage to fiberglass kayaks than plastic kayaks because fiberglass gel coat is more porous and prone to osmotic blistering when salt penetrates the surface. Plastic (polyethylene) kayaks resist corrosion better but still suffer UV-accelerated degradation when salt residue remains on the surface.
Damage comparison:
Fiberglass kayaks:
- Gel coat absorbs salt water through microscopic pores
- Osmotic blistering develops when trapped salt draws moisture under the gel coat
- Blisters appear as bubbles or raised spots that can crack and expose underlying laminate
- Requires more frequent waxing and barrier coat maintenance
- Repairs are more complex and expensive
Plastic (polyethylene) kayaks:
- Non-porous surface resists salt absorption
- Primary damage is UV degradation accelerated by salt crystal magnification
- Hull becomes chalky, faded, and brittle over time
- Hardware mounting points can develop stress cracks if corrosion goes unchecked
- Generally more forgiving of delayed cleaning
Metal hardware suffers equally on both kayak types. Stainless steel, aluminum tracks, and zinc-plated screws corrode at the same rate regardless of hull material.
For fishing kayak comparison purposes, plastic kayaks offer better saltwater durability for recreational anglers who may not maintain strict cleaning schedules. Serious offshore anglers investing in high-end fiberglass models must commit to meticulous post-trip maintenance.
How to Protect Kayak From Saltwater Corrosion Long Term
Long-term protection from saltwater corrosion requires a three-part strategy: consistent cleaning, protective coatings, and proper storage. Kayaks maintained with this approach can last 15-20 years in saltwater environments versus 8-10 years for neglected vessels.
Protective coating routine:
UV protectant spray (303 Aerospace Protectant, Star brite, or similar) applied every 3-4 weeks
- Creates a barrier against UV rays and salt bonding
- Apply to clean, dry surfaces
- Buff with microfiber cloth for even coverage
Marine wax (for fiberglass kayaks) applied quarterly
- Fills gel coat pores to prevent salt water intrusion
- Provides additional UV protection
- Use non-abrasive marine-grade wax only
Corrosion inhibitor on metal hardware monthly
- Products like Boeshield T-9 or CRC Marine create a moisture barrier
- Apply to tracks, screws, cleats, and hinges
- Wipe off excess to prevent slippery surfaces
Storage best practices:
- Store kayak out of direct sunlight (under cover or indoors)
- Keep in a dry environment to prevent moisture-related corrosion
- Store upside down or on its side to prevent water pooling
- Remove all scupper plugs during storage for air circulation
- Cover with breathable kayak cover (not plastic tarp that traps moisture)
Hardware upgrades:
Replace standard hardware with marine-grade stainless steel (316 grade) or anodized aluminum components. While more expensive initially, these materials resist saltwater corrosion significantly better than zinc-plated or standard stainless steel (304 grade).
Inspection schedule:
- Weekly: Visual check for new corrosion or damage
- Monthly: Detailed inspection of all mounting points and hardware
- Quarterly: Remove and inspect internal hardware; apply fresh corrosion inhibitor
- Annually: Professional inspection for structural issues if heavily used
Do I Need to Clean Kayak Hardware and Bungees Separately After Ocean
Yes, kayak hardware and bungee cords require separate, focused cleaning after ocean exposure because these components trap salt in threads, crevices, and woven fibers where a general hull rinse won’t reach. Metal hardware corrodes fastest, while bungees degrade and lose elasticity when salt crystals remain embedded in the cord material.
Hardware cleaning process:
- Spray each component individually with fresh water, using a nozzle for pressure
- Scrub threads and crevices with a soft-bristle toothbrush or detail brush
- Work moving parts (hinges, cam straps, anchor trolleys) back and forth while rinsing to flush internal salt
- Apply corrosion inhibitor to metal components after drying
- Inspect for early corrosion signs: discoloration, rough texture, or resistance when moving
Bungee cord maintenance:
- Stretch bungees fully while spraying with fresh water to open the weave
- Massage cords while rinsing to work salt out of the fiber core
- Apply mild soap solution monthly and work it through the cord
- Rinse thoroughly until water runs clear
- Let air dry completely before storing kayak
- Apply UV protectant spray to extend bungee life
Rod holder and track cleaning:
- Remove rod holders if possible and flush with fresh water
- Use a bottle brush to scrub inside rod holder tubes
- Spray tracks from multiple angles to reach all surfaces
- Wipe tracks with a cloth dampened with vinegar solution monthly
- Apply dry lubricant (not oil-based) to track channels quarterly
Bungee cords typically last 2-3 years with proper maintenance versus 6-12 months when neglected in saltwater environments. Hardware can last the life of the kayak if cleaned consistently, or require replacement within 1-2 years if corrosion takes hold.
Common Mistakes When Cleaning Saltwater Off Kayak
The most common mistake when cleaning saltwater off a kayak is using too much pressure or the wrong cleaning tools, which can cause micro-cracks in the hull or scratch protective coatings. These seemingly minor errors compound over time, creating entry points for UV damage and reducing the kayak’s structural integrity.
Top cleaning mistakes to avoid:
Using a pressure washer incorrectly
- Never exceed 1,500 PSI on kayak surfaces
- Keep the nozzle at least 12 inches from the hull
- Avoid direct spray on decals, hatches, and sealed seams
- Use a wide fan spray pattern, not a concentrated jet
Cleaning in direct sunlight
- Soap and water dry too quickly, leaving residue
- UV protectants don’t bond properly to hot surfaces
- Difficult to see if all salt has been removed
- Clean in shade or during cooler parts of the day
Skipping the flip
- Many anglers rinse only the deck and forget the hull bottom
- Salt accumulates on the hull and accelerates UV damage
- Always rinse both sides thoroughly
Using abrasive materials
- Stiff brushes, scouring pads, or rough towels scratch surfaces
- Scratches trap salt and dirt, making future cleaning harder
- Use only soft sponges, microfiber cloths, or soft-bristle brushes
Not rinsing thoroughly after soap
- Soap residue attracts dirt and creates a sticky film
- Can degrade rubber and plastic components over time
- Rinse until water runs completely clear
Storing before completely dry
- Trapped moisture promotes mold and mildew growth
- Accelerates corrosion of metal components
- Creates musty odors in enclosed storage areas
Neglecting small components
- Forgetting to clean paddle holders, cup holders, and accessory mounts
- These areas trap salt and corrode quickly
- Small parts are expensive to replace
For kayak fishing enthusiasts who invest in quality gear, avoiding these mistakes preserves both the kayak’s performance and resale value.
How Often Should I Deep Clean My Kayak If I Use It in Ocean Weekly
Deep clean your kayak once per month if you use it in the ocean weekly, while performing a thorough freshwater rinse after every single trip. This schedule balances protection against time investment, preventing long-term damage without requiring excessive maintenance hours.
Recommended cleaning schedule for weekly ocean use:
After every trip (10-15 minutes):
- Complete freshwater rinse of hull, deck, and hardware
- Flush scupper holes
- Rinse bungees and straps
- Quick wipe-down of seat and high-contact areas
Weekly (additional 5 minutes):
- Inspect hardware for early corrosion signs
- Check bungees for fraying or stiffness
- Wipe down tracks and rod holders with damp cloth
Monthly (30-45 minutes):
- Full soap-and-water deep clean
- Scrub all hardware with brush
- Clean scupper holes with bottle brush
- Apply UV protectant to hull and deck
- Apply corrosion inhibitor to metal components
- Inspect and tighten all mounting hardware
Quarterly (1-2 hours):
- Remove and inspect internal hardware
- Deep clean tracks and mounting systems
- Apply marine wax (fiberglass kayaks)
- Replace worn bungees or corroded hardware
- Check hull for stress cracks or damage
Adjust frequency based on conditions:
Increase cleaning frequency if:
- You fish in particularly salty or polluted waters
- Your kayak is stored outdoors
- You notice accelerated corrosion or fading
- You live in a humid coastal climate
You may reduce frequency if:
- You store indoors in climate-controlled space
- You use a kayak cover between trips
- You apply protective coatings consistently
- Your kayak has minimal metal hardware
For saltwater kayak fishing guides or serious tournament anglers using their kayaks multiple times per week, consider deep cleaning every 2-3 weeks instead of monthly.
Can I Use a Pressure Washer on Kayak After Saltwater
You can use a pressure washer on your kayak after saltwater exposure if you keep the PSI below 1,500, maintain at least 12 inches of distance, and use a wide fan spray pattern. Higher pressure or closer proximity can force water into sealed compartments, damage decals, or create micro-cracks in the hull material.
Safe pressure washer guidelines:
Pressure settings:
- Maximum 1,500 PSI (1,000-1,200 PSI is ideal)
- Use 40-degree or wider nozzle tip (white or green tip)
- Never use 0-degree or 15-degree concentrated spray tips
Technique:
- Keep nozzle 12-18 inches from kayak surface
- Move in sweeping motions, never holding in one spot
- Spray at a slight angle, not perpendicular to surface
- Work from top to bottom to let gravity assist
Areas to avoid with pressure washer:
- Hatch covers and sealed seams (can force water past gaskets)
- Decals and graphics (can peel or damage)
- Rudder or skeg cables and housings
- Electronic component mounting areas
- Drain plugs and scupper plug areas
When pressure washers work well:
- Removing heavy mud or sand from hull bottom
- Flushing large scupper holes and drain channels
- Cleaning textured non-skid deck surfaces
- Rinsing undercarriage of kayak trailers
When to stick with garden hose:
- Routine post-trip cleaning
- Cleaning around sensitive hardware
- Washing near hatches or storage compartments
- If you’re unsure about proper technique
Many fishing kayak buying guide resources recommend against pressure washers entirely for beginners. A standard garden hose with a spray nozzle provides adequate pressure for effective cleaning without the risk of damage.
What Parts of Kayak Are Most Damaged by Salt If Not Cleaned
Metal hardware components suffer the most severe and fastest damage from uncleaned saltwater, with stainless steel tracks, aluminum rod holders, and zinc-plated screws showing visible corrosion within 2-4 weeks of regular exposure. These parts corrode from the outside in, eventually seizing, breaking, or requiring complete replacement.
Most vulnerable components (in order of damage speed):
Mounting hardware (screws, bolts, washers)
- Corrodes within 2-4 weeks
- Seizes in place, making removal impossible
- Can break during removal, requiring drilling out
Aluminum rod holders and tracks
- Develops white oxidation (aluminum oxide) within 1 month
- Pitting and rough texture makes sliding accessories difficult
- Eventually weakens and can crack under stress
Stainless steel tracks and cleats
- “Stainless” is a misnomer in saltwater—still corrodes
- Surface rust appears within 4-8 weeks
- 304-grade stainless corrodes faster than 316 marine-grade
Bungee cord attachment points
- Metal hooks and loops corrode quickly
- Bungee cord itself stiffens and loses elasticity
- Typically fails within 6-12 months without cleaning
Anchor trolley systems
- Pulleys seize from salt in bearings
- Cleats corrode and become difficult to operate
- Rope or line becomes stiff and abraded
Rudder and skeg systems
- Cables corrode and fray inside housings
- Pivot points seize
- Blade attachment hardware fails
Scupper plugs
- Rubber degrades faster when salt remains
- Plastic plugs become brittle and crack
- Metal drain plugs corrode and leak
Hull and deck surfaces
- Damage is slower but cumulative
- UV degradation accelerated by salt crystals
- Becomes chalky, faded, and brittle over 1-2 years
Replacement costs for neglected components:
- Track system: $50-150 per track
- Rod holders: $20-60 each
- Complete hardware replacement: $200-500
- Anchor trolley system: $40-80
- Rudder system: $100-300
Regular cleaning costs essentially nothing beyond water and occasional soap, making it the most cost-effective maintenance you can perform.
FAQ
How long does it take to properly clean a kayak after saltwater?
A basic freshwater rinse takes 10-15 minutes, while a thorough deep clean with soap and UV protectant application requires 30-45 minutes. The time investment depends on kayak size, amount of hardware, and how much salt buildup exists.
Can I use car wash soap on my fishing kayak?
No, avoid car wash soap because it contains waxes, polymers, and additives designed for automotive paint that leave residue on kayak surfaces. Use mild dish soap or marine-specific kayak cleaners instead for safe, effective cleaning.
Will saltwater ruin my kayak if I forget to clean it once?
One missed cleaning won’t ruin your kayak, but it starts the damage process. Salt crystals begin bonding to surfaces within 24 hours and accelerate UV degradation. Clean as soon as you remember, using soap or vinegar solution if more than 48 hours have passed.
What’s the white crusty stuff on my kayak after ocean fishing?
The white crust is crystallized salt that formed as seawater evaporated from your kayak’s surface. Remove it with a vinegar-water solution (1:1 ratio) or marine cleaner, scrubbing gently with a soft sponge, then rinse thoroughly with fresh water.
Should I remove my kayak seat to clean it after saltwater?
Yes, remove the seat monthly for deep cleaning if it’s easily detachable. Rinse it separately with fresh water after every trip, and wash with mild soap monthly to prevent salt buildup in fabric, foam, and mounting hardware.
Can I clean my kayak with a hose attachment at the boat ramp?
Yes, boat ramp rinse stations are ideal for immediate post-trip cleaning. Spend 5-10 minutes thoroughly rinsing all surfaces, hardware, and scupper holes before loading your kayak for transport home.
Does freshwater fishing require the same cleaning as saltwater?
No, freshwater fishing requires less intensive cleaning because fresh water doesn’t leave corrosive salt deposits. However, still rinse your kayak to remove dirt, algae, and organic matter that can cause odors and stains.
How do I know if my kayak hardware is too corroded to save?
Hardware is too corroded if it shows deep pitting, flaking metal, structural weakness, or won’t move despite cleaning and lubrication. Surface rust and light oxidation can usually be cleaned and treated with corrosion inhibitor.
What’s better for saltwater kayaks: sit-on-top or sit-inside?
Sit-on-top kayaks are better for saltwater because they’re easier to clean thoroughly, have self-draining scupper holes, and don’t trap water in an enclosed cockpit. Most ocean kayak fishing is done from sit-on-top models.
Can I store my kayak outside if I clean it after every saltwater trip?
You can store a kayak outside if cleaned regularly, but it will still degrade faster than indoor storage due to constant UV exposure. Use a breathable kayak cover and store in shade to minimize damage.
How do I clean salt from my kayak’s fish finder and electronics?
Wipe electronics with a damp (not wet) microfiber cloth after each trip. Never spray directly with water or pressure washer. Use electronics-safe cleaner for stubborn salt, and apply corrosion inhibitor to mounting brackets and cable connections.
Will vinegar damage my kayak’s plastic or fiberglass?
No, diluted white vinegar (1:1 with water) is safe for both plastic and fiberglass kayaks. It effectively dissolves salt deposits without damaging hull materials. Always rinse thoroughly with fresh water after using vinegar solution.
Conclusion
Learning how to clean a kayak after saltwater is the single most important maintenance task for extending your fishing kayak’s lifespan and protecting your investment. A consistent routine of immediate freshwater rinsing after every trip, combined with monthly deep cleaning and protective coating application, prevents the corrosion, UV damage, and material degradation that can cut a kayak’s useful life in half.
The process doesn’t require expensive products or specialized equipment—a garden hose, mild soap, and 15 minutes of attention after each outing will keep your kayak in excellent condition for years. Focus your efforts on the most vulnerable components: metal hardware, scupper holes, bungee cords, and tracks where salt accumulates fastest and causes the most expensive damage.
Take action today:
- Rinse your kayak thoroughly with fresh water after your next saltwater trip
- Inspect all hardware for early signs of corrosion
- Set a monthly reminder for deep cleaning and UV protectant application
- Replace any heavily corroded hardware before it fails during a fishing trip
- Consider upgrading to marine-grade stainless steel components for long-term durability
Your fishing kayak is a significant investment in your angling adventures. Fifteen minutes of post-trip maintenance is a small price to pay for years of reliable performance on the water. Start your cleaning routine today, and your kayak will reward you with decades of productive fishing trips.
For more guidance on maintaining your fishing kayak and maximizing your time on the water, explore our comprehensive resources on kayak fishing techniques and kayak gear maintenance.





