
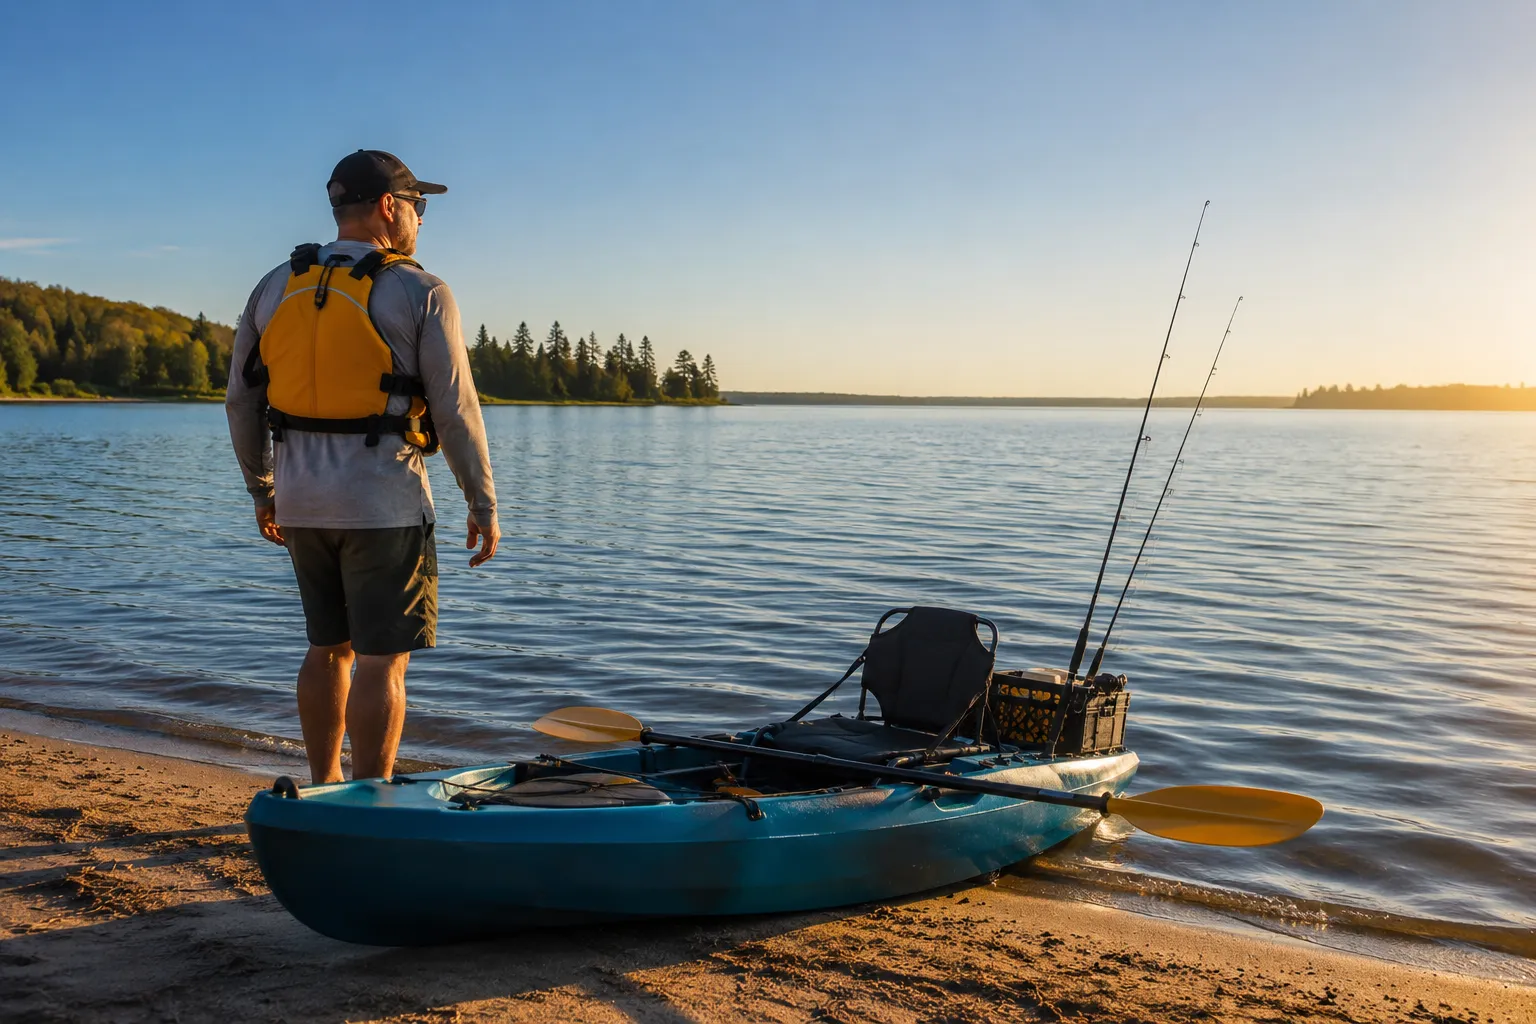
Quick Answer: To launch a kayak from shore solo, position your kayak perpendicular to the water’s edge in shallow water (ankle to knee-deep), place your paddle across the cockpit behind the seat for stability, step in with your weight centered, sit down quickly while holding the paddle shaft, then push off with your hands or paddle. The key is entering the kayak when it’s already floating in shallow water rather than trying to get in on dry land.
Key Takeaways
- Position your kayak perpendicular to shore in ankle-deep water before entering to prevent tipping
- Use your paddle as an outrigger by placing it across the cockpit for added stability during entry
- Enter the kayak quickly with your weight centered, stepping into the middle of the cockpit
- Sit-on-top kayaks are significantly easier for solo beach launches than sit-inside models
- A kayak cart protects your hull and saves energy when crossing sand or rocky terrain
- Launch in calm conditions when learning; waves require different techniques and timing
- Water shoes with good grip prevent slipping on wet rocks and provide stability during launch
- Never drag your kayak across rocks or rough terrain without hull protection
- Beginners can safely launch solo from beaches with proper technique and calm water conditions
- Keep your paddle leash attached and gear secured before entering the water
What Is the Easiest Way to Launch a Kayak by Yourself From the Beach
The easiest solo beach launch method is the shallow-water entry technique. Position your kayak perpendicular to the shoreline in ankle to knee-deep water where the kayak floats but you can still stand comfortably. Place your paddle across the kayak behind the cockpit, step into the center of the cockpit with one foot while holding the paddle shaft for balance, bring your second foot in quickly, and sit down in one smooth motion.
This method works because the kayak is already floating and stable in the water rather than resting on unstable sand or rocks. The perpendicular angle to shore keeps the kayak from drifting parallel to the beach, and the paddle acts as an outrigger for extra stability.
Step-by-step shallow-water entry:
- Carry or cart your kayak to the water’s edge
- Wade into ankle to knee-deep water while pulling the kayak alongside you
- Turn the kayak perpendicular to shore (bow pointing out to deeper water)
- Place your paddle across the kayak behind the seat, with one blade resting on shore or in shallow water
- Stand beside the cockpit facing the bow
- Grip the paddle shaft and cockpit rim with both hands
- Step into the center of the cockpit with your foot closest to the kayak
- Quickly bring your other foot in while lowering your center of gravity
- Sit down immediately and adjust your position
- Use your hands or paddle to push away from shore
Choose this method if: You have a sandy or gently sloping beach, calm water conditions, and a recreational or fishing kayak. It works for paddlers of all skill levels and minimizes the risk of tipping.
Common mistake: Many beginners try to sit in the kayak while it’s still on dry sand, then attempt to push themselves into the water. This damages the hull, requires enormous effort, and often results in the kayak getting stuck or tipping sideways as it enters the water.
How to Get Into a Kayak From Shore Without Tipping Over
Getting into a kayak from shore without tipping requires keeping your weight centered over the kayak’s keel line and entering in shallow water where the kayak is already floating. The paddle-as-outrigger technique provides the most stability: lay your paddle across the kayak behind the seat with one blade resting on shore or in shallow water, then grip both the paddle shaft and cockpit rim as you step in.
The physics of kayak stability depend on keeping your center of gravity low and centered. When you stand beside a kayak and step in, you create a tipping moment. The paddle outrigger extends your base of support and prevents the kayak from rolling away from you.
Stability techniques for shore entry:
- Paddle outrigger method: Most stable for beginners; the paddle blade on shore acts as a third point of contact
- Two-hand cockpit grip: Place both hands on opposite sides of the cockpit rim and lower yourself straight down
- Straddle entry: For sit-on-tops, straddle the kayak from behind and shuffle forward into the seat
- Buddy assist: Have someone hold the kayak steady from the opposite side while you enter
Body mechanics for stable entry:
- Keep your head and torso centered over the kayak’s centerline
- Move quickly and deliberately rather than slowly and tentatively
- Bend your knees and lower your center of gravity before stepping in
- Step into the deepest part of the cockpit, not near the edges
- Sit down immediately after both feet are in
Edge case: If you have mobility limitations or balance concerns, consider entering from a dock or using a kayak with a wider beam (30+ inches) that offers more initial stability. Some paddlers find it easier to sit on the back deck first, then slide forward into the seat.
Launching a Kayak From Shore vs From a Dock: Which Is Easier Solo
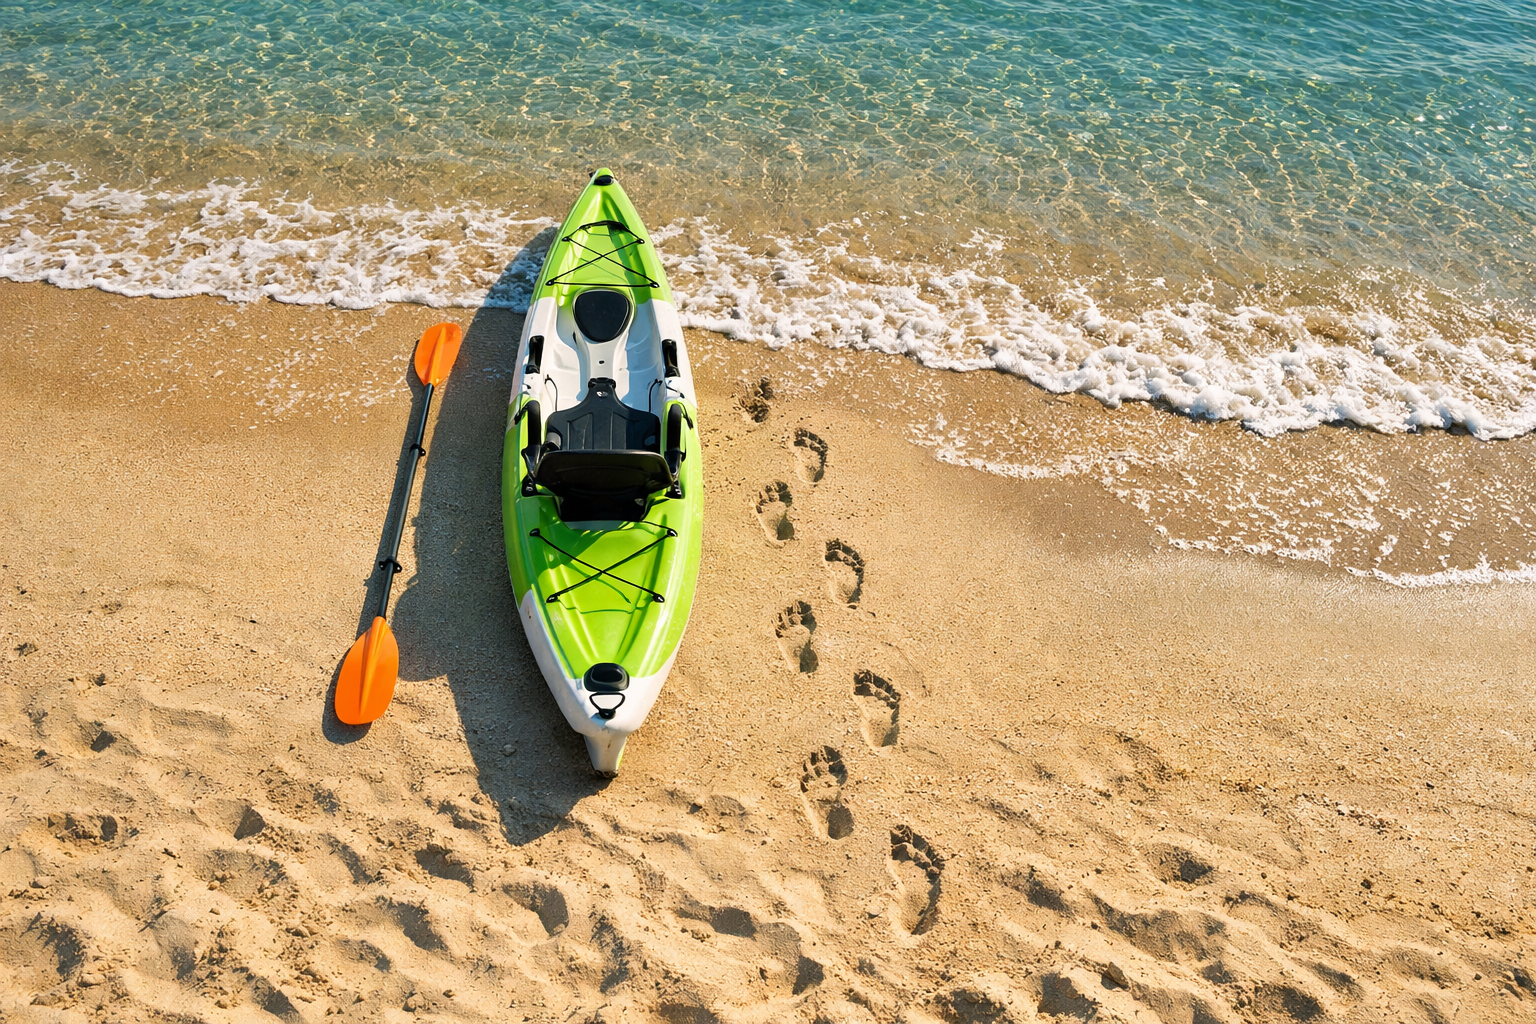
Launching from a dock is generally easier for solo paddlers because the dock provides a stable platform at water level, eliminating the need to wade into the water or balance on unstable sand. However, shore launches offer more flexibility since you can launch from any beach, sandbar, or shoreline without requiring infrastructure.
From a dock, you can sit on the edge with your legs in the kayak, hold the dock with one hand for stability, and lower yourself into the seat with minimal risk of tipping. The kayak stays at a consistent height relative to the dock, and you can keep your feet dry.
Dock launch advantages:
- Stable platform for entry and exit
- No need to wade into water or get feet wet
- Easier to load and unload gear before entering
- Better for paddlers with mobility limitations
- Kayak stays cleaner without sand or mud
Shore launch advantages:
- Available at any waterfront location
- No need to find or pay for dock access
- Better for shallow water or areas with low tide
- Allows launching in protected coves without facilities
- More natural and remote launch locations
Choose dock launching if: You have regular access to a dock, prefer to stay dry, have mobility concerns, or paddle in areas with deep water immediately at the shoreline.
Choose shore launching if: You explore remote locations, fish in shallow coves, want flexibility in launch sites, or paddle in areas without dock infrastructure.
Practical consideration: Many kayak anglers prefer shore launching because it provides access to shallow fishing spots that docks don’t reach. Recreational paddlers often prefer docks for convenience and cleanliness.
Best Type of Kayak for Solo Beach Launches
Sit-on-top kayaks are the best type for solo beach launches because they have an open deck that allows easy entry and exit, self-draining scupper holes that eliminate water accumulation, and wider beams that provide better initial stability. Recreational sit-on-tops in the 10-12 foot range with widths of 28-32 inches offer the ideal combination of stability and manageability for solo launching.
Sit-inside kayaks require more skill for beach launches because you must keep water out of the cockpit during entry, and the enclosed design makes it harder to recover if you tip. Touring kayaks with narrow beams (under 24 inches) are challenging for beginners to launch solo from beaches.
Kayak features that make solo beach launching easier:
- Width: 28-32 inches provides good stability without being too heavy
- Weight: Under 60 pounds allows one person to carry or cart to the water
- Hull shape: Flat or pontoon-style hulls are more stable than V-shaped hulls
- Length: 10-12 feet is manageable for solo handling while providing decent tracking
- Handles: Molded carry handles at bow and stern make transport easier
Kayak types ranked for solo beach launching (easiest to hardest):
- Recreational sit-on-top: Wide, stable, easy entry, self-draining
- Fishing kayak (sit-on-top): Very stable but heavier due to accessories
- Recreational sit-inside: Moderate difficulty, requires keeping cockpit dry
- Touring sit-inside: Narrower beam requires better balance and technique
- Tandem kayak: Heavy and awkward for one person to position and launch
- Sea kayak: Long, narrow, and requires advanced skills for solo beach launching
Choose a sit-on-top if: You’re a beginner, launch frequently from beaches, fish from your kayak, or paddle in warm water where getting wet isn’t a concern.
Choose a sit-inside if: You paddle in cold water, want better protection from wind and spray, prioritize speed and efficiency, or have mastered entry and exit techniques.
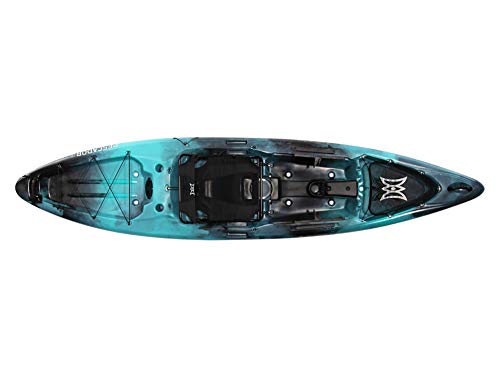
Premium Fishing Experience: The Perception Pescador Pro 12 is a sit-on-top kayak designed for the recreational angler. Equipped with a large front and rear storage area, it provides ample space for all your fishing gear and personal items.

UV-Protected HDPE Construction for Durability: Built with high-density polyethylene (HDPE) plastic, this kayak is both lightweight and highly durable, offering long-lasting protection against UV rays for years of use in various conditions. Paddle included.

PADDLE & STABLE SIT-ON-TOP DESIGN: Includes paddle, Features a flat bottom hull with chine rails that maximize stability and minimize tipping, making it ideal for beginners and recreational paddlers
Do I Need a Kayak Cart to Launch From Shore Alone
You don’t absolutely need a kayak cart to launch from shore alone, but it makes the process significantly easier and protects your kayak hull from damage. A kayak cart is essential if you have to cross more than 50 feet of sand, gravel, or rough terrain, or if your kayak weighs over 50 pounds. Without a cart, you’ll either drag the kayak (risking hull damage) or carry it (which is exhausting and increases injury risk).
Kayak carts with large balloon tires (10-12 inches) work best on soft sand, while smaller wheels suffice for hard-packed surfaces or boat ramps. The investment of $60-150 for a quality cart pays off in reduced physical strain and extended kayak lifespan.
When a kayak cart is worth it:
- Your launch site is more than 50 feet from parking
- You cross soft sand, gravel, or uneven terrain
- Your kayak weighs over 50 pounds
- You have back, shoulder, or knee concerns
- You launch frequently (multiple times per week)
- Your kayak has a flat or textured hull that drags poorly
When you can skip the cart:
- Launch site is within 20 feet of parking on grass or smooth ground
- You have a lightweight kayak (under 40 pounds)
- You launch from a dock or directly from a vehicle
- You paddle with a partner who can help carry
- Launch area has a smooth concrete or paved ramp
Cart features that matter:
- Wheel size: 10-12 inch balloon tires for sand; 6-8 inch wheels for hard surfaces
- Weight capacity: Should exceed your kayak weight by 20-30 pounds
- Strap system: Padded straps prevent hull damage and keep kayak secure
- Kickstand: Allows cart to stand upright for easier loading
- Corrosion resistance: Stainless steel or aluminum for saltwater use
Alternative: Some paddlers use a kayak dolly (a small wheeled platform) or even a modified hand truck. These work but are less stable than purpose-built kayak carts.
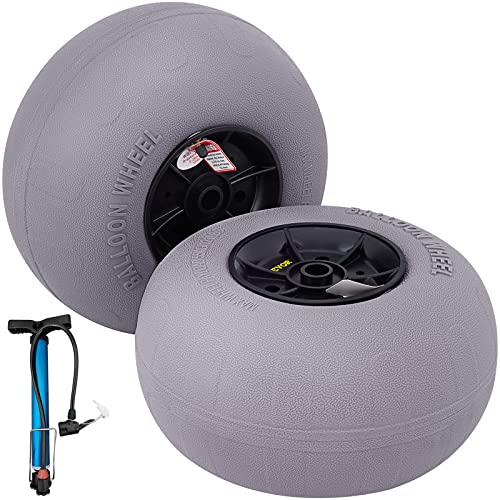
2PCS x 13" Beach Balloon Wheels: The 2PCS x 13" beach wheels make it easier than ever to transport your beach umbrellas, folding chairs, and kayaks to the beach. Its large and inflatable wheel design allows your cart to glide on the sand effortlessly. This wheel is suitable for axles with a 0.9-inch diameter. Please measure your cart's axle before purchase, then select the proper size you need.

Beach Wheels: Effortlessly pull carts over soft sand with our beach wheels. Roll your kayak dolly, beach cart, wheelchair, cooler, sand wagon, rolling walker, fish cart, and garden cart with ease

Beach Wheels: Effortlessly pull carts over soft sand with our beach wheels. Roll your kayak dolly, beach cart, wheelchair, cooler, sand wagon, rolling walker, fish cart, and garden cart with ease.Please check your cart's axle hole diameter to match our axle size before purchase. Meanwhile, ensure the height from the ground to the axle mounting position does not exceed the wheel radius.
Common Mistakes When Launching a Kayak Solo From the Beach
The most common mistake when launching a kayak solo from the beach is trying to enter the kayak while it’s still on dry land, then attempting to push or shuffle into the water. This damages the hull, exhausts the paddler, and often results in getting stuck or tipping sideways. Other frequent errors include forgetting to secure gear before entering, launching in conditions beyond your skill level, and dragging the kayak across rocks without protection.
Top mistakes and how to avoid them:
1. Entering on dry land
- Why it fails: Creates friction, damages hull, makes tipping likely
- Fix: Wade into ankle-deep water before entering
2. Forgetting to attach paddle leash
- Why it fails: Paddle floats away if you drop it during entry
- Fix: Attach leash before wading into water
3. Overloading gear in the cockpit
- Why it fails: Loose gear shifts during entry, affecting balance
- Fix: Secure all gear in hatches or bungees before launching
4. Launching parallel to shore
- Why it fails: Waves push kayak sideways, making entry unstable
- Fix: Position kayak perpendicular to shore, bow pointing out
5. Wearing cotton clothing
- Why it fails: Cotton stays wet and cold, increasing hypothermia risk
- Fix: Wear synthetic or wool layers, even in warm weather
6. Not checking weather and water conditions
- Why it fails: Conditions can deteriorate quickly on water
- Fix: Check forecast, wind speed, and tide charts before launching
7. Dragging kayak across rocks or shells
- Why it fails: Scratches and gouges weaken hull over time
- Fix: Use a cart, carry the kayak, or place a mat under the hull
8. Skipping the PFD until after launch
- Why it fails: Risk of capsizing during launch when you’re not wearing it
- Fix: Put on PFD before entering the water
9. Launching alone without telling anyone
- Why it fails: No one knows to look for you if something goes wrong
- Fix: Share your float plan with someone on shore
10. Rushing the entry
- Why it fails: Hasty movements throw off balance and cause tipping
- Fix: Move deliberately and smoothly, not slowly or frantically
How to Launch a Sit-On-Top Kayak vs Sit-Inside Kayak From Shore
Launching a sit-on-top kayak from shore is simpler because you can enter from the side or rear in shallow water without worrying about water entering the cockpit. For sit-inside kayaks, you must keep the cockpit dry during entry, which requires entering in very shallow water or using a spray skirt, and demands better balance to avoid shipping water over the coaming.
Sit-on-top launch technique:
- Wade into ankle-deep water with your kayak
- Position kayak perpendicular to shore
- Straddle the kayak from behind the seat, or stand beside it
- Place paddle across the hull behind the seat
- Step or slide onto the seat from the side or rear
- Settle into position and adjust foot braces
- Push off with hands or paddle
The open deck of a sit-on-top means water that splashes in drains through scupper holes, so you don’t need to worry about swamping the kayak during entry.
Sit-inside launch technique:
- Wade into very shallow water (just deep enough for kayak to float)
- Position kayak perpendicular to shore
- Place paddle across the cockpit behind the seat, with one blade on shore
- Stand beside the cockpit facing forward
- Hold paddle shaft and cockpit rim with both hands
- Step into the center of the cockpit with your inside foot
- Quickly bring your other foot in while sitting down
- Slide your legs under the deck and adjust foot pegs
- Attach spray skirt if using one
- Push off gently to avoid splashing water into cockpit
Key differences:
| Aspect | Sit-On-Top | Sit-Inside |
|---|---|---|
| Water in cockpit | Drains automatically through scupper holes | Must be kept out or bailed manually |
| Entry position | Can enter from side or rear | Must enter from side with paddle outrigger |
| Stability during entry | More stable due to wider beam | Less stable, requires better technique |
| Spray skirt | Not needed | Recommended for rough water |
| Recovery from tip | Easy to remount from water | Difficult; requires assisted rescue or shore |
Choose sit-on-top launching if: You’re a beginner, paddle in warm water, or want the simplest entry and exit process.
Choose sit-inside launching if: You paddle in cold water, want protection from wind and spray, or have mastered the entry technique.
Can Beginners Launch a Kayak From Shore by Themselves Safely
Yes, beginners can safely launch a kayak from shore by themselves if they choose calm conditions, use proper technique, wear a PFD, and start with a stable recreational kayak. The shallow-water entry method is specifically designed for beginners and minimizes the risk of tipping. Most kayaking accidents happen on the water, not during launch, so mastering a safe launch technique is an important first step.
Beginners should practice launching in ideal conditions before attempting more challenging scenarios. Ideal beginner conditions include calm water with no waves, a gently sloping sandy beach, warm weather, and no wind.
Safety checklist for beginner solo launches:
- ✅ Water temperature above 60°F (or appropriate cold-water gear)
- ✅ Wind speed under 10 mph
- ✅ No waves or only small ripples
- ✅ Sandy or smooth beach (not rocky or muddy)
- ✅ Shallow water extending at least 20 feet from shore
- ✅ Other people nearby in case of emergency
- ✅ PFD worn before entering water
- ✅ Phone in waterproof case
- ✅ Someone on shore knows your plan
- ✅ Stable recreational kayak (not a narrow touring kayak)
Skills beginners should practice before solo launching:
- Wet exit: Practice getting out of the kayak if it tips
- Self-rescue: Learn to flip the kayak upright and re-enter in shallow water
- Paddle strokes: Master forward stroke and stopping before launching
- Balance: Practice shifting weight in the kayak while in shallow water
Progressive learning approach:
- Session 1: Practice entry and exit in ankle-deep water with someone holding the kayak
- Session 2: Practice entry and exit solo in ankle-deep water
- Session 3: Launch solo and paddle 50 feet from shore, then return
- Session 4: Extend distance gradually as confidence builds
When beginners should NOT launch solo:
- Water temperature below 60°F without proper cold-water gear
- Wind speed above 15 mph
- Waves over 1 foot
- Unfamiliar location without other people present
- After consuming alcohol
- When feeling tired or unwell
Encouraging reality: Thousands of beginners successfully launch kayaks solo every day. The key is starting in easy conditions and building skills progressively rather than attempting challenging launches before you’re ready.
What to Do If Your Kayak Tips Over During Shore Launch
If your kayak tips over during shore launch, stand up in the shallow water, flip the kayak upright, drain any water, and try again with better technique. Shore launch capsizes are rarely dangerous because you’re in shallow water where you can stand, and you haven’t yet paddled away from shore. The main concerns are keeping track of your paddle and gear, and understanding what went wrong so you can correct it.
Immediate steps after a shore launch capsize:
- Stand up in the shallow water (you should be able to touch bottom)
- Locate your paddle before it floats away (this is why paddle leashes matter)
- Flip the kayak upright by reaching across and pulling the far edge toward you
- Drain water from the cockpit by tilting the kayak on its side
- Check your gear to ensure nothing floated away
- Move to slightly deeper water if you capsized because the kayak was grounded
- Reset and try again using proper technique
Common causes of shore launch capsizes:
- Leaning too far to one side during entry
- Stepping on the edge of the cockpit instead of the center
- Entering too slowly and tentatively
- Kayak not floating (still grounded on sand or rocks)
- Wave hitting the kayak during entry
- Paddle not positioned for stability
How to prevent the next capsize:
- Wade into slightly deeper water so the kayak floats freely
- Use the paddle-outrigger technique for stability
- Step into the center of the cockpit, not near the edges
- Move quickly and decisively rather than slowly
- Keep your weight centered over the kayak’s centerline
- Wait for a lull between waves if launching in surf
If you capsize repeatedly: You may need a wider, more stable kayak, or you should practice the entry technique with someone holding the kayak steady until you master the motion.
Gear protection: Keep phones and electronics in waterproof cases, and secure all gear with clips or bungees so nothing is lost during a capsize.
Is It Harder to Launch a Tandem Kayak Solo From the Beach
Yes, launching a tandem kayak solo from the beach is significantly harder because tandem kayaks are longer (12-16 feet), heavier (60-90 pounds), and more awkward to position and enter alone. The extra length makes the kayak harder to turn perpendicular to shore, and the weight makes it difficult to carry or cart to the water. Additionally, tandem kayaks are designed for two paddlers and have less stability when paddled solo from the center seat.
If you must launch a tandem kayak solo, position yourself in the rear seat (closest to the stern) rather than the center. This improves tracking and control, though the kayak will still be bow-heavy.
Challenges of solo tandem launches:
- Weight: Most tandem kayaks weigh 60-90 pounds, requiring a cart for any distance
- Length: 14-16 foot kayaks are difficult to maneuver and position alone
- Stability: Tandem kayaks are less stable when paddled solo
- Entry: Longer cockpit area makes it harder to use paddle-outrigger technique
- Control: Bow-heavy balance affects tracking and steering
Technique for solo tandem launch:
- Use a kayak cart to transport to water’s edge
- Wade into knee-deep water (deeper than for solo kayaks)
- Position kayak perpendicular to shore
- Enter from the rear seat position
- Place paddle across the kayak behind the rear seat
- Use the same entry technique as a solo kayak
- Expect the bow to ride higher and affect wind resistance
Better alternatives:
- Rent or borrow a solo kayak for solo paddling
- Add ballast (water jugs) to the front seat to balance the kayak
- Launch from a dock instead of a beach for easier entry
- Get help from another person to stabilize during launch
When solo tandem launching makes sense: If you already own a tandem kayak and paddle solo occasionally, it’s manageable with practice. But if you primarily paddle alone, investing in a solo kayak will make launching and paddling much more enjoyable.
How to Protect Kayak Bottom When Dragging to Launch From Shore
To protect your kayak bottom when dragging to launch from shore, use a kayak cart with padded straps, install permanent keel guards or skid plates, or place a foam pad or carpet remnant under the hull during short drags. Never drag a kayak across rocks, gravel, or rough concrete without protection, as this causes scratches, gouges, and stress cracks that weaken the hull and reduce resale value.
Polyethylene kayaks are more resistant to abrasion than fiberglass or composite kayaks, but all kayak hulls will eventually show damage from repeated dragging.
Hull protection methods ranked by effectiveness:
1. Kayak cart (best protection)
- Eliminates hull contact with ground
- Works on all terrain types
- Preserves hull condition for years
- Cost: $60-150
2. Keel guard or skid plate (permanent protection)
- Adhesive strips applied to keel and high-wear areas
- Replaceable when worn
- Adds minimal weight
- Cost: $20-40
3. Kayak glide strips (for frequent draggers)
- UHMW plastic strips applied to hull bottom
- Reduces friction and protects hull
- Professional installation recommended
- Cost: $50-100 installed
4. Foam pad or mat (temporary protection)
- Place under hull for short drags
- Carpet remnant or foam camping pad works
- Must be repositioned frequently
- Cost: $5-15
5. Carry the kayak (no protection needed)
- Two-person carry for heavy kayaks
- Solo carry for kayaks under 40 pounds
- Use proper lifting technique to avoid injury
- Cost: Free
When dragging is acceptable:
- Short distances (under 10 feet) on smooth sand
- Polyethylene kayaks on grass
- Emergency situations where hull damage is secondary to safety
When dragging causes serious damage:
- Across rocks, gravel, or shells
- On rough concrete or asphalt
- Fiberglass or composite kayaks on any rough surface
- Repeated dragging over long distances
DIY hull protection: Some paddlers apply marine-grade epoxy or truck bed liner to high-wear areas. This works but adds weight and can be difficult to apply evenly.
Long-term cost: Replacing a damaged kayak costs $400-2000+, while a quality cart costs $100-150. The cart pays for itself by extending your kayak’s lifespan.
Launching Kayak in Waves by Yourself: Tips
Launching a kayak in waves by yourself requires timing your entry between wave sets, positioning the kayak perpendicular to the waves, and paddling aggressively through the surf zone once you’re in. Wait for a lull in the wave pattern, enter quickly, and paddle hard to get beyond the break before the next set arrives. This technique demands more skill than calm-water launching and should only be attempted after mastering basic launches.
Waves create two main challenges: they can push your kayak sideways during entry, and they can swamp or flip the kayak as you paddle through the surf zone.
Wave launch technique:
- Watch the wave pattern for 5-10 minutes before launching
- Identify the lull between wave sets (usually 5-7 waves, then a pause)
- Position your kayak perpendicular to the waves in shallow water
- Wait for the lull after a set passes
- Enter quickly using the paddle-outrigger technique
- Paddle hard straight out through the surf zone
- Lean forward and keep paddling through small waves
- Don’t stop until you’re beyond the break
Wave size guidelines:
- Under 1 foot: Manageable for beginners with proper technique
- 1-2 feet: Requires intermediate skills and aggressive paddling
- 2-3 feet: Advanced paddlers only; high risk of capsize
- Over 3 feet: Do not attempt solo launch; find a protected area
Kayak positioning in waves:
- Perpendicular to waves: Kayak points straight out through the surf
- Never parallel: Waves will push kayak sideways and flip it
- Bow into waves: Always face incoming waves, never turn sideways
Timing strategy:
- Wave sets typically come in groups of 5-7 waves
- Lulls between sets last 30-90 seconds
- Launch immediately after the last wave of a set passes
- You need 20-30 seconds to enter and start paddling
If a wave catches you during entry:
- Stay low and centered in the kayak
- Grip the paddle across your lap for stability
- Lean slightly forward into the wave
- Don’t panic – small waves usually just wash over the deck
- Resume paddling as soon as the wave passes
Alternative: If waves are too large or unpredictable, walk along the beach to find a protected area, launch from a nearby bay or inlet, or wait for calmer conditions.
Safety note: Launching in waves carries real risk of capsize in the surf zone. Always wear your PFD, secure all gear, and ensure you can swim and self-rescue before attempting wave launches.
Do I Need Special Shoes or Gear for Solo Kayak Shore Launch
You need water shoes or sandals with good grip and drainage for solo kayak shore launches, as they protect your feet from rocks and shells while providing traction on slippery surfaces. A properly fitted PFD is mandatory safety gear. Beyond that, a paddle leash prevents losing your paddle during entry, and a dry bag protects electronics and valuables from water exposure during launch.
Regular athletic shoes or going barefoot are poor choices for shore launches. Athletic shoes stay waterlogged and heavy, while bare feet are vulnerable to cuts from shells, rocks, or broken glass hidden in sand or mud.
Essential gear for solo shore launches:
1. Water shoes or sandals
- Features needed: Drainage holes, grippy rubber sole, secure heel strap
- Best types: Neoprene water shoes, sport sandals (Chaco, Teva), dive booties
- Avoid: Flip-flops (fall off), Crocs (poor grip), bare feet (injury risk)
- Cost: $25-80
2. Personal Flotation Device (PFD)
- Requirement: Coast Guard-approved Type III or Type V
- Fit: Snug but allows full range of motion for paddling
- Features: High back for kayak seats, pockets for gear
- Cost: $50-150
3. Paddle leash
- Purpose: Prevents paddle from floating away if dropped
- Type: Coiled leash that attaches to kayak and paddle
- Cost: $10-20
4. Dry bag or waterproof case
- Purpose: Protects phone, keys, wallet from water
- Size: 5-10 liter for personal items
- Cost: $15-40
Helpful but not essential:
- Neoprene gloves: Protect hands in cold water, improve grip ($15-30)
- Sun protection: Hat with chin strap, sunglasses with retainer, sunscreen
- Kayak cart: Makes transport easier, protects hull ($60-150)
- Whistle: Attached to PFD for emergency signaling (required in some states)
- Bilge pump: For removing water from sit-inside kayaks ($10-25)
Clothing considerations:
- Warm weather: Quick-dry shorts, synthetic or merino wool shirt, sun hat
- Cold weather: Wetsuit or drysuit if water temp is below 60°F
- Rule of 120: If air temp + water temp is less than 120°F, wear thermal protection
What you don’t need:
- Expensive technical paddling gear for recreational launches
- Spray skirt (unless paddling rough water in a sit-inside)
- Specialized launch gloves or boots
- Wetsuit for warm-water summer paddling
Budget-friendly approach: Start with basic water shoes ($25), a Coast Guard-approved PFD ($50), and a paddle leash ($15). Add other gear as you paddle more frequently and identify specific needs.

BREATHABLE & QUICK-DRY – Stay comfy all day in Homitem adult womens water shoes! Made with breathable and stretchy material, featuring a quick-drying upper and cushioned sole for added comfort.

QUICK-DRYING COMFORT-these water shoes will dry out very fast with great airflow for a cool dry comfort thanks to the quick-drying material.

Traction: Water shoes have sturdy soles for grip on wet surfaces.
Frequently Asked Questions
How deep should the water be when launching a kayak from shore? The water should be ankle to knee-deep (6-18 inches) when you enter the kayak, deep enough for the kayak to float freely but shallow enough for you to stand comfortably. This depth provides stability during entry while preventing the kayak from grounding on the bottom.
Can you launch a kayak by yourself if you’re not very strong? Yes, you can launch a kayak solo without significant strength by using a kayak cart to transport it to the water and entering in shallow water where you don’t need to lift or carry the kayak. Choose a lightweight kayak (under 50 pounds) and use proper technique rather than brute force.
Should I put my kayak in the water bow-first or stern-first? Position your kayak perpendicular to the shore with the bow pointing toward deeper water, not bow-first or stern-first. This orientation keeps the kayak stable and prevents waves from pushing it parallel to shore during entry.
What do I do with my paddle while getting into the kayak? Place your paddle across the kayak behind the seat with one blade resting on shore or in shallow water, then grip both the paddle shaft and the cockpit rim as you step in. This paddle-outrigger technique provides stability during entry.
How do I keep my kayak from drifting away while I’m getting in? Position the kayak in shallow water where it’s floating but you can still stand, and keep one hand on the kayak or paddle at all times during entry. The shallow depth prevents the kayak from drifting significantly before you’re seated.
Is it safe to launch a kayak alone if you can’t swim well? You should wear a properly fitted PFD and stay in shallow water near shore if you’re not a confident swimmer, but improving your swimming skills is highly recommended before kayaking. Consider taking swimming lessons and practicing in a pool before launching solo.
Can I launch a fishing kayak loaded with gear by myself? Yes, but load heavy gear after you’ve entered the kayak and are stable in the water, or use a kayak cart to transport the loaded kayak to the water’s edge. Launching with gear already loaded makes the kayak heavier and less stable during entry.
What’s the best time of day to launch a kayak from the beach? Early morning typically offers the calmest conditions with less wind and fewer waves, making it ideal for solo launches. Avoid midday when winds are strongest and late afternoon when thunderstorms are more likely.
Do I need to wax or treat my kayak hull before launching from sand? No, you don’t need to wax or treat your kayak hull for sand launches. Polyethylene kayaks are designed to handle sand contact, though using a cart or keel guard will extend hull life. Fiberglass kayaks benefit from keel guards if you launch frequently.
How do I launch from a rocky shore without damaging my kayak? Use a kayak cart to transport over rocks, place a foam pad under the hull if you must set it down, and enter the kayak in deeper water beyond the rocky area. Never drag a kayak across rocks without protection.
Should I practice launching before my first real kayaking trip? Yes, practice launching and entering your kayak in calm, shallow water several times before your first trip. This builds confidence and helps you identify any technique issues in a safe environment.
Can I launch a kayak solo in cold water? Yes, but you must wear appropriate thermal protection (wetsuit or drysuit) if the water temperature is below 60°F. Cold water immersion can cause rapid loss of muscle control, so proper gear and staying close to shore are essential for safety.
Conclusion
Learning how to launch a kayak from shore solo opens up countless paddling opportunities and gives you the freedom to explore waterways on your own schedule. The shallow-water entry technique, combined with proper positioning and the paddle-outrigger method, makes solo launching safe and manageable for paddlers of all skill levels.
Start by practicing in ideal conditions: calm water, a sandy beach, warm weather, and a stable recreational kayak. Master the basic technique before progressing to more challenging scenarios like wave launches or rocky shores. Always wear your PFD, secure your gear, and let someone know your paddling plan.
Your next steps:
- Gather essential gear: Water shoes, PFD, paddle leash, and dry bag for valuables
- Choose your launch site: Find a calm beach with a gentle slope and shallow water
- Practice the technique: Wade into ankle-deep water and practice entering your kayak several times
- Start with short trips: Paddle close to shore until you’re confident in your launching and landing skills
- Progress gradually: As your skills improve, try different launch sites and conditions
The confidence that comes from mastering solo shore launches transforms kayaking from a complicated group activity into a simple, accessible adventure you can enjoy whenever the mood strikes. With proper technique and a bit of practice, you’ll be launching smoothly and paddling confidently in no time.





