
Quick Answer
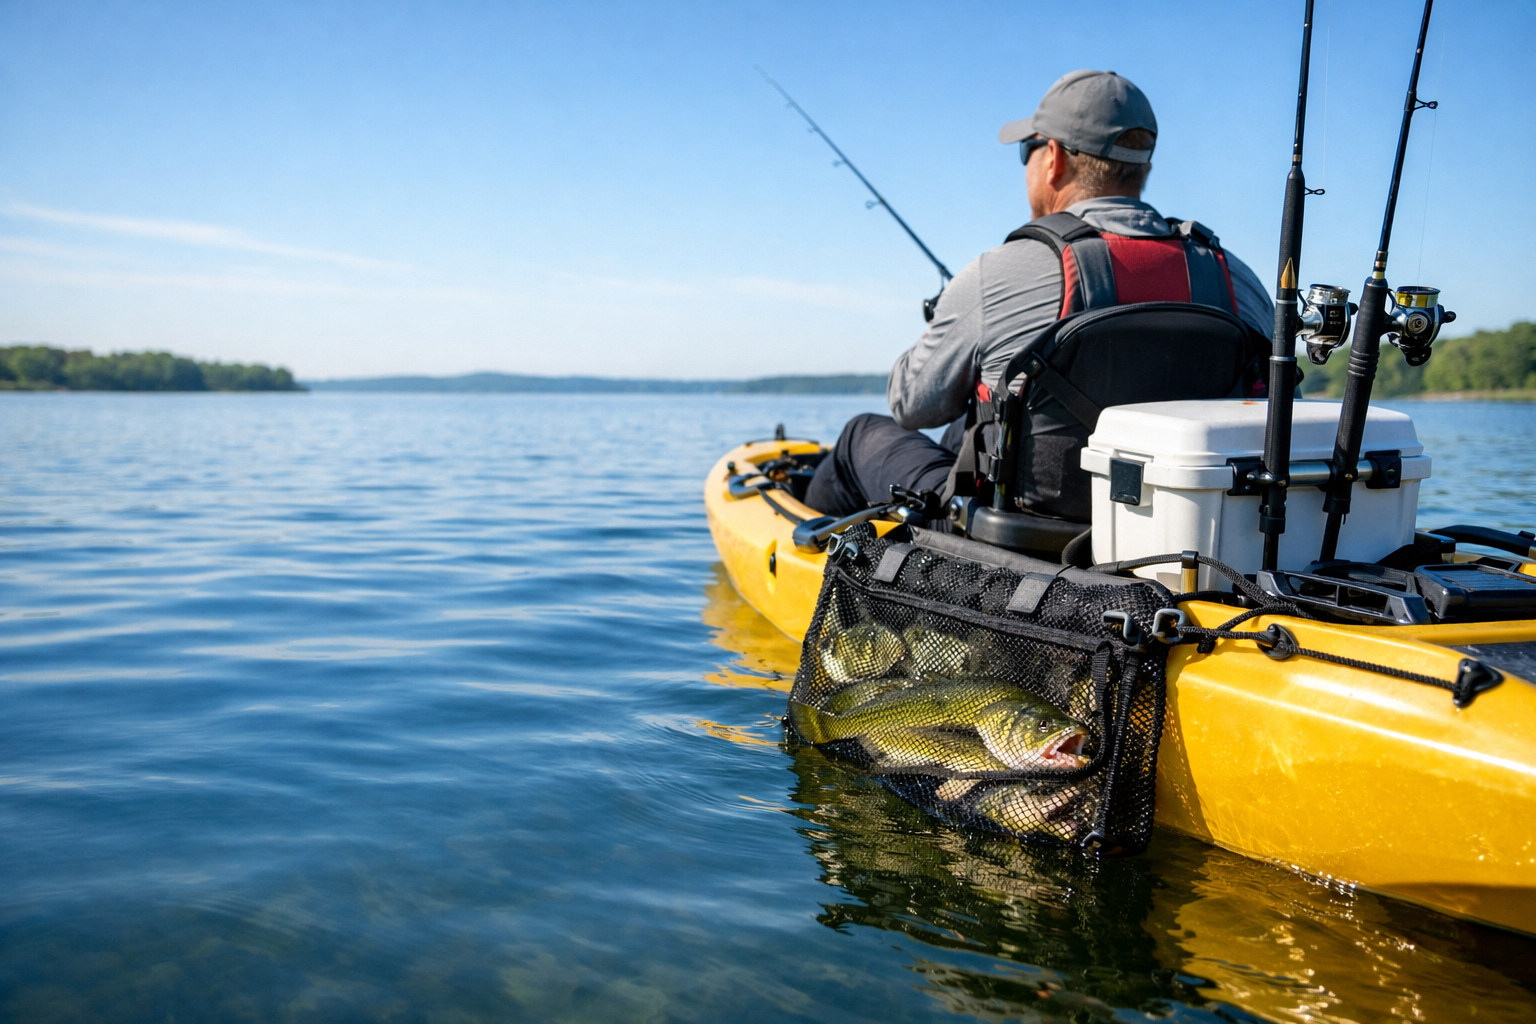
Fish caught from a kayak are typically stored in insulated cooler bags, soft-sided fish bags, hard coolers mounted behind the seat, or on clip stringers attached to the kayak’s side. The best method depends on your kayak type, fishing duration, water temperature, and whether you plan to keep or release your catch. Most experienced kayak anglers use a combination of a fish bag for short-term holding and a cooler with ice for longer trips or warm weather.
Key Takeaways
- Insulated fish bags are the most popular choice for kayak anglers because they’re lightweight, collapsible, and fit easily on most kayak decks
- Hard coolers work best when mounted behind the seat or in the tank well, but add significant weight and take up valuable space
- Stringers can be used but require careful attachment to prevent fish loss and avoid attracting predators in saltwater
- Ice is essential in temperatures above 70°F to keep fish fresh and safe to eat
- Sit-on-top kayaks offer more storage flexibility than sit-inside models for fish storage
- Tournament anglers typically use specialized fish bags with aerators or livewells for catch-and-release fishing
- Never store fish loose in the hull of a sit-inside kayak due to contamination and odor issues
- Mounting location matters: behind-seat and tank-well positions keep weight centered and don’t interfere with paddling
What Is a Kayak Fish Cooler Bag?
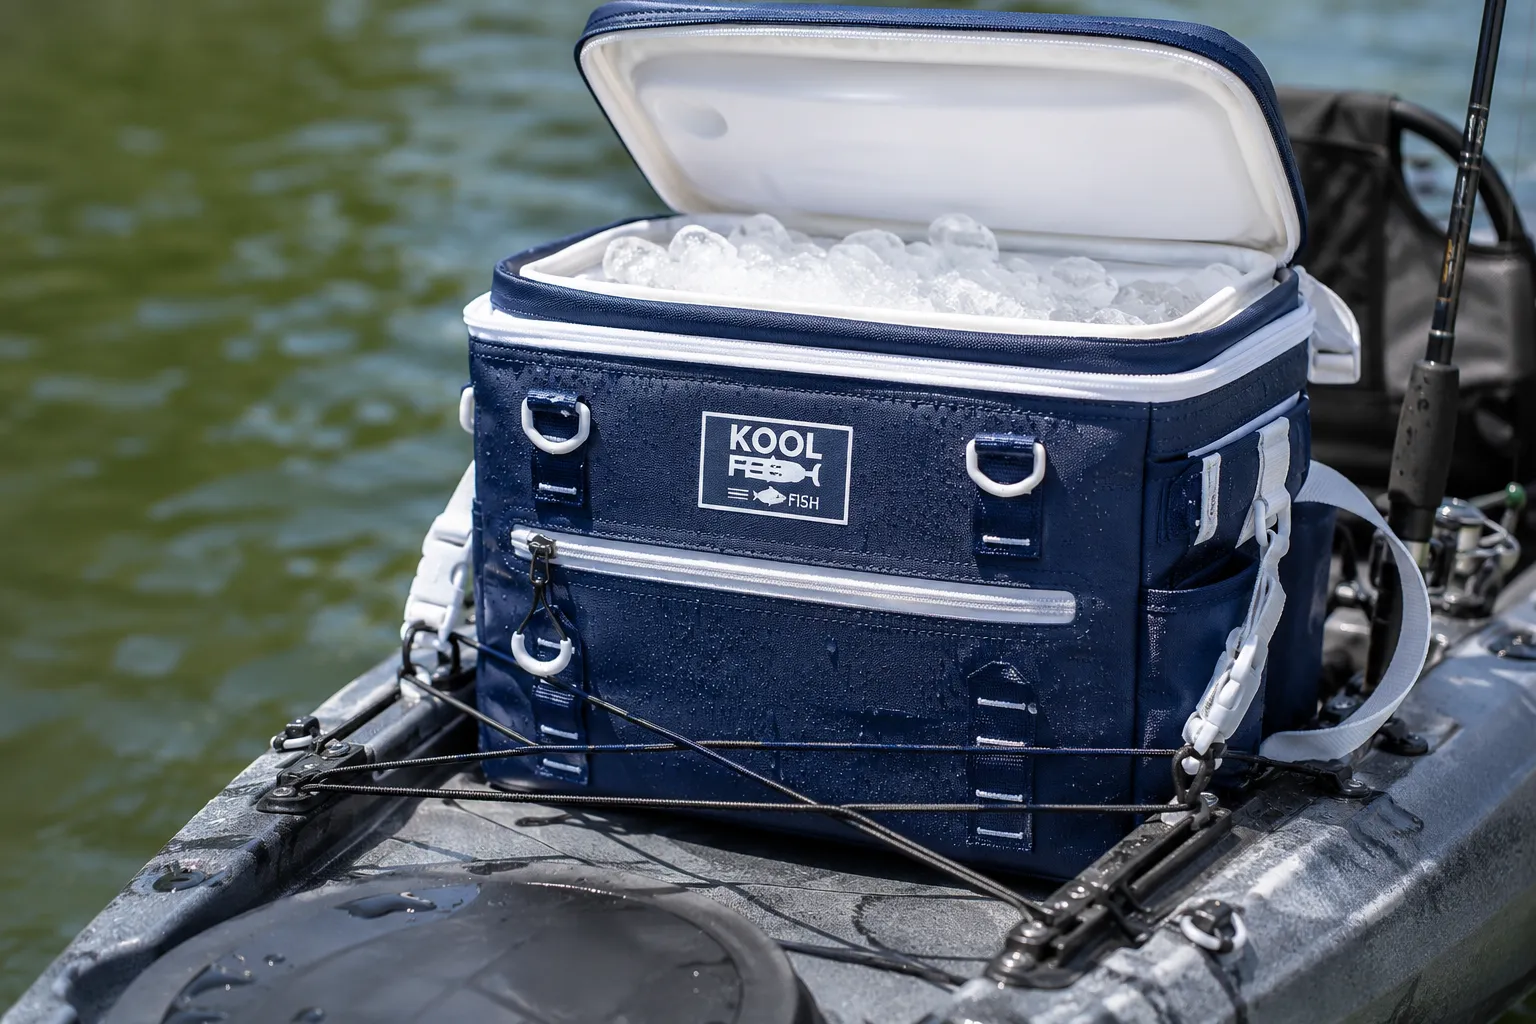
A kayak fish cooler bag is a soft-sided, insulated storage container designed specifically to hold fish on small watercraft. These bags typically feature waterproof exteriors, insulated linings, drainage grommets, and attachment points for securing to kayak deck rigging or bungee cords.
Most kayak fish bags measure between 24 and 36 inches long and can hold 15 to 30 pounds of fish. They collapse flat when empty, making them far more practical than hard coolers for kayak fishing where space is limited. Quality bags include:
- Insulated walls (usually 0.5 to 1 inch thick) to maintain temperature
- Waterproof zippers or roll-top closures to prevent leaks
- D-rings or straps for securing to kayak deck fittings
- Drainage ports to release melted ice water
- Reflective exteriors to deflect heat in summer conditions
Choose a fish cooler bag if you’re fishing in warm weather, need to maximize deck space, or frequently switch between keeping and releasing fish. The collapsible design means the bag doesn’t take up room when you’re not using it, unlike a permanent hard cooler.
One common mistake is buying a bag that’s too large for your kayak’s available deck space. Measure your tank well or behind-seat area before purchasing, and remember that a full bag will be heavier and bulkier than you expect.
Kayak Fish Bag vs Cooler: Which Is Better?
Fish bags are better for most recreational kayak anglers because they’re lighter, more flexible, and easier to secure on limited deck space. Hard coolers excel when you need maximum ice retention for full-day trips or have a larger kayak with dedicated cooler mounts.
Fish Bag Advantages:
- Weighs 1-3 pounds empty vs. 10-20 pounds for hard coolers
- Collapses when not in use
- Fits irregular spaces on kayak decks
- Costs $30-80 vs. $100-300 for quality hard coolers
- Easier to carry to and from launch sites
Hard Cooler Advantages:
- Keeps ice frozen 2-3 times longer (24-48 hours vs. 8-12 hours)
- Provides rigid protection for fish
- Can double as a seat or work surface
- More durable for long-term use
- Better for multi-day fishing trips
Choose a fish bag if you’re fishing for 4-8 hours, have limited kayak space, or need to carry your gear any distance from your vehicle. Choose a hard cooler if you’re fishing all day in temperatures above 85°F, targeting larger fish that need more protection, or have a pedal kayak with dedicated cooler mounting systems.
Many serious kayak anglers use both: a fish bag for active fishing and a hard cooler left in the tank well for long-term storage once they’re done moving around.
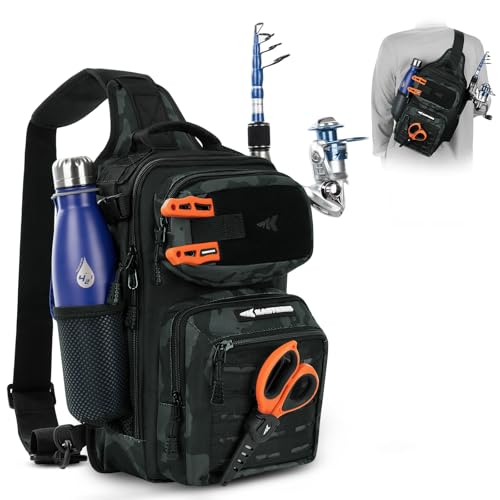
VERSATILE DESIGN – KastKing BlowBak Tactical Fishing backpacks are a light-weight, versatile, sling bag designed for the adventurous angler who likes to hike, canoe, kayak, or SUP to more remote fishing locations. The BlowBak offers the essential features you will need to store and carry your fishing rod/ fishing reel, tools, lures, and tackle for a few hours of fishing without weighing you down. (Dimensions – 8” x 6” x 14”)

VERSATILE FISHING SLING BAG– The KastKing Standard BaitSpace Fishing Tackle Sling Bag is designed for anglers on the go. Perfect for bank fishing, wader fishing, or fishing with your buddy on boat. This lightweight yet spacious bag adapts to your needs with a convertible sling or backpack-style design for hands-free convenience.
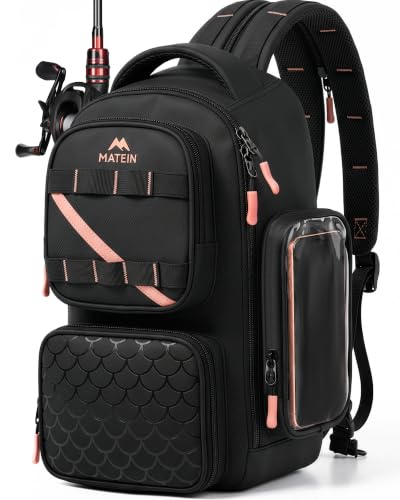
Important: This fishing sling bag does not include the 3600 tackle box
Best Way to Store Fish While Kayak Fishing
The best way to store fish while kayak fishing is in an insulated bag or cooler with ice, positioned behind your seat or in the tank well to maintain kayak balance. Add ice immediately after catching fish, bleed larger fish before storage, and keep the container sealed to maintain temperature.
Step-by-step storage process:
- Prepare your storage before launching – Pre-load your cooler or bag with ice (1 pound of ice per 2 pounds of expected fish)
- Bleed the fish immediately – Cut gills or use a knife to bleed larger fish, which improves meat quality
- Place fish on ice within 10 minutes – Bacteria growth accelerates rapidly in warm conditions
- Layer ice and fish – Put a layer of ice on the bottom, add fish, then cover with more ice
- Drain water periodically – Open drainage ports to release melted ice water, which conducts heat
- Keep the container sealed – Opening the bag repeatedly lets cold air escape and warm air in
- Add ice if fishing longer than 4 hours – Bring extra ice in a separate dry bag for extended trips
Position the storage container where it won’t shift your center of gravity. Behind the seat is ideal for most kayaks because it keeps weight centered. Avoid placing heavy coolers on the bow, which makes the kayak harder to control in wind.
A common mistake is using too little ice. The ratio should be at least 1:2 ice to fish by weight, and more in hot weather. Another error is storing fish in direct sunlight – use a light-colored bag or cover dark coolers with a towel to reflect heat.

KAYAK FISH COOLER: The fish cooler bag for kayak fishing have double wall premium insulation and leak-proof performance to keep your catch cold and fresh even after a long day

[Saves Space and Organizes Essentials] Unlike bulky kayak crates, this cooler for kayak has a narrow, compact design that fits perfectly in under seat storage, letting you carry other kayak gear too. The see-through mesh pockets on the outside are removable, making it easier to organize your kayak seat cooler

KAYAK COOLER: The kayak cooler bag have double wall premium insulation and leak-proof performance to keep your catch or drinks cold even after a long day
Can You Use a Stringer While Kayak Fishing?
You can use a stringer while kayak fishing by attaching it to a side handle, scupper hole, or dedicated anchor trolley point, but stringers work best for short-duration fishing in freshwater. Clip stringers are safer than rope stringers because they’re easier to detach quickly if needed.
Stringer advantages for kayak fishing:
- No deck space required
- Fish stay alive longer in cool water
- Zero weight inside the kayak
- Immediate access for measuring or releasing fish
Stringer disadvantages and risks:
- Fish can attract predators (especially in saltwater)
- Creates drag that slows paddling
- Fish can be lost if the stringer detaches
- Not practical in heavy current or rough water
- Fish quality degrades in warm water
Proper stringer attachment: Use a clip stringer (not rope) and attach it to a side handle or through a scupper hole with a carabiner. Never tie a stringer to your paddle or to loose deck rigging. The attachment point should be secure but easy to release quickly if a large predator approaches.
When to avoid stringers: Don’t use stringers in saltwater areas with sharks or alligators, in water temperatures above 75°F, or when fishing in heavy boat traffic where the stringer could get tangled in propellers.
Why Do Fish Fall Off Stringers on Kayaks?
Fish fall off kayak stringers primarily because of constant kayak movement, which works the stringer clip through soft gill tissue, and because stringers get tangled in underwater structure or vegetation while the kayak drifts. Clip stringers are more secure than rope stringers but still lose fish at rates of 10-20% on longer trips.
Main causes of fish loss from stringers:
- Kayak motion – Unlike bank fishing, kayaks constantly rock and move, which enlarges the hole where the clip passes through
- Soft tissue failure – Gill plates and jaw tissue break down, especially in warm water
- Snags – Stringers catch on rocks, logs, and weeds as the kayak moves
- Predator attacks – Larger fish or turtles may attack stringered fish, tearing them free
- Improper clip placement – Clipping through only one gill plate instead of both, or through the jaw only
To minimize losses: Use heavy-duty clips rated for the fish size you’re targeting, clip through both the lower jaw and gill plate (not just one), check the stringer every 20-30 minutes, and switch to a cooler or bag if you’re keeping fish longer than 2 hours.
Tournament anglers almost never use stringers because the loss rate is unacceptable when every fish counts. Recreational anglers who use stringers should consider them temporary holding only, transferring fish to a cooler once they’ve caught their limit.
How to Keep Fish Fresh on a Kayak in Summer
Keep fish fresh on a kayak in summer by using a well-insulated cooler or fish bag with a 2:1 ice-to-fish ratio, pre-chilling the container before adding fish, and keeping it out of direct sunlight. In temperatures above 85°F, fish should be on ice within 5 minutes of being caught to prevent bacterial growth and tissue breakdown.
Summer fish storage checklist:
✅ Pre-freeze your cooler or bag – Put it in a freezer overnight before your trip
✅ Use block ice plus cubed ice – Blocks melt slower; cubes fill gaps
✅ Freeze water bottles – They act as ice packs and provide drinking water as they melt
✅ Bleed fish immediately – Removes blood that accelerates spoilage
✅ Cover your cooler – Use a light-colored towel or reflective cover
✅ Drain melt water – Water conducts heat faster than ice
✅ Limit opening the container – Each opening adds warm air
✅ Keep a backup ice supply – Store extra ice in a separate dry bag
Temperature guidelines: Fish tissue begins to degrade rapidly above 40°F. In 90°F air temperatures, uniced fish can reach unsafe temperatures in under 30 minutes. The USDA recommends keeping fish below 40°F from catch to consumption.
Choose your fishing times strategically in extreme heat. Early morning and evening sessions mean cooler air temperatures and less ice needed. If you must fish midday in summer, consider catch-and-release instead of keeping fish, or bring a larger cooler with extra ice capacity.
A common mistake is using a dark-colored cooler in direct sun. Dark surfaces can be 20-30°F hotter than light-colored ones. If you have a dark cooler, cover it with a white towel or space blanket.
Where to Mount a Fish Cooler on a Sit-On-Top Kayak
Mount a fish cooler on a sit-on-top kayak in the tank well (rear storage area) or immediately behind the seat, secured with bungee cords or cam straps through the cooler’s handles. These positions keep weight centered over the kayak’s widest point and don’t interfere with paddle strokes or leg movement.
Best mounting locations ranked:
- Tank well (rear storage area) – Most stable position, doesn’t interfere with fishing, easy access
- Behind the seat – Keeps weight centered, accessible while seated, good for smaller coolers
- Between your legs (on some wide models) – Immediate access but limits movement
- In front of the seat – Only for small soft bags, can interfere with paddle strokes
Mounting methods:
- Bungee cord crisscross – Works for soft bags and light coolers, allows quick removal
- Cam straps – Better for heavy hard coolers, more secure in rough water
- Cooler tie-down kits – Permanent mounting systems for dedicated fishing kayaks
- Milk crate systems – Cooler sits inside a secured crate in the tank well
Measure before buying: Most sit-on-top kayak tank wells are 16-24 inches wide. A cooler that’s too large will hang over the sides and catch water, creating drag. A 20-quart to 30-quart cooler is the practical maximum for most recreational fishing kayaks.
Weight distribution matters: A full 30-quart cooler with ice and fish can weigh 40-50 pounds. That much weight too far forward or back will make the kayak handle poorly. Test your loaded kayak in shallow water before heading out to ensure it’s balanced.
Never mount a cooler on the bow (front) of a sit-on-top kayak. This creates a dangerous weight imbalance and makes the kayak nearly impossible to control in wind.
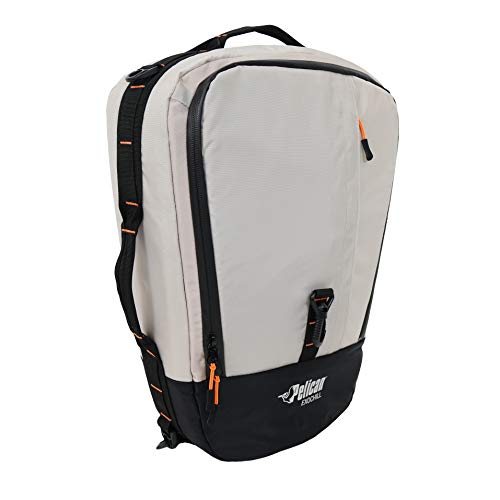
Made of a 420 Denier material, the Exochill was designed to be used as a cooler. Due to is 0.5 inch insulation, it keeps food and beverages cold for hours on the water. It's also designed to fit in most tank wells.

Fits within the open storage area (tank well) of most sit on top kayaks and versatile enough for everyday use too

Frabill | Trusted By Anglers Since 1938
Do You Need a Livewell on a Fishing Kayak?
You don’t need a livewell on a fishing kayak for most recreational fishing, but tournament anglers and those practicing catch-and-release benefit from portable livewell systems that keep fish healthy until weigh-in or release. A basic insulated bag with ice serves the same purpose for anglers who are keeping their catch.
What is a kayak livewell? A livewell is an aerated water container that keeps fish alive by circulating oxygenated water. Kayak livewells are typically 5-10 gallon soft-sided bags with battery-powered aerator pumps.
When you need a livewell:
- Competing in catch-and-release tournaments
- Fishing in warm water where fish stress quickly
- Targeting species that must be alive at weigh-in (tournament rules)
- Wanting to release fish after photographing them later
When you don’t need a livewell:
- Keeping fish to eat (use a cooler with ice instead)
- Fishing in cool water (below 65°F) where fish survive well on stringers
- Catch-and-immediate-release fishing
- Recreational fishing without tournament rules
Livewell alternatives: A basic aerated bait bucket (2-5 gallons) works for temporarily holding fish before release. These cost $20-40 compared to $100-200 for dedicated kayak livewell systems.
The main drawback of livewells on kayaks is weight and complexity. A 10-gallon livewell with water weighs over 80 pounds, which is too much for many kayaks. Most kayak anglers who need live fish storage use smaller 5-gallon systems and change the water periodically.
How Do Tournament Kayak Anglers Store Their Catch?
Tournament kayak anglers store their catch in specialized aerated fish bags or portable livewells that keep fish alive and healthy until weigh-in, as most kayak fishing tournaments require live release after measurement. These systems typically include battery-powered aerators, insulated bags, and quick-drain features for rapid fish release.
Tournament fish storage requirements:
- Fish must be alive at weigh-in (most tournaments)
- Minimum water quality standards (dissolved oxygen, temperature)
- Quick measurement and release capability
- Portable and lightweight for tournament check-in procedures
- Durable enough for 6-8 hour tournament days
Popular tournament storage systems:
- Aerated fish bags (5-10 gallons) with 12V aerator pumps – most common
- Portable livewells with recirculating pumps and battery packs
- Insulated bags with ice and frequent water changes – for cooler weather
- Culling systems that allow quick fish measurement and selective release
Tournament-specific techniques: Serious competitors use “culling beams” or digital scales to measure fish in the bag, releasing smaller fish as they catch larger ones. They also monitor water temperature in the bag, adding ice packs wrapped in towels if water exceeds 75°F.
Cost considerations: A tournament-grade fish storage system costs $150-300 including the bag, aerator, battery, and accessories. Recreational anglers who occasionally enter tournaments can use simpler systems, but serious competitors invest in reliable equipment to avoid disqualification for dead fish.
Most major kayak fishing tournament trails (KBF, Hobie BOS, KATS) have specific rules about fish care. Check your tournament’s rules before the event, as some require specific bag types or aeration standards.
Is It Safe to Put Fish in the Hull of a Kayak?
It is not safe or practical to put fish in the hull of a sit-inside kayak because fish slime, blood, and bacteria will contaminate the enclosed space, create persistent odors, and potentially damage the kayak’s interior. Hull storage also makes fish inaccessible during fishing and impossible to keep properly iced.
Why hull storage fails:
- Contamination – Fish fluids seep into foam and plastic, creating permanent odors
- No temperature control – Fish spoil rapidly without ice
- Inaccessible – Can’t add fish or check condition without stopping and opening hatches
- Cleanup nightmare – Enclosed hulls are difficult to clean thoroughly
- Attracts pests – Residual fish smell attracts insects and animals during storage
Sit-inside vs. sit-on-top: This issue primarily affects sit-inside kayaks where the hull is an enclosed space beneath the cockpit. Sit-on-top kayaks don’t have enclosed hulls in the same way, but you still shouldn’t put fish in scupper holes or open hull spaces without a sealed container.
Proper sit-inside kayak fish storage: Use a sealed, insulated fish bag or small cooler secured in the cockpit area between your legs or behind your seat. The container must be waterproof and secured so it won’t shift if you capsize.
Some anglers mistakenly think the cool, dark hull will keep fish fresh. In reality, hull temperatures can exceed 80°F on sunny days, and without ice, fish will spoil in 1-2 hours. Always use a proper cooler or insulated bag, regardless of where you position it on the kayak.
Common Mistakes People Make Storing Fish on Kayaks
The most common mistakes kayak anglers make when storing fish are using insufficient ice, positioning storage containers where they create balance problems, and failing to secure containers properly, which leads to lost fish and gear. Many anglers also wait too long to ice fish in warm weather, compromising meat quality.
Top fish storage mistakes:
❌ Too little ice – Using a 1:4 ice-to-fish ratio instead of 1:2 or better
❌ No pre-chilling – Adding fish to a warm cooler that hasn’t been pre-frozen
❌ Poor positioning – Mounting coolers on the bow or too far back
❌ Inadequate securing – Using weak bungees that let coolers shift or fall off
❌ Opening too frequently – Checking fish every 10 minutes and letting cold air escape
❌ Wrong container size – Buying a cooler too large for the kayak or too small for the catch
❌ No drainage – Letting fish sit in warm melt water
❌ Ignoring weight – Not accounting for 40+ pounds of cooler, ice, and fish
❌ Dark colors in sun – Using black coolers without shade in summer heat
❌ Mixing live and dead fish – Putting kept fish in the same container as catch-and-release fish
The 10-minute rule: Fish should be on ice within 10 minutes in temperatures above 75°F, and within 5 minutes above 85°F. Many anglers wait until they’ve caught several fish before icing any of them, which means the first fish has been in warm air for 30-60 minutes.
Balance and stability: A 40-pound cooler positioned poorly can make a kayak unstable or even dangerous. Test your loaded kayak in shallow water before paddling out. If the kayak feels tippy or handles strangely, reposition the weight.
Secure everything: A cooler that slides around is annoying; one that falls off mid-paddle is a disaster. Use cam straps or heavy-duty bungees, and always have backup attachment points. Check security before launching and periodically during fishing.
Do Fish Attract Sharks When Kayak Fishing in Saltwater?
Fish on stringers or in open containers can attract sharks when kayak fishing in saltwater because blood and body fluids disperse through the water, creating a scent trail that sharks detect from hundreds of yards away. Storing fish in sealed, waterproof containers dramatically reduces this risk, though it doesn’t eliminate it entirely.
Shark attraction factors:
- Blood in the water – The primary attractant; sharks detect blood at concentrations as low as one part per million
- Struggling fish – Vibrations from live fish on stringers travel through water
- Fish slime and oils – Create scent trails even without visible bleeding
- Splashing and commotion – Landing fish creates surface disturbance sharks investigate
Risk reduction strategies:
- Use sealed coolers or fish bags – Prevents blood and scent from entering the water
- Bleed fish immediately – Do this over the kayak, not in the water
- Avoid stringers in shark-prone areas – Especially in Florida, Gulf Coast, and Southern California
- Fish during daylight – Sharks are more active at dawn, dusk, and night
- Don’t keep fish if sharks are present – Release fish immediately if you see sharks
- Stay in groups – Kayak with others when fishing shark-prone waters
Real risk assessment: Shark attacks on kayak anglers are extremely rare, but sharks investigating fish on stringers are common in some areas. Most encounters involve sharks bumping the kayak or taking fish off stringers, not attacking the angler.
Species-specific concerns: Bull sharks, blacktips, and spinner sharks are most commonly encountered by inshore kayak anglers. These species are curious and food-motivated but rarely aggressive toward humans. Tiger sharks and great whites are more dangerous but less commonly encountered in typical kayak fishing areas.
When to avoid keeping fish: If you’re fishing in areas with known shark populations, especially near inlets, channels, or areas with murky water, consider catch-and-release only. The risk of losing fish to sharks (or worse, attracting aggressive sharks) outweighs the benefit of keeping a few fish for dinner.
Do You Need Ice in Your Kayak Fish Bag?
You need ice in your kayak fish bag whenever air or water temperatures exceed 70°F or when you’ll be fishing for more than 2 hours, as fish tissue begins degrading rapidly above 40°F. Ice is essential for food safety and maintaining fish quality, with a minimum ratio of 1 pound of ice per 2 pounds of fish.
When ice is required:
- Air temperature above 70°F
- Water temperature above 65°F
- Fishing trips longer than 2 hours
- Keeping fish for consumption (always)
- Transporting fish more than 30 minutes after catching
When you might skip ice:
- Water temperature below 50°F and immediate release planned
- Fishing for less than 1 hour in cool weather
- Using a livewell system for tournament catch-and-release
- Catch-and-immediate-release fishing
Ice types and performance:
| Ice Type | Melt Time | Best For | Cost |
|---|---|---|---|
| Block ice | 12-24 hours | All-day trips | $ |
| Cubed ice | 6-12 hours | Half-day trips | $ |
| Ice packs (reusable) | 8-16 hours | Regular anglers | $$ |
| Frozen water bottles | 10-18 hours | Budget option | Free |
Ice management tips: Layer ice and fish rather than dumping all fish on top of ice. Start with 2-3 inches of ice on the bottom, add fish as you catch them, and cover with more ice. Drain melt water every 2-3 hours, as water conducts heat much faster than ice.
How much ice to bring: For a 4-hour trip in 80°F weather, bring 5-8 pounds of ice for an expected catch of 10-15 pounds of fish. For 8-hour trips or temperatures above 90°F, double that amount. It’s better to have too much ice than too little.
A common mistake is thinking an insulated bag alone will keep fish fresh. Insulation only slows heat transfer; it doesn’t create cold. Without ice, an insulated bag in 85°F weather will reach unsafe temperatures in 2-3 hours.
What Size Cooler Fits Behind a Kayak Seat?
Most fishing kayaks accommodate coolers between 20 and 30 quarts behind the seat, with dimensions roughly 18-24 inches long, 12-16 inches wide, and 12-15 inches tall. Measure your specific kayak’s behind-seat area before purchasing, as models vary significantly in available space.
Measuring your kayak for cooler fit:
- Measure width between the seat rails or at the narrowest point behind the seat
- Measure length from the seat back to the tank well or next obstruction
- Measure height from the deck to any overhead obstructions (rare but possible)
- Account for securing straps – Add 2-3 inches to width for strap clearance
- Consider loaded height – A full cooler will be taller than empty
Popular cooler sizes for kayaks:
- 20-quart – Fits most kayaks, holds 10-15 pounds of fish plus ice
- 26-quart – Maximum size for many recreational kayaks
- 30-quart – Only fits larger fishing kayaks (13+ feet)
- 40-quart+ – Too large for behind-seat mounting; tank well only
Soft vs. hard cooler dimensions: Soft coolers and fish bags are more forgiving because they compress slightly to fit irregular spaces. Hard coolers must fit the space exactly, with no flexibility. If you’re between sizes, choose the smaller hard cooler or the larger soft bag.
Kayak-specific considerations:
- Pedal kayaks often have more behind-seat space than paddle kayaks
- Sit-on-top kayaks have more flexible mounting options than sit-inside
- Wider kayaks (32+ inches) can accommodate wider coolers
- Kayaks with elevated seats may have less vertical clearance
Test before you buy: If possible, bring a measuring tape to the kayak shop or bring the cooler to test-fit before your first trip. A cooler that’s 1-2 inches too large is frustrating and potentially unusable.
Many kayak anglers find that a 24-quart cooler is the sweet spot: large enough for a good day’s catch plus ice, but small enough to fit most kayaks without creating balance issues.
Conclusion
Storing fish on a kayak requires planning, the right equipment, and attention to food safety. The best solution for most kayak anglers is an insulated fish bag or small cooler (20-30 quarts) mounted behind the seat or in the tank well, loaded with a 2:1 ratio of ice to fish. This approach balances fish quality, kayak stability, and practical space constraints.
Key takeaways for successful fish storage:
- Choose your storage method based on trip length, water temperature, and kayak type
- Use adequate ice – more than you think you need, especially in summer
- Position weight carefully – behind the seat or tank well for best balance
- Secure everything – use cam straps or heavy-duty bungees
- Bleed and ice fish immediately – within 10 minutes in warm weather
- Avoid stringers in saltwater – sealed containers are safer and more reliable
Next steps: Measure your kayak’s available storage space before purchasing a cooler or fish bag. Start with a mid-size insulated bag (24-30 quarts) if you’re unsure, as these work for most situations and collapse when not needed. Practice securing and accessing your fish storage system in shallow water before heading out on a serious fishing trip.
The difference between fresh, high-quality fish and spoiled catch often comes down to proper storage in the first hour after catching. Invest in good storage equipment, use plenty of ice, and handle your catch with care from the moment it comes over the side of your kayak.





