
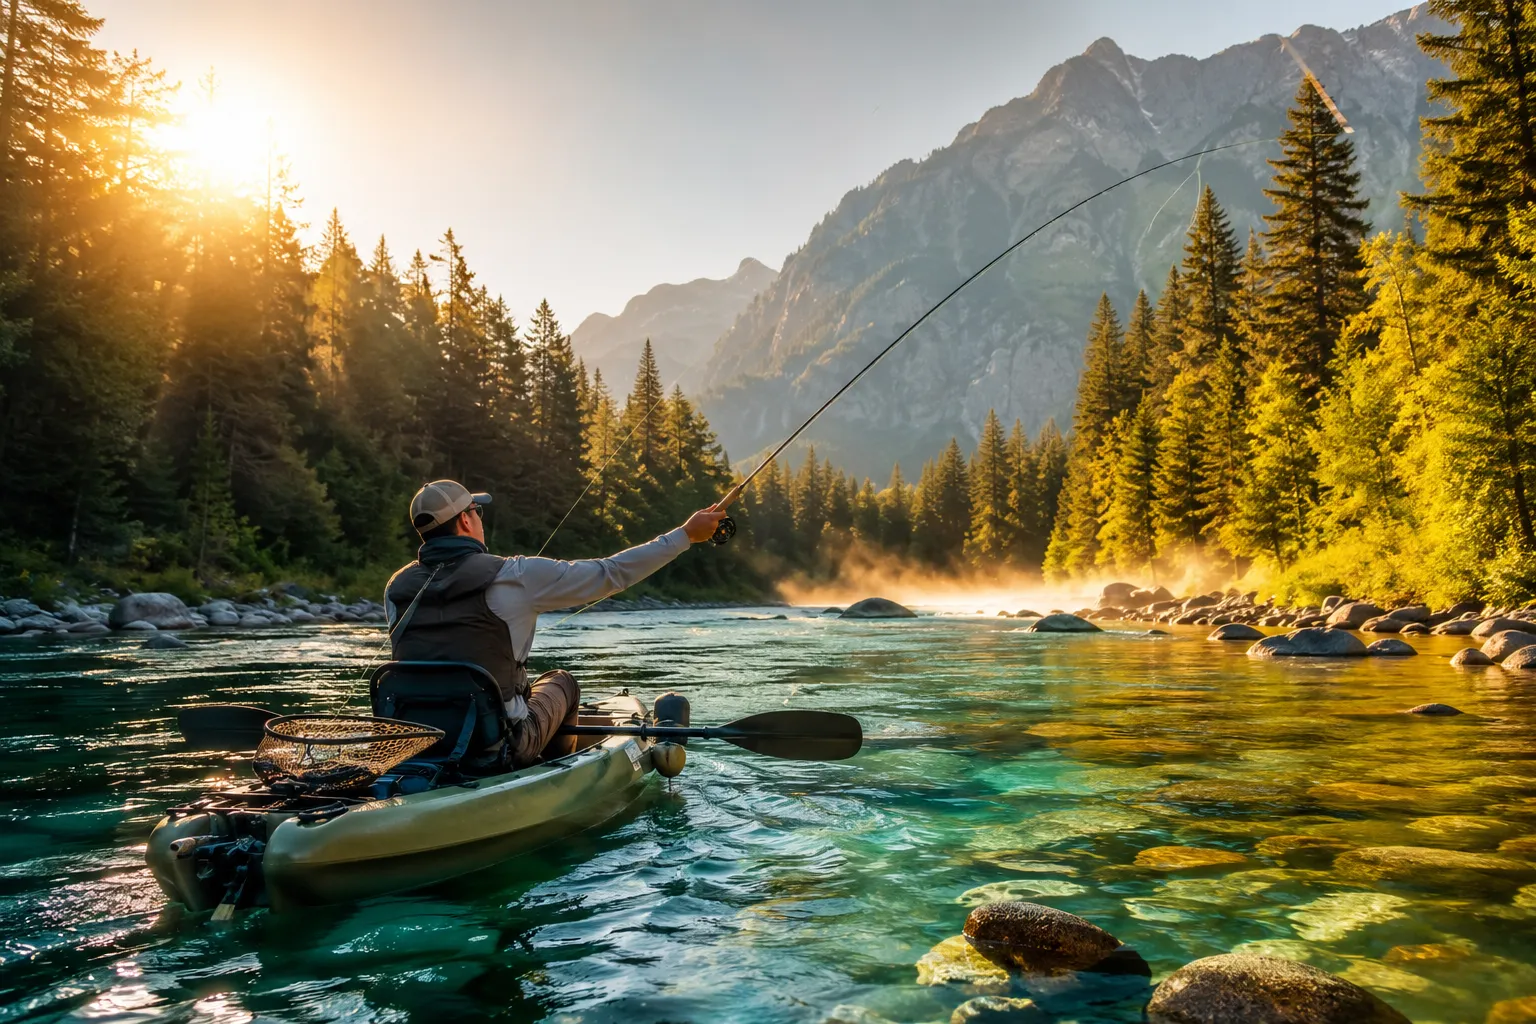
Kayak trout fishing on rivers combines the stealth and mobility of a kayak with access to productive trout water that wading anglers and powerboats can’t reach. A fishing kayak lets you drift quietly through runs, anchor in current to work prime lies, and cover miles of river in a single session while carrying all your gear. This approach works best on medium to large rivers with adequate depth and manageable current, opening up stretches of water that see far less pressure than roadside access points.
Key Takeaways
- Sit-on-top kayaks (10-12 feet) offer the best stability and gear access for river trout fishing, with widths of 32-36 inches providing a stable casting platform
- Essential gear includes a personal flotation device, anchor trolley system, paddle leash, rod holders, and waterproof storage for tackle and electronics
- Anchoring from the bow using a trolley system keeps your kayak stable in current; side anchoring can flip your kayak and is extremely dangerous
- Kayak fishing excels in deeper pools and long runs where wading is difficult, while wade fishing offers better mobility in shallow, technical water
- Beginner-friendly rivers have Class I water (slow current, few obstacles), clear launch points, and water depths of 2-4 feet in fishing zones
- Current management requires drift chutes, anchor systems, or eddy positioning to slow your drift speed and maintain fishing position
- Safety limits include avoiding water above 55°F air/water combined temperature without proper cold-water gear, Class II+ rapids, and flood conditions
- Typical setup costs range from $800-2,500 for a complete beginner fishing kayak package including paddle, PFD, and basic rigging
What Gear Do You Need for Kayak Trout Fishing on Rivers?
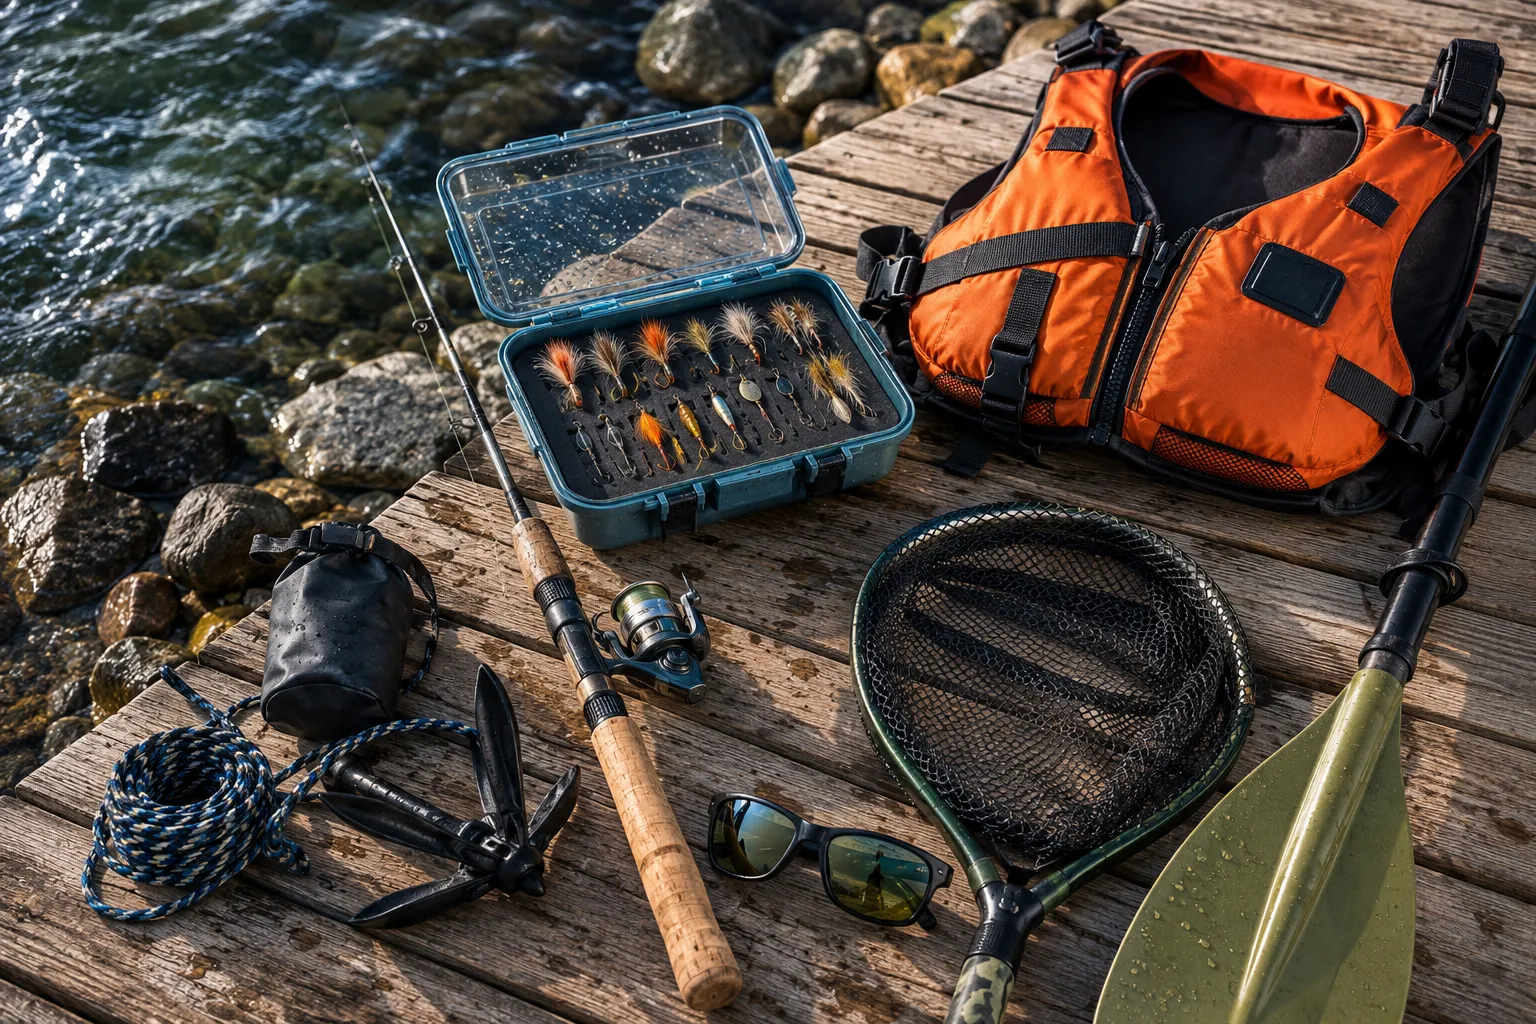
You need a stable fishing kayak, personal flotation device (PFD), paddle, anchor system with trolley, rod holders, fishing tackle, and safety equipment including a whistle and knife. The kayak should be 10-12 feet long with a width of at least 32 inches for river stability, and all gear must be secured with leashes or stored in waterproof compartments to prevent loss during capsizes.
Core Equipment Checklist:
- Kayak: Sit-on-top design, 10-12 feet long, 32-36 inches wide, weight capacity 100+ pounds above your loaded weight
- Paddle: 230-250 cm length for most anglers, lightweight composite or fiberglass construction
- PFD: Type III life jacket designed for paddling, with pockets for tools and a knife attachment point
- Anchor system: 3-5 pound folding anchor with 50+ feet of rope, deployed through bow-mounted trolley
- Rod holders: At least two flush-mount or rail-mount holders positioned within arm’s reach
- Tackle storage: Waterproof boxes or bags for flies, lures, tippet, and terminal tackle
- Landing net: Rubber-coated net with short handle that can be secured to kayak
- Safety gear: Whistle, knife, paddle leash, bilge pump or sponge, first aid kit
- Electronics (optional): Compact fish finder with kayak-specific transducer mount
Common mistake: Beginners often skip the anchor trolley system and try to anchor directly from a cleat or handle, which prevents proper positioning and creates a tipping hazard. The trolley lets you adjust anchor point from bow to stern while seated, keeping the kayak nose-first into current.
Choose rod holders that angle outward at 45 degrees to keep lines clear of your paddle stroke. Mount them behind your seat position so rods don’t interfere with casting or landing fish.
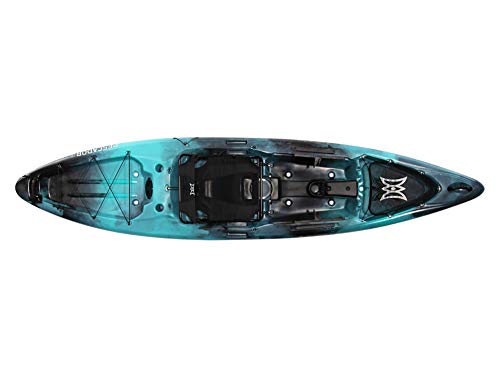
Premium Fishing Experience: The Perception Pescador Pro 12 is a sit-on-top kayak designed for the recreational angler. Equipped with a large front and rear storage area, it provides ample space for all your fishing gear and personal items.

UV-Protected HDPE Construction for Durability: Built with high-density polyethylene (HDPE) plastic, this kayak is both lightweight and highly durable, offering long-lasting protection against UV rays for years of use in various conditions. Paddle included.

PADDLE & STABLE SIT-ON-TOP DESIGN: Includes paddle, Features a flat bottom hull with chine rails that maximize stability and minimize tipping, making it ideal for beginners and recreational paddlers
Best Kayak Type for River Trout Fishing
Sit-on-top kayaks in the 10-12 foot range with widths of 32-36 inches provide the best combination of stability, maneuverability, and gear access for river trout fishing. These kayaks offer easy entry and exit, self-draining scupper holes for water management, and open deck space for tackle and fish handling, while remaining short enough to navigate river bends and avoid obstacles in current.
Sit-On-Top vs Sit-Inside for Rivers:
Sit-on-top advantages:
- Self-bailing design drains water automatically through scupper holes
- Easy remounting after capsizing (critical safety feature in current)
- Open deck provides rod storage, tackle access, and fish handling space
- Better ventilation in warm weather
- No cockpit to fill with water in rapids or waves
Sit-inside advantages:
- Better protection from cold water and wind
- Lower center of gravity can feel more stable in calm conditions
- Drier ride in light rain or splash
For river trout fishing specifically, sit-on-top wins because the self-draining design handles river splash and rain without requiring constant pumping, and the open deck lets you manage gear and fish without the confined space of a cockpit.
Length and Width Guidelines:
- 10-11 feet: Maximum maneuverability for tight rivers with frequent bends, easier to transport, but slower and less stable in wind
- 12 feet: Best all-around length for river fishing, balances tracking and turning ability
- 13+ feet: Better for large rivers with long straight sections, but harder to turn and transport
Width matters more than length for stability:
- 28-30 inches: Tippy for beginners, requires good balance
- 32-34 inches: Stable enough for most anglers to cast comfortably
- 36+ inches: Very stable, allows standing for some anglers, but slower and harder to paddle
Pedal vs paddle: Pedal-drive kayaks free your hands for fishing but add weight, cost, and complexity. They work well on large, deep rivers but struggle in shallow rocky sections where the drive unit can hit bottom. Stick with paddle-driven kayaks for small to medium trout rivers with variable depth.

Constructed of UV-Protected High-Density Polyethylene (HDPE)

Stable: The twin-arched multi-chine hull offers excellent stability for a secure and steady ride. It also makes it incredibly easy to get in and out of the kayak.

Ultimate Comfort: Enjoy long fishing adventures with the Lifetime Kenai Kayak's adjustable padded seat and backrest, designed to provide maximum comfort for paddlers of all sizes.
How to Anchor a Kayak in River Current While Fishing
Always anchor from the bow (front) of your kayak using an anchor trolley system that lets you adjust the anchor point while seated. Deploy 3-5 pounds of anchor weight on 50+ feet of rope, letting out enough line so the rope angle is less than 45 degrees from horizontal. This keeps your kayak pointed into the current and prevents the dangerous sideways orientation that can flip your boat.
Step-by-Step Anchoring Process:
- Position your kayak upstream of the target fishing zone, using your paddle to hold position temporarily
- Slide the trolley ring to the bow position (front of kayak) while maintaining paddle control
- Deploy the anchor by lowering it hand-over-hand until it reaches bottom, then let out additional line
- Use a 7:1 scope ratio: If the water is 5 feet deep, let out 35 feet of anchor line for secure holding
- Test the hold by pulling gently on the line; the kayak should swing into current and hold position
- Adjust trolley position slightly aft if needed to fine-tune your angle to the current and target area
- Secure the line to a cleat or through the trolley ring, keeping slack line organized to prevent tangles
Why You Should Never Anchor From the Side:
Anchoring from the side (beam) of your kayak creates a broadside orientation to current. The water pressure pushes against the entire length of the kayak, creating massive force that can roll the boat underwater in even moderate current. This is the most common cause of kayak fishing fatalities on rivers.
Anchor Trolley Explained:
An anchor trolley is a continuous loop of rope or cord running from bow to stern along one side of your kayak, with a ring or pulley that slides along the loop. You attach your anchor line to this ring, then adjust the ring position using the trolley lines to move your anchor attachment point forward or backward without leaving your seat.
Alternative Current Management:
- Drift chute: Parachute-style drag device deployed from bow to slow drift speed by 50-70%, allowing controlled drifting while fishing
- Stake-out pole: 6-8 foot push-pole that pins kayak to bottom in water less than 6 feet deep, faster deployment than anchor
- Eddy positioning: Park kayak in calm water behind rocks or points where current creates reverse flow
Choose anchoring for long sessions working a specific pool or run. Use drift chutes when you want to cover water while maintaining casting position. Deploy stake-out poles for quick stops in shallow areas.
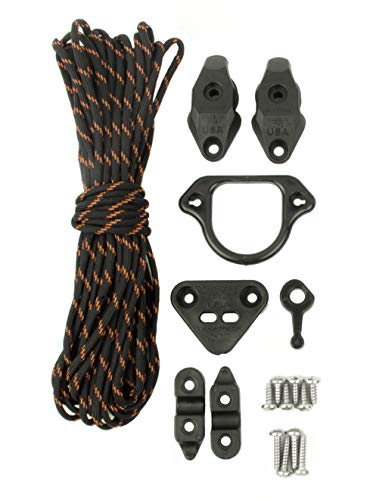

Anchor ring,pad eyes and carabiner of the kayak anchor trolley system are all made of 316 stainless steel,which is more anti-rust and wear resistance,strong and durable,enhance the stability and safety of the anchor trolley system.
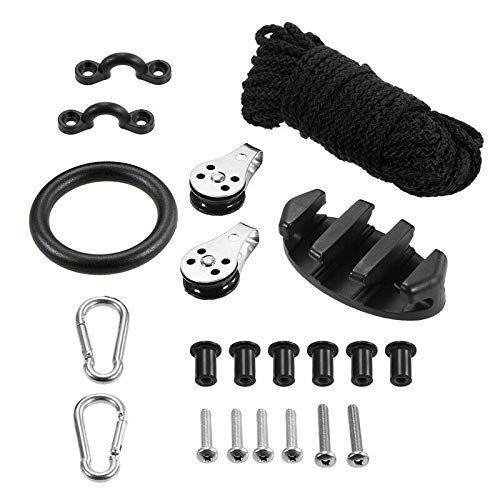
✔Feature:Durable, Seaworthy Materials: Made of tough, corrosion-proof stainless steel, nylon hardware and an ultra-strong paracord (USA made) with a reflective tracer that adds visibility in low-light situations.
Kayak Trout Fishing vs Wade Fishing: Which Is Better?
Kayak fishing excels on deeper rivers (3+ feet average depth) with long pools and runs where wading is limited, while wade fishing offers superior mobility and stealth in shallow, technical water with complex structure. Choose kayak fishing when you need to cover miles of river, access mid-channel structure, or fish water too deep to wade safely. Choose wade fishing for small streams, pocket water, and situations requiring precise positioning among rocks and logs.
Kayak Fishing Advantages:
- Range: Cover 5-10 miles of river per session vs 1-2 miles wading
- Access: Reach mid-channel structure, islands, and opposite banks without crossing deep water
- Gear capacity: Carry multiple rod setups, full tackle selection, lunch, and safety equipment
- Energy efficiency: Paddle to spots and fish fresh vs exhausting yourself wading in current
- Deep water: Fish pools and runs 4-8 feet deep that are impossible to wade effectively
Wade Fishing Advantages:
- Stealth: Lower profile and quieter approach in clear, shallow water
- Precision positioning: Stand exactly where needed to present flies or lures to specific lies
- Technical water: Navigate between boulders, logs, and tight structure that kayaks can’t access
- Simplicity: No boat to transport, launch, or manage while fishing
- Small streams: Access creeks and tributaries too narrow or shallow for kayaks
Decision Framework:
Choose kayak fishing if:
- The river averages 40+ feet wide with depth over 3 feet
- Target areas are more than 1 mile from access points
- You’re fishing large pools, long glides, or deep runs
- The river has limited wading access due to private property or steep banks
- You want to fish all day without exhausting yourself fighting current
Choose wade fishing if:
- The stream is under 30 feet wide with average depth under 3 feet
- You’re targeting pocket water, riffles, or complex boulder structure
- Stealth is critical due to clear water and spooky fish
- You prefer the mobility to move quickly between spots
- You’re fishing technical dry fly presentations that require precise positioning
Hybrid approach: Many anglers use kayaks for transportation and anchor or beach the boat to wade fish productive sections. This combines the range of kayak fishing with the precision of wading.
What Size Trout Can You Catch From a Kayak in Rivers?
You can catch trout of any size from a kayak, from 8-inch wild browns to 20+ inch trophy fish, with the kayak actually providing advantages for landing larger trout compared to wading. The stable platform lets you fight fish with proper rod angle and reel technique, while the net and open deck space make landing and handling easier than trying to manage a big fish while standing in current.
Typical Size Ranges by Species:
- Rainbow trout: 10-16 inches common, 18-22 inches in quality waters
- Brown trout: 12-18 inches typical, 20-26 inches possible in larger rivers
- Brook trout: 8-12 inches standard, 14-16 inches in prime habitat
- Cutthroat trout: 10-14 inches average, 16-20 inches in less-pressured systems
Kayak Advantages for Large Trout:
The seated position in a kayak provides a stable base for fighting fish without the balance challenges of standing in current. You can let the kayak drift with a running fish rather than trying to follow on foot through slippery rocks. The open deck space allows you to use a proper landing net and handle fish safely without the cramped conditions of wading.
Landing Technique for Big Fish:
- Let the kayak drift with the fish rather than fighting current and fish simultaneously
- Use the current to tire the fish by keeping tension while letting water pressure work against it
- Net from the head by leading the fish into a submerged net rather than chasing from behind
- Secure your paddle with a leash before netting to prevent it drifting away
- Keep the fish in the water for photos and hook removal using the kayak’s stability as a platform
Common mistake: Beginners try to horse big fish to the kayak quickly, resulting in broken tippets or pulled hooks. Let fish run and tire properly, using the kayak’s drift to maintain position rather than fighting to stay anchored.
The kayak’s gear capacity also means you can carry heavier tippet and larger nets appropriate for trophy trout, rather than the minimalist approach required when wading long distances.
How Much Does a Fishing Kayak Setup Cost for Trout?
A complete beginner kayak trout fishing setup costs $800-1,500 for budget-friendly options or $1,500-2,500 for mid-range quality gear. This includes the kayak ($400-1,200), paddle ($80-200), PFD ($60-120), anchor system ($40-80), rod holders and rigging ($60-150), and basic fishing tackle ($100-200). Used kayaks can reduce initial costs by 30-50%, but ensure they include essential safety features and haven’t been damaged.
Budget Breakdown by Component:
| Component | Budget Option | Mid-Range | Premium |
|---|---|---|---|
| Kayak | $400-600 | $800-1,200 | $1,500-2,500 |
| Paddle | $80-120 | $150-200 | $250-400 |
| PFD | $60-80 | $90-120 | $150-200 |
| Anchor system | $40-60 | $70-100 | $120-180 |
| Rod holders (2) | $30-50 | $60-90 | $100-150 |
| Tackle storage | $20-40 | $50-80 | $100-150 |
| Fish finder | Skip | $150-300 | $400-800 |
| Total | $800-1,200 | $1,500-2,500 | $3,000-5,000 |
Money-Saving Strategies:
- Buy used kayaks from local classifieds or kayak fishing forums, inspecting for hull damage and checking scupper plugs
- Start with basic rigging and add accessories as you identify actual needs rather than buying everything upfront
- Use existing fishing gear if you already have rods and tackle suitable for trout
- Skip the fish finder initially; learn to read water visually before relying on electronics
- DIY anchor trolley installation using hardware store components costs $20-30 vs $60-100 for kits
Hidden Costs to Consider:
- Transportation: Roof rack or kayak trailer ($150-600) if your vehicle can’t accommodate the kayak inside
- Licensing: Fishing license ($30-80 annually) and kayak registration if required in your state ($15-50)
- Clothing: Quick-dry or wading pants, sun protection, and cold-weather layers ($100-300)
- Maintenance: Paddle leash, spare paddle, repair kit, and annual gear replacement ($50-150/year)
Best value approach: Buy a quality used sit-on-top kayak ($400-600), new PFD for proper fit and safety certification ($80-100), mid-range paddle ($150), and basic rigging ($100). This $730-850 foundation provides everything needed to start fishing safely, with room to upgrade components as you gain experience.
Common Mistakes Beginners Make Kayak Fishing for Trout in Rivers
The most common beginner mistakes include anchoring from the side instead of the bow, overloading the kayak with unnecessary gear, failing to secure equipment with leashes, and attempting to fish in current that’s too fast for their skill level. These errors compromise safety and fishing effectiveness, but are easily corrected with proper technique and realistic assessment of conditions.
Critical Safety Mistakes:
- Side anchoring: Creates broadside orientation to current that can flip the kayak; always anchor from bow using a trolley system
- No paddle leash: Losing your paddle in current leaves you stranded and unable to control the kayak
- Inadequate PFD: Wearing a cheap or improperly fitted life jacket, or removing it because “the water looks calm”
- Overconfidence in current: Attempting Class II or higher water without proper skills and safety training
- Ignoring weather: Launching before checking forecasts for thunderstorms, high winds, or rapid temperature drops
Gear and Rigging Mistakes:
- Overloading: Bringing too much tackle and gear, exceeding weight capacity or making the kayak unstable
- Poor rod storage: Leaving rods loose where they can slide overboard or get stepped on during landing fish
- Unsecured items: Failing to leash or tether tackle boxes, pliers, nets, and other tools that will sink if dropped
- Wrong anchor weight: Using too light an anchor (under 3 pounds) that won’t hold in current, or too heavy (over 7 pounds) that’s difficult to retrieve
- Tangled anchor line: Not organizing anchor rope properly, leading to tangles that prevent quick deployment or emergency release
Fishing Technique Mistakes:
- Fishing while drifting too fast: Trying to fish in current without slowing drift speed, resulting in poor presentations and missed strikes
- Standing too soon: Attempting to stand and cast before developing balance and stability in the specific kayak
- Fighting current instead of using it: Paddling constantly to maintain position rather than anchoring or using eddies
- Wrong water selection: Choosing rivers with too much current, too many obstacles, or insufficient depth for safe kayak navigation
How to Avoid These Mistakes:
Start on calm, slow-moving water (Class I or less) with clear channels and few obstacles. Practice basic kayak skills including wet exit and re-entry before adding fishing complexity. Rig your kayak methodically with everything secured, and test the setup on calm water before heading to rivers. Study river reading and current dynamics through online resources or guided trips before attempting challenging water.
Edge case: Some beginners assume kayak fishing is safer than wading because you’re “in a boat,” but kayaks require different safety skills. A wading angler can usually walk to shore if conditions deteriorate, while a kayaker must paddle through the problem or risk capsizing.
Is Kayak Trout Fishing Safe for Beginners on Moving Water?
Kayak trout fishing is safe for beginners on Class I rivers (slow current, few obstacles, clear channels) when wearing a proper PFD, staying within skill limits, and choosing appropriate weather conditions. Beginners should start on calm sections with water temperatures above 60°F, avoid rapids or fast current, and practice basic paddling and self-rescue skills before adding fishing complexity.
Beginner-Safe River Characteristics:
- Current speed: Walking pace or slower (under 2 mph)
- Water clarity: Clear enough to see bottom and identify obstacles
- Depth: 2-4 feet in main channel, allowing safe passage without grounding
- Width: 40+ feet with clear navigation channels
- Obstacles: Minimal rocks, logs, or strainers; clear sight lines around bends
- Access: Multiple exit points every 1-2 miles in case you need to leave the river
- Traffic: Low powerboat activity that won’t create large wakes
Required Safety Skills Before River Fishing:
- Wet exit and re-entry: Practice capsizing and climbing back onto your kayak in controlled conditions
- Basic paddle strokes: Forward, reverse, sweep turns, and draw strokes for maneuvering
- Eddy turns: Entering and exiting calm water behind obstacles
- Ferry angle: Crossing current without being swept downstream
- Self-rescue: Swimming with your kayak to shore if you can’t remount
Progressive Skill Development:
- Session 1-3: Paddle calm lakes or ponds to develop basic strokes and balance
- Session 4-6: Practice on very slow rivers (Class I) without fishing, focusing on current reading and maneuvering
- Session 7-10: Add fishing on familiar calm sections, practicing anchor deployment and fish landing
- Session 11+: Gradually increase current speed and river complexity as skills improve
When to Skip the Trip:
- Water temperature below 60°F without proper cold-water gear (wetsuit or drysuit)
- Air + water temperature combined under 120°F (see 120 Rule below)
- Thunderstorms in forecast within 4 hours of planned session
- River flow above normal levels due to recent rain (check USGS gauges)
- Wind speeds over 15 mph creating whitecaps or making paddle control difficult
- You’re alone and haven’t told someone your float plan and expected return time
The 120 Rule: Add air temperature and water temperature together. If the sum is less than 120°F, cold water immersion is a serious risk and you need wetsuit or drysuit protection. Example: 50°F air + 55°F water = 105°F total, requiring cold-water gear.
Common beginner question: “Do I need whitewater kayaking skills for river trout fishing?” No, if you stick to Class I water. Basic recreational kayaking skills are sufficient for calm rivers. Whitewater skills become important only if you plan to fish Class II+ rapids or technical boulder gardens.
How to Handle a Kayak and Fight a Trout at the Same Time
Use your paddle as a brace across your lap or secure it with a paddle leash while fighting the fish, keeping one hand on the rod and using your body position to maintain kayak stability. Let the kayak drift naturally with the current and fish rather than trying to maintain a fixed position, and use your legs and core to shift weight for balance instead of making sudden movements that could tip the boat.
Step-by-Step Fish Fighting Process:
- Set the hook with a firm strip-set or rod lift while seated in your normal paddling position
- Secure your paddle by laying it across your lap or letting it hang from the paddle leash
- Let the kayak drift with the fish and current rather than fighting to stay anchored
- Use proper rod angle (45-60 degrees) to maintain pressure while the kayak moves
- Shift weight with your core to maintain balance as the fish runs or changes direction
- Keep the rod tip up and let the reel drag do the work rather than trying to muscle the fish
- Prepare the net once the fish tires, securing it within reach before the final approach
- Lead the fish into the net head-first, submerging the net and guiding the fish over it
Balance and Stability Techniques:
- Wide leg position: Brace your knees against the kayak sides for a stable three-point contact
- Low center of gravity: Keep your upper body over the kayak centerline, avoiding leaning far to either side
- Smooth movements: Make gradual weight shifts rather than sudden jerks that can destabilize the kayak
- Use the paddle as outrigger: If balance feels uncertain, place the paddle blade flat on the water surface for support
Managing Multiple Tasks:
The key is accepting that you can’t paddle and fight a fish simultaneously. Let the kayak drift and focus on the fish. If you’re approaching a hazard (logjam, rapids, shallow rocks), you have three options:
- Break off the fish if safety is compromised
- Beach the kayak quickly on a gravel bar or bank
- Release anchor if deployed, letting you drift past the hazard while fighting the fish
Common mistake: Beginners try to maintain their anchored position while fighting fish, creating a tug-of-war between fish, current, and anchor. Release the anchor or use a quick-release system to let the kayak move freely during the fight.
Equipment that helps:
- Paddle leash: Keeps paddle attached so you can drop it without losing it
- Rod holders: Secure unused rods so they don’t slide around during fish fights
- Rubber landing net: Easier on fish and less likely to tangle hooks than mesh nets
- Hemostats or pliers: Attached to PFD for quick hook removal without searching for tools
Practice fighting fish on calm water before attempting it in current. The muscle memory of balancing while managing the rod will transfer to river conditions.
Best Rivers for Kayak Trout Fishing Near Me
The best rivers for kayak trout fishing combine Class I water with adequate depth (2-4 feet minimum), public access points every 3-5 miles, and healthy trout populations either from stocking or natural reproduction. Research local options using state fish and wildlife websites, which list designated trout waters, access points, and flow data. Look for rivers described as “float fishing” destinations or “canoe/kayak friendly” in regional fishing reports.
How to Research Local Rivers:
- Check state fish and wildlife websites for trout stocking schedules and designated trout waters
- Review USGS stream gauges to identify rivers with stable flows and adequate depth
- Search kayak fishing forums for regional reports and access point information
- Use Google Earth to identify launch points, takeout locations, and river characteristics
- Contact local fly shops or kayak outfitters for insider knowledge on beginner-friendly sections
Characteristics of Ideal Beginner Rivers:
- Flow rate: 200-2,000 cubic feet per second (cfs) for stable, manageable current
- Gradient: Less than 10 feet per mile for calm water with minimal rapids
- Access: Public boat ramps, fishing access sites, or bridge crossings every 3-5 miles
- Depth: Average 2-4 feet with deeper pools to 6-8 feet
- Width: 40-100 feet allowing easy maneuvering and multiple fishing lanes
- Clarity: Clear to slightly stained water for sight fishing and obstacle identification
- Regulations: Open to kayak fishing with no motor-only restrictions
Regional Examples (general types, not specific recommendations):
- Tailwaters below dams: Cold, stable flows with year-round trout populations
- Spring creeks: Consistent temperatures and flows, often with wild trout
- Freestone rivers: Natural flow patterns, best in spring and fall when water levels are moderate
- Stocked rivers: Regular trout plants in accessible sections, good for beginners learning techniques
Planning Your First Trip:
- Float length: Start with 3-5 mile sections requiring 2-3 hours of paddle time
- Shuttle logistics: Arrange two vehicles or use commercial shuttle services for point-to-point floats
- Flow conditions: Check current flow vs historical average; aim for 80-120% of average for best conditions
- Weather window: Choose calm, mild days with stable weather forecasts
- Backup plan: Identify exit points along the route in case you need to cut the trip short
Edge case: Some excellent trout rivers have limited kayak access due to private property or regulations restricting floating during spawning seasons. Always verify current regulations before planning a trip.
Do You Need a Special License for Kayak Fishing Trout?
You need a valid fishing license for the state where you’re fishing, but most states don’t require a separate kayak-specific fishing license. Some states do require kayak registration (similar to boat registration) if the kayak exceeds certain length thresholds or has a motor, with fees typically ranging from $15-50 for multi-year registration. Check your state’s fish and wildlife department and parks department websites for both fishing license and watercraft registration requirements.
Fishing License Requirements:
- Resident fishing license: Required in your home state, typically $20-50 annually
- Non-resident license: Required when fishing other states, typically $40-100 annually or $10-30 for short-term (1-7 day) licenses
- Trout stamp: Additional endorsement required in many states for trout fishing, $5-15 annually
- Age exemptions: Most states exempt children under 16 and seniors over 65 from license requirements
Kayak Registration Requirements by State Type:
No registration required (most common):
- Non-motorized kayaks under 10-16 feet (varies by state)
- Used exclusively for fishing in most inland waters
Registration required:
- Kayaks with electric or gas motors attached
- Kayaks over certain length (typically 14-16 feet)
- Used in specific waters (some states require registration for ocean use)
How to Check Your Requirements:
- Visit your state fish and wildlife website and search “fishing license requirements”
- Check your state parks or natural resources department for “kayak registration” or “watercraft registration”
- Call the local fish and wildlife office if website information is unclear
- Purchase licenses online through state websites or at sporting goods retailers
Where to Display Registration:
If registration is required, most states mandate displaying the registration number on both sides of the bow (front) of the kayak in 3-inch contrasting letters. The registration certificate must be carried with you while on the water.
Penalties for Fishing Without Proper Licenses:
- First offense: Typically $100-300 fine plus court costs
- Subsequent offenses: Higher fines and potential loss of fishing privileges
- Equipment confiscation: In extreme cases, fish and wildlife officers can confiscate gear
Common mistake: Assuming that because you have a fishing license in your home state, you can fish from a kayak in neighboring states. Each state requires its own license, and some have reciprocal agreements only for shore fishing, not boat fishing.
Edge case: Some states classify kayaks as “vessels” for fishing license purposes, which may require a different license type than shore fishing. Montana, for example, has specific regulations for “floating” vs “wade fishing” on certain rivers.
Kayak Keeps Drifting Too Fast in River Current: What to Do
Deploy a drift chute (sea anchor) from your bow to slow drift speed by 50-70%, or use an anchor system to hold position completely in productive water. A drift chute is a parachute-style drag device that creates water resistance without stopping your kayak, allowing controlled drifting at fishing speed rather than current speed. For complete stops, anchor from the bow using proper scope (7:1 line-to-depth ratio) and a trolley system.
Drift Speed Management Options:
Drift chute (best for moving presentations):
- Deploys from bow on 10-15 feet of line
- Slows drift by 50-70% depending on chute size and current speed
- Allows continuous fishing while covering water
- Easy to retrieve by pulling hand-over-hand
- Cost: $30-60 for kayak-sized chutes
Anchor system (best for working specific spots):
- Holds kayak in position for extended periods
- Requires proper bow deployment through trolley
- Needs 7:1 scope ratio (35 feet of line in 5 feet of water)
- More setup time but complete control
- Cost: $40-80 for complete system
Stake-out pole (best for shallow water):
- 6-8 foot pole that pins kayak to bottom
- Works only in water less than 6 feet deep
- Fastest deployment and retrieval
- Requires firm bottom (sand, gravel, or mud)
- Cost: $60-120 for kayak-specific poles
Eddy positioning (free technique):
- Park kayak in calm water behind rocks, points, or bends
- Requires reading water to identify eddy locations
- No equipment needed but limited to specific spots
- Best combined with other methods for full river coverage
Choosing the Right Method:
Use drift chutes when:
- Fishing streamers, spinners, or other moving presentations
- Covering long runs or pools methodically
- Current is moderate (1-3 mph) but too fast for effective fishing
- You want to stay mobile and explore water
Use anchors when:
- Working a specific pool, seam, or structure intensively
- Fishing dry flies or nymphs that require precise drifts
- Current is strong (3+ mph) and drift chute isn’t sufficient
- You’ve located feeding fish and want to stay on them
Use stake-out poles when:
- Making quick stops in shallow riffles or runs
- Water depth is 3-6 feet with firm bottom
- You need frequent position changes
- Speed of deployment matters more than holding power in strong current
DIY drift chute: Make a simple drift chute from a 5-gallon bucket with holes drilled in the bottom and sides, attached to 15 feet of rope. This costs under $10 and works surprisingly well for slowing drift speed.
Common mistake: Using too small a drift chute for the current speed, resulting in minimal slowdown. Match chute size to conditions: 24-30 inch diameter chutes for moderate current, 36-48 inch for strong current.
Can You Kayak Fish for Trout in Shallow Rocky Rivers?
You can kayak fish in shallow rocky rivers if the main channel maintains at least 6-8 inches of depth and you choose a kayak with a flat or shallow-V hull design that glides over obstacles. Success requires reading water to identify the deepest channels, using your paddle to push off rocks when necessary, and accepting that you’ll occasionally scrape bottom in transition areas. Rivers with average depths under 6 inches are better suited for wading.
Minimum Depth Requirements:
- Absolute minimum: 6 inches in the shallowest sections you’ll navigate
- Comfortable minimum: 12 inches for relaxed paddling without constant maneuvering
- Ideal depth: 18-24 inches in runs and riffles, 3-6 feet in pools
Hull Design for Rocky Rivers:
- Flat hull: Best for shallow water, slides over rocks easily, but less stable in deeper water
- Shallow-V hull: Good compromise between rock clearance and stability
- Deep-V or pontoon hulls: Poor choice for rocky rivers, will hang up constantly
Techniques for Navigating Shallow Rocky Sections:
- Read the water to identify the deepest channel, usually marked by darker color or smoother surface
- Use momentum to carry you over shallow spots rather than stopping and getting stuck
- Push off rocks with your paddle blade when you contact obstacles
- Lift your weight slightly by pressing on the paddle when crossing very shallow areas
- Walk the kayak through sections too shallow to paddle by getting out and guiding it alongside you
- Choose your line carefully, sometimes taking a longer route through deeper water rather than the shortest path
When Shallow Rocky Rivers Work Well:
- Spring runoff: Higher water levels cover rocks and create navigable channels
- After rain events: Temporary depth increases make normally shallow sections passable
- Dam releases: Tailwaters with controlled flows that maintain adequate depth
- Larger rivers: Even rocky rivers over 60 feet wide usually have navigable channels
When to Choose Wading Instead:
- Average depth under 12 inches with frequent rock gardens
- Narrow streams under 30 feet wide with constant obstacles
- Technical pocket water requiring precise positioning between boulders
- Clear, shallow water where kayak presence spooks fish
Protecting Your Kayak:
Scraping rocks is inevitable in shallow rivers. Polyethylene kayaks are durable and handle rock contact well, while composite (fiberglass or carbon) kayaks can crack or puncture. Consider adding keel guards or skid plates to high-wear areas if you’ll regularly fish rocky rivers.
Edge case: Some shallow rocky rivers have deep pools connected by shallow riffles. You can paddle the pools, then get out and walk the kayak through the shallows, effectively using the kayak as a floating gear cart between fishing spots.
What Water Conditions Are Too Dangerous for Kayak Trout Fishing?
Water conditions become too dangerous when current speed exceeds your paddling ability to maintain control (typically Class II+ rapids), water temperature drops below 60°F without cold-water protection gear, or weather creates lightning risk, high winds over 15 mph, or rapidly rising water from upstream rain. Additionally, avoid flooded rivers with debris, water visibility under 12 inches that prevents seeing obstacles, and any situation where you lack the skills to handle the conditions safely.
Dangerous Current Conditions:
- Class II+ rapids: Standing waves, rocks requiring maneuvering, or drops over 1 foot
- Strainers: Fallen trees or logjams where current flows through branches (can trap kayakers)
- Undercut banks: Current flowing under overhanging banks that can trap kayaks
- Low-head dams: Recirculating hydraulics that can trap and hold kayaks underwater
- Flood stage: Water over banks, fast current, floating debris, and unpredictable hazards
Dangerous Weather Conditions:
- Thunderstorms: Lightning risk when you’re the highest object on open water
- High winds: Over 15 mph creating whitecaps, making paddle control difficult
- Fog: Visibility under 100 yards preventing navigation and hazard identification
- Extreme heat: Over 95°F increasing dehydration and heat exhaustion risk
- Rapid weather changes: Approaching cold fronts or storm systems
Cold Water Danger:
Water temperature below 60°F poses serious hypothermia risk if you capsize. Cold water shock can cause gasping and hyperventilation within seconds, and you lose dexterity and swimming ability within minutes. The 120 Rule applies: if air temperature plus water temperature is less than 120°F, wear wetsuit or drysuit protection.
Example: 50°F water + 65°F air = 115°F total. This requires cold-water gear even though the air feels comfortable.
High Water Indicators:
- USGS gauge reading: Flow over 150% of historical average for the date
- Muddy water: Visibility under 12 inches from sediment
- Debris in current: Logs, branches, or trash indicating recent flooding
- Water over banks: River extending into normally dry areas
- Fast current: Walking pace or faster in areas normally calm
How to Check Conditions Before Launching:
- USGS stream gauges: Compare current flow (cfs) to historical average for the date
- Weather forecast: Check hourly forecast for next 4-6 hours, including upstream areas
- River reports: Check local fishing forums or fly shop reports for recent conditions
- Visual inspection: Look at the water from your launch point before committing
- Local knowledge: Ask other anglers or outfitters about current conditions
When in Doubt, Don’t Go Out:
If conditions look marginal or you feel uncertain about your ability to handle them safely, postpone the trip. Rivers will be there another day, and no fish is worth risking your life. This is especially important for beginners who may not recognize dangerous conditions until it’s too late.
Emergency Indicators to Exit Immediately:
- Water rising visibly during your trip (indicates upstream rain)
- Weather deteriorating faster than forecast
- You’re exhausted and struggling to maintain control
- Equipment failure (broken paddle, lost anchor, damaged kayak)
- Injury or illness affecting your ability to paddle safely
Carry a whistle and know the universal distress signal: three short blasts repeated at intervals. Other boaters or shore-based people will recognize this as a call for help.
FAQ
What’s the best time of year for kayak trout fishing on rivers?
Spring (April-May) and fall (September-October) offer the best combination of comfortable temperatures, stable water flows, and active trout feeding. Summer works well on tailwaters and high-elevation rivers with cold water, while winter fishing is possible but requires cold-water safety gear and experience.
How long should my first kayak fishing trip be?
Plan for 2-3 hours and 3-5 miles for your first trip, allowing time to practice paddling, anchoring, and fishing without exhausting yourself. You can extend trips as your skills and stamina improve, but starting short prevents getting stranded far from takeout if you tire or conditions change.
Can I use my recreational kayak for river trout fishing?
Yes, if it’s a sit-on-top design at least 10 feet long and 30 inches wide, and you add proper safety gear (PFD, paddle leash, whistle). Recreational kayaks lack specialized fishing features like rod holders and gear tracks, but you can add aftermarket accessories or simply keep gear in dry bags.
Do I need waders when kayak fishing?
No, waders aren’t necessary for kayak fishing since you’re sitting in the boat rather than standing in water. Wear quick-dry pants or shorts with water shoes or sandals that can get wet. Save waders for situations where you’ll beach the kayak and wade fish from shore.
How do I transport a trout I catch in my kayak?
Use a fish basket or cooler with ice if keeping fish, or practice catch-and-release by landing fish quickly, removing hooks in the water, and releasing without removing them from the river. A stringer works but can attract predators and stress fish in warm water.
What if I capsize in current?
Stay upstream of your kayak to avoid being pinned between the boat and obstacles, hold onto the kayak and paddle if possible, and swim on your back with feet downstream to fend off rocks. Work your way to shore or calm water, then attempt to remount or walk the kayak to a safe exit point.
Can I fish from an inflatable kayak on rivers?
Yes, modern inflatable fishing kayaks are durable enough for river use and offer good stability. Choose models designed specifically for fishing with multiple air chambers for safety, and avoid sharp rocks or branches that could puncture the material. Inflatables are lighter and easier to transport than hard-shell kayaks.
How far can I kayak fish in a day?
Most anglers comfortably cover 5-10 miles in a full day of fishing, with actual distance depending on current speed, how much time you spend anchored and fishing vs paddling, and your fitness level. Plan for 1-2 miles per hour of paddling time when estimating trip length.
Do I need a fish finder for kayak trout fishing?
No, fish finders are optional for river trout fishing since you can read water visually to identify likely holding spots (pools, seams, structure). Fish finders are more useful on large rivers or lakes where trout locations are less predictable, but many successful kayak anglers never use electronics.
What’s the hardest part of kayak trout fishing for beginners?
Managing multiple tasks simultaneously, maintaining kayak position, casting accurately, and fighting fish, while staying balanced and safe. This coordination improves quickly with practice. Start on calm water to develop each skill separately before combining them in current.
Can I stand up in my kayak to cast?
Some fishing kayaks are stable enough for standing, typically those 34+ inches wide with flat hulls and standing platforms. Most beginners should stay seated until they’ve developed excellent balance and familiarity with their specific kayak. Practice standing in calm, shallow water before attempting it while fishing.
How do I know if a river is too dangerous for my skill level?
If you feel uncertain or anxious looking at the water, it’s probably beyond your current ability. Start with Class I water (slow current, clear channels, no rapids) and gradually progress as skills improve. Take a kayaking safety course or hire a guide for your first river trips to learn proper technique and risk assessment.
Conclusion
Kayak trout fishing on rivers opens up miles of productive water that’s difficult or impossible to access by wading, combining the range and gear capacity of a boat with the stealth and simplicity of a kayak. Success requires choosing the right equipment, a stable sit-on-top kayak, proper safety gear, and effective current management systems, along with developing core skills in paddling, anchoring, and reading water.
Your Next Steps:
- Research local rivers using state fish and wildlife websites and USGS gauges to identify beginner-friendly Class I sections with public access
- Acquire essential gear starting with a quality PFD, stable kayak, and basic rigging before adding accessories
- Practice on calm water to develop paddling skills, balance, and wet exit/re-entry before attempting river fishing
- Start small with short 2-3 hour trips on familiar water, gradually increasing distance and current speed as confidence grows
- Learn continuously through online resources, local paddling clubs, or guided trips to build skills safely
The learning curve for kayak trout fishing is manageable for anyone with basic fitness and a willingness to start conservatively. Within a season, most anglers develop the skills to explore their local rivers confidently, accessing trout water that sees a fraction of the pressure found at roadside access points. The combination of paddling, fishing, and river reading creates a deeply engaging outdoor experience that rewards both patience and adventure.
Remember that safety always comes first, wear your PFD, check conditions before launching, stay within your skill limits, and never hesitate to postpone a trip if conditions look marginal. The rivers will be there tomorrow, and building skills gradually ensures you’ll enjoy kayak trout fishing for years to come.





