
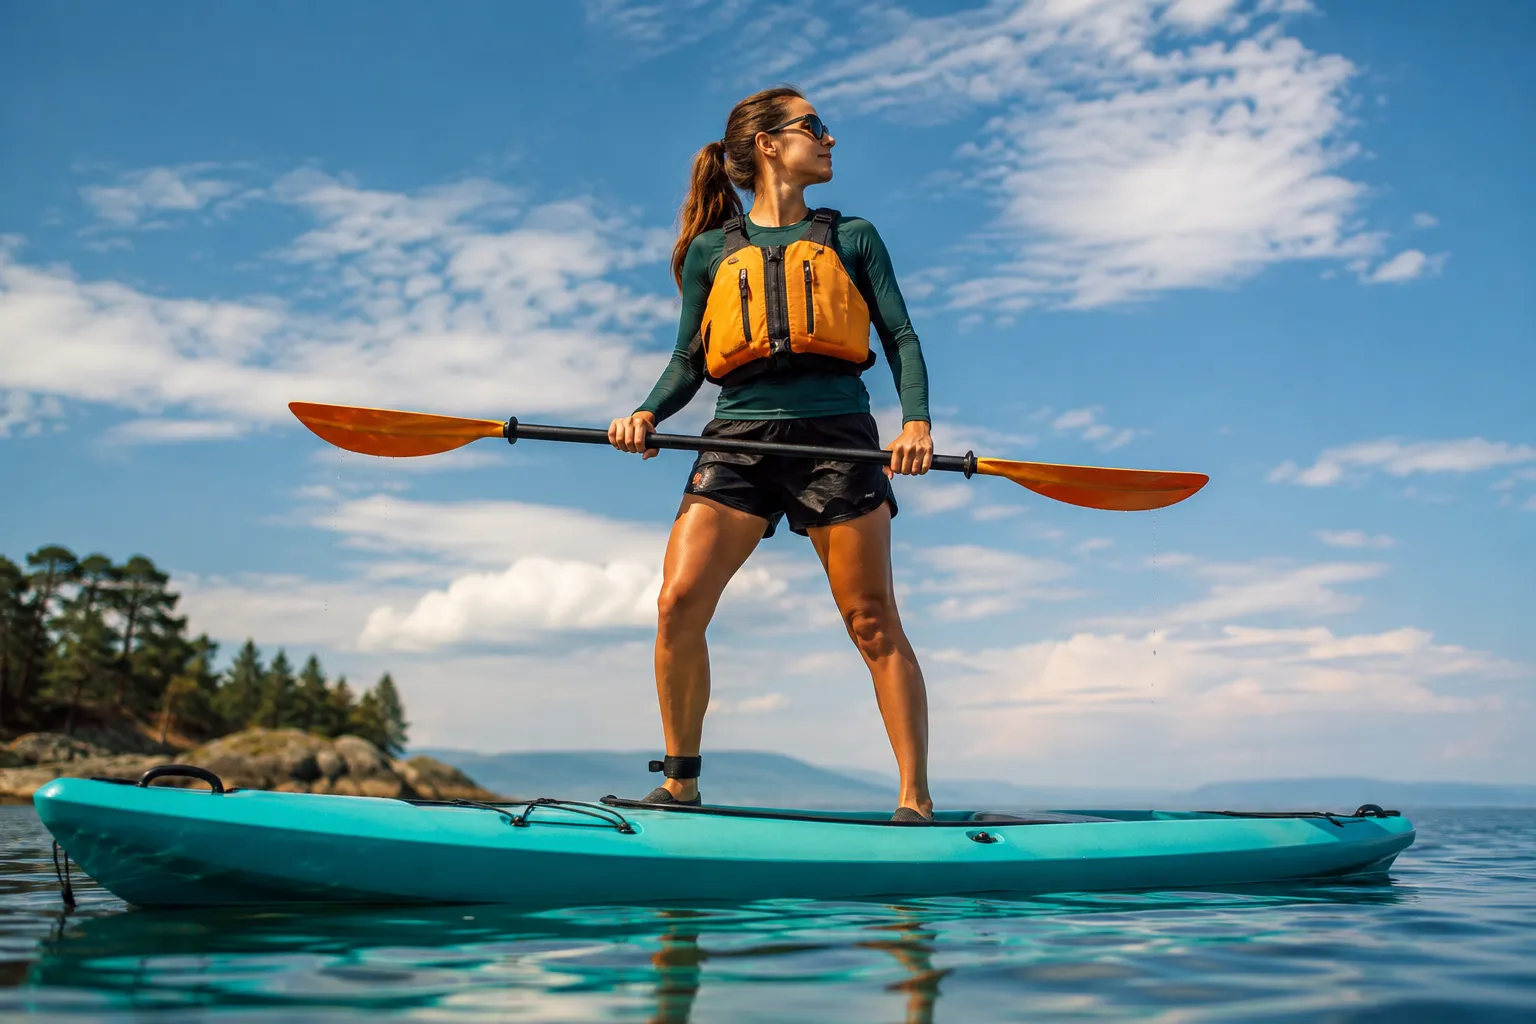
Standing in a kayak opens up better sight-fishing opportunities and casting angles, but it requires the right boat, proper technique, and progressive practice in controlled conditions. Most anglers can learn to stand safely in a wide, stable fishing kayak by starting in shallow, calm water and gradually building balance and confidence through specific drills.
Key Takeaways
- Width matters most: Kayaks 33 inches wide or wider provide the stability needed for most anglers to stand safely
- Start shallow: Practice in waist-deep, calm water where you can touch bottom and recover easily from falls
- Sit-on-top kayaks are significantly better for standing than sit-inside models due to lower center of gravity and easier re-entry
- Balance training on land accelerates your learning curve and builds the core strength needed for standing
- Safety gear is non-negotiable: always wear a PFD and practice in warm conditions when learning
- Foot position is critical: keep feet shoulder-width apart, knees slightly bent, and weight centered over the hull
- Common mistakes include standing too quickly, looking down at your feet, and practicing in choppy conditions too soon
- Most beginners can stand comfortably after 3-5 practice sessions in the right kayak and conditions
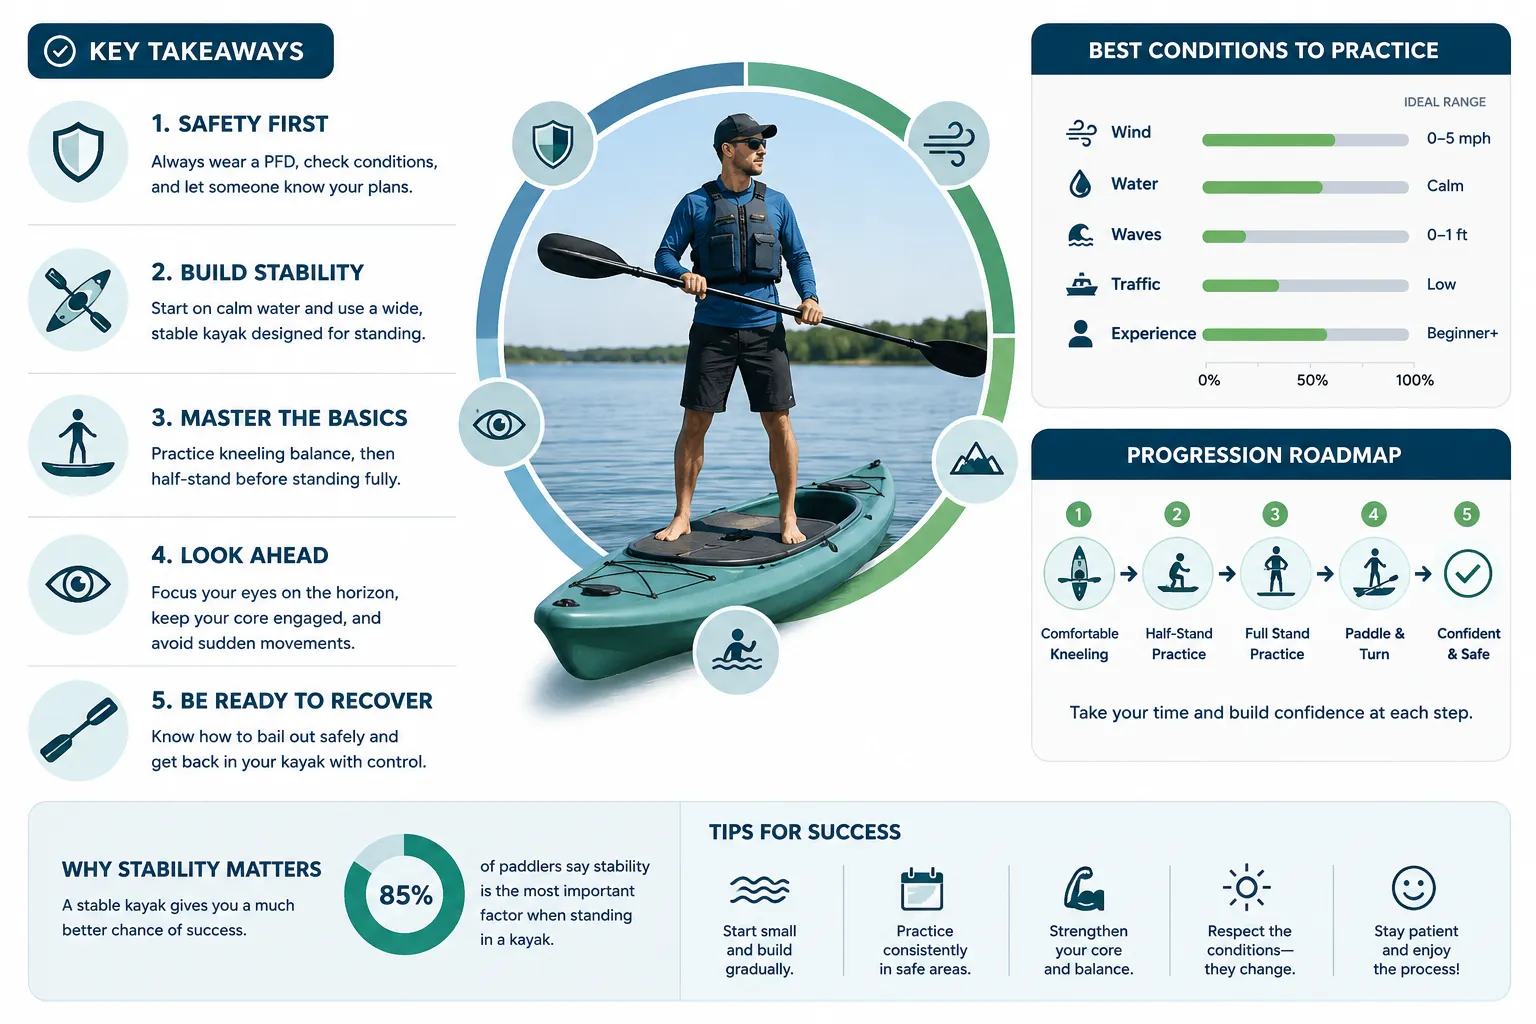
What Are the Basic Requirements for Standing in a Kayak
Standing in a kayak safely requires three fundamental elements: a kayak with sufficient width and stability (typically 33+ inches wide), calm water conditions with minimal wind and current, and proper safety equipment including a personal flotation device. Your own balance ability and core strength also play significant roles, but these can be developed through practice.
The kayak itself is the most important factor. A fishing kayak designed with a flat, wide hull and standing-friendly deck layout makes standing dramatically easier than trying to stand in a narrow touring kayak. The hull shape determines the initial stability (how stable it feels when flat) versus secondary stability (how it resists tipping once it starts to lean).
Essential requirements checklist:
- Kayak width of at least 33 inches (36+ inches is ideal for beginners)
- Flat or pontoon-style hull design rather than V-shaped touring hull
- Textured deck pads or standing platform for secure foot placement
- Calm water with waves under 6 inches and wind below 10 mph
- Water temperature above 60°F for safe practice (or appropriate cold-water gear)
- Type III PFD properly fitted and worn at all times
- Ability to swim and comfort in water
- Practice location with depth between waist and chest deep
Your physical requirements:
- Basic core strength and balance (can be improved through training)
- Flexibility to bend knees and maintain athletic stance
- Confidence in water and swimming ability
- No medical conditions that affect balance or coordination
One common mistake is assuming expensive gear compensates for poor conditions. Even the most stable kayak becomes challenging to stand in when facing wind, current, or boat wakes. Start with perfect conditions and gradually add complexity as your skills improve.
Best Kayak Types for Standing Up While Paddling
Sit-on-top fishing kayaks with widths between 34 and 38 inches are the best platforms for standing, particularly models with pontoon-style hulls or tri-hull designs that maximize initial stability. These kayaks place your center of gravity lower than sit-inside models and provide a flat, open deck for secure foot placement.
Top kayak categories for standing:
Wide fishing kayaks (36-38 inches): These offer the easiest standing experience for beginners and larger anglers. Models in this category feel rock-solid when standing but sacrifice some paddling speed and are harder to transport. Choose this width if you’re over 200 pounds, new to standing, or fish in areas with boat traffic.
Mid-width fishing kayaks (33-35 inches): This range balances standing stability with better paddling performance and easier transport. Experienced paddlers and lighter anglers often prefer this width. You’ll need better balance technique, but the kayak remains manageable on land and water.
Pedal-drive fishing kayaks: These allow hands-free propulsion while standing, making them excellent for sight-fishing and casting. The pedal drive adds weight low in the hull, improving stability. However, they cost significantly more and require more maintenance.
Kayaks to avoid for standing:
- Sit-inside kayaks under 28 inches wide (designed for speed, not stability)
- Whitewater kayaks (too short and rounded)
- Inflatable kayaks without rigid floor systems (too flexible)
- Touring kayaks with V-shaped hulls (designed to lean, not stand)
Hull shape matters as much as width. A flat-bottomed hull feels stable initially but can feel “tippy” once it starts to lean. A pontoon or tunnel hull design provides both initial stability and better secondary stability, giving you more recovery time if you start to lose balance.

AirPro ACES seat: Embodying easy Adjustability, luxurious Comfort, and fine-tuned Ergonomics. 360 swivel allows left and right continuous movement provides ease of entering and exiting the kayak and 360 degree access all the way around . Relax in the premium, breathable materials and dial in your position for paddling, pedaling, motoring, or making room for gear with the one-handed mechanical lever that adjusts the seat trim on the fly.

UV-Protected HDPE Construction for Durability: Built with high-density polyethylene (HDPE) plastic, this kayak is both lightweight and highly durable, offering long-lasting protection against UV rays for years of use in various conditions. Paddle included.

Quality Construction: Constructed of uv-protected high-density polyethylene. Multiple footrest positions for different size riders. Stable flat bottom
How to Improve Balance Before Trying to Stand in a Kayak
Building balance on land through specific exercises reduces your learning curve on water and prevents frustrating early failures. Core-strengthening exercises, wobble board training, and single-leg balance drills directly translate to better kayak standing ability.
Land-based balance training program:
Week 1-2: Foundation exercises (10 minutes daily)
- Single-leg stands: 30 seconds each leg, 3 sets
- Heel-to-toe walking: 20 steps forward and back
- Squats with proper form: 15 reps, 3 sets
- Plank holds: 30-60 seconds, 3 sets
Week 3-4: Progressive difficulty (15 minutes daily)
- Single-leg stands with eyes closed: 20 seconds each leg
- Wobble board or balance pad training: 1 minute sessions
- Single-leg squats (assisted): 8 reps each leg
- Side planks: 30 seconds each side, 3 sets
Week 5+: Kayak-specific movements (20 minutes, 3x weekly)
- Wobble board with casting motion: 10 reps each side
- Balance board squats: 12 reps, 3 sets
- Single-leg deadlifts: 10 reps each leg
- Rotational exercises while balancing: 15 reps each direction
Equipment that helps:
- Balance board or wobble board ($30-60)
- Foam balance pad ($15-25)
- Resistance bands for core work ($10-20)
- Yoga mat for floor exercises ($15-30)
The key is consistency rather than intensity. Ten minutes of daily balance work produces better results than occasional long sessions. Focus on maintaining proper posture during exercises: shoulders back, core engaged, knees slightly bent, and eyes looking forward rather than down.
A common mistake is skipping land training and jumping straight to water practice. Anglers who spend two weeks on balance exercises typically stand successfully in their kayak on the first or second water session, while those who skip this step often need five or more frustrating attempts.
Stand Up Kayak vs Sit on Top Kayak: Which Is Better for Standing
Sit-on-top kayaks are significantly better for standing than sit-inside kayaks because they position your center of gravity lower, provide a wider stance platform, and allow instant re-entry if you fall. The open deck design of a sit-on-top also eliminates the cockpit rim that restricts foot placement in sit-inside models.
Sit-on-top advantages for standing:
- Lower center of gravity: You sit on the hull rather than inside it, reducing your height above water by 4-6 inches
- Wider stance options: Full deck width available for foot placement
- Easier recovery: Simply climb back on if you fall, no need to drain water from cockpit
- Better visibility: Already elevated position improves sight-fishing even when seated
- No entrapment risk: Can’t get trapped inside the kayak if it flips
Sit-inside disadvantages for standing:
- Higher center of gravity: Sitting inside the hull raises your position
- Cockpit rim limits stance: Feet must stay within or straddle the cockpit opening
- Difficult re-entry: Requires paddle float rescue or assisted rescue if you capsize
- Water intrusion: Capsizing fills the cockpit, making the kayak difficult to manage
- Narrower platforms: Most sit-inside kayaks are designed for speed, not stability
When sit-inside might work:
Some specialized sit-inside fishing kayaks with extra-wide beams (32+ inches) and large cockpit openings allow standing, but they’re rare. If you already own a wide sit-inside kayak, you can practice standing by straddling the cockpit with one foot on each side of the opening, but this position is less stable and more tiring than standing on a sit-on-top deck.
The term “stand-up kayak” sometimes refers to stand-up paddleboards (SUPs) with kayak features, which are a different category entirely. True fishing kayaks designed for standing are sit-on-top models with wide, stable hulls.
Decision rule: If standing is a priority for your fishing style (sight-fishing, casting to structure, scanning for birds or bait), invest in a sit-on-top fishing kayak 33+ inches wide rather than trying to adapt a sit-inside model.

Ergolounge seating system : Extra-thick cushioning and an extra high and wide padded backrest.

PADDLE & STABLE SIT-ON-TOP DESIGN: Includes paddle, Features a flat bottom hull with chine rails that maximize stability and minimize tipping, making it ideal for beginners and recreational paddlers
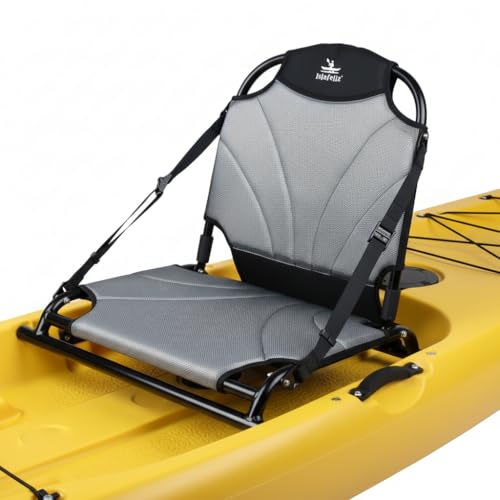
[CRITICAL FITMENT] MEASURE DECK WIDTH FIRST: STOP AND MEASURE: The base dimensions are 22.83'' (W) × 17.5'' (L). It is specifically engineered for wide Sit-On-Top kayaks and fishing boats with flat mounting decks or molded seat wells. Please verify your vessel has enough clearance before purchasing to ensure a perfect, hassle-free upgrade
What Safety Gear Do You Need When Practicing Standing in a Kayak
A properly fitted Type III personal flotation device is the only truly mandatory safety item when practicing standing in a kayak, but a complete safety kit should also include a whistle, waterproof communication device, and appropriate clothing for the water temperature. The gear you need expands based on where and when you practice.
Essential safety gear (required for every practice session):
- Type III PFD: Must be Coast Guard approved, properly sized, and worn (not stored)
- Whistle: Attached to PFD for signaling if separated from kayak
- Appropriate clothing: Dress for water temperature, not air temperature
- Waterproof phone case or VHF radio: For emergency communication
- Paddle leash: Prevents losing your paddle when you fall
Recommended additional gear:
- Bilge pump or sponge: For removing water from deck
- Dry bag with spare clothes: Especially important in cool weather
- First aid kit: Waterproof container with basic supplies
- Sun protection: Hat, sunglasses, sunscreen (even on cloudy days)
- Hydration: Water bottle secured to kayak
Cold-water specific gear (water below 60°F):
- Wetsuit or drysuit: Hypothermia risk increases dramatically in cold water
- Neoprene gloves and booties: Maintain dexterity and warmth
- Spare dry clothes in waterproof bag: For after practice
- Knowledge of cold-water risks: Understand the 1-10-1 rule (1 minute of cold shock, 10 minutes of useful movement, 1 hour before unconsciousness)
The 120-degree rule: Add air temperature and water temperature together. If the total is less than 120°F, wear immersion protection (wetsuit or drysuit). For example, 50°F water + 65°F air = 115°F total, requiring thermal protection.
A common and dangerous mistake is wearing a PFD loosely or leaving it unzipped “because I’m just practicing.” When you fall unexpectedly, you may hit the water disoriented or even hit your head on the kayak. A properly fitted, fastened PFD keeps you afloat even if you’re stunned or injured.
Practice buddy system: Whenever possible, practice with another kayaker or have someone on shore watching. This isn’t required for shallow-water practice where you can stand, but becomes important as you progress to deeper water.

US COAST GUARD APPROVED PFD: US Coast Guard Approved Type V Personal Flotation Device with Type III performance designed for stand-up paddlers, anglers, and boaters.

MAXIMUM SAFETY: Dual U.S. Coast Guard and Transport Canada Approved, ensuring the highest standards of water safety

The boat throwable flotation cushion qualifies as a Coast Guard approved type IV throwable floatation device (PFD)for boat,USCG Approved throwable cushion
Common Mistakes Beginners Make When Trying to Stand in a Kayak
The most common mistake beginners make is standing up too quickly without establishing a stable base, which immediately shifts their center of gravity and causes a fall. Other frequent errors include looking down at their feet, practicing in conditions that are too challenging, and using improper foot placement.
Top mistakes and how to avoid them:
Standing too fast: Rushing the transition from sitting to standing is the number one cause of falls. Instead, use a three-stage progression: first, move to a kneeling position; second, place one foot flat on the deck; third, slowly bring the second foot up while keeping your center of gravity low. Pause at each stage to ensure stability.
Looking down at feet: Your body follows your eyes. Looking down shifts your weight forward and disrupts balance. Keep your eyes on the horizon or a fixed point at eye level. Trust your feet to find their position through feel.
Feet too close together: A narrow stance provides minimal stability. Keep feet shoulder-width apart or slightly wider, positioned along the kayak’s centerline. Think of creating a stable triangle between your two feet and the kayak’s center.
Straight legs: Locked knees eliminate your ability to make micro-adjustments. Keep knees slightly bent in an athletic stance, which allows you to absorb movement and make quick corrections.
Wrong water conditions: Practicing in wind, current, or boat wakes before mastering calm-water standing leads to frustration and potential injury. Master standing in perfect conditions first, then gradually add complexity.
Inadequate kayak for the task: Trying to stand in a 28-inch touring kayak or sit-inside model sets you up for failure. The kayak matters more than technique for beginners.
Gripping the paddle wrong: Holding your paddle vertically or in one hand throws off balance. Hold the paddle horizontally across your body at chest height, which provides a balance aid and keeps weight centered.
Standing in deep water too soon: Start in waist-deep water where you can touch bottom. This eliminates fear and allows you to focus on technique rather than consequences.
Wearing wrong footwear: Smooth-soled shoes slip on wet decks. Wear water shoes with grippy rubber soles or go barefoot on textured deck pads.
Not practicing the fall: Knowing how to fall safely and re-enter your kayak reduces anxiety. Practice intentional falls and re-entry in shallow water until it becomes routine.
Progressive practice schedule to avoid mistakes:
- Session 1: Shallow water, kneeling position only, 20 minutes
- Session 2: Shallow water, one-foot-up position, 20 minutes
- Session 3: Shallow water, full standing for 10-second intervals
- Session 4: Shallow water, standing for 30+ seconds, practice casting motion
- Session 5: Slightly deeper water (chest deep), standing with confidence
- Session 6+: Gradually add wind, small waves, and longer standing periods
How Wide Does a Kayak Need to Be to Stand Up Safely
A kayak should be at least 33 inches wide for most adults to stand safely, with 36 inches or wider providing the easiest learning experience for beginners and larger paddlers. Width alone doesn’t guarantee standing ability, but it’s the single most important specification for stability.
Width categories and standing difficulty:
- Under 30 inches: Not suitable for standing (touring and racing kayaks)
- 30-32 inches: Possible for experienced paddlers with excellent balance, not recommended for learning
- 33-35 inches: Adequate for standing with proper technique, good for experienced anglers under 200 pounds
- 36-38 inches: Comfortable standing for most anglers, ideal for beginners and heavier paddlers
- Over 38 inches: Maximum stability but sacrifices paddling efficiency and portability
How weight affects width requirements:
Your body weight changes the effective stability of any kayak. A 150-pound angler might stand comfortably in a 33-inch kayak, while a 250-pound angler needs 36+ inches for the same confidence level. As a general rule, add one inch of width for every 25 pounds over 175 pounds.
Other design factors that affect standing ability:
- Hull shape: Pontoon and tri-hull designs stand better than V-hulls at the same width
- Deck height: Lower decks place your center of gravity closer to water
- Chine design: Hard chines (sharp edges where hull sides meet bottom) provide better initial stability
- Length: Longer kayaks (12+ feet) are more stable than shorter ones at the same width
- Weight distribution: Built-in storage and tank wells affect how the kayak sits in water
Real-world width examples:
Popular fishing kayaks known for standing ability include models like the Bonafide SS127 (37 inches), Old Town Topwater PDL (34 inches), and Hobie Pro Angler (38 inches). These widths represent the industry standard for stand-up fishing.
The width trade-off: Wider kayaks are more stable but harder to paddle, transport, and store. They catch more wind and require more effort to maintain speed. If you plan to paddle long distances to fishing spots, a 33-34 inch kayak might be better than a 38-inch model, even though standing is slightly more challenging.
Decision rule: Choose 36+ inches if standing is your primary activity and you fish calm waters. Choose 33-35 inches if you need to balance standing ability with paddling performance for longer trips.
Can You Stand in a Fishing Kayak or Regular Kayak
You can stand in fishing kayaks specifically designed with wide, stable hulls (33+ inches), but standing in regular recreational or touring kayaks is unsafe and impractical due to their narrow width and V-shaped hulls optimized for speed rather than stability. The kayak’s intended purpose determines its standing capability.
Fishing kayaks designed for standing:
Modern fishing kayaks incorporate features specifically for standing: wide beams, flat decks, textured standing pads, and hull shapes that prioritize stability. These kayaks typically measure 33-38 inches wide and 10-14 feet long. They’re heavier and slower than touring kayaks but provide a stable casting platform.
Regular kayaks not suitable for standing:
- Touring kayaks: 22-28 inches wide, V-shaped hulls designed for tracking and speed
- Recreational kayaks: 26-30 inches wide, moderate stability but still too narrow for safe standing
- Whitewater kayaks: Short and maneuverable, designed for sitting only
- Racing kayaks: Extremely narrow (18-22 inches), built for speed with minimal stability
- Tandem kayaks: Length creates instability when one person stands
Hybrid options:
Some recreational kayaks in the 30-32 inch range allow brief standing for experienced paddlers in calm conditions, but they’re not designed for it. If you already own a wider recreational kayak, you can test standing in shallow water, but don’t expect the confidence level of a true fishing kayak.
Stand-up paddleboard (SUP) kayak hybrids: These combine SUP width and stability with kayak features like seats and rod holders. They’re excellent for standing but less efficient for paddling long distances. Consider these if standing is your primary goal and you fish small lakes or protected coastal areas.
The cost difference: Fishing kayaks designed for standing typically cost $800-3,000, while basic recreational kayaks cost $300-700. The price difference reflects specialized design, better materials, and features like rod holders, tank wells, and standing platforms.
Decision rule: If you plan to stand regularly while fishing, invest in a kayak designed for that purpose. Trying to adapt a regular kayak is frustrating and potentially dangerous. If you only need to stand occasionally for brief moments (checking surroundings, stretching), a wider recreational kayak might suffice.
Where Should You Practice Standing in a Kayak for the First Time
Practice standing in a kayak for the first time in a protected, shallow area with a sandy or soft bottom, calm water, and no boat traffic, where the water depth is between waist and chest high. Ideal locations include small ponds, protected coves, quiet lake shorelines, or slow-moving river backwaters on calm days.
Perfect practice location characteristics:
- Water depth: Waist to chest deep (3-4 feet for most adults)
- Bottom type: Sand, mud, or soft vegetation (avoid rocky bottoms)
- Water clarity: Clear enough to see bottom (reduces anxiety)
- Wave height: Flat to 2 inches maximum
- Wind speed: Under 5 mph
- Temperature: Water above 70°F for comfortable practice
- Boat traffic: None or minimal
- Distance from shore: 20-50 feet (close enough to wade in if needed)
- Obstacles: No submerged logs, rocks, or vegetation that could tangle
Specific location types that work well:
Small ponds: Private or public ponds under 20 acres typically have no boat traffic and calm conditions. These are ideal for first attempts.
Protected coves: Larger lakes have small coves and inlets protected from wind and waves. Launch from these areas early morning before wind picks up.
Boat ramps with calm areas: Many boat ramps have adjacent shallow areas perfect for practice. Go during off-peak hours (weekday mornings) to avoid traffic.
Slow river backwaters: Side channels and backwaters of slow rivers provide current-free practice areas. Avoid main river channels.
Locations to avoid:
- Open water with fetch (distance wind can blow across water)
- Areas with boat traffic or jet skis
- Tidal areas during current flow
- Rivers with current over 1 mph
- Water with submerged hazards
- Deep water (over your head) until you’re confident
Time of day matters: Early morning typically offers the calmest conditions before thermal winds develop. Wind usually picks up by late morning and peaks in afternoon. Plan practice sessions for dawn to 9 AM when possible.
Progression to more challenging locations: Once you can stand confidently for 30+ seconds in perfect conditions, gradually add complexity:
- Slightly deeper water (over your head but near shore)
- Light wind (5-10 mph)
- Small waves (3-6 inches)
- Gentle current (under 0.5 mph)
- Boat wake practice (controlled exposure)
Practice buddy advantage: Having another kayaker or someone on shore provides safety backup and can offer feedback on your technique. They can also retrieve your paddle or kayak if you drift after a fall.
Why Do You Keep Falling When You Try to Stand in Your Kayak
Repeated falls when attempting to stand in a kayak typically result from one of three issues: using a kayak that’s too narrow for your skill level and weight, standing up too quickly without establishing a stable base, or practicing in water conditions that are too challenging for your current ability. Identifying the specific cause allows you to fix the problem.
Diagnostic checklist for repeated falls:
Kayak-related causes:
- Width under 33 inches (most common equipment issue)
- V-shaped touring hull instead of flat fishing hull
- Sit-inside design instead of sit-on-top
- Poor weight distribution (heavy gear on one side)
- Worn or slippery deck surface
Technique-related causes:
- Standing too quickly (not using three-stage progression)
- Feet too close together (narrow stance)
- Looking down at feet instead of horizon
- Straight legs instead of bent knees
- Weight too far forward or back
- Gripping paddle incorrectly or not using it for balance
Condition-related causes:
- Wind over 10 mph creating constant movement
- Waves or boat wakes disrupting stability
- Current pushing kayak sideways
- Water too deep (psychological factor)
- Cold water creating tension and stiff movements
Physical causes:
- Insufficient core strength
- Poor balance (fixable through land training)
- Tension and fear causing rigid movements
- Fatigue from repeated attempts
Troubleshooting process:
Step 1: Verify your kayak is appropriate. If it’s under 33 inches wide or a sit-inside model, the kayak is likely the problem, not your technique. Borrow or rent a wider fishing kayak to test this.
Step 2: Film yourself or have someone watch your technique. Common issues like standing too fast or looking down are obvious to observers but hard to self-diagnose.
Step 3: Return to shallower water and slower progression. If you’re trying to stand in one motion, break it into three stages with 5-second pauses at each stage.
Step 4: Check conditions. Even experienced kayakers struggle to stand in wind and waves. Wait for a calm day and try again.
Step 5: Assess your physical readiness. If you can’t hold a single-leg stand on land for 20 seconds, spend two weeks on balance training before returning to water practice.
The tension cycle: Fear of falling creates muscle tension, which reduces your ability to make the small balance adjustments needed to stay upright. This creates more falls, which increases fear. Break this cycle by practicing intentional falls in shallow water until falling becomes routine and non-threatening.
When to seek instruction: If you’ve practiced 5+ sessions in appropriate conditions with a suitable kayak and still can’t stand for 10 seconds, consider hiring a kayak fishing guide or instructor for a one-hour lesson. They can identify subtle technique issues you’re missing.
Is Standing in a Kayak Safe for Beginners or Only Experienced Paddlers
Standing in a kayak is safe for beginners when they use an appropriately wide and stable kayak (36+ inches), practice in controlled conditions with proper safety gear, and follow a progressive learning approach starting in shallow water. Experience level matters less than equipment choice and practice methodology.
Safety factors that matter more than experience:
Equipment appropriateness: A beginner in a 36-inch sit-on-top fishing kayak will stand more safely than an experienced paddler trying to stand in a 28-inch touring kayak. The right equipment compensates for limited experience.
Practice environment: Shallow, calm water with a soft bottom eliminates most risks. Even complete beginners can practice safely when they can touch bottom and easily recover from falls.
Safety gear: Wearing a proper PFD and dressing for water temperature makes standing practice safe regardless of experience level.
Progression speed: Beginners who follow a gradual progression (kneeling, then one foot, then standing) succeed safely. Experienced paddlers who skip steps and rush often fall more.
Realistic expectations for beginners:
- Session 1: Expect to feel unstable and possibly fall 2-5 times
- Session 2-3: Should achieve 10-30 second stands with concentration
- Session 4-5: Can stand comfortably for several minutes
- Session 6+: Standing becomes natural, can cast and move while standing
Most beginners with average fitness and balance can stand confidently within 3-5 practice sessions of 30-45 minutes each, assuming proper equipment and conditions.
When beginners should wait:
- If you’re not comfortable swimming or being in water
- If you have medical conditions affecting balance (consult doctor first)
- If water temperature is below 60°F and you lack cold-water gear
- If you don’t have access to appropriate practice locations
- If you can’t afford or access a suitable kayak for standing
Advantages beginners have: New kayakers often learn standing technique faster than experienced paddlers who developed habits in narrow kayaks. Beginners also tend to follow progressive learning steps more carefully, while experienced paddlers sometimes skip fundamentals.
Risk comparison: Standing in a kayak in controlled conditions with proper safety gear is safer than many common fishing activities like wading in current, fishing from rocks, or boating in rough weather. The perceived risk often exceeds actual risk when proper precautions are taken.
Decision rule: If you’re a beginner interested in stand-up fishing, invest in the right equipment and follow a structured learning approach. Don’t let lack of experience stop you. If you’re an experienced paddler in narrow kayaks, recognize that standing requires different skills and equipment than traditional kayaking.
What Water Conditions Are Safest for Practicing Standing in a Kayak
The safest water conditions for practicing standing in a kayak are flat calm water with no wind, no current, no boat traffic, water temperature above 70°F, and depth between waist and chest high where you can touch bottom. These conditions eliminate external variables and allow you to focus entirely on balance and technique.
Ideal practice conditions (perfect scenario):
- Wind: 0-5 mph (flat calm to light air)
- Waves: 0-2 inches (mirror smooth to tiny ripples)
- Current: None (0 mph)
- Water temperature: 70-85°F
- Air temperature: 75-90°F
- Visibility: Clear water, can see bottom
- Depth: 3-4 feet (waist to chest high)
- Boat traffic: None
- Time of day: Early morning (calmest conditions)
- Weather: Sunny or overcast, no storms approaching
Acceptable practice conditions (still safe for learning):
- Wind: 5-10 mph (light breeze, small wavelets)
- Waves: 2-4 inches (gentle ripples)
- Current: Under 0.5 mph (barely noticeable)
- Water temperature: 60-70°F (with wetsuit if needed)
- Depth: 4-6 feet (over your head but near shore)
- Boat traffic: Minimal, distant
Conditions to avoid until experienced:
- Wind: Over 10 mph (whitecaps forming)
- Waves: Over 6 inches (noticeable rocking)
- Current: Over 1 mph (visible water movement)
- Water temperature: Under 60°F (hypothermia risk)
- Boat traffic: Active boat lanes or jet ski areas
- Weather: Approaching storms, lightning risk
- Tidal areas: During current flow (practice at slack tide only)
How conditions affect difficulty:
Wind impact: Wind creates constant kayak movement and requires continuous micro-adjustments. A 10 mph wind makes standing roughly twice as difficult as calm conditions. Wind also creates psychological pressure as you feel pushed around.
Wave impact: Even small waves (4-6 inches) create rhythmic rocking that disrupts balance. Boat wakes are particularly challenging because they arrive unexpectedly and from varying angles.
Current impact: Current pushes your kayak sideways, requiring you to compensate by leaning slightly into the current. This advanced technique should wait until you’re comfortable in still water.
Temperature impact: Cold water creates anxiety and muscle tension, both of which hurt balance. Warm water allows relaxed practice and makes falls less shocking.
Progressive condition training:
Once you can stand for 60+ seconds in perfect conditions, gradually add one challenge at a time:
- Week 1-2: Perfect conditions only
- Week 3: Add light wind (5-8 mph)
- Week 4: Add small waves (3-4 inches)
- Week 5: Practice in slightly deeper water
- Week 6: Add gentle current (under 0.5 mph)
- Week 7+: Combine multiple factors, practice boat wake recovery
Reading conditions before launching: Check wind forecast (not just current conditions, but predicted changes), observe water surface for wave patterns, watch for boat traffic patterns, and verify water temperature. If conditions are borderline, wait for a better day. Successful practice builds confidence; struggling in poor conditions creates frustration.
How to Get Back in a Kayak After Falling While Trying to Stand
To get back in a sit-on-top kayak after falling while standing, swim to the side of the kayak near the center, place both hands flat on the deck, kick your legs to the surface behind you, then pull yourself up and across the deck in one smooth motion, rotating to a seated position once your torso is on the kayak. This technique works in water of any depth and becomes easy with practice.
Step-by-step re-entry technique:
Step 1: Secure your paddle
- If you have a paddle leash, it’s already attached
- If not, place paddle across the kayak deck before re-entering
- Don’t try to hold the paddle while re-entering
Step 2: Position yourself
- Swim to the side of the kayak at the widest point (usually center)
- Face the kayak perpendicular to its length
- Keep your body horizontal in the water, not vertical
Step 3: Establish hand position
- Place both palms flat on the deck, shoulder-width apart
- Position hands near the centerline, not at the edge
- Keep arms slightly bent, not locked
Step 4: Generate momentum
- Kick your legs to bring them horizontal behind you
- Use a strong flutter kick or dolphin kick
- Simultaneously pull down on the deck with your arms
Step 5: Pull yourself up
- Combine the kick and arm pull to lift your torso onto the deck
- Aim to get your belly button over the centerline
- Don’t try to keep your legs out of the water; let them drag
Step 6: Rotate to seated
- Once your torso is across the deck, rotate your body 90 degrees
- Swing one leg over to the opposite side
- Settle into your seated position
Step 7: Recover and assess
- Retrieve your paddle if it drifted
- Check that gear is still secured
- Take a moment to rest before attempting to stand again
Common re-entry mistakes:
Trying to climb in from the end: The narrow bow or stern tips easily. Always re-enter from the side at the widest point.
Pulling straight up: Trying to lift your body weight vertically is exhausting and usually fails. Use the horizontal kick-and-pull technique instead.
Grabbing the far edge: Reaching across to the opposite edge can flip the kayak. Keep hands near the centerline.
Not using leg kick: Arm strength alone isn’t enough for most people. The leg kick provides crucial upward momentum.
Rushing: Take a breath, position correctly, then execute smoothly. Frantic attempts waste energy.
Practice re-entry in shallow water: Before attempting to stand in deep water, practice falling and re-entering 5-10 times in waist-deep water. This builds muscle memory and confidence. Time yourself to see improvement; most people can re-enter in 10-15 seconds with practice.
Re-entry for larger paddlers: If you weigh over 250 pounds or have limited upper body strength, consider these modifications:
- Use a kayak with lower deck height
- Practice the “seal launch” technique (slide on from the end in shallow water)
- Install deck rigging or handles for better grip points
- Consider a kayak with re-entry steps or stirrups
When re-entry is difficult: If you attempt re-entry three times and can’t get back on, swim the kayak to shallow water where you can stand, or call for assistance. Don’t exhaust yourself with repeated failed attempts.
Cold water considerations: In water below 60°F, cold shock and loss of dexterity make re-entry harder. Practice in warm water first, and always wear appropriate thermal protection in cold conditions. You have limited time before cold affects your ability to perform the technique.
Frequently Asked Questions
Can you stand in any kayak?
No, only kayaks with sufficient width (typically 33+ inches) and stable hull designs allow safe standing. Narrow touring kayaks, sit-inside models, and recreational kayaks under 30 inches wide are not suitable for standing.
How long does it take to learn to stand in a kayak?
Most people can stand comfortably in an appropriate kayak after 3-5 practice sessions of 30-45 minutes each, assuming proper equipment and calm conditions. Building confidence for extended standing and casting typically takes 2-3 weeks of regular practice.
Do you need a special kayak to stand up?
Yes, you need a kayak specifically designed for stability, typically a sit-on-top fishing kayak 33+ inches wide with a flat or pontoon-style hull. Regular recreational and touring kayaks are not designed for standing.
What is the best width for a stand-up kayak?
For most adults, 36-38 inches provides the easiest standing experience. Lighter paddlers (under 175 pounds) with good balance can manage 33-35 inches, while heavier paddlers (over 225 pounds) should choose 36+ inches.
Is it easier to stand in a longer or shorter kayak?
Longer kayaks (12+ feet) are generally more stable for standing than shorter ones at the same width because they distribute your weight over a larger surface area and resist tipping better.
Can you stand in a kayak while fishing?
Yes, standing in a fishing kayak provides better visibility for sight-fishing, improved casting angles, and the ability to scan for birds and baitfish. Many modern fishing kayaks are specifically designed for stand-up fishing.
What should you wear when practicing standing in a kayak?
Always wear a properly fitted Type III PFD. Dress for the water temperature, not air temperature. In water below 60°F, wear a wetsuit or drysuit. Wear water shoes with grippy soles or go barefoot on textured deck pads.
How do you improve balance for kayak standing?
Practice land-based balance exercises including single-leg stands, wobble board training, squats, and core strengthening exercises. Ten minutes of daily balance work for 2-3 weeks significantly improves kayak standing ability.
Should beginners practice standing in shallow or deep water?
Beginners should start in waist to chest-deep water where they can touch bottom. This eliminates fear and allows focus on technique. Progress to deeper water only after achieving consistent 30+ second stands in shallow water.
What time of day is best for practicing standing in a kayak?
Early morning (dawn to 9 AM) typically offers the calmest conditions before thermal winds develop. Wind usually increases by late morning and peaks in afternoon, making standing practice more difficult.
Can you stand in a pedal kayak?
Yes, pedal kayaks are excellent for standing because the pedal drive allows hands-free propulsion while standing, and the drive unit adds weight low in the hull, improving stability. Many pedal kayaks are specifically designed for stand-up fishing.
How do you prevent falling when standing in a kayak?
Keep feet shoulder-width apart, knees slightly bent, weight centered over the hull, and eyes on the horizon. Hold your paddle horizontally for balance. Stand up slowly using a three-stage progression (kneeling, one foot, then both feet). Practice in calm conditions until technique becomes natural.
Conclusion
Learning how to practice standing in a kayak safely opens up new fishing opportunities and improves your effectiveness on the water. The key factors for success are choosing a kayak with adequate width (36+ inches for beginners), practicing in controlled conditions with proper safety gear, and following a progressive learning approach that builds confidence through small steps.
Start your standing practice in shallow, calm water where you can touch bottom, and focus on proper technique: feet shoulder-width apart, knees bent, eyes on the horizon, and a slow three-stage progression from sitting to standing. Complement your water practice with land-based balance training to accelerate your learning curve and build the core strength needed for confident standing.
Your next steps:
Assess your equipment: Verify your kayak is 33+ inches wide and designed for stability. If not, consider upgrading or renting a fishing kayak for practice.
Start balance training today: Begin a simple 10-minute daily routine of single-leg stands, squats, and core exercises. Two weeks of consistent training makes a noticeable difference.
Scout practice locations: Identify a protected, shallow area with calm water and soft bottom where you can practice safely.
Check your safety gear: Ensure you have a properly fitted PFD, whistle, and appropriate clothing for water temperature.
Schedule your first session: Choose a calm morning in the next week to begin practice. Start with kneeling and one-foot positions before attempting full standing.
Practice re-entry: In shallow water, intentionally fall and practice getting back on your kayak 5-10 times until it becomes routine.
Progress gradually: Don’t rush to challenging conditions. Master calm-water standing for 60+ seconds before adding wind, waves, or deeper water.
Remember that standing in a kayak is a skill anyone can learn with the right equipment and approach. The confidence and fishing advantages you’ll gain make the practice time worthwhile. Stay patient, prioritize safety, and enjoy the process of developing this valuable skill.





