
Quick Answer
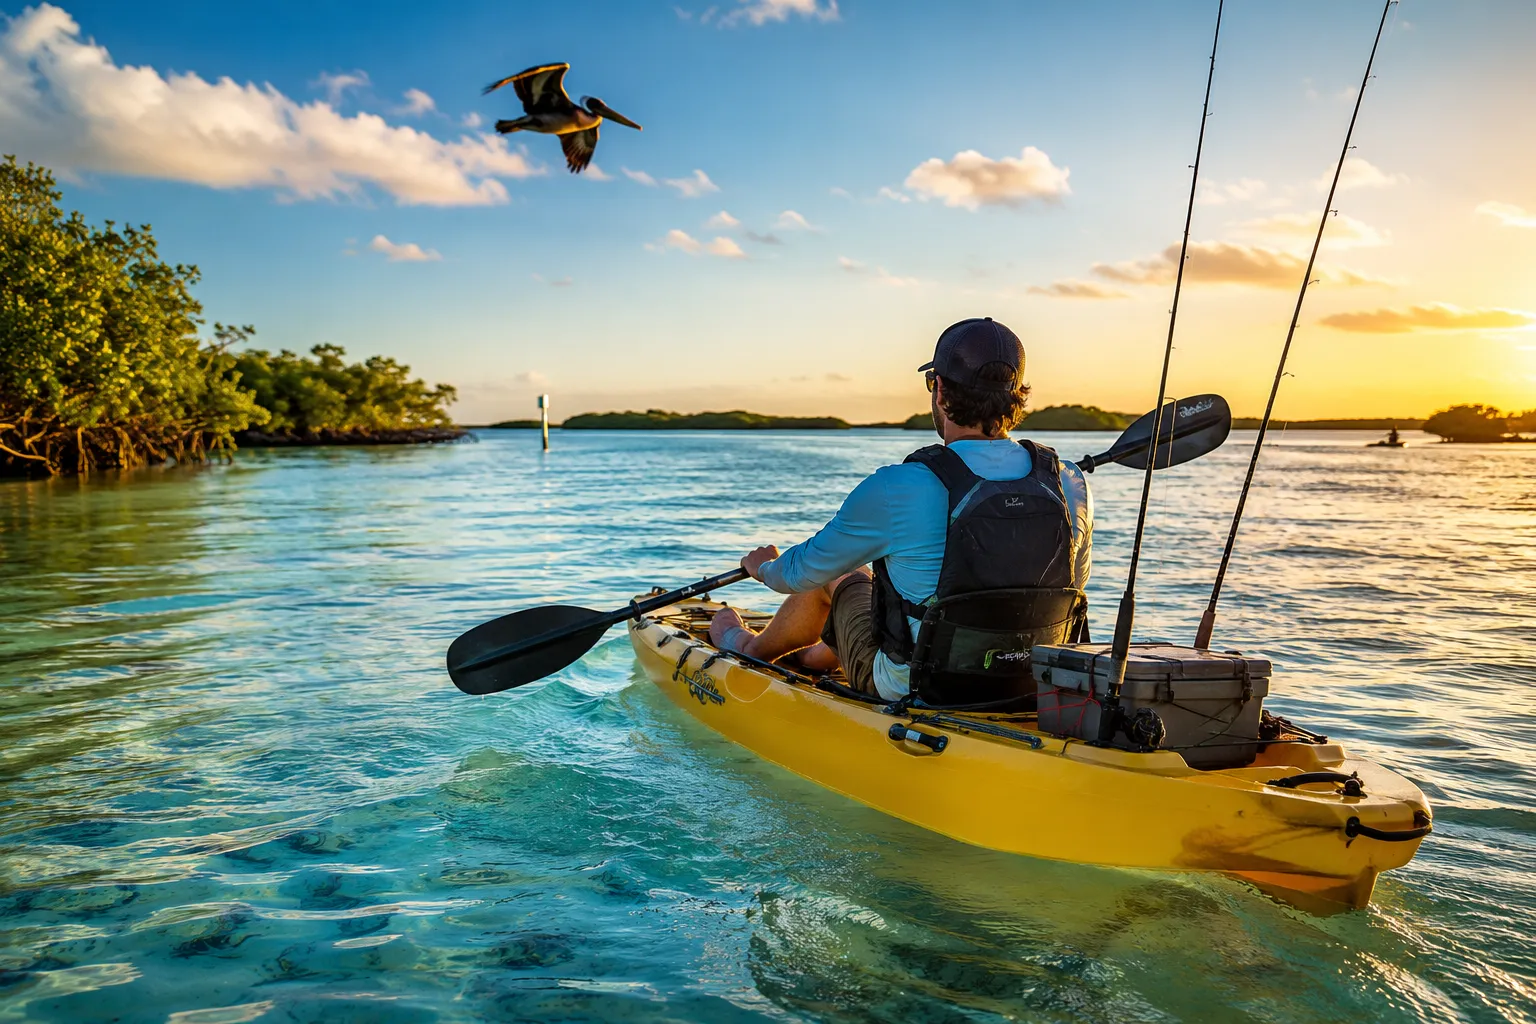
Inshore saltwater kayak fishing for beginners involves fishing from a kayak in protected coastal waters like bays, estuaries, and flats within a few miles of shore. You’ll need a stable sit-on-top kayak (10-12 feet long), basic fishing gear, a personal flotation device, and knowledge of tides and safe launch techniques. Most beginners can start catching species like redfish, speckled trout, and flounder within their first few outings by targeting grass flats and oyster bars during moving tides.
Key Takeaways
- Sit-on-top kayaks are safer and more practical than sit-inside models for saltwater fishing because they’re self-draining and easier to re-enter after a capsize
- Budget $600-1,000 for a quality beginner fishing kayak with rod holders, storage, and adequate width (at least 30 inches) for stability
- Essential gear includes a Coast Guard-approved PFD, paddle, anchor trolley system, basic tackle, and sun protection, total startup cost around $1,200-1,500
- Stay within 1-2 miles of shore as a beginner; inshore waters offer protection from wind, waves, and strong currents while providing excellent fishing opportunities
- Rinse everything with freshwater immediately after each trip to prevent saltwater corrosion on reels, rod guides, and kayak hardware
- Target beginner-friendly species like redfish, speckled trout, flounder, and snook around grass flats, oyster bars, and mangrove shorelines
- Learn to read tides,moving water (incoming or outgoing) activates fish feeding; slack tide is typically slow
- Practice self-rescue in shallow, calm water before venturing into open areas; capsizing is manageable with proper technique
What Is Inshore Saltwater Kayak Fishing?
Inshore saltwater kayak fishing means fishing from a kayak in protected coastal waters typically within three miles of shore, including bays, estuaries, tidal creeks, grass flats, and mangrove-lined shorelines. These areas offer calmer conditions than offshore waters while providing access to productive fishing grounds that larger boats often can’t reach due to shallow depths.
The inshore environment is ideal for beginners because:
- Water depth ranges from 1-10 feet in most fishing zones
- Wave action is minimal compared to open ocean
- Shelter from wind is available near shorelines and islands
- Fish species are abundant and accessible year-round
- Rescue distance to shore remains manageable
Inshore kayak fishing differs from offshore kayak fishing (which targets pelagic species in deeper water miles from shore) and freshwater kayak fishing (rivers, lakes, ponds). The saltwater environment requires corrosion-resistant gear and awareness of tides, currents, and marine weather patterns.
Common mistake: Beginners often underestimate how quickly conditions can change in saltwater. Always check marine forecasts for wind speed, wave height, and tide times before launching.
Sit-On-Top vs Sit-Inside Kayaks for Saltwater Fishing
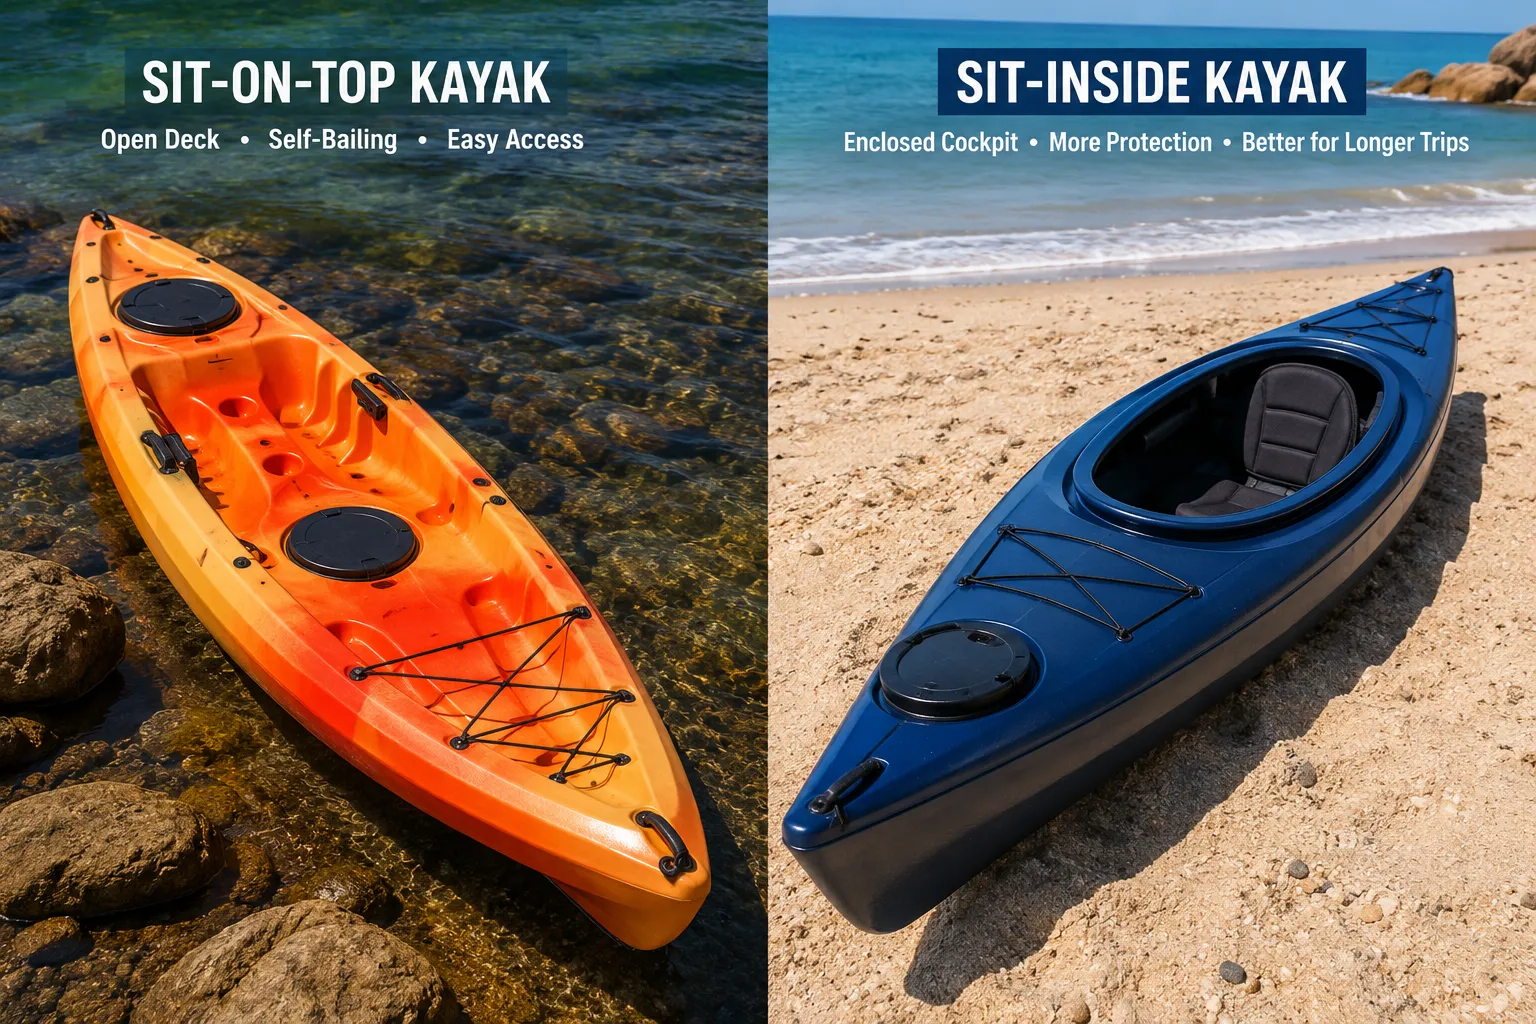
Sit-on-top kayaks are the better choice for saltwater fishing beginners because they’re self-bailing (water drains through scupper holes), provide easier entry and exit, and allow quick re-boarding after a capsize. Sit-inside kayaks trap water in the cockpit when waves splash over or you flip, requiring a bilge pump and advanced skills to empty.

HyDryve II pedal system: The HyDryve II pedal system makes maneuvering in shallow water or around aquatic plants, an absolute breeze.

UV-Protected HDPE Construction for Durability: Built with high-density polyethylene (HDPE) plastic, this kayak is both lightweight and highly durable, offering long-lasting protection against UV rays for years of use in various conditions. Paddle included.

AirPro ACES seat: Embodying easy Adjustability, luxurious Comfort, and fine-tuned Ergonomics. 360 swivel allows left and right continuous movement provides ease of entering and exiting the kayak and 360 degree access all the way around . Relax in the premium, breathable materials and dial in your position for paddling, pedaling, motoring, or making room for gear with the one-handed mechanical lever that adjusts the seat trim on the fly.
Key Differences
| Feature | Sit-On-Top | Sit-Inside |
|---|---|---|
| Water drainage | Automatic through scupper holes | Requires manual pumping |
| Re-entry after capsize | Easy, climb back on from water | Difficult, requires paddle float or assisted rescue |
| Gear storage | Open deck with tank wells, exposed | Dry hatches, protected storage |
| Stability | Generally wider and more stable | Narrower, less initial stability |
| Best for | Warm climates, beginners, fishing | Cold water, touring, speed |
Choose sit-on-top if: You’re fishing in water above 65°F, prioritize safety and ease of use, or plan to stand while fishing.
Choose sit-inside if: You’re fishing in cold water (below 60°F) where immersion is dangerous, need maximum dry storage, or prioritize speed over fishing features.
For inshore saltwater fishing in 2026, approximately 85% of fishing kayaks sold are sit-on-top models due to their practical advantages in warm coastal environments.
What Gear Do You Need to Start Kayak Fishing in Saltwater?
The essential gear for inshore saltwater kayak fishing includes a fishing kayak, paddle, Coast Guard-approved PFD (personal flotation device), anchor system with trolley, basic fishing tackle, and sun protection. Total startup investment typically ranges from $1,200-1,500 for quality beginner equipment.
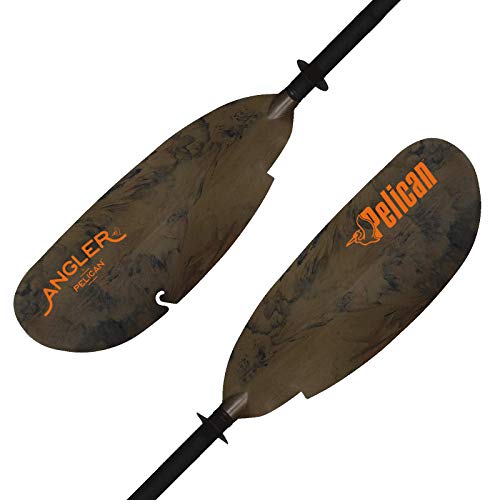
Longer reach:This high-quality paddle is extra long and sized to fit modern fishing kayaks over 34" wide.

[ NO LOSS ] The fishing coil lanyard is designed to keep safe for your fishing poles/rods, fishing pliers, fishing net, or fishing tools, far away from falling or losing

Core Equipment Checklist
Kayak and Propulsion:
- Fishing kayak (10-12 feet, 30+ inches wide): $600-1,000
- Paddle (230-250 cm length for most anglers): $80-150
- Paddle leash to prevent loss: $15-25
Safety Gear (Non-Negotiable):
- Type III PFD with pockets: $60-120
- Whistle attached to PFD: $5
- Waterproof VHF radio or phone case: $30-250
- Bilge pump or large sponge: $15-30
- First aid kit in dry bag: $25-40
Fishing Equipment:
- Medium spinning rod and reel combo (7-7.5 feet): $100-200
- Tackle box with lures, hooks, weights: $50-100
- Pliers and line cutters: $20-40
- Landing net: $30-50
- Rod holders (usually included on fishing kayaks)
- Stringer or fish bag: $15-30
Anchoring System:
- Anchor (3-5 lbs folding grapnel): $20-35
- Anchor trolley kit: $30-50
- 50-100 feet of anchor line: $15-25
Comfort and Protection:
- Wide-brim hat or cap with chin strap: $20-40
- Polarized sunglasses: $30-150
- SPF 50+ sunscreen: $12-20
- Dry bag for phone, keys, wallet: $20-40
- Cooler or insulated bag for catch: $30-60
Common mistake: Buying cheap fishing reels that aren’t saltwater-rated. Saltwater destroys freshwater reels within weeks. Look for sealed bearings and corrosion-resistant materials.
Best Beginner Kayaks for Saltwater Fishing Under $1,000
Quality fishing kayaks under $1,000 include the Perception Pescador Pro 10 ($699-799), Lifetime Tamarack Angler 100 ($499-599), and Vibe Sea Ghost 110 ($899-999). These models offer stability, fishing features, and durability suitable for inshore saltwater use.

Everybody Can Tie Their Own Tackle Safely: Prevent fish hook injuries by covering the sharp barb on the fishing hook when tying fishing tackle. Great fishing gift for beginner anglers who are learning to tie their own tackle

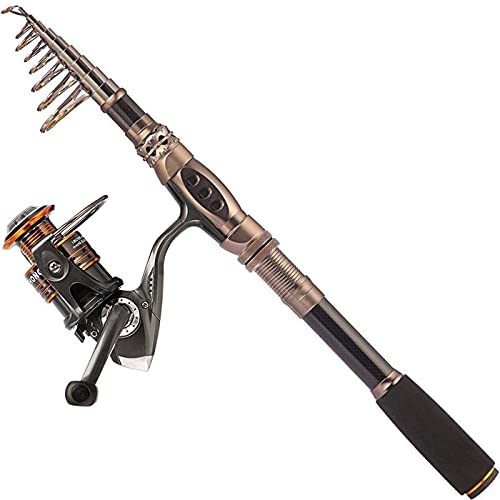
🎣 Warm Prompt: Fishing rod + reel (No Lures & Line) include Only Include 1 Fishing Rod +1 Fishing Reel.
What to Look For
Length: 10-12 feet balances maneuverability with tracking (ability to paddle straight). Shorter kayaks turn easily in tight spaces; longer kayaks track better in wind and current.
Width: At least 30 inches for beginners. Wider kayaks (32-36 inches) provide more initial stability but paddle slower. If you weigh over 200 lbs or plan to stand, choose 33+ inches.
Weight capacity: Manufacturer ratings are optimistic. Subtract 100 lbs from the stated capacity to find your realistic maximum (including your weight, gear, and catch). A kayak rated for 350 lbs should carry no more than 250 lbs for safe performance.
Features to prioritize:
- Multiple rod holders (at least 2 flush-mount, 1-2 adjustable)
- Tank well with bungee storage (behind seat)
- Paddle holder or clips
- Comfortable, adjustable seat
- Scupper holes with plugs
- Molded-in handles at bow and stern
Avoid: Recreational kayaks without fishing features, kayaks under 29 inches wide, or models with poor online reviews regarding stability.
How to Launch a Fishing Kayak in the Ocean Safely
Launch from protected beaches or boat ramps during calm conditions by entering the kayak in ankle-deep water, keeping the bow pointed into any waves, and timing your entry between wave sets. Never launch in surf over 2 feet or when wind exceeds 15 mph as a beginner.
Step-by-Step Launch Process
- Scout the launch site before unloading gear, look for gentle slope, minimal wave action, and absence of strong currents
- Load gear in the kayak while it’s still on shore, securing everything with straps or in storage compartments
- Attach your paddle leash and ensure your PFD is properly fastened
- Carry or drag the kayak to ankle-deep water (6-12 inches)
- Position the kayak perpendicular to shore with bow pointing toward deeper water
- Step in quickly by placing one foot in the center of the kayak, then bringing the other foot in while sitting down in one smooth motion
- Push off with your paddle or hands to clear the shallows
- Paddle out at a 45-degree angle to any incoming waves until you reach calmer water
Launch Site Selection
Best options for beginners:
- Protected boat ramps with floating docks
- Bay beaches with gradual slopes
- Tidal creek mouths during slack tide
- Marina launch areas with minimal boat traffic
Avoid:
- Ocean beaches with breaking surf
- Areas with strong tidal currents (near inlets)
- Rocky or oyster-covered shorelines
- Locations with heavy boat traffic
Safety rule: If you can’t easily stand and balance in the water at your launch point, conditions are too rough for safe kayak fishing.
What Fish Species Can Beginners Target From a Kayak Inshore?
Beginner-friendly inshore species include redfish (red drum), speckled trout, flounder, snook, and black drum,all of which inhabit shallow water, bite readily on simple presentations, and don’t require specialized techniques. These fish are found along grass flats, oyster bars, mangrove shorelines, and tidal creeks throughout the Gulf Coast and Atlantic seaboard.
Top Species and Where to Find Them
Redfish (Red Drum):
- Habitat: Grass flats, oyster bars, shallow shorelines (1-4 feet deep)
- Best bait: Live shrimp, cut mullet, gold spoon lures
- Technique: Cast near structure and retrieve slowly
- Season: Year-round in most areas; best in fall
Speckled Trout:
- Habitat: Grass flats, deeper holes (4-8 feet), channel edges
- Best bait: Live shrimp, soft plastic jigs (white, chartreuse)
- Technique: Slow retrieve with occasional twitches
- Season: Spring and fall peaks; avoid extreme heat
Flounder:
- Habitat: Sandy bottoms near structure, channel edges, dock pilings
- Best bait: Live mud minnows, finger mullet, jigs bounced on bottom
- Technique: Slow dragging along bottom
- Season: Spring and fall migrations; summer in deeper water
Snook (Florida, Gulf Coast):
- Habitat: Mangrove shorelines, bridge pilings, inlet areas
- Best bait: Live pilchards, pinfish, soft plastic jerk baits
- Technique: Cast tight to structure
- Season: Summer peak; catch-and-release only during closed seasons
Black Drum:
- Habitat: Oyster bars, shallow flats, grass beds
- Best bait: Live or dead shrimp, blue crab
- Technique: Bottom fishing near structure
- Season: Spring spawning run is best
Beginner strategy: Start with speckled trout and redfish. They’re abundant, forgiving of presentation mistakes, and found in easily accessible shallow water. Fish during moving tides (2 hours before to 2 hours after high or low tide) for best results.
Pedal Drive vs Paddle Kayaks for Saltwater Fishing Beginners
Paddle kayaks are better for beginners because they cost $800-1,200 less than pedal-drive models, require less maintenance, work in shallower water (under 2 feet), and teach fundamental kayak handling skills. Pedal-drive kayaks offer hands-free propulsion but add complexity, weight, and cost that most beginners don’t need initially.
Honest Comparison
Paddle Kayaks:
- Pros: Lower cost ($600-1,000), lighter weight (50-70 lbs), simple maintenance, work in ultra-shallow water, no moving parts to fail, quieter approach to fish
- Cons: Requires putting down rod to move, slower speed, more physical effort, less efficient in wind
Pedal-Drive Kayaks:
- Pros: Hands-free fishing while moving, faster speed (3-4 mph vs 2-3 mph), better in wind and current, less upper-body fatigue
- Cons: Higher cost ($1,800-3,500), heavier (80-120 lbs), requires 2+ feet of water depth, complex maintenance, moving parts can fail, louder
Choose paddle if: You’re budget-conscious, fish in very shallow water (under 2 feet), want simplicity, or are still learning basic kayak skills.
Choose pedal-drive if: You have the budget, fish in deeper water (3+ feet), cover long distances, or have upper-body limitations that make paddling difficult.
Reality check: Many experienced kayak anglers own both types and choose based on the day’s fishing location. Starting with a paddle kayak lets you learn fundamentals without the financial commitment. You can always upgrade to pedal-drive after a season or two if you decide the benefits justify the cost.
Do You Need a Special Kayak for Saltwater or Can You Use Freshwater Kayaks?
You can use the same kayak in both saltwater and freshwater, but saltwater requires diligent rinsing after every trip to prevent corrosion. The kayak hull material (polyethylene or rotomolded plastic) is identical for both environments, but metal hardware, rudder systems, and fishing accessories will corrode rapidly in saltwater without proper maintenance.
Saltwater-Specific Considerations
What’s the same:
- Hull material (polyethylene, ABS plastic)
- Basic kayak design and structure
- Seat and padding materials
What requires extra attention in saltwater:
- Metal hardware (screws, bolts, hinges), choose stainless steel or aluminum
- Rudder and skeg systems, rinse thoroughly
- Rod holders and track systems, flush with freshwater
- Anchor trolley pulleys and cleats, inspect for salt buildup
Maintenance protocol for saltwater use:
- Rinse entire kayak with freshwater immediately after each trip
- Spray down all metal hardware and moving parts
- Flush rod holders and scupper holes
- Wipe down seat and any fabric components
- Store in shade to prevent UV damage
Common mistake: Assuming “saltwater kayak” means a different type of kayak. Marketing terms like “saltwater fishing kayak” simply indicate the manufacturer included corrosion-resistant hardware and fishing features, the hull material is the same.
If you already own a freshwater fishing kayak, you can use it in saltwater by upgrading any low-quality hardware to stainless steel and committing to thorough post-trip rinsing.
How to Prevent Saltwater Corrosion on Kayak Fishing Equipment
Rinse all equipment with freshwater within 30 minutes of leaving saltwater, apply corrosion inhibitor spray to metal components, and store gear in a dry location. Saltwater corrosion begins immediately upon exposure and accelerates in warm, humid conditions typical of coastal environments.
Equipment-Specific Protection
Fishing Reels (Most Vulnerable):
- Rinse with freshwater spray (not full submersion unless reel is sealed)
- Wipe down with freshwater-dampened cloth
- Apply reel oil to moving parts monthly
- Store in climate-controlled space, not in garage or truck
- Service annually by professional or per manufacturer schedule
Rods and Guides:
- Rinse guides thoroughly, salt accumulates in ceramic inserts
- Wipe down blank and handle
- Check for guide cracks or loose wraps
- Store horizontally or in rod holders, never leaning in corners
Kayak Hardware:
- Spray all screws, bolts, and track systems with freshwater
- Apply marine-grade corrosion inhibitor (like Boeshield T-9 or CRC Marine) monthly
- Check for rust spots and address immediately
- Replace any corroded hardware with stainless steel
Tackle and Tools:
- Rinse pliers, hook removers, and knives in freshwater
- Dry thoroughly before storage
- Apply light oil coating to pivot points
- Replace rusty hooks and lures, they weaken and break
Anchors and Lines:
- Rinse anchor and chain thoroughly
- Check rope for fraying or salt stiffness
- Flush anchor trolley pulleys with freshwater
- Apply silicone spray to pulleys quarterly
Electronics (Fish Finders, GPS):
- Wipe down screens with freshwater-dampened microfiber cloth
- Check connection points for corrosion
- Apply dielectric grease to electrical connections
- Remove batteries if storing long-term
Time-saving tip: Keep a 5-gallon bucket of freshwater in your vehicle. Dunk reels, pliers, and small items immediately after loading your kayak, then do a thorough rinse at home.
How Far Offshore Can You Safely Go in a Fishing Kayak?
Beginners should stay within 1-2 miles of shore in protected waters with easy access to land. Experienced kayak anglers may venture 3-5 miles offshore in calm conditions, but distance from shore is less important than water conditions, weather stability, and your skill level.
Safety Distance Guidelines
Beginner (first 10 trips):
- Stay within 0.5 miles of launch point
- Fish in protected bays, creeks, and coves
- Always maintain visual contact with shore
- Avoid open water crossings over 0.25 miles
Intermediate (10-50 trips):
- Extend to 1-2 miles from shore in calm conditions
- Cross open water up to 0.5 miles if conditions are stable
- Fish around near-shore structure (piers, jetties, reefs)
- Monitor weather continuously
Advanced (50+ trips, training, experience):
- May venture 3-5 miles offshore in ideal conditions
- Target offshore structure and artificial reefs
- Carry VHF radio, GPS, and emergency signaling devices
- Fish with partners and file float plan
Factors More Important Than Distance
Water conditions:
- Wave height under 2 feet (beginners) or 3 feet (experienced)
- Wind under 10 mph (beginners) or 15 mph (experienced)
- No thunderstorms within 20 miles
- Visibility over 1 mile
Current strength:
- Tidal current under 1 knot for comfortable paddling
- Avoid inlet areas during strong tidal flow
- Plan routes with current, not against it
Water temperature:
- Below 60°F requires wetsuit or drysuit (hypothermia risk)
- Above 60°F allows more time for self-rescue if capsized
Your fitness level:
- Can you paddle back against 10 mph wind?
- Can you self-rescue and re-enter kayak in open water?
- Do you have endurance for 2-3 hour paddle?
Safety rule: If you can’t see your launch point or a safe landing spot, you’re too far out for your skill level.
How to Deal With Tipping Over in a Kayak While Fishing
If you capsize, stay calm, stay with your kayak, and use the re-entry technique: swim to the side of the kayak, reach across to the far edge, kick your legs to the surface, and pull yourself onto the deck in one motion. Practice this skill in shallow, warm water before fishing in deeper areas.
Self-Rescue Steps
- Stay with your kayak,it’s your flotation device and is visible to rescuers
- Secure your paddle if possible (paddle leash prevents loss)
- Position yourself at the side of the kayak, midway between bow and stern
- Reach across the kayak and grab the far edge
- Kick your legs up to the surface behind you (horizontal position)
- Pull and kick simultaneously to slide your chest onto the kayak deck
- Rotate your body to sitting position once your waist is on the kayak
- Swing your legs into the seat area
- Bail water if needed (sit-on-tops drain automatically)
- Recover your paddle and assess your situation
Prevention Strategies
Before you fish:
- Practice re-entry in controlled conditions (shallow, warm water)
- Wear your PFD at all times (non-negotiable)
- Secure all gear with leashes or in closed storage
- Start in calm, protected waters
While fishing:
- Keep your weight centered over the kayak
- Avoid sudden movements or leaning far to one side
- Lower your center of gravity when landing fish
- Be cautious when standing (if your kayak allows it)
- Watch for boat wakes and adjust your position
What to do with gear after capsize:
- Rods with leashes: retrieve after re-entry
- Tackle boxes: should be secured in tank well or storage
- Loose items: may be lost (secure everything before launching)
Common mistake: Panicking and trying to climb onto the kayak from the end (bow or stern), which usually flips it again. Always re-enter from the side.
Is Inshore Kayak Fishing Safe for Kids and Families?
Inshore kayak fishing is safe for kids ages 8 and up when fishing in calm, protected waters, using stable tandem kayaks, and ensuring every person wears a properly fitted PFD. Family kayak fishing requires extra planning, conservative weather limits, and age-appropriate expectations.
Age and Skill Guidelines
Ages 8-12:
- Fish from tandem kayak with adult
- Stay within 0.25 miles of shore
- Choose calm days (wind under 5 mph, no waves)
- Keep trips under 2 hours
- Focus on fun, not fish quantity
Ages 13-16:
- May use solo kayak with adult supervision nearby
- Stay within 0.5 miles of shore
- Build skills gradually over multiple trips
- Require demonstrated swimming ability
- Carry whistle and waterproof phone
Ages 17+:
- Can fish independently with proper training
- Follow adult safety guidelines
- Consider formal kayaking instruction
Family-Friendly Setup
Equipment choices:
- Tandem kayaks (12-14 feet) for parent + child
- Extra-wide kayaks (34+ inches) for stability
- Comfortable seats with back support
- Simplified fishing gear (spincast or simple spinning reels)
Location selection:
- Protected bays and coves
- Shallow water (3-6 feet) over grass or sand
- Visible bottom for reassurance
- Nearby facilities (restrooms, parking)
- Minimal boat traffic
Safety additions:
- Brightly colored kayaks (yellow, orange, red)
- Safety flag on tall pole
- VHF radio or cell phone in waterproof case
- First aid kit
- Extra water and snacks
- Sunscreen and hats for everyone
Reality check: Kids under 12 often lose interest after 60-90 minutes. Plan short trips focused on action (catching small fish frequently) rather than targeting trophy fish that require patience.
Is Kayak Fishing Harder Than Fishing From a Boat?
Kayak fishing requires more physical effort and balance but offers better access to shallow water, lower costs, and a more intimate fishing experience. The difficulty depends on your fitness level, the water conditions, and your expectations.
What’s Harder in a Kayak
Physical demands:
- Paddling to and from fishing spots (1-3 miles typical)
- Maintaining balance while casting and fighting fish
- Loading and unloading kayak from vehicle
- Carrying kayak to water (50-120 lbs depending on model)
Fishing challenges:
- Limited space for gear and tackle
- Difficulty landing large fish without a net
- Can’t move quickly to follow fish
- Fighting fish while managing kayak position
- Less stable casting platform than boat deck
Environmental exposure:
- Closer to water surface (sun reflection, spray)
- More affected by wind and current
- Limited shelter from weather
- Sitting position for extended periods
What’s Easier in a Kayak
Access advantages:
- Fish in 1-3 feet of water where boats can’t go
- Launch from any beach, ramp, or shoreline
- Approach fish quietly without motor noise
- Navigate narrow creeks and under low bridges
Cost benefits:
- No fuel, insurance, or slip fees
- No trailer or towing vehicle required
- Minimal maintenance costs
- Lower initial investment ($1,500 vs $15,000+)
Simplicity:
- No motor maintenance or mechanical issues
- Easy to store in garage or shed
- One person can handle all aspects
- Quick setup and breakdown
Choose kayak fishing if: You value access to shallow water, enjoy physical activity, fish solo or with one partner, and want minimal cost and maintenance.
Choose boat fishing if: You fish with groups, target offshore species, prioritize comfort and speed, or have physical limitations that make paddling difficult.
Common Mistakes Beginners Make Kayak Fishing in Saltwater
The most common beginner mistakes are overloading the kayak with gear, fishing in wind over 10 mph, neglecting to rinse equipment after trips, and failing to check tides before launching. These errors compromise safety, damage equipment, and reduce fishing success.
Top Mistakes and How to Avoid Them
1. Ignoring weather forecasts
- Mistake: Launching without checking wind, waves, and tide predictions
- Fix: Check NOAA marine forecast and local tide charts every time; postpone trips when wind exceeds 10 mph or waves exceed 2 feet
2. Bringing too much gear
- Mistake: Packing multiple rods, full tackle boxes, and unnecessary items
- Fix: Bring 1-2 rods, one small tackle box with essentials, and only critical safety gear; every pound affects stability and paddling effort
3. Skipping the PFD
- Mistake: Leaving PFD in tank well “just in case” instead of wearing it
- Fix: Wear your PFD from launch to landing, no exceptions; it’s required by law and saves lives
4. Poor anchor technique
- Mistake: Anchoring from the side of the kayak (causes tipping) or using too much anchor line
- Fix: Always anchor from bow or stern using an anchor trolley; use 3:1 scope ratio (if water is 5 feet deep, use 15 feet of line)
5. Fighting the tide
- Mistake: Paddling against strong current or launching at wrong tide stage
- Fix: Launch during slack tide or plan routes with current; fish during moving tides (best bite) but paddle with current flow
6. Not securing gear
- Mistake: Placing rods, tackle, and tools loosely in kayak
- Fix: Use rod leashes, secure tackle boxes with bungees, attach pliers and tools with retractable lanyards
7. Inadequate sun protection
- Mistake: Underestimating sun exposure on water (reflection intensifies UV)
- Fix: Wear SPF 50+ sunscreen, long-sleeve sun shirt, wide-brim hat, and polarized sunglasses; reapply sunscreen every 2 hours
8. Forgetting freshwater rinse
- Mistake: Leaving saltwater on reels, rods, and kayak hardware
- Fix: Rinse everything within 30 minutes of leaving saltwater; keep 5-gallon bucket in vehicle for immediate rinse
9. Overestimating abilities
- Mistake: Venturing too far from shore or fishing in conditions beyond skill level
- Fix: Build experience gradually; stay within 0.5 miles of shore for first 10 trips; practice self-rescue in controlled conditions
10. Not telling anyone your plan
- Mistake: Launching without informing someone of location and expected return time
- Fix: Text or call a friend/family member with launch location, fishing area, and return time; check in when you’re off the water
Frequently Asked Questions
Do I need a fishing license to fish from a kayak?
Yes, you need a valid saltwater fishing license for your state, just as you would fishing from shore or a boat. Kayaks don’t exempt you from licensing requirements. Most states offer annual, short-term, and online purchase options.
Can I use a freshwater fishing kayak in saltwater?
Yes, the kayak hull material is the same for both environments. However, you must rinse all metal hardware, fishing gear, and the kayak thoroughly with freshwater after every saltwater trip to prevent corrosion.
How much does it cost to start kayak fishing in saltwater?
Expect to spend $1,200-1,500 for quality beginner equipment: kayak ($600-1,000), paddle ($80-150), PFD ($60-120), fishing gear ($200-400), and accessories ($200-300). You can start cheaper with used equipment or budget models.
What’s the best time of day for inshore kayak fishing?
Early morning (dawn to 9 AM) and late afternoon (4 PM to dusk) typically produce the best fishing, especially in summer when midday heat slows fish activity. Moving tides matter more than time of day, fish are most active during incoming or outgoing tides.
How do I transport a kayak without a roof rack?
You can use foam blocks and cam straps to secure a kayak directly to your vehicle’s roof, or use a truck bed extender if you have a pickup. Some shorter kayaks (under 10 feet) fit inside SUVs with seats folded down. Always secure bow and stern with additional straps.
What should I do if I see a shark while kayak fishing?
Stay calm, most sharks in inshore waters are small and not interested in kayaks. Avoid splashing, don’t dangle limbs in the water, and don’t keep bleeding fish on a stringer. If a shark approaches, calmly paddle toward shore. Attacks on kayaks are extremely rare.
Can I stand up in a fishing kayak?
Some fishing kayaks are designed for standing (typically 33+ inches wide with flat, stable hulls), but beginners should master sitting techniques first. Practice standing in shallow water near shore before attempting it while fishing. Many anglers fish successfully without ever standing.
How do I keep my phone dry while kayak fishing?
Use a waterproof phone case or dry bag designed for electronics. Keep it secured in a tank well or pocket, not loose on the deck. Consider a floating phone case in case it goes overboard.
What’s the best kayak length for saltwater fishing?
For beginners, 10-12 feet is ideal. Shorter kayaks (10-11 feet) are more maneuverable in tight spaces and easier to transport. Longer kayaks (12+ feet) track better in wind and current but are harder to turn and store.
Do I need a fish finder for kayak fishing?
No, fish finders are optional for beginners. You can catch plenty of fish by targeting visible structure (grass flats, oyster bars, mangroves) and fishing during moving tides. Add a fish finder later if you want to locate deeper structure or offshore reefs.
How do I deal with wind while kayak fishing?
Check forecasts and avoid fishing when wind exceeds 10 mph as a beginner. If caught in wind, paddle at a 45-degree angle to the wind direction, use shorelines as windbreaks, and consider using a small drift anchor or sea anchor to slow your drift.
What’s the 120 Rule in kayaking?
The 120 Rule states that if air temperature plus water temperature equals less than 120°F, you risk hypothermia if you capsize. Below this threshold, wear a wetsuit or drysuit. For example, 50°F water + 60°F air = 110°F total, requiring thermal protection.
Conclusion
Inshore saltwater kayak fishing for beginners offers an accessible, affordable way to explore productive coastal waters and catch species like redfish, speckled trout, and flounder from a stable, maneuverable platform. Success starts with choosing the right equipment, a sit-on-top kayak 10-12 feet long with 30+ inches of width, quality fishing gear, and essential safety equipment including a Coast Guard-approved PFD.
The key to safe, enjoyable kayak fishing is building skills gradually. Start in protected waters within 0.5 miles of shore, fish during calm conditions (wind under 10 mph, waves under 2 feet), and practice self-rescue techniques in shallow water before venturing into deeper areas. Learn to read tides and target moving water for the best fishing action, and always rinse your equipment with freshwater immediately after each trip to prevent saltwater corrosion.
Your next steps:
- Acquire essential gear,prioritize a stable kayak, proper PFD, and basic fishing tackle before adding accessories
- Practice in controlled conditions,spend your first 2-3 trips learning to paddle, balance, and re-enter your kayak in calm, shallow water
- Study local fishing reports,identify beginner-friendly species and productive locations in your area
- Check weather and tides,make this a non-negotiable habit before every launch
- Join local kayak fishing groups,online forums and Facebook groups provide location-specific advice and fishing partners
The learning curve is manageable, the startup costs are reasonable, and the rewards, quiet mornings on protected flats, the thrill of sight-casting to tailing redfish, and the satisfaction of landing fish from your own kayak, make inshore saltwater kayak fishing one of the most engaging ways to experience coastal angling in 2026.





